Moss Roulade: A Floral Foam Substitute Mechanic
Floral Foam Substitute: Moss Roulade
As a florist who specializes in weddings, I make a lot of arbors and chuppahs. As a passionate environmentalist, I am committed to avoiding floral foam. And I have spent a lot of time and effort looking for the best, most sustainable foam-free floral mechanics.
That’s why I’m excited to share my Moss Roulade technique with you! It’s my go-to base for a foam-free flower spray, and I use it for the majority of the wedding arbors I make because it's a versatile and easy technique (one that is even reusable!).
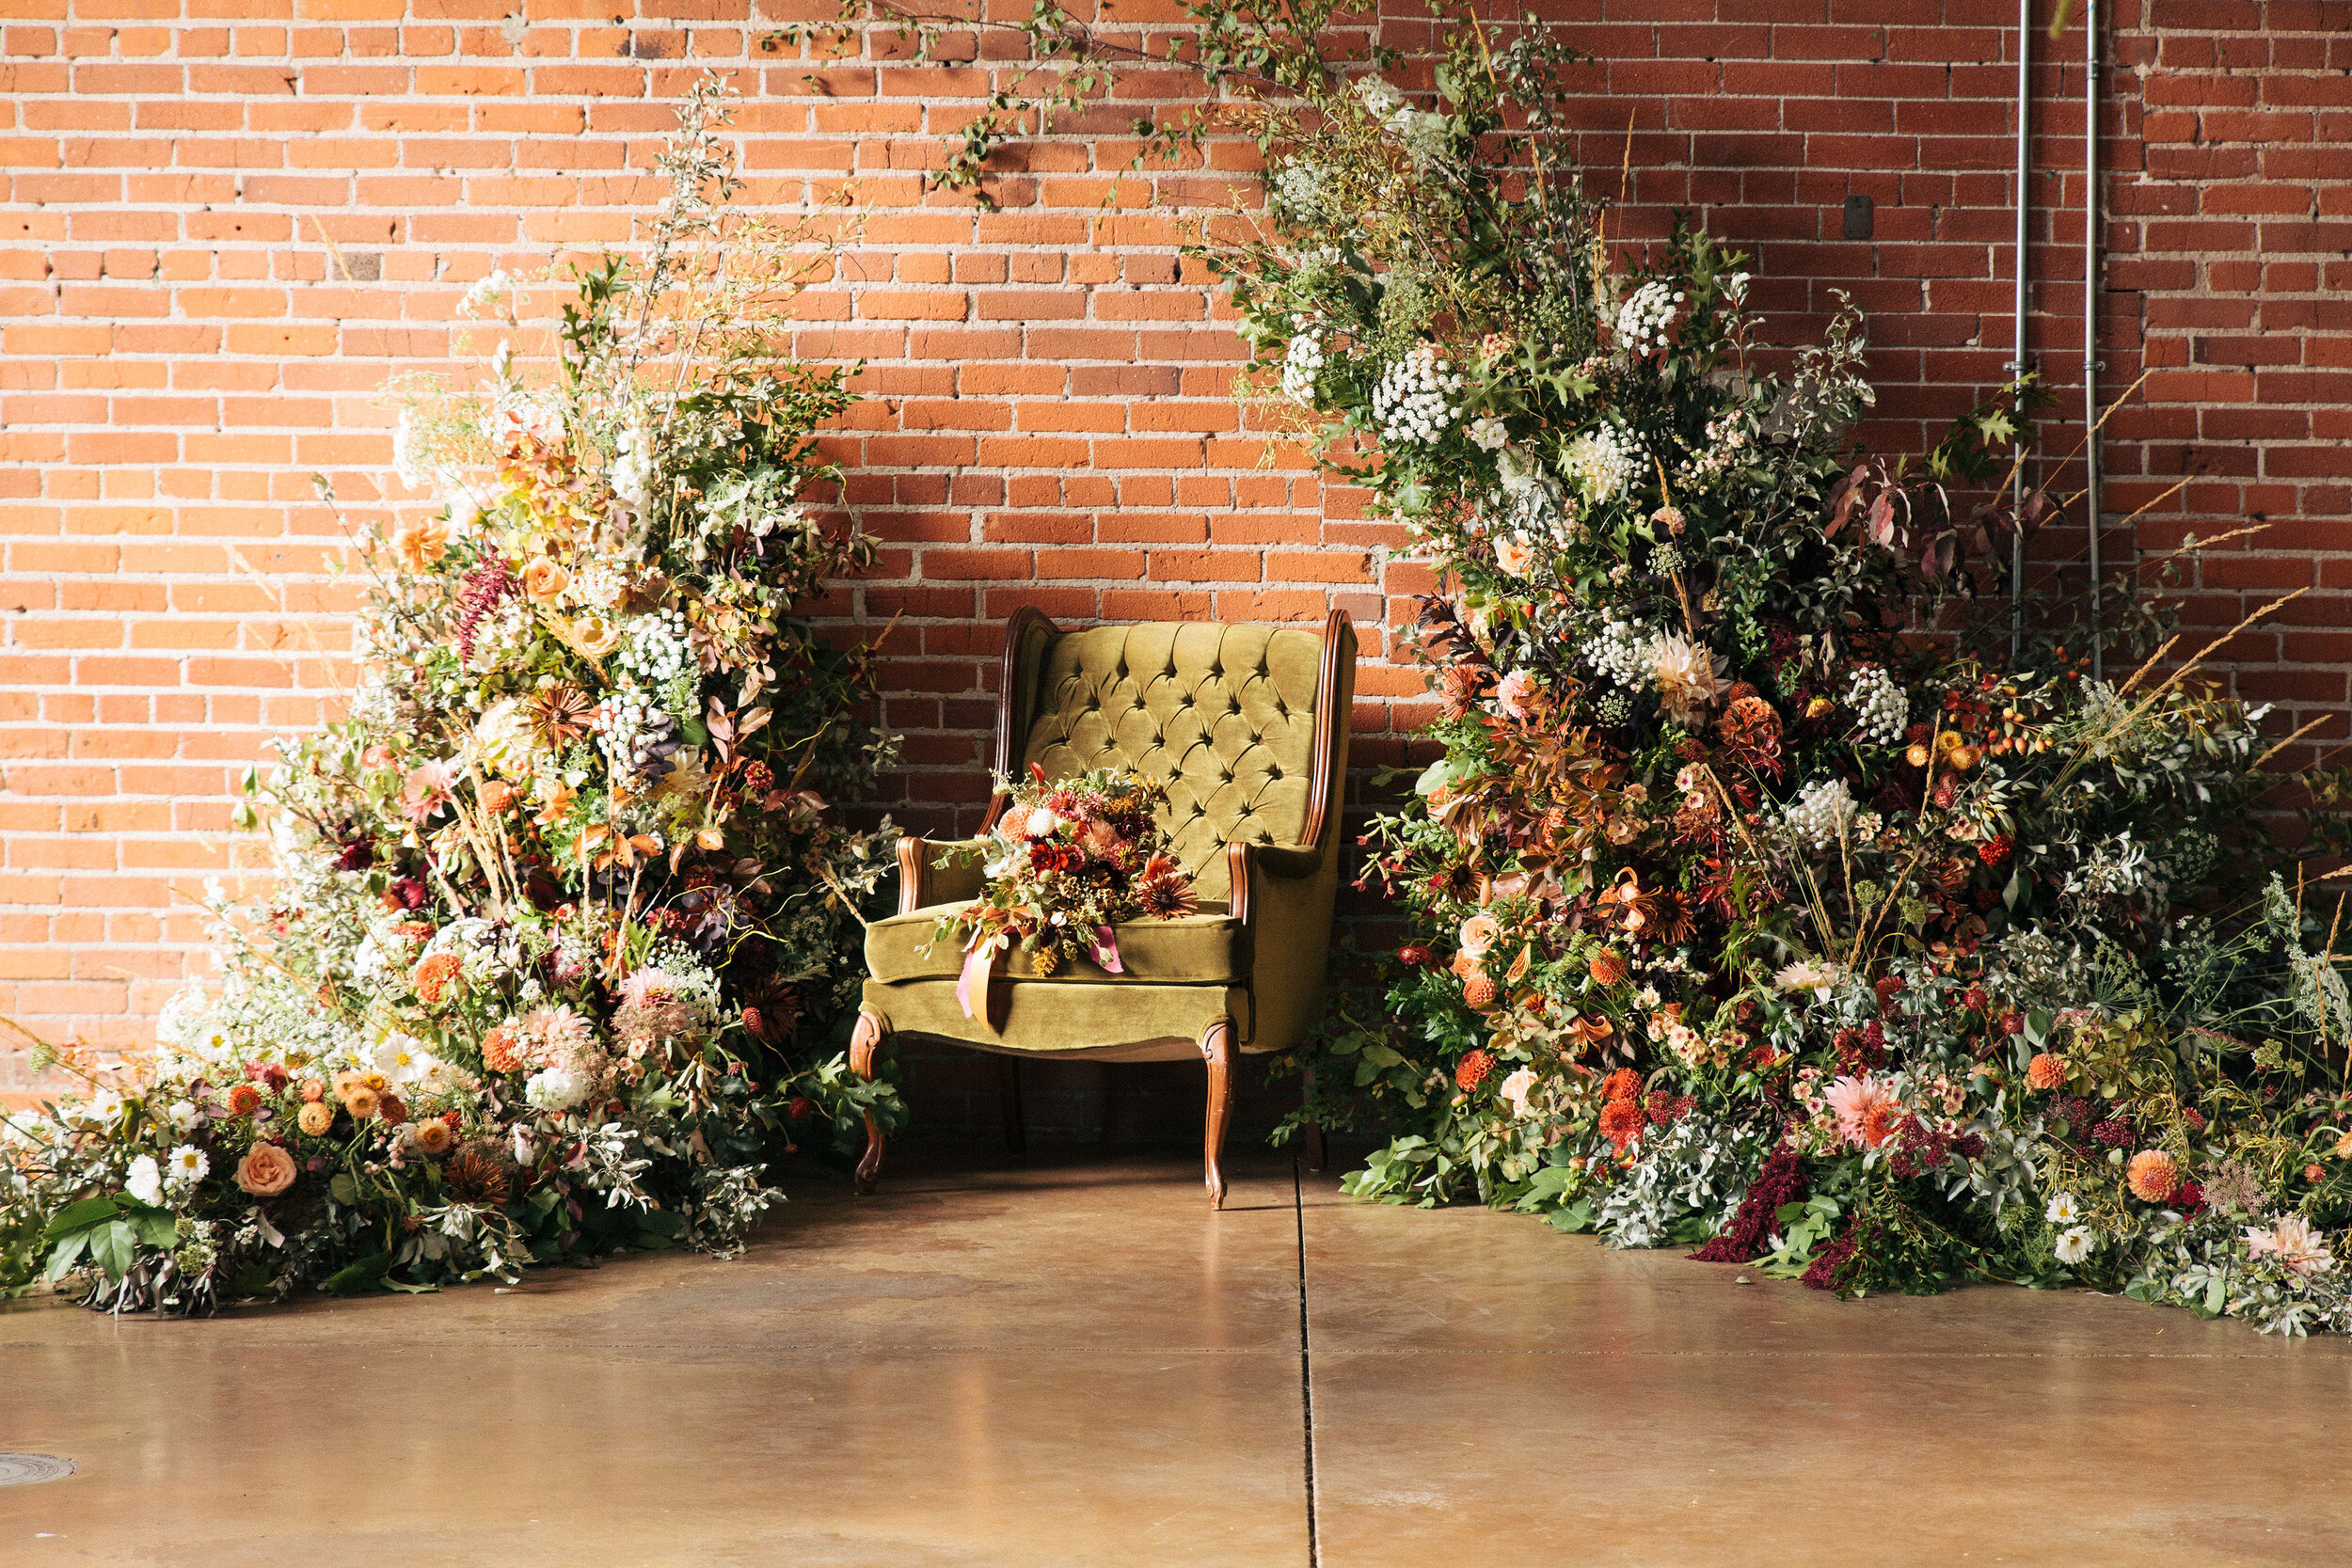
In this article, you can see photos of this humble little mechanic as well as a foam-free wedding arbor I created using this technique.
The moss roulade is perfect for outdoor weddings with a short set up window. I commonly make mine in the studio the day before. When I arrive on site, I simply attach it to the structure, fine-tune the design, and cover my mechanics—then I'm done!
You can adapt this technique for many uses. When I taught at the Sustainable Flowers Workshop (produced by Becky Feasby of Prairie Girl Flowers), we used a big fat roulade for the "meadows" in this installation.
The moss roulade serves a couple of different functions, much like floral foam would.
It provides a matrix to hold stems in place. Depending on the moisture in the roll, it can also provide a water source.
Primarily it provides a source of humidity, reducing transpiration and, therefore, the moisture needs of the plant material. I find this to be adequate for most wedding installations since they are typically used for a short duration. If I am using a particularly thirsty stem, I will place it in an Eco-Fresh bouquet wrap or a water tube and insert that into the mechanic to ensure that the stem has enough water.
I live in the Pacific Northwest, outside of Seattle on Whidbey Island. Moss is abundant here, making it a sustainable choice for me to use in this mechanic. Moss is a compostable, renewable resource that isn't shipped from afar. Depending on where you live, you may choose to substitute another material for the moss. The critical quality to consider in an alternate material is that it has some amount of moisture-holding capacity. Since I’m very committed to sustainable floristry, it is also important to me that the product be local, renewable, and compostable.
Excelsior is an alternate material to moss for this roulade mechanic. Excelsior is a softwood shaving product used for packing, shipping, and stuffing furniture. You may have received some in a gift basket! Many garden centers that sell statuary will have it as a waste product. (And I love an opportunity to give a second life to a waste product!) Since it is made from wood, it is compostable and renewable. It’s lighter than moss, which can be a valuable quality, but it won't hold as much moisture for as long. It is important to match the material to the need of the project and the need of the botanicals you’re using. There have been many projects where I have used my roulade mechanic dry; it is an excellent matrix for stems.
There are just a couple of downsides to the moss roulade:
It’s a bit messy to make.
It can be cumbersome when wet, and may be prone to rolling a bit on the structure if you don't cinch it down tight.
Despite these downsides, it’s a very worthwhile floral mechanic to have in your toolbox. But because of these concerns, I always make them at my studio ahead of time and not on site. You must also make sure it is well-drained before the couple is scheduled to be near it. When used wet, it’s best suited to outdoor events or industrial settings with concrete floors and low sensitivity to water issues. Lastly, be aware of the weight and consider working your design onsite until you are familiar with the way the mechanic behaves on your structure.
How to Create Moss Roulade for Your Floral Foam Substitute
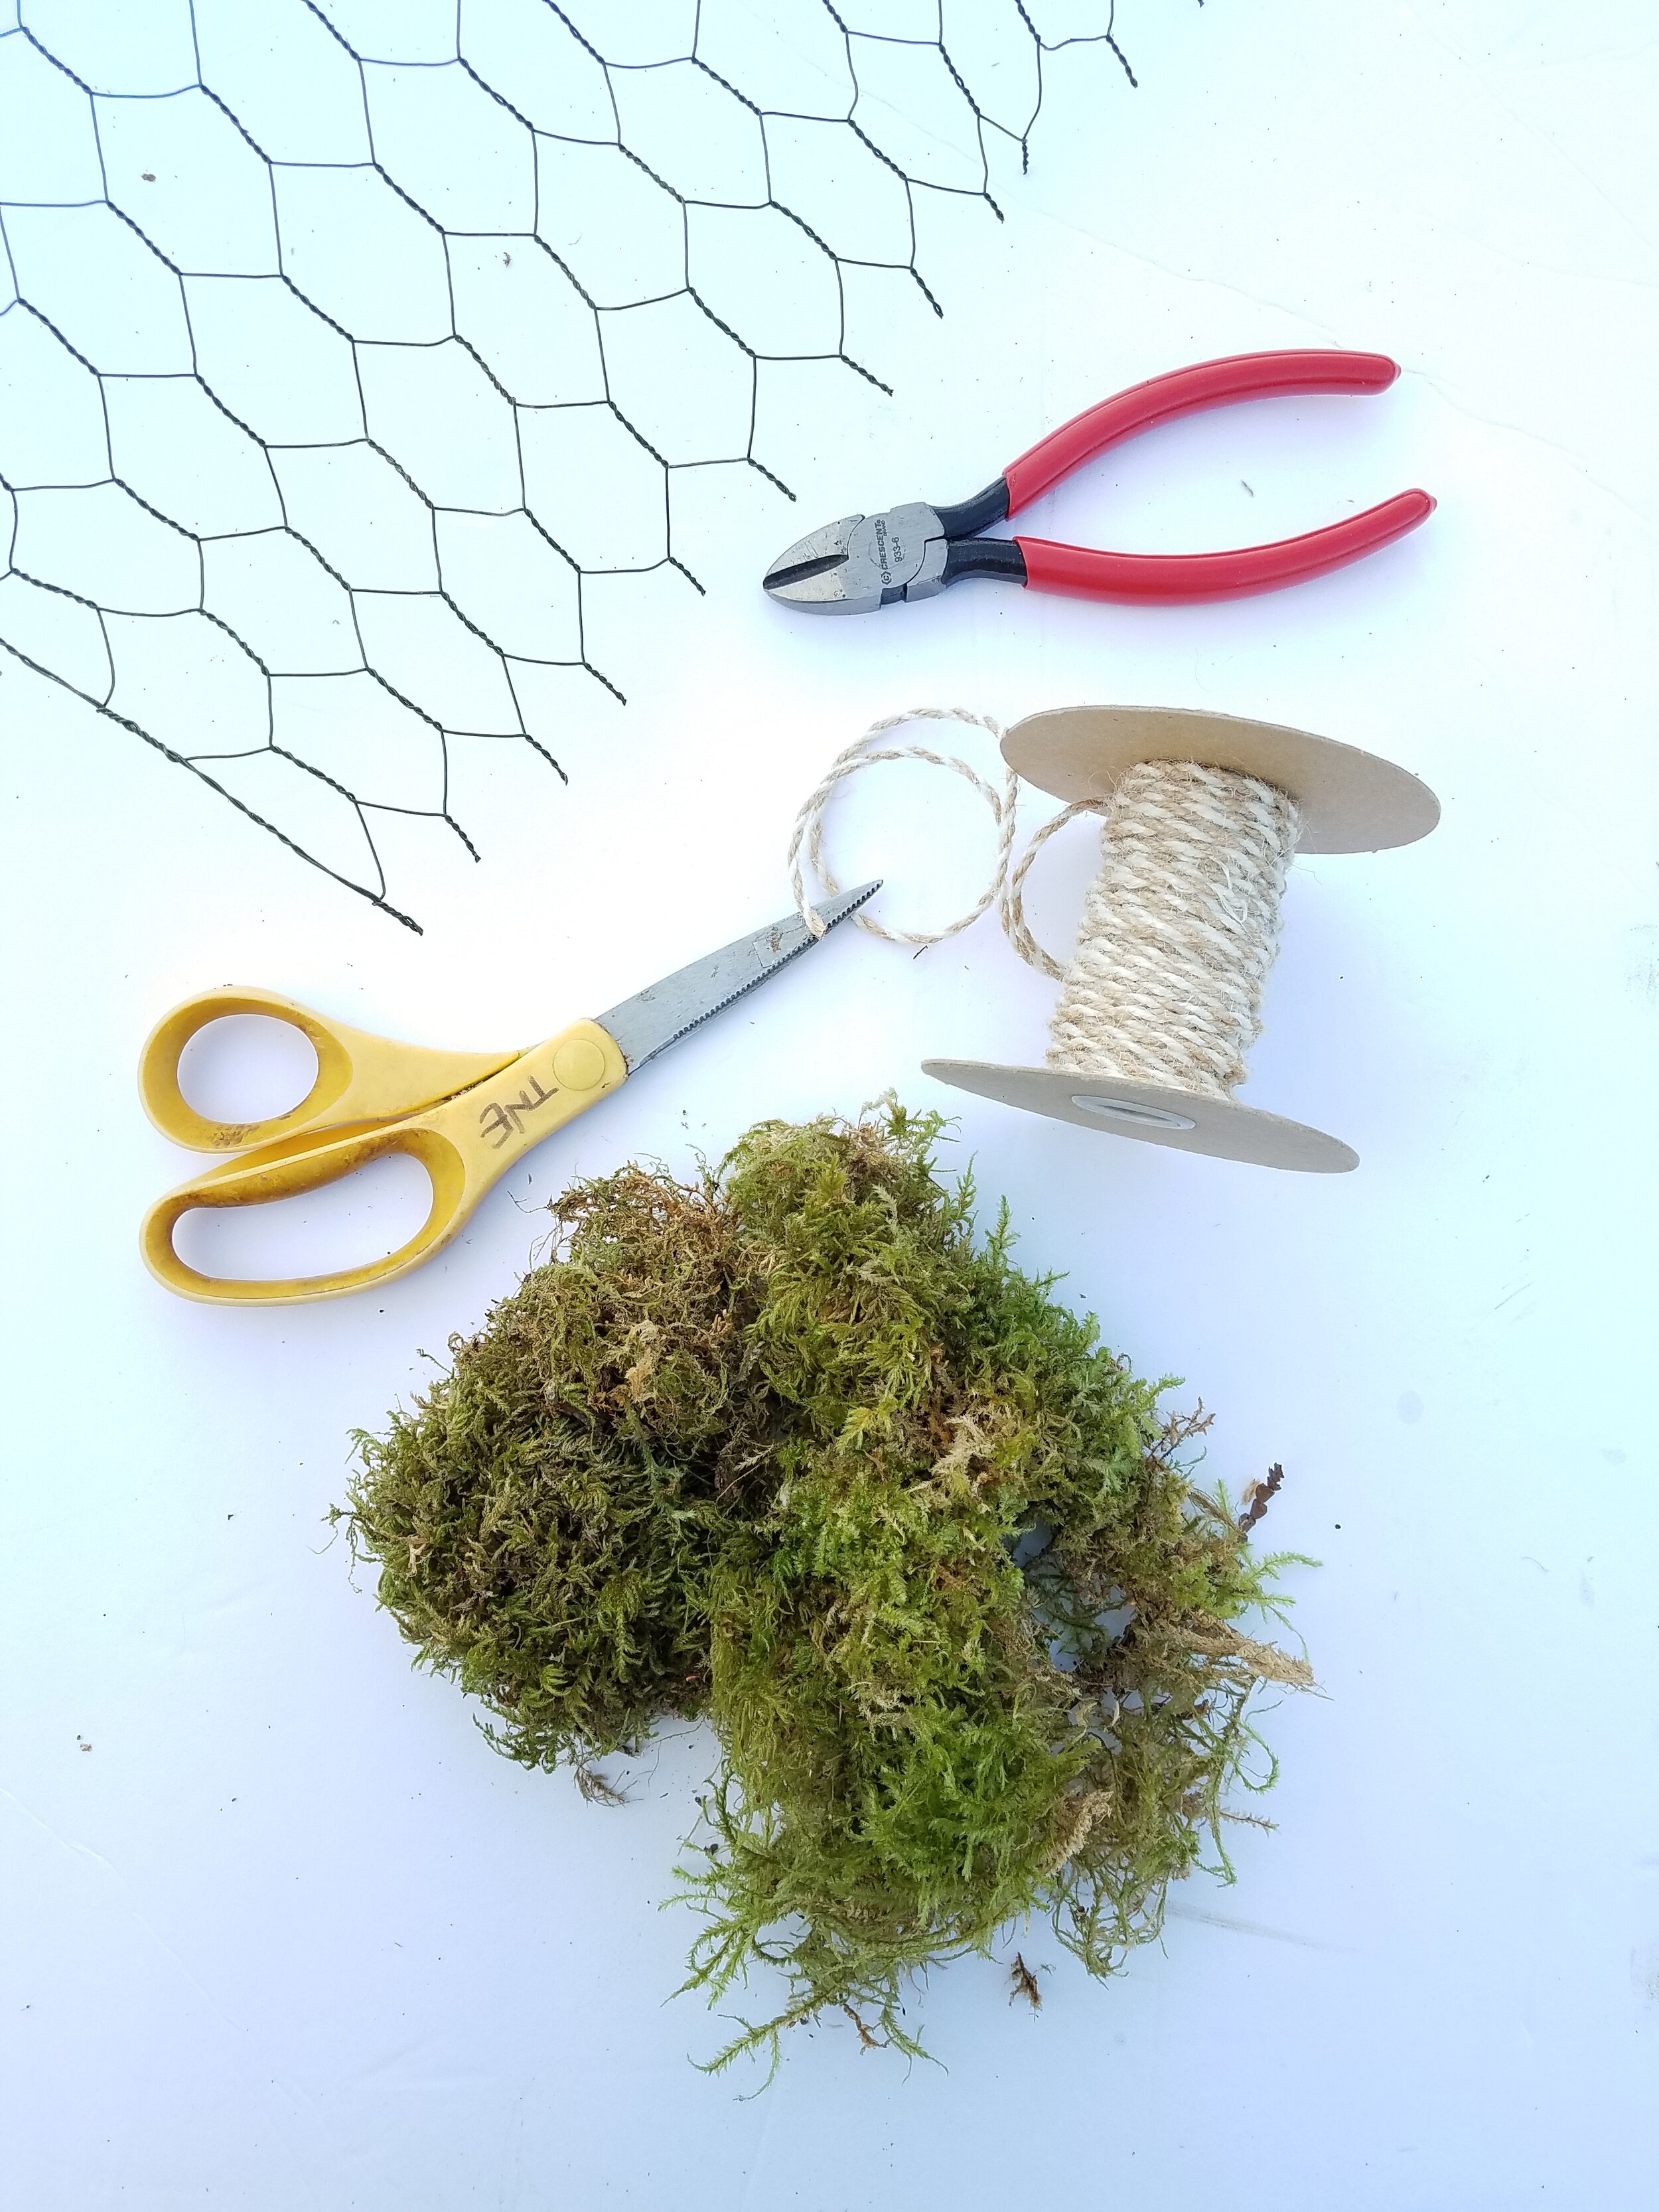
To create a moss roulade, you just need a few basic supplies:
Florist netting or chicken wire (I prefer green)
Moss or a moisture-retentive filling
Hemp twine or wire
Scissors
Wire cutter
Step 1: Prep the Floral netting
The first step is to cut your floral netting to the length you need for your foam-free mechanic. The nice thing about making your own mechanic is that you can adapt it to whatever size you need. I have some rolls that are just 18 inches long, and I have others that are 4 to 6 feet long—it all depends on the design.
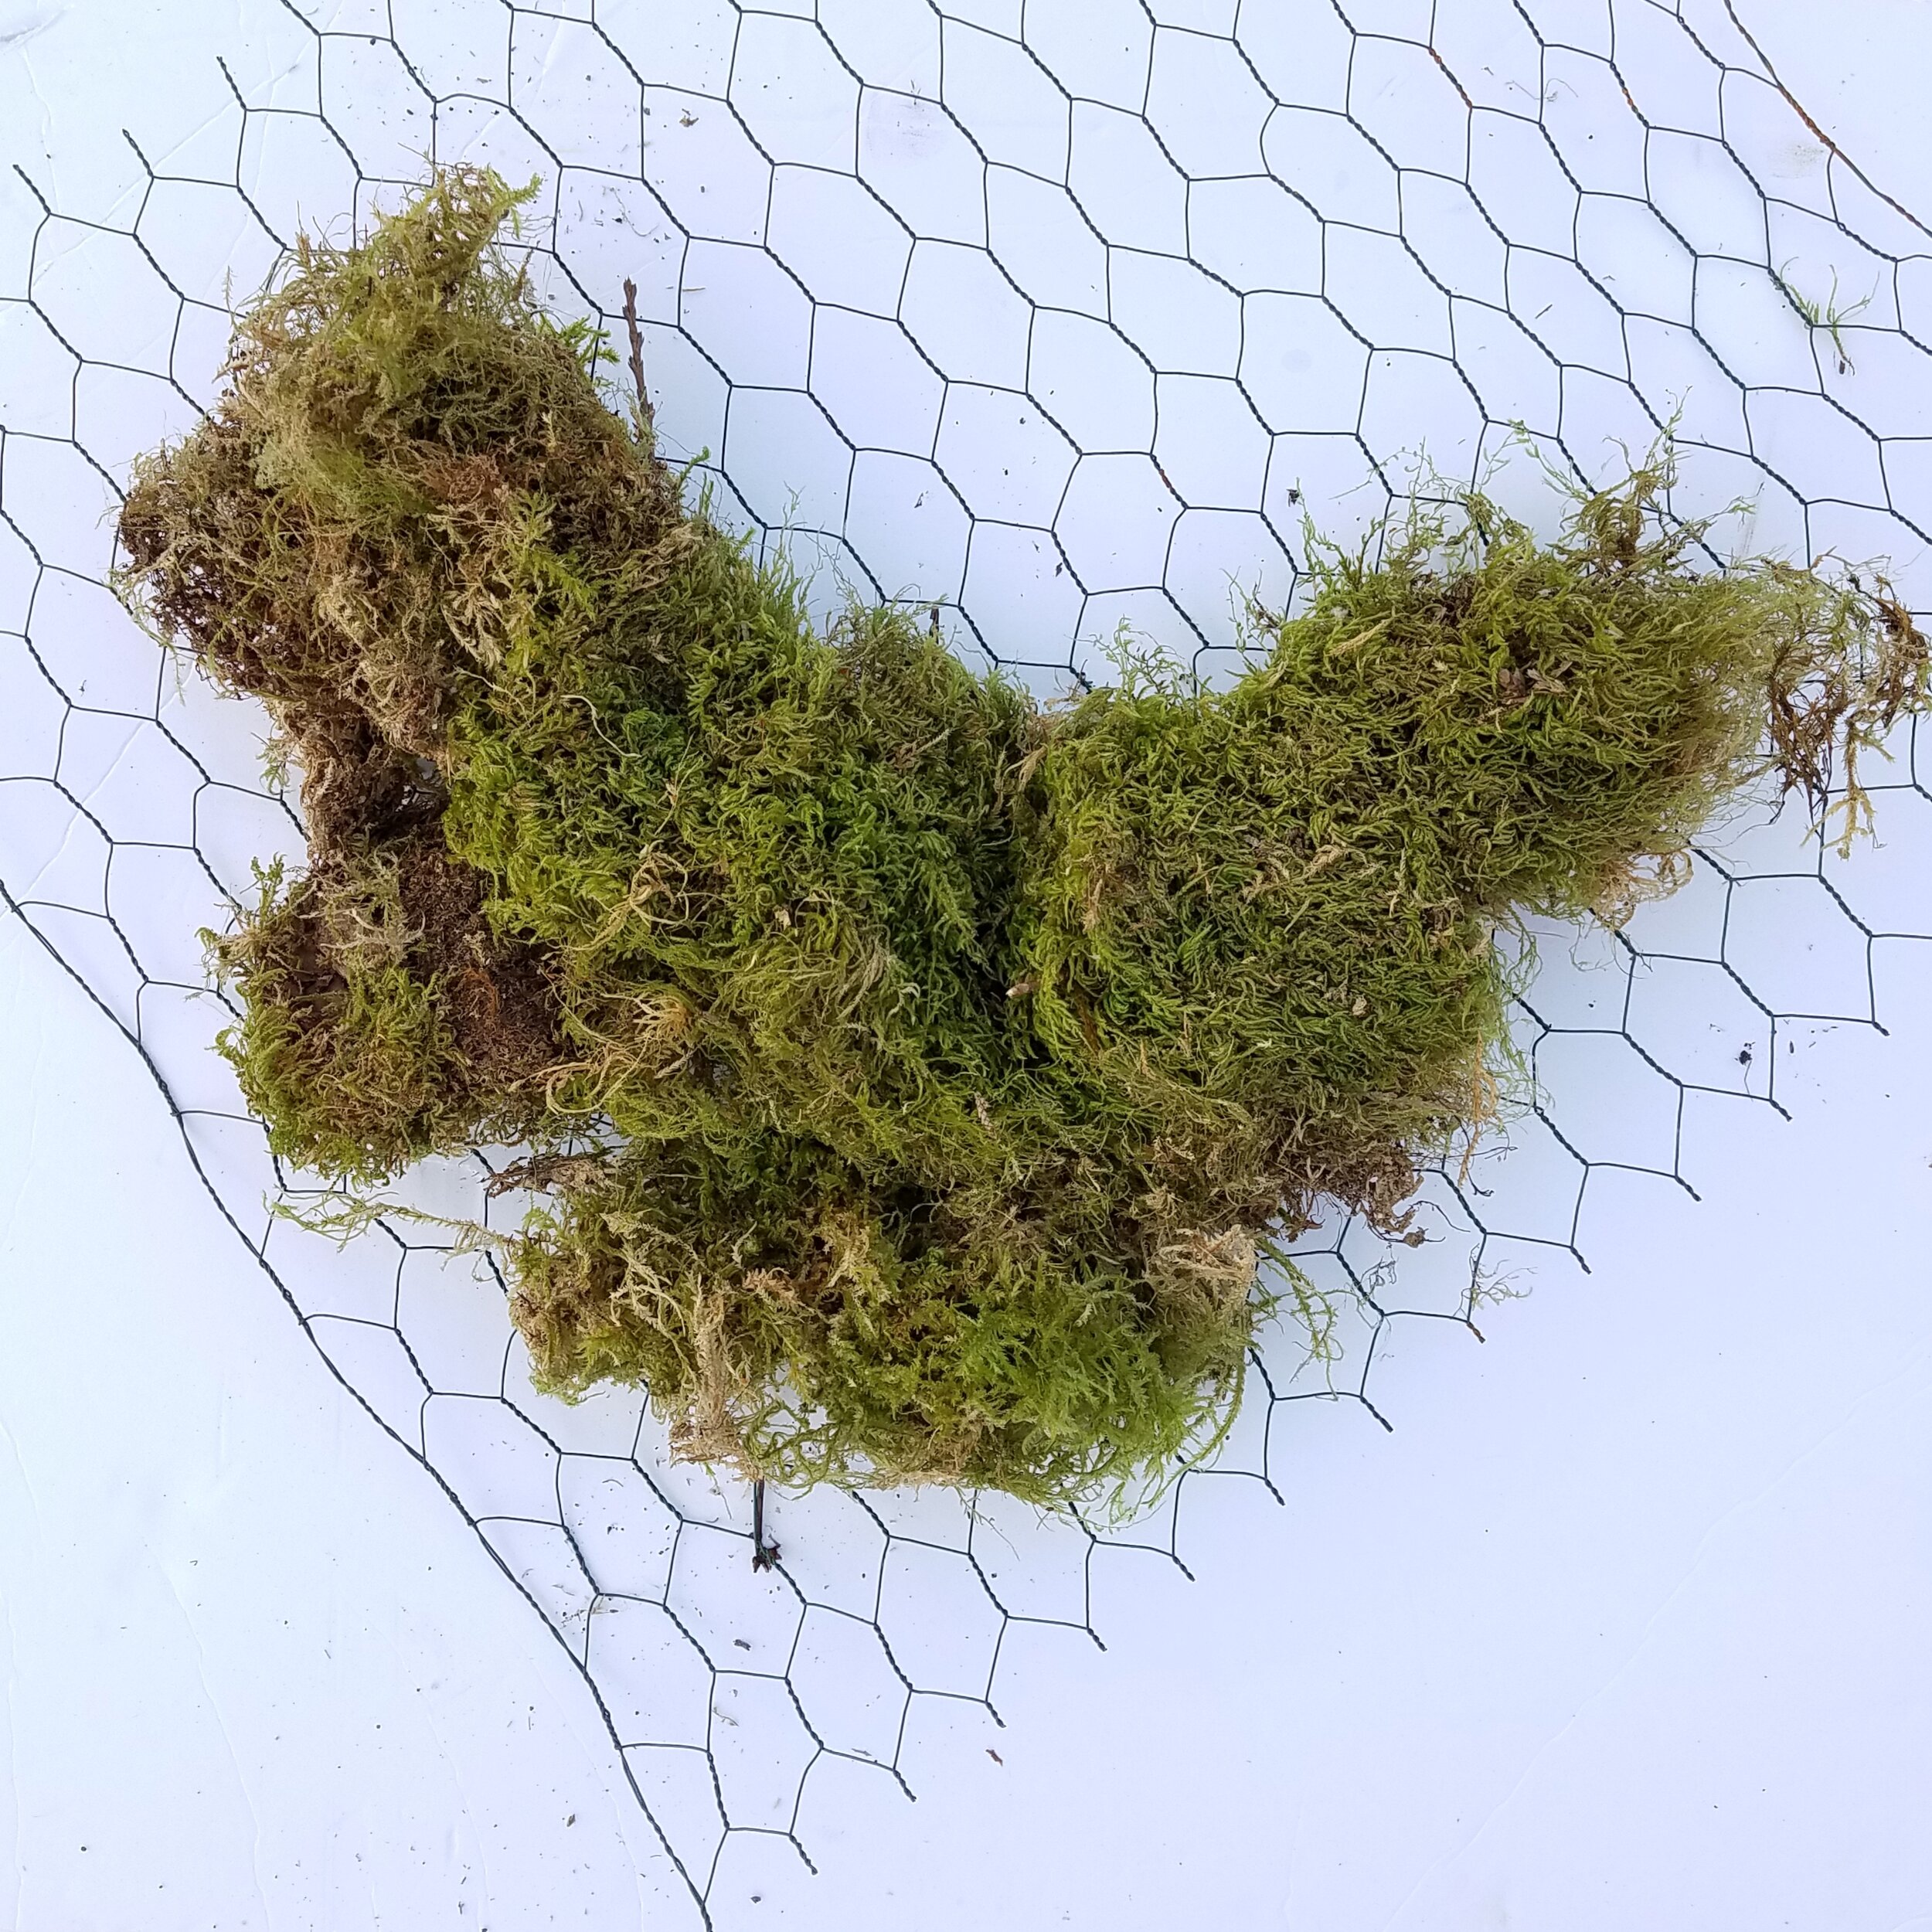
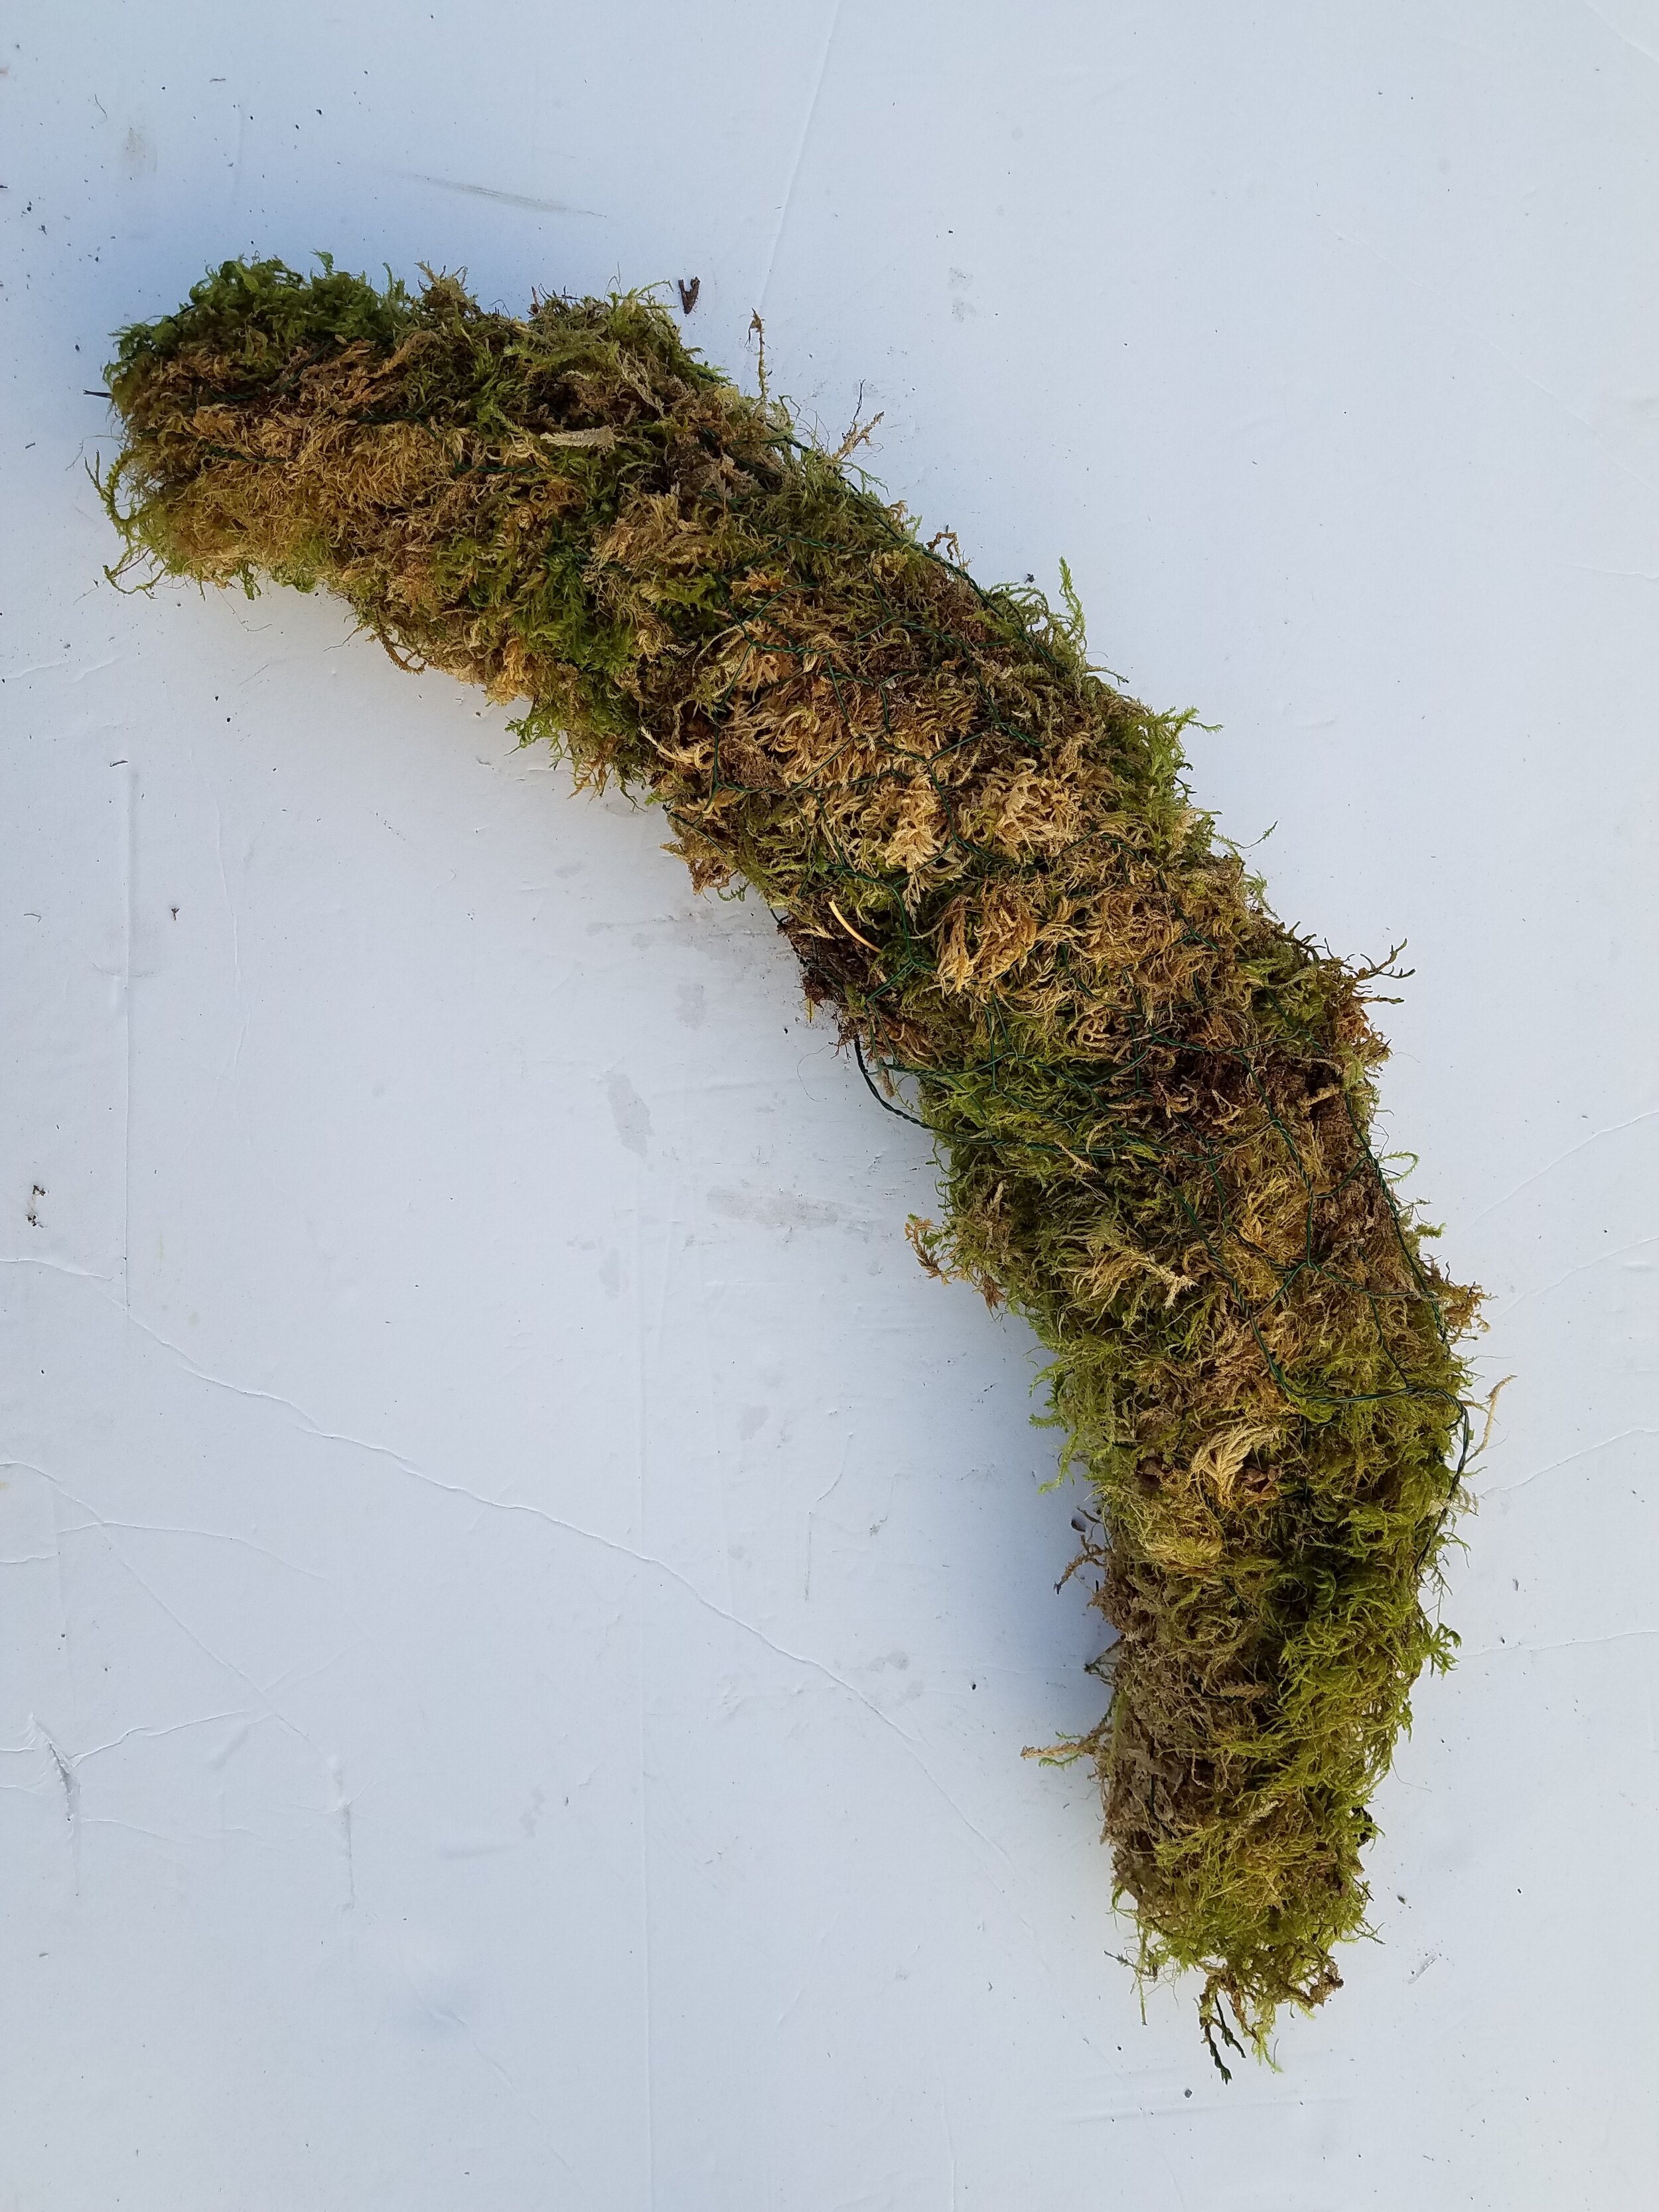
Step 2: Layer in the Moss
Next, lay the floral netting flat and layer it with moss. Roll the netting onto itself, much like you would roll a roulade cake or a sushi roll. You can create contour in your roll by piling more moss in some areas and less in others. As you roll, tuck moss in as needed to make sure the roll is evenly full. Don't pack the moss in, or it will be difficult for stems to penetrate. Don't be too sparing either, though, or there won't be enough to hold the stems in place!

The thickness of the roulade will also vary with the project. Some designs call for a thin piece, while others may need a fatter section. In general, the thicker the roll, the more moss it will contain—which means it will have better moisture holding capacity but will also have more weight. The more spirals of netting in between means more control of your stem placements. So again, adapt the mechanic to your design needs.
As you roll, bend the piece into the shape you want. Give it a curve if you're using it on the corner of an arbor. Arch it if it is for an arched arbor. Or you can leave it straight.

Step 3: Tie Off Your Moss Roll
Once your roll is finished, tie it shut with your wire, hemp twine, or whatever else you’d like to use. I personally avoid using zip ties since they are plastic. If I know I will be keeping my roll for reuse, then I prefer wire. If you’re making a mechanic for short-term use, hemp twine is a good option as it is durable but compostable. I typically tack mine shut every 6 inches or so. Tuck or tie the ends so everything stays in place!

How to Use Your Moss Roulade Floral Foam Substitute
Once you've made the roll, you need to prep it for use. I always start by locating my anchor ties. These are the ties I will use to attach it to the structure. I thread them through so that I am catching several layers of wire, though sometimes I have to use a stick to get the twine through. (Side note: you can jam wire through a bit more easily.) Be sure to leave the anchor ties nice and long!
Soak the Moss Roulade Before Install: Here’s How
Next, soak the roll. Depending on the size, you can do this in a sink, bucket, or a bus tub. For very long rolls, I will sometimes layer a flower box with a plastic tarp to make a sort of bathtub. That is also commonly how I transport the rolls. Turn the piece to make sure all the moss gets in contact with water, and give it enough time for the moss to really absorb the water.
Remove the roll from the soaking tub and let it drain for a little bit. Then you’re ready for the next step: framing up your design!

Designing with the Moss Roulade
Now it’s time to attach your botanicals. Sometimes you need to "pre-drill" to insert soft stems: find a sturdier stem or a skewer and pre-poke the hole. You can simply rough the design ahead of time, and then finish onsite, or you can make a fairly finished piece ahead of time. One big plus to this mechanic is that you don't have to work as hard to hide it like you would with foam. This can significantly help out with your budget!
You have a choice about how you cut your stems. You can cut them short enough that they end inside the roulade, where they will suck up as much moisture as is present. Or you can leave stems so long that you can tube them from the backside.
But here's my favorite make-ahead trick: Most often, I cut stems so they are just inside the back of the roll or are almost poking out the backside. I then rest the roll back into the flower box "bathtub" with a little bit of water, deep enough for the stems to drink. I then mist the piece generously, cover it with moist paper towels and then a lightweight piece of plastic, and pop it into my cooler to wait overnight.
Once you get to the gig, remove the roll from the bathtub and let it drain (on the lawn, in the parking lot, etc.). While the piece drains, I will often spread a tarp out under my work area to protect the space from any last drips that might come out. Once the piece is well-drained, simply tie it to the structure, add a few finishing touches to conceal your mechanics, and voila! A foam-free wedding arbor is made!
When the event is over, you can easily snip it from the frame. Pull all the botanicals out, set the piece aside to dry, and it will be ready to store until the next wedding! If you don't care to save it, simply snip the ties to open it and shake the contents into the compost bin. Then roll your floral netting/chicken wire up for the next project!
And remember, this mechanic can also be used dry or barely damp for indoor installations or materials with very low water need, such as hard-stemmed greenery, flowers like protea, etc., or for things that can be tubed. Dry moss can be a bit flakey, so you may want eye protection if you are designing with it overhead.
I hope this info helps you with your own floral practice! The floral industry can be a dirty business. If everyone makes just a few small changes, we can all help cut down on pollution and waste.
For more foam-free tricks and to learn more about sustainable floristry, follow Tobey on Instagram at @sustainablefloraldesign.