All in Videos

Video: Using Potted Plants in a Floral Arrangement Alongside Cut Flowers

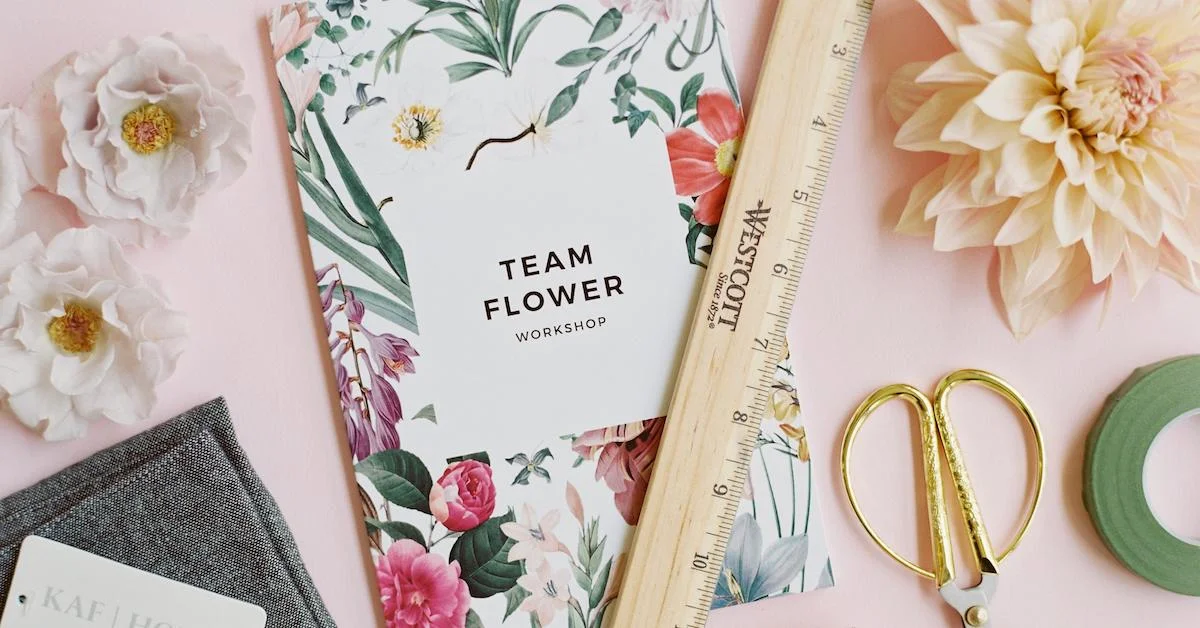
In this springtime video, Kelly will show you how to pull together an arrangement perfect for an Easter lunch table.  Learn how to become a florist and take floral design classes online with Team Flower. Here you can even learn tips on flower gardening for beginners. We'll show you how to do flower arrangements in flower arranging videos.

Transcript

Hi, I'm Kelly Perry with Team Flower. And I wanted to share an Easter centerpiece with you today. I'm reading this book called Flower Arranging Through the Year, by Daphne Vagg.

And in it there is a little idea. They call it pot-et-fleur. Literally means pot in flower. It evolved about 20 years ago to describe an arrangement of growing plants that are still rooted with a few cut flowers.

At times of the year when flowers are scarce or expensive, a pot-et-fleur can provide a type of decoration which has never really enjoyed the popularity it deserves for its economy and long life. A well-planted and cared for bowl will last for two or three years.

Well, maybe not if it lives in-- maybe not if it lives in my house. But if you're a good house plant person and very attentive, this is a great idea.

I love the concept behind it. In the book that they show here, they have some begonias, succulents, dusty millers, ivies, things like that. And then they've added in some little lilies.

A great idea to have some simple house plants that then you can, throughout the year, go back to and simple little if you need a little extra in a boutineer. Or just to have something fresh and growing in your house all the time that you can then take things they're blooming outside and add into your bowl, just to keep things fresh and fun. But it doesn't take maybe quite as much work as an arrangement.

So that is what we're going to do today. And I am using some things that I would probably plant these things out. It's not house plant kind of materials. But these are things that are available at the garden center now.

And we're going to plant them, pop them up here for our Easter bowl. And then after frost passes we're going to go ahead and plan these things out in the garden.

So my version is not as strict. But that's something that you could do is plant the house plants. And then follow the same kind of set up and concept to have something that's fresh and growing throughout the year.

So we are going to start by taking our terracotta pot. And I'm going to flip it upside down. I'd kind of like to age it a little bit, but I don't have time to go through the whole process of covering it and letting that process happen.

So I'm going to do a quick little cheat. And I'm going to just use some chalk. Some simple classroom chalk or some sidewalk chalk if your kids have some.

And I'm just going to go back and forth on my bowl with the chalk. And then we're going to smooth it over and kind of blend it all together just with a towel.

You will, of course, want to be careful when you pick this back up to take it in your house so you don't have chalk all over the front of you. But this is just a really quick way to get some interest, and texture, and age to your pot instantly. It's fun.

Kind of like we're giving her some makeup. Putting on the powder.

Now next, we're going to add some-- get a base level of some potting soil in here. We'll go back over where I just put a little thumb print. OK.

And I'm just using a simple Miracle-Gro potting mix from the hardware store that has some nutrients for the plants in it already. This is only designed to last for a little while in terms of nutrients for your plants. So you'll want to check the brand and the bag that you have to see what's in it, how long it will last, and what you'll need to add or supplement to keep your plants looking great long-term.

I know a lot of times with house plants-- I'm getting a little bit better at them. But I was on a real losing streak with them because I kept getting insects in the soil.

And so I did some Dawn dish detergent and have been doing flower food in them regularly. And that's really helped. So maybe my black thumb of death is going to leave here pretty soon.

OK. We're going to add these first. They're just a sweet little-- what was this called? Saxi-- frage? Fr-ah-g? Did we look this-- we looked this up and-- oh, man.

If I haven't heard it said before. I have a tough time with that sometimes. But it is spelled highlander white. And it's S-A-X-I-F-R-A-G-E.

I'm just going to break up this little bit at the bottom so that the roots can move around in the pot. And I chose two different ones. This one has more compact flowers and this one was a little bit leggy looking. But I liked that because I can have this one that is doing a little bit more movement come and drape down the front like this.

So I'll tuck that little baby in the there. I'm going to add-- I have some different kinds of lettuces. I guess this is a lettuce, a kale, and I think this is cabbage. Yep. A little bit of cabbage.

That one I lost. I tell people a lot with cut flowers, feeling the flowers to know if it's going to hold well for use a cut if you're cutting some things from your garden. If you feel lettuce it feels very tender and soft. And then if you feel this cabbage down here it's very leathery.

That Cabbage will do just fine out of water. But the lettuce, you'll have a little bit more wobbling around. And we're experiencing that even now just here on the plant. The cabbage and kale over here, same thing.

And I wanted to have a little bit of lettuce in here. Have a little spring garden. Thought it would be sweet. So we'll see how it does.

Let's put a little thyme in here next. Thyme is one of my-- this is a lemon variety. I love thyme.

It's very sweet smelling. It's great to have on hand for cake decorating flowers if you do wedding flowers. I like to use that on wedding cakes a lot. Of course, I make little cookies and Jesse and I had it in scrambled eggs the other morning.

When I was choosing these plants at the garden center I was thinking about the different shapes of the leaves and how they might look grouped together. I wanted to have some varieties, so that's why we have long lettuce leaves.

And these cabbage leaves have just a little hint of purple in them, which I really liked. Just add a little bit of depth to our green. It's, of course, primarily green. But I wanted to have a little hint of color.

Now This, you could plant the whole thing in the ground I suppose. I want to liberate it for what we're doing.

It has become-- the roots have come bound around the bottom of this. Try not to disturb them too much but let them go free so they can keep moving.

Easter is one of my favorite-- well it is my very favorite holiday. So I'm excited about this one. Parents are coming down to visit. And we'll have our little brunch with this centerpiece.

Nice thing about these is you can do them in advance and keep an eye on them, keep them watered, and happy. And that's one less thing you have to do when company comes. You don't need to be arranging fresh flowers. You can just touch your potted arrangement up and pay attention to your guests.

OK. I think I'm going to reserve these last two, just in case we need them. And I'm going to fill in with a little bit more potting soil. Then we're going to add some fresh flowers.

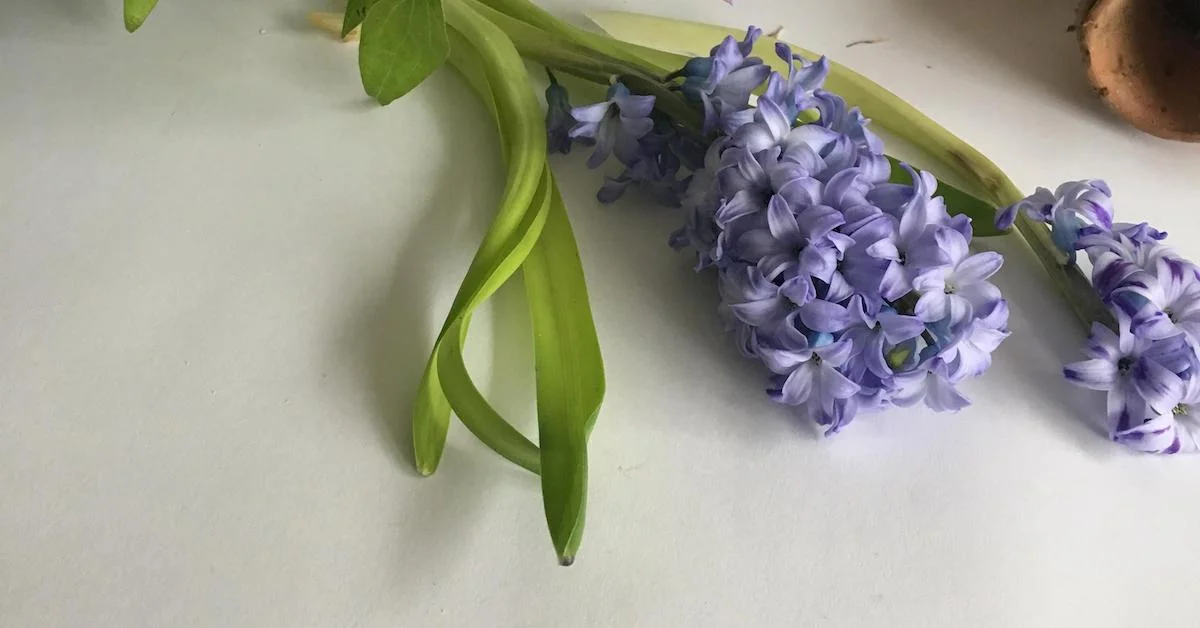
And these daffodils will be-- they will be all done blooming. They will have lived their life by Easter for me right now. But there will be more in the garden when Easter rolls around and I'll run out pick some more.

Same with-- I think we're going to add some forsythia to this. It's a great plant to use.

But again, that forsythia will actually very likely still be looking great for me around Easter. Forsythia is one of those flowers that roofs in water. And those kinds of things are always very long lasting in arrangements.

I don't know if you've ever noticed ivy. If you cut ivy and put it in a vase, it will start to shoot out little roots at the bottom. Maybe after about two weeks of being cut.

And forsythia acts the same way. That's how it spreads in the ground and multiplies is by putting out roots. So that is a great, great cut. Great thing to have in your garden if you don't have already. OK. Cute.

So to put these flowers in, I'm going to use some little water picks. But I wanted to show you a few other options.

In the book, whenever they talk about putting together the pot-et-fleurs, they have thin little containers or little vessels that they actually plant in the soil that then they can put their little bouquet in. So I wanted to show these. These would be great little things that you could plant in there. With what we're doing with it being so low and just the shape of what we're doing today, this isn't what I need.

We could, if we wanted to, perhaps use this. This is a little pin frog cup that you can put a little bit of water down in here. And then you have the pins that you can set the flowers in and around.

So I'm going to just-- there's a little place right here that I've created that would be fine to put that in. Since it's green it mixes in with the things that we have. I'm just going to put a little bit of water in that.

And since I might want to put some flowers in a spot other than this or maybe just one little flower over here, I also have some water tubes to use as well. And they just look like this if you haven't used them before. They have a little poke and you just poke it down in there. And then kind of hide the mechanics of that as needed.

So I'm going to start with the forsythia. And I'm going to use this to create the kind of more interesting shape at the top. We've filled in the base of our arrangement. But now opposite of this rosemary that's probably the most prominent thing that we have coming up, I'm going to do the forsythia right over here.

And I'm not getting real serious about precisely how this is going in there. I want it to feel casual and just that it was a walk in the garden. But naturally, just because that's how my eyes bend, I'm thinking about the lines and the movement that I'm creating in the arrangement with the pieces that I put in.

And then the little daffodils. You can see how they get this little-- where they've been living and forming. You can just pull that off and liberate the flower. So there she is. Glad and ready to roll.

I'm going to take a quick peek at my flowers. See which ones are the biggest, which ones are medium, which ones are small. That helps me as I place them.

You place larger flowers at the base of the arrangement and smaller ones higher. It feels a little bit more grounded, I guess is the word you could use to describe that.

And as I place the flowers in, I'm thinking about just putting maybe one a stair step above the other, rather than crunching them together. Because I want this to just look like they're growing there.

And as you go out and gather your flowers, you don't have to use daffodils. You don't have to use forsythia. Use whatever is in your garden.

But notice as you bring it in and as it's growing there, just the natural bend to the flower and how it seems to grow. And if you mimic that kind of look as you arrange it in the bowl, you'll get a nice garden feel.

So I'm going to show you-- I have this one in here and I'm going to take it out. And I'll show you why I think-- I mean it could stay there.

But I kind of think it's a stronger composition to me if I just pull this out and we have that. These were kind of on the same level and similar. So I'm just going to readjust how this one is facing. Maybe use it a little bit further back in the arrangement.

So now I'm going to work this angle. And see how as we do this we're creating depth in the arrangement. You can tell that it's moving backwards here just a little bit more. Movement.

You really could, I think, stop there with the flower placement. What I might do with some of these other smaller daffodils that I have is just create a small little grouping in a little bud vase and put these in front of each person seat. I think that would be a sweet way to use the rest of these.

And I wanted to add in my little bunny here. I have two younger sisters. And the one next in line to me, her name is Kristin. But we-- from the day she was born she just looked like the sweetest little snugly bunny. And the name stuck.

So this is little bunny right here. She can't make it down to Easter. So we're going to put this little-- we're going to put this little bunny in here to remember Kristin. I think we will put that right here. Cute.

And just these last two that I have. There's a little spot back here. I'm going to fill them in.

OK. I think that took care of that. I think we're done.

Another thing you might want to do down the ends of the tables. I know everybody's dinner tables are a little bit different. Some people are eating family style. Some people are having it on a buffet or something like that. So just a few other things.

So the daffodils in the bud vase is another way that you could add and make something with this. And then there are little sweet terracotta pots that you can get at the hardware store. They have little tiny mini ones too. That might be something that's sweet that you could put at each person's place setting.

And I also have some carrots and I have some cabbage leaves. I took some leaves off. And I have the actual cabbage head here. You can arrange these down your table and make it sweet and special.

Or you might even consider using one of these cabbage leaves as maybe a place card. Maybe you paint, just with some little-- bit of acrylic paint, you paint their little name in there as a place card. Or you could serve a chicken salad in it, you know. Whatever you think.

But there's so many sweet ways you can use something like this. And what a beautiful leaf, all the colors and veins within the leaf. So those are a few little ideas for you with that.

I already mentioned planning it out after you're finished using it as your centerpiece. And don't want to forget to give it a little bit of water here before we sign off as well, since we've disturbed those-- disturbed those roots, go ahead and get them some water back to their way.

So that's what I've got for you. Wishing you a wonderful, wonderful Easter. And hope that you enjoy spring and all the beautiful things that it has to offer.

Talk to you soon. Have a great day.

Video: When and Where to Use Wired Flowers in Floral Design

Wiring is a valuable and specialized skill that can add value to your business and set you apart as a designer and freelancer. Kelly explains why wiring is important—as well as when and where to use wired flowers—in this excerpt from the Team Flower Advanced Techniques for Wiring fast track class. The wiring technique gives you a lot of control over the exact placement and orientation of each and every bloom in a piece—if you need your focal flower to bend in a certain way that is not natural for its stem, wiring makes that possible!

Video: Using Complementary Colors in a Minimalistic Floral Arrangement

In this excerpt from the Team Flower Elements and Principles of Design class, Kelly demonstrates the principle of movement by creating a minimalistic floral arrangement using complimentary colors. Complimentary colors are opposites on the color wheel (orange and blue, purple and yellow, and red and green). She uses caladium, firecracker, and green trick dianthus to demonstrate the most difficult of the three groups: red and green. This is a color palette that typically reminds us of Christmas, but it can be used to create a sweet summer piece as well.

Video: How to Use Succulents in Floral Arrangements

In this quick tip video about using succulents in an arrangement, Kelly will show you a tip how to elongate the stem! Learn how to become a florist and take floral design classes online with Team Flower. Here you can even learn tips on flower gardening for beginners. We'll show you how to do flower arrangements in flower arranging videos.

Transcript

I wanted to show you how to wire succulents. And by wire, I mean I'm gonna stick a big bamboo skewer through it. 

I like to pull off these little lower petals. 

And then I just take my bamboo skewer and I line it up right there on the side. And then I look for the stem tape that is the closest color to the succulent that I'm using. And I just wrap it around like this. 

Very, very simple. 

For succulents that are really big, I like to poke a little whole in the top of it and then put in some-- just a tiny little dab of Oasis wet glue. Let it get sticky for about 10 seconds, and then I put my skewer in that and tape down the stem just like I did with this one. So this is ready to pop into a bouquet, or you can clip it off just like you would a flower stem and pop it into your arrangement. I'm gonna do it one more time. 

Clip as long as you can from the base of the plant. Take off the lower level petals. 

And I'll just reuse this skewer that I already wrapped. Gotta get [INAUDIBLE] of it. 

And just tightly, firmly wrap it to your skewer. 

That's it. Very easy. 

And just because a succulent isn't completely perfect, doesn't mean you can't use it. If part of these petals, if it was kind of one-sided and some of these petals over here didn't grow quite right, you could just tug that part in towards the back and then put those pieces that still looked really pretty out as, like, a silhouette around the bottom of your container or something. So you can always use the flowers. And use every little last bit that you can. 

Just be strategic. 

So there you have it. Little succulent addition. Hope you enjoyed it, and hope that encourages you to go try it for yourself. Have a good one.

Video: How to Make Flowers Spring Out of a Table

In this centerpiece video, Kelly makes a unique arrangement using a forest floor as inspiration. Watch as she pulls together unique mechanics to design an idea you can use in your next ceremony. Learn how to become a florist and take floral design classes online with Team Flower. Here you can even learn tips on flower gardening for beginners. We'll show you how to do flower arrangements in flower arranging videos.

Transcript

Up next, we have a really fun long table centerpiece display that we're going to work on together. I've partially constructed and deconstructed part of it. So we're going to go back through, and I'll show you kind of how to get up and to this point. And then, we'll keep finishing it out. 

So what we have here, in terms of supplies, this is from Lowe's hardware. We have got a piece of siding that they use on homes. And what I did, it had a lip on one side. And I took the-- I think it was 12 or 14 or so feet in length-- and I cut it in half and put them end to end so that I would have a lip on both sides. 

And I just used some packing tape to make them together-- to put them together, so I have kind of like a little tray, which is great because it makes it a little bit sturdier, you know, for lifting and things like that. But it's perfect for this type of project. The width on it is really nice. 

We are working on, this is going to be a six-foot long runner. It's going on an eight-foot table. And whenever I get it on site to install, for Amy, we're going to put just a few more little pieces of moss on the sides. And then, I have just one more candle like this that's going to kind of sit and fill in the area on that last little bit. 

So that's what we've got. It's sitting in. Then, I have some oasis foam. And it's just a simple-- it's not a fancy kind or anything. It's just a simple brick of oasis. 

And what I did was I cut it. I just made little notches. And I cut it the whole way down in thirds that'll be nice and flat. 

And once I did that, and this is kind of what it looks like once it's cut, just nice and narrow there, I took some Oasis waterproof tape. And I have gone down the entire length of it. And I just have everything taped in there to keep it from sliding one way or another. I think that's a really important thing to keep kind of everything in check. 

If you wanted to, you could use some Oasis glue. But I just really don't like glue. But some people don't mind it. I seem to get it all over myself so I avoid it. 

But you can use this tape instead if you'd like. And then, just with a couple of the leftover pieces of Oasis, I've made-- you can see here-- a little bit of-- a little bit of a level, or just a rise-- a rise here to make it a little bit taller. And that's so that my moss kind of can go up and down throughout the course of the display. So I just have one here and here and one here. 

I have three different types of ferns. And I just left some space in between my Oasis. I sort of kind of laid everything out before. And then, I just left some space as I took them out of their pots. And I'm kind of, like, just temporarily potting them in there between the pieces of Oasis, and I've got three here. 

And then, the other thing is these candles. And I just press them down into the Oasis so that they kind of had just like a little-- a little bit of sturdiness there. Then, it's going to get covered in with some moss and we'll adjust whenever it's in its final position, just to make sure everything's upright and in good shape. 

So those are the supplies that we're working with. And I have this beautiful sheet moss, some local sheet moss. Since it is local-- it came out of the woods-- I put it in some water just to hydrate it. 

And then, I also wanted to get the critters out. So that helped me get the critters. I just put it on a towel, squished it out, and then just kind of pressed through to make sure that I didn't have anything in there that I was carrying along that I didn't want to have with me. 

So that's where we stand with that. We're going to go ahead, and I'm just going to layer some of this moss in here so you can see what that looks like. I'm using some pieces of wire. And this is, I think this is about a 20-gauge wire. You could use, I think, anywhere between 18 and 24 probably would be fine for this. 

But I just made these little pins. And as I put the moss in, I just pin it into the Oasis. So the Oasis has several different purposes in this arrangement. 

One is to give a little bit of different levels. Another is to have a place where we can pin in to secure the moss without using glue. And then, I'm going to be adding some fresh flowers to this. And I wanted to have a water source for those. 

So I'm really just right now going to focus on the edges. And again, when it's in its final position on site, I'm going to go through and maybe just kind of, like, make this a little bit more irregular down the sides. But I want to leave some of that Oasis exposed right now so that I can see where to layer my fresh flowers in. 

And that's the next step. So you can see over here, I had some umbrella fern that I just took apart. And I have that sort of spread throughout. 

And then a little bit of this hydrangea. I'm going to add some more hydrangea, a little bit of seeded eucalyptus to get things started here. And then, we're going to kind of build up from there. 

I love this hydrangea because it can go large scale. I have another project for this event that is very big. And these transition nicely from very big things to very small things. 

You can see here, it has these sweet little berries and things you could pull this off, and this could become a part of a boutonniere or a corsage. It's also great to cut here in this area. And you can use this in a centerpiece, kind of to frame out the bottom of a centerpiece container or something like that. You can use it for what we're doing right now, or you can cut just each little piece off from the sides and kind of start popping those in like your seeing here. 

I just love the lacy, romantic texture that this adds. This bride wanted to have a woodsy event. Her husband is very outdoorsy, but she's very romantic and elegant. And so we're sort of marrying the two together in this arrangement. 

Probably not going to find hydrangea on the forest floor. But it does like shade or just in a beautiful garden. And you could easily find this type of plant growing in a garden where the moss and ferns and everything are. 

Umbrella ferns are one of my favorite things to have on hand if bright greens are being used in an event. Because, again, like the hydrangea, it can be used in so many different ways. You can pull it apart and use it in a boutonniere. You can leave it together and have it framed, you know, a big fleurette for something that you're doing in a large scale arrangement, maybe for a church or something like that. 

Now, with the seeded eucalyptus, we're just going to use really mainly the berries from it. But the leaves do kind of nod to this fern over here. There's a little bit of similarities there. So I might move on just a few of those. 

The goal with this is some texture. This is a very textural piece with all the different-- there's actually several different-- I don't know if you can see them, the detail, in the camera-- but there are several different types of moss within this. And that's one of the beautiful things about having something that's fresh and local is you get this variation between the browns, the yellows, the greens, something that I really love. 

You can get moss in cases from wholesalers. Generally, that's not a real tough thing to find. Price wise, it will differ, depending on where you're getting it from and all that kind of thing. But I think it's about between $36 and $40, when I've checked on it. So that kind of gives you a little bit of perspective, in terms of material costs. 

The little ferns that we're using today are from a local nursery. And I think they're about $8 each. Sometimes if you can get into Lowe's, where the piece of siding came from, sometimes you can get them in there for about maybe $4. It just depends what you're looking for and what you'd like to have for your design. 

The candles that we're using today are a birch bark unscented candle from Jamali Garden. And I just purchased two sets of those for this project. I'm going to go ahead and just loop this around. And just like I would an ordinary centerpiece or I could switch sides of the tables, except you're there, and I need to stay out of-- I need to stay out of your way. I just want to make sure I'm not overworking one section of the arrangement. 

The next ingredient we're going to add is called Pennsylvania Knotweed, something that as the name would suggest is a weed that you can find oftentimes. It looks very similar-- although I'm told it's not, you know, the same thing-- it looks very, very similar to me to Kiss Me Over the Garden Gate, which is something that you can get wholesale different times throughout the year. So very big, another one of those ingredients that can go very big or very small. 

With this, I'm going to start playing a little bit with height then start jumping up and out and creating a skyline for my table. The next time that you're in a city, you should kind of take notice of all of the buildings and the outline that they make up against the sky. And when you arrange, you can kind of-- you can think in a similar way. You're putting all the different buildings together. 

And just like when you're doing a compote arrangement, you want to create a little bit of depth. In this table runner, as well, just be thinking of having it come in, go out. Most of these that I have right now are sort of centered. So with my next little round, I'm going to focus on adding that dimension, that depth. 

The next ingredient we're going to add in are just some slightly pink roses. I didn't want this part of the reception-- this is going on the head table-- I didn't want it to look so, wow, this isn't something we're probably going to find on the forest floor. I didn't want it to look so different from the rest of the reception. 

She loved the lushful arrangements, so they're full of, you know, dahlias and roses and things like that. So I do want to incorporate a few things to tie those spaces together. These roses I'm using to create little lines that help the eye travel through the arrangement. Let's see if I can do this upside down here. 

So I'm thinking about the size of the roses a little bit. I don't want to-- it's kind of nice to move from big medium to small if you can. It just creates just a little bit of a more gentle progression for your eye. And now, I'm going to set my biggest point. And I'm going to go-- roses are going to be smaller again. 

So this would be a great place to pop in a dahlia and frame-- frame it with the roses. I took just a quick little intermission so I could put a bunch of flowers in so you didn't have to watch me place every single one. So we sped that up for you a little bit. 

We put it in-- we finished up the roses and made, like, little lines throughout the arrangement. And then, I went and added this white gumfrina, sort of at a medium level in the arrangement. And then, over here, I started going for my highest moment in the arrangement, which is going to be this Queen Anne's lace. 

So you just want to make sure that you're not going really above your knuckles. And I'm just going to keep going with some of this Queen Anne's. And then, we're going to add in some dahlias. 

I think, if you wanted this to be a really light airy design, I would stop here and perhaps, even, maybe not use the roses. But, like I said, I want this to coordinate with the rest of what's happening in that room. And it's just full of really gorgeous big blooms. 

So we are going to add some dahlias in here, not a ton. It's obviously more light and airy than heavy on blooms. But I do want to add in just a few. 

I think I'm going to flip this around so you can see what's going on over here and also so that I don't overwork one side of the arrangement. Over here, everything looks pretty good to me, except there are some moss spots in the front that we'll fill in before we wrap up. OK, I'll finish with some dahlias. 

I'm just going to take note of where my roses are. And I'm going to put one in the same neighborhood, just nice and low. This is great if you have some stems that break. I actually have kind of a funny story about these dahlias. 

I don't like taking Buster whenever I pick up my flowers because he's a crazy dog. And he runs all through the car. But I just was-- I knew all the places I had to go. And I thought, oh, he'll be so sad if he was just hanging out with himself all day. 

So I'll take him with me. He loves to ride in the car. So I took him with me. And my car was completely full, completely full. 

And I thought, there's no way-- I just had to make one more quick stop and run in to a store. I thought there's no way he's going to crawl back in there on top of all those flowers. Well, you better believe he did. He was sitting right on top of my dahlia bucket. 

But believe it or not, I only lost-- I only lost, like, two stems from the whole ordeal. And those were the first two stems that I popped in here that just had a little bit of a broken neck. But oh, man, I couldn't believe it when I came back and saw that. 

Then, after that happened, I dropped an entire bucket of water went rolling underneath my seat. If that ever happens to you and lights start going off in your car-- my "check engine" light was on. The "take it to the dealership" light was on. I thought it was over. 

Then, I got to the dealership. And he said, oh, ma'am-- and I'm about in tears-- he said, oh, that'll dry out. No worries. 

So if that happens to you, just wipe it up real good. Take it and check. But don't panic right away like I did, because it might be all right. Ooh, it's a heavy one. 

So a few more dahlias and we'll be done. People have a hard time with dahlias, how to keep them alive and looking pretty. You can do them wholesale. If you're part of the Team Flower Community, there's actually a discussion going on right now about this and some good tips and advice from some other members about how to condition them. 

But I just have not-- I have not had a good experience with wholesale dahlias. So I don't-- I don't buy them to try out all of the different solutions that you can put them in. But just get them local, and they're beautiful, and they hold well. 

You still do want to keep them out of the sun, of course. But it's a much easier time. All right. I think we're about done. 

As always, I'll kind of take a step away and then come back and see if there's anything glaring. There might be something you see in the camera that you're like, oh, Kelly, you need to fix that. But right now, to me-- of course, I'm close up to it and I've been looking at it so much, looks good. 

And these candles, I don't think are getting lit at the venue. So I'm going to leave them where they are for now. But you might want, if you're going to do this, you might want to get yourself some cylinders to pop them in so that you have them covered if you'd like to do that. 

They do take one that is a little bit bigger than what you would normally get for a bouquet vase. So they don't slide down in those easy. You need to size up. 

So anyway, all right, well, that's the six-- that's the six-foot forest floor table runner centerpiece. I hope you enjoyed watching it. I hope it inspires you to think outside of the container and do something fun and interesting for your next client. Thanks for watching.

Video: How to Make a Double Wrist Corsage

Watch this clip from the Team Flower Bouquets and Personals class. Here, Kelly demonstrates how to make a double wrist corsage (everybody’s favorite, right?). Even though pin-on corsages and hand-held posies are becoming more popular, the wrist corsage is a classic piece that every wedding designer and shop owner should have the skills to create. Watch to see a few tricks Kelly has learned in order to make wrist corsages easier and more feasible.

Team Flower's Next Chapter

Small businesses grow one step at a time, and most often, the really important things unfold slowly right under our own noses. You probably remember those early moments of your floral business, too, where you were crunching the numbers and fitting in floral work where you could on top of others jobs…

Video: How to Make a Chuppah

Our friend Fuschia of Fuschia Moss Floral Design is here to help show us how to make a chuppah. See how we used a bale of Southern smilax and late summer forsythia foliage to create a base and a very small amount of Oasis and chicken wire to provide support and nourishment for the flowers.

Video: How to Make a Boutonniere

Watch as Kelly puts together a boutonniere and explains the various methods of wiring needed. She also shares tips about using ranunculus, color combinations and more. Learn how to become a florist and take floral design classes online with Team Flower. Here you can even learn tips on flower gardening for beginners. We'll show you how to do flower arrangements in flower arranging videos.

Transcript:

-So I have-- and I keep a little reference here whenever I buy new wire-- but this is a 20 gauge. Helps me remember what it is that I want so I can refer back to it. And I just cut off some small sections here. I'm going to fold that in half like a bobby pin.

I'm going to take my ranunculus, and I'm going to pull off anything that is undesirable-- be a petal that got crushed or is facing the wrong way. And I'm just going to snip that off. And some people will just use the stem of their ranunculus for the boutonniere. They wouldn't wire it, and that's another option, another thing that you can do. I prefer the wire because I can have more control over how if faces.

Now this is the stem tape that I mentioned earlier. Whenever I'm choosing-- it comes in several different colors-- but whenever I'm choosing which to use, I consider the flower that I'm using and I try to match as closely as I can with the stem color of the flower. This makes it look most natural. So get as close as you can up to the neck of the flower.

And I am just carrying that tape, stretching it out as I and twisting and finishing that off. Now see, I'm taking that and I'm just going to tilt the face of the flower forward. So now I have a wilder flower and a flower that is cooperating with what I want to do with it. And I have some olive here I'm going to lay in as a backdrop for it. Sometimes I put two pieces of back and maybe one down in here, which I think too that the lapel goes off to the right-hand side. So having a little flourish on the right side it's always nice.

And I'm going to add some berries for texture. And feel free-- like this berry that's a really dark red. It is pulling out some of the color in that ranunculus, but it's just not exactly where I want it to be. So I'm just going to clip that off. And then I trim a few of these piece off here that are lower. And that gives me some berries that can go high.

Then there's a few ways you can finish this off. I'm just going to show you how to use stem tape to finish it off today. But you can use a thin tape and wrap it the same way that we wrapped our bouquet if you like. Or I just tie simple knots to cover my tape. so for a fancier wedding that might be best. But when you wrap with stem tape I just clip off these thicker branches on a little bit of an angle here.

And some people take that little wire that we had and they'll make a little curler or flourish with it. I don't do that very often. But yeah, I pretty much always dress them up with some ribbon.

So practice a few ways to experiment check out a few different ways that you could do that. The oasis tape- you just wrap it around, wrap it back around like we did with the bouquet and these lower stems here are exposed and let's put that there. So now you have a cute little boutonniere that you can photograph. And you make a little tray of wine or you could make a tray of three or five is what I like to do. Now we're going to turn that boutonniere into a flower crown.

Video: Easy Ways to Organize Your Studio to Process Flowers Efficiently

In this snippet from the Team Flower Foundations class, Kelly walks you through her studio setup and how she organizes everything for maximum efficiency and minimum workload. Many people don’t realize that working in the floral industry can require a lot of manual labor. From picking up and moving buckets of water to processing flowers to delivery, these are all tasks that can take a toll on our bodies!

Video: How to Make a Cradle Bouquet (AKA a Pageant Bouquet)

The cradle bouquet (also known as the pageant bouquet) is often overlooked by designers. This bouquet shape is perfect for gracefully draping over one arm. It is similar to a cascade, but it moves out and away from the body rather than in front. It's pleasant and easy to hold, surprisingly lightweight, and perfect for a bride who likes to keep her flowers close.

Fast Flower Video: Winter White Flower Arrangements

In this centerpiece time-lapse video, Kelly quickly pulls together a centerpiece for your inspiration! Learn how to become a florist and take floral design classes online with Team Flower. Here you can even learn tips on flower gardening for beginners. We'll show you how to do flower arrangements in flower arranging videos.

Video: Arranging Flowers Using Wire, Foam, and Frogs

Unsure which technique is the best for your upcoming project? Wire, foam or frogs? Learn the pros and cons in this video. Learn how to become a florist and take floral design classes online with Team Flower. Here you can even learn tips on flower gardening for beginners. We'll show you how to do flower arrangements in flower arranging videos.

Transcript

Hello, and welcome to the first Team Flower webinar. Today, I'm going to be sharing one of my core principles about arranging flowers. And that is that there is more than one way to do it. 

Think a lot of times, it's easy to, as you go through making your arrangements and doing your business, to wonder if you're doing things the right way or if that's what everyone else is doing. And I think what's really important is to just shake all that off. And give yourself the freedom and the opportunity to experiment with a lot of different techniques because the more you experiment, the more you learn. And every time you fail, it's a lesson learned. And every time you succeed, it moves you forward. So I think it's really important just to forget about what everyone else is doing, and to experiment for yourself. 

Today, I'm going to show you three different ways that you can prep your containers for your holiday center pieces or your next upcoming event. Each of them has pros and cons, and we're going to talk about those. There are certain situations where some are better-suited than others. And perhaps, you're just using one right now. And maybe having these other options in your pocket might be good and help propel you forward. 

So the first one I'm going to show you is what I started out whenever I was doing flowers, and I used chicken wire. You might be familiar with this, and you might not be. And that's all right. 

This is available at a craft store, like AC Moore. Or Michaels typically carries this. And then they also have it at flower wholesale. If you have a wholesale license, you can pick up a gigantic roll of this for about $50. 

So chicken wire is fairly inexpensive. If you're trying to loosen your arrangements up a little bit, it's a great way to do it because it allows the flowers to fall naturally as you arrange. Sometimes when you arrange in something like a floral foam, the flowers, they go in and they stay exactly where you put them. And if you're trying to create a more loose or organic look, using the chicken wire is a great thing because when you put the flowers in, they're naturally going to fall the way that they want. 

So let's go ahead. Jessie, send this over to this other computer. And we'll take a look at how to go about doing the chicken wire. 

So the key with arranging and chicken wire is not to use too much. I found that if I have even just a little bit too much, it can be very bothersome as I'm arranging. So what I like to do when I am deciding how much to use is I will create a little cylinder like this. And I'll set it over the container that I'm going to use. And see how that just covers from side-to-side there? 

Next, I fold it under. And this is a very technical florist term, but I just smush it. And what we're trying to do here is mold the chicken wire into the shape of the container that we're using. And our goal in doing this is to create something that is fairly secure and that is really molded so that we're not going to have this rocking back and forth. 

The other thing, we want the flowers to have room, obviously, to go through the chicken wire. And ideally, they would pass through maybe two to three layers of the chicken wire. So I try to avoid things sticking straight up like that because that can [INAUDIBLE] the flowers from going in. 

So I like something about that. But again, just because I do it this way doesn't mean it's the only way that you can do it. And you can experiment further, even within chicken wire, just to see what your preferences are. 

So next, I'm going to secure it was some waterproof tape. Some people like to be extra secure, and they'll go back and forth three times on one side. And again, it's a matter of preference. It's a matter of what you find works best for you. So I secure it really well there. It's important that your container is very dry anytime that you're working with this tape so you get a nice, secure hold. 

Now if you'd like to do a little bit of extra support, what you can do is flip your container over, and you can put a little tape here. And do that on all four sides. Some people just use tape as a base. And they would create a grid going back and forth only using tape. 

I, personally, it's a little time-intense for me. And I don't prefer to it that way. But that's another thing you can do, especially if you're using a clear container. 

So this is chicken wire. Then I would fill this with water. I would be very careful to just keep it away from the tape. Ta-da! 

Let's move on to flower frogs. I started using flower frogs because there were a few things about chicken wire that I didn't like. And that was that the arrangements were not traveling very well. And I was having trouble whenever I would put things that were very heavy in my arrangements. 

I like to use a lot of fruits, and apples, persimmons, grapes, things like that. And when I was trying to get those into the chicken wire, a lot of times it would maybe pull the chicken wire out on one side. I guess those were the two main things that made me think what's another option that I can have in my tool belt? 

So the frogs, I really struggled with. And I hesitated using them for a long time because they just felt intimidating. And I realized that I was using frogs the wrong way, and that was the problem. 

So once I figured out how to get everything situated properly, I've been using them ever since and absolutely love it. It has the benefits of both the chicken wire-- where the flowers have room to breathe and they're laying more naturally-- and also the benefit that foam gives you-- is that once you put it in there, it really doesn't move a whole lot. So it gives you a little extra security there. 

What I'm using here is called Cling. This is also available at a Hobby Lobby or an AC Moore craft store. It might be under a different name, but it's basically a really hardcore waterproof putty. Also available at flower wholesalers and probably even on Amazon. 

So the trick with the flower frogs is that you don't want it to release once you start arranging your flowers. And trick with that is to get a really great seal. So Jessie, right don't we switch over to this camera so they can really see what I'm doing here. Maybe even zoom in a little bit, if you can. 

I'm going around the outside of the flower frog. And now I'm going to move towards the underside. I do not want any water passing through this putty and going underneath my flower frog. Because that is what is going to cause that to release, and give you a big headache. 

The flower frogs are tough with glass and porcelains. If something is very slick to touch, you're just going to need to be extra careful if you're working with a brass or something that-- it's not quite as slick. It's going to be a little bit easier, and they're not going to release as quick. But just takes a lot of putty to put this together. 

Once I get in here, I might start doing a little bit of ribbon, so that I don't have a gap. And some people-- like I said, everybody does this different-- so some people don't go the whole way into the center. Some people do. Really just experiment, and see what you like. 

So now I'm going to go ahead and set that in the center of my bowl. And you'll see, I have this little bit of extra, and that was on purpose. I'll show you what that's for in a second. 

So I take a towel, and I just put all of my weight on that frog. And sometimes-- if it's a brand new piece that I'm doing-- I might step on it and really, just with all might, get that in there really secure. So I test it with my hands, make sure it's not going anywhere. 

And then what I do, is with that little extra piece that I have, I roll it. And feel down around here, and see where your gaps are. So I take this, and I do an extra layer. I used to be a cake baker. So this, in a way, reminds me of frosting my cakes, and making sure every little nook and cranny was covered. So push all that down there really, really good. 

Sometimes, some people like to use a hairdryer just to warm the putty up a little bit, get it extra sticky. I think that's great. If your container is at all damp, this will not work. So it's very important everything is very dry. And a little bit more here. 

I leave my frogs in my containers. When I buy a container, I buy a frog. And that makes it very efficient. Because when you're in the middle of doing weddings back-to-back-to-back, it's nice to be able just to come home, pull the flowers out, rinse the containers out, put a little bleach in them, and then just to jump right in and start over again. 

So those are some perks of using the frog. Now some people combine using a frog, and they'll put a layer of chicken wire over it. I prefer not to. It's a little bit bothersome to me. Just it's tough to get the flowers in there with all of those things in my way, I feel like. 

So what I like to do instead is I work from the outside of the frog in. So as I'm putting my heavier things-- my branches and my structural pieces in first-- I'm going around the outside of the frog first. And in doing that, I'm allowing space in the middle for things. So if you just haphazardly put your flowers into a flower frog and you aren't thinking about it, a lot of times with your stems, you're taking up all of this valuable support system that you have. So it's important to work from the outside in, to be very mindful of that. 

Let's see, what else is important about frogs? Think those are the two main things. Get it in there really tight and then work from the outside in. Like I said, if you feel like you need a little bit of a safety blanket or your transitioning from chicken wire to just using a frog, go ahead and put a layer of chicken wire, put a grid of tape here. Just jump in and try it without it. 

These travel really well. I've had great success. I live in the mountains, and every time I'm delivering a wedding, it's up one mountain and down the other side. And sometimes on dirt roads. 

And so, like I said with the chicken wire, I just had a lot of trouble with things settling as I drove. But with the flower frogs, they seem to do better, with things looking pretty close to how they looked wherever I left the house. So I really appreciate that about the frog. 

So one other thing. Another situation that I ran into and I was like, ah, neither one of these things are working very well for me and I need some other way to go about this was whenever I had a bride who was maybe doing a smaller wedding. And she was picking her flowers up here at the house. And she was using a less expensive disposable container that I was just sending out the door with her, and then I was never seen again. I didn't want to give her my frogs, but then I knew that when she got to her venue, her flowers would settle a little bit. I didn't like that either for her. 

So that's when I decided that I was going to go ahead and use the flower foam in those situations. It's not something that I love because it's not really earth-friendly and it's not great for the environment. Also, just don't like the way that it smells. There's a lot of different reasons. 

But there are some situations where it's the best thing to use for your client. And you should know how to do this as well, I decided. So with the flower foam, it is possible to do a really lovely loose arrangement in foam. I've done it many, many times. 

And the trick with it is just to give yourself some space. So this is a really-- probably I need my-- I don't have a knife that I cut that I cut Oasis with. I usually cut it with a wire, but I forgot to grab my little wire holder whenever I came in here earlier. So you improvise. 

Now, one of the problems and one of the hesitations I had when using foam was that I didn't feel like the flowers lasted as long or held as well as they did with the frogs and the chicken wire. And I still think that to be true. But through experimentation, I have come up with what I believe is another way to help the flowers last longer. 

First thing, I soak my foam much longer than the package says. The Instant Oasis should be good to go in 10 minutes, and I believe it. But I've tried it, and I really didn't love my flower arrangements came out. So I've decided that I like to soak overnight. 

And then I also, once I get the foam situated in here, I will fill the container still to the brim with water. And I've had a lot of successful with that. The flowers still look good for quite a while after the event takes place. 

And I'm pretty pleased with how it goes. It's a bummer, some things that are more fragile or have a soft step just don't like to go into Oasis. And having that water in the container as well is something that I found that helps a little bit with that. 

Oh man, [INAUDIBLE]. I need my wire. The whole studio is full of cameras and lights, top to bottom, so I can't just run out there real quick and grab it. 

Oh man, guys. Look at this. Woo wee! 

So that's about the height that I like. Now that I've made a complete mess, you'll be much more on top of things when you do this for your next event. So I put the foam in here. And now I'm going take a pass at it with the tape. 

Now I didn't take a pass at it with the tape for one of the weddings, the first wedding that I tried this at. And the foam started floating and rocking back and forth. It was fine when I was moving them just one at a time. But when they were all in the box and rocking back and forth, my box just went crazy on me and flowers were flying everywhere. So that was a bummer. 

But anyway, this is what foam looks like. And then, fill this, of course, up with water. And as you arrange, you just leave room. 

You do want to start and do some foliage low and get this area covered. That's a perk about the flower frog, is you don't really have any area that you have to have covered. So you can do things that don't have as many flowers in them. 

But this is what that looks like. And another benefit of doing this is that the client can simply pull the flowers out, put it into another container if they want if you've decide that you're in a hurry one day. Sometimes arranging in a frog or in chicken wire can take just a little bit longer. Foam is very quick. You can just put everything in and nothing really moves very much. 

So if you were doing an event where you were going back to pick your containers up and you went this route, I'd be very easy just to pull the foam out and set those out on a table. Let them drip off a little bit. Then people can take the full arrangement. So that's three ways to set up your centerpiece. 

I think I got everything. Let me just double check. I think we covered most of the pros and cons. I don't know that I mentioned this, but if you need to get a frog out of a container that you've used, it's a little bit challenging, but it can be done. And if you get a hair dryer and warm up that putty, get it malleable. And then, take a screwdriver, and pull that thing right out. 

So those are the three different ways. So I hope that encourages you to try new things. Before we go today, I'm going to go ahead and answer three of the questions that you had written in. I'm sorry that I can't get to all of them today. But let me just answer a few here. 

So the first one. Ashley from Minnesota writes, what has been your biggest success marketing-wise attracting local brides? I don't do fairs and I don't pay for magazine advertising because I know that those things don't work. I've tried them. 

Yes, very smart. And I agree. From the very beginning, I talked to a photographer friend who told me I don't pay for any advertising. And I think that everyone's markets are a little bit different. 

I think that some of the people that are watching have probably had success with doing ads or doing bridal shows. I personally haven't. So I think that the important thing is to know your market, and know what works in your market. Again, using this principle of experimenting with a lot of different ways. 

So personally, Ashely, what works for me is networking with like-minded people who have a similar client that they're looking for. So I make friends with not just people here in my immediate area, but inside my region that have a similar aesthetic, and have similar goals and are going the same place. And so I network with a lot of people. And some of my favorite weddings and my strongest leads have come from those relationships. And it's a lot of fun to do it that way. 

So that is what I would recommend, Ashley from Minnesota. Do some research in your area and find some people. Wedding planners are great. Photographers. Just network with a lot of people. 

And then I have Kersty from England. And she writes, what is your favorite variety of rose? My is currently a majolica spray rose or the quicksand rose. But I am enjoying learning new varieties all the time. 

Well, Kersty, I think what I would like to recommend to you is the champagne rose. And that rose looks very beautiful. It's like the tone right in-between the white majolica rose and the quicksand rose. And it's a slightly different size. 

So if you're working on a blushing white wedding-- which is very popular and oh so classic these days-- the champagne rose is a really great option. It opens beautifully. It's one of the standard roses that I think looks the closest to a garden rose. It's something that just popped right out of the garden. So I love champagne. 

And then, the last one, Rachel. She asks, what should I name my business? That's a really tough and personal question. But let me tell you my two thoughts on it. 

Whenever you are choosing your business name, you can go in two different directions. You can choose a name that isn't your name, and you can do a doing business as Philosophy Flowers, or Buds and Blooms or whatever you might like to call your business. And when you choose a name like that, that has flowers in the name, it's a perk because it tells you what the business does right off the bat. 

But then it also limits you. So if you think that you might want to someday add planning to your business or someday add coaching or some other aspect of you-- maybe interior design or something like that-- sometimes it's nice to be able to use your name because then, people still recognize your name. And you can be constantly adding new products and services under that name, and it's still pretty clear what you do. 

So those are my two thoughts about it. Consider who's around you. Consider what other people in your area what they're doing their businesses. Not that you should follow suit because of that. 

With me, whenever I chose Philosophy Flowers, one day I was on a walk. And it just came to me, and everything about it felt right. Why I do what I do is very important to me, so having philosophy in the name was a great pick for me. 

So those are the two views that I have. So just consider long-term what you might like to do. If your name might be more effective then using something specifically flower-related. 

I think that's all the questions that I had. Before I sign off, I wanted to wish you a very Merry Christmas. And I wanted to share a little something from my walk this afternoon that I picked up here in the woods. And this is called-- oh, very messy-- this is called ground conifer. And this is an evergreen vine that grows on the ground that you might like to go outs on a woods walk, and just happened to notice and add it to some of your Christmas centerpieces. 

My grandpa used to go out and pick this up out of the wood every Christmas. And he would make these beautiful garlands over my grandparents' door. And since I hadn't seen it in the wild-- at that time, I was very young when that was taking place and going on-- when I discovered it here in boon in my backyard on a little walk, I was really pleased and excited. 

So ground conifer or ground pine. It's called ground pine as well. And it has a sweet little pine cone bloom that peaks out. 

Well, I think that's all for now. Thanks again so much for joining me. I hope that you learned something. And I hope that what you saw here today will encourage you to take the next step.

Video: Entry Table Floral Arrangement How-To

In this video, Kelly uses one of her favorite planters from TJ Maxx with a liner for a fresh-flower arrangement. The key ingredients are Viburnum, Mock Orange, and Poppies. You'll learn about the undertone colors in flowers and how attention to this can bring unity to your ingredient choices. As you watch, notice that each of the flowers are of a creamy white color palette. However, they also bring in a yellow hint in the center of the flowers, especially the poppy and mock orange.

Video: How to Wire Flowers - Hyacinth

In this video, Kelly Perry of Team Flower demonstrates how to wire flowers for a floral comb. Wiring is a very important part of a florist’s toolkit as it allows you to do so many different things with various types of flowers. For this floral comb, Kelly is using white hyacinth and pieris.