Watch a fun & bright time-lapse bouquet celebrating Valentine's Day!

All in Videos
Watch a fun & bright time-lapse bouquet celebrating Valentine's Day!
Our friend Fuschia of Fuschia Moss Floral Design is here to help show us how to make a chuppah. See how we used a bale of Southern smilax and late summer forsythia foliage to create a base and a very small amount of Oasis and chicken wire to provide support and nourishment for the flowers.
Watch as Kelly puts together a boutonniere and explains the various methods of wiring needed. She also shares tips about using ranunculus, color combinations and more. Learn how to become a florist and take floral design classes online with Team Flower. Here you can even learn tips on flower gardening for beginners. We'll show you how to do flower arrangements in flower arranging videos.
Transcript:
-So I have-- and I keep a little reference here whenever I buy new wire-- but this is a 20 gauge. Helps me remember what it is that I want so I can refer back to it. And I just cut off some small sections here. I'm going to fold that in half like a bobby pin.
I'm going to take my ranunculus, and I'm going to pull off anything that is undesirable-- be a petal that got crushed or is facing the wrong way. And I'm just going to snip that off. And some people will just use the stem of their ranunculus for the boutonniere. They wouldn't wire it, and that's another option, another thing that you can do. I prefer the wire because I can have more control over how if faces.
Now this is the stem tape that I mentioned earlier. Whenever I'm choosing-- it comes in several different colors-- but whenever I'm choosing which to use, I consider the flower that I'm using and I try to match as closely as I can with the stem color of the flower. This makes it look most natural. So get as close as you can up to the neck of the flower.
And I am just carrying that tape, stretching it out as I and twisting and finishing that off. Now see, I'm taking that and I'm just going to tilt the face of the flower forward. So now I have a wilder flower and a flower that is cooperating with what I want to do with it. And I have some olive here I'm going to lay in as a backdrop for it. Sometimes I put two pieces of back and maybe one down in here, which I think too that the lapel goes off to the right-hand side. So having a little flourish on the right side it's always nice.
And I'm going to add some berries for texture. And feel free-- like this berry that's a really dark red. It is pulling out some of the color in that ranunculus, but it's just not exactly where I want it to be. So I'm just going to clip that off. And then I trim a few of these piece off here that are lower. And that gives me some berries that can go high.
Then there's a few ways you can finish this off. I'm just going to show you how to use stem tape to finish it off today. But you can use a thin tape and wrap it the same way that we wrapped our bouquet if you like. Or I just tie simple knots to cover my tape. so for a fancier wedding that might be best. But when you wrap with stem tape I just clip off these thicker branches on a little bit of an angle here.
And some people take that little wire that we had and they'll make a little curler or flourish with it. I don't do that very often. But yeah, I pretty much always dress them up with some ribbon.
So practice a few ways to experiment check out a few different ways that you could do that. The oasis tape- you just wrap it around, wrap it back around like we did with the bouquet and these lower stems here are exposed and let's put that there. So now you have a cute little boutonniere that you can photograph. And you make a little tray of wine or you could make a tray of three or five is what I like to do. Now we're going to turn that boutonniere into a flower crown.
In this snippet from the Team Flower Foundations class, Kelly walks you through her studio setup and how she organizes everything for maximum efficiency and minimum workload. Many people don’t realize that working in the floral industry can require a lot of manual labor. From picking up and moving buckets of water to processing flowers to delivery, these are all tasks that can take a toll on our bodies!
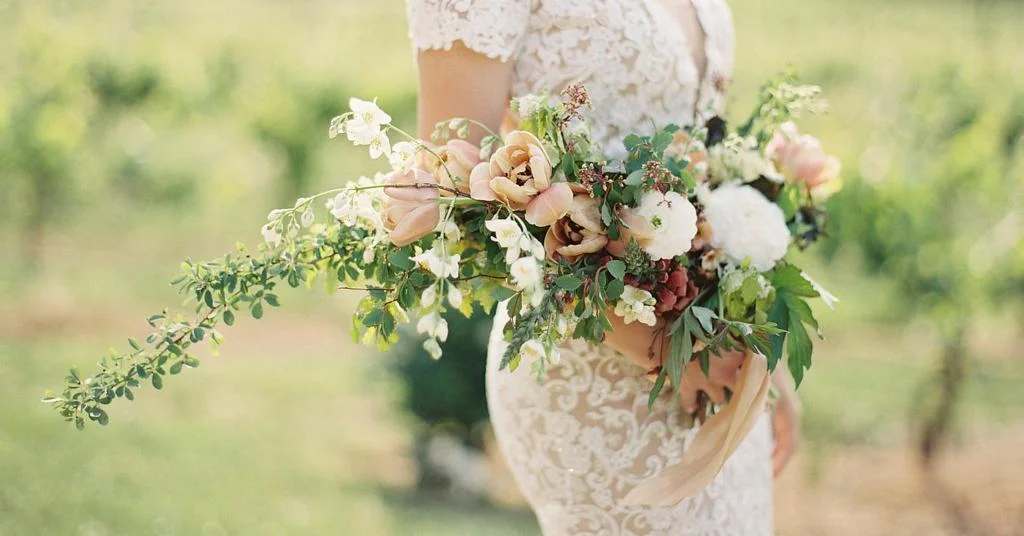
The cradle bouquet (also known as the pageant bouquet) is often overlooked by designers. This bouquet shape is perfect for gracefully draping over one arm. It is similar to a cascade, but it moves out and away from the body rather than in front. It's pleasant and easy to hold, surprisingly lightweight, and perfect for a bride who likes to keep her flowers close.
In this centerpiece time-lapse video, Kelly quickly pulls together a centerpiece for your inspiration! Learn how to become a florist and take floral design classes online with Team Flower. Here you can even learn tips on flower gardening for beginners. We'll show you how to do flower arrangements in flower arranging videos.
Unsure which technique is the best for your upcoming project? Wire, foam or frogs? Learn the pros and cons in this video. Learn how to become a florist and take floral design classes online with Team Flower. Here you can even learn tips on flower gardening for beginners. We'll show you how to do flower arrangements in flower arranging videos.
Transcript
Hello, and welcome to the first Team Flower webinar. Today, I'm going to be sharing one of my core principles about arranging flowers. And that is that there is more than one way to do it.
Think a lot of times, it's easy to, as you go through making your arrangements and doing your business, to wonder if you're doing things the right way or if that's what everyone else is doing. And I think what's really important is to just shake all that off. And give yourself the freedom and the opportunity to experiment with a lot of different techniques because the more you experiment, the more you learn. And every time you fail, it's a lesson learned. And every time you succeed, it moves you forward. So I think it's really important just to forget about what everyone else is doing, and to experiment for yourself.
Today, I'm going to show you three different ways that you can prep your containers for your holiday center pieces or your next upcoming event. Each of them has pros and cons, and we're going to talk about those. There are certain situations where some are better-suited than others. And perhaps, you're just using one right now. And maybe having these other options in your pocket might be good and help propel you forward.
So the first one I'm going to show you is what I started out whenever I was doing flowers, and I used chicken wire. You might be familiar with this, and you might not be. And that's all right.
This is available at a craft store, like AC Moore. Or Michaels typically carries this. And then they also have it at flower wholesale. If you have a wholesale license, you can pick up a gigantic roll of this for about $50.
So chicken wire is fairly inexpensive. If you're trying to loosen your arrangements up a little bit, it's a great way to do it because it allows the flowers to fall naturally as you arrange. Sometimes when you arrange in something like a floral foam, the flowers, they go in and they stay exactly where you put them. And if you're trying to create a more loose or organic look, using the chicken wire is a great thing because when you put the flowers in, they're naturally going to fall the way that they want.
So let's go ahead. Jessie, send this over to this other computer. And we'll take a look at how to go about doing the chicken wire.
So the key with arranging and chicken wire is not to use too much. I found that if I have even just a little bit too much, it can be very bothersome as I'm arranging. So what I like to do when I am deciding how much to use is I will create a little cylinder like this. And I'll set it over the container that I'm going to use. And see how that just covers from side-to-side there?
Next, I fold it under. And this is a very technical florist term, but I just smush it. And what we're trying to do here is mold the chicken wire into the shape of the container that we're using. And our goal in doing this is to create something that is fairly secure and that is really molded so that we're not going to have this rocking back and forth.
The other thing, we want the flowers to have room, obviously, to go through the chicken wire. And ideally, they would pass through maybe two to three layers of the chicken wire. So I try to avoid things sticking straight up like that because that can [INAUDIBLE] the flowers from going in.
So I like something about that. But again, just because I do it this way doesn't mean it's the only way that you can do it. And you can experiment further, even within chicken wire, just to see what your preferences are.
So next, I'm going to secure it was some waterproof tape. Some people like to be extra secure, and they'll go back and forth three times on one side. And again, it's a matter of preference. It's a matter of what you find works best for you. So I secure it really well there. It's important that your container is very dry anytime that you're working with this tape so you get a nice, secure hold.
Now if you'd like to do a little bit of extra support, what you can do is flip your container over, and you can put a little tape here. And do that on all four sides. Some people just use tape as a base. And they would create a grid going back and forth only using tape.
I, personally, it's a little time-intense for me. And I don't prefer to it that way. But that's another thing you can do, especially if you're using a clear container.
So this is chicken wire. Then I would fill this with water. I would be very careful to just keep it away from the tape. Ta-da!
Let's move on to flower frogs. I started using flower frogs because there were a few things about chicken wire that I didn't like. And that was that the arrangements were not traveling very well. And I was having trouble whenever I would put things that were very heavy in my arrangements.
I like to use a lot of fruits, and apples, persimmons, grapes, things like that. And when I was trying to get those into the chicken wire, a lot of times it would maybe pull the chicken wire out on one side. I guess those were the two main things that made me think what's another option that I can have in my tool belt?
So the frogs, I really struggled with. And I hesitated using them for a long time because they just felt intimidating. And I realized that I was using frogs the wrong way, and that was the problem.
So once I figured out how to get everything situated properly, I've been using them ever since and absolutely love it. It has the benefits of both the chicken wire-- where the flowers have room to breathe and they're laying more naturally-- and also the benefit that foam gives you-- is that once you put it in there, it really doesn't move a whole lot. So it gives you a little extra security there.
What I'm using here is called Cling. This is also available at a Hobby Lobby or an AC Moore craft store. It might be under a different name, but it's basically a really hardcore waterproof putty. Also available at flower wholesalers and probably even on Amazon.
So the trick with the flower frogs is that you don't want it to release once you start arranging your flowers. And trick with that is to get a really great seal. So Jessie, right don't we switch over to this camera so they can really see what I'm doing here. Maybe even zoom in a little bit, if you can.
I'm going around the outside of the flower frog. And now I'm going to move towards the underside. I do not want any water passing through this putty and going underneath my flower frog. Because that is what is going to cause that to release, and give you a big headache.
The flower frogs are tough with glass and porcelains. If something is very slick to touch, you're just going to need to be extra careful if you're working with a brass or something that-- it's not quite as slick. It's going to be a little bit easier, and they're not going to release as quick. But just takes a lot of putty to put this together.
Once I get in here, I might start doing a little bit of ribbon, so that I don't have a gap. And some people-- like I said, everybody does this different-- so some people don't go the whole way into the center. Some people do. Really just experiment, and see what you like.
So now I'm going to go ahead and set that in the center of my bowl. And you'll see, I have this little bit of extra, and that was on purpose. I'll show you what that's for in a second.
So I take a towel, and I just put all of my weight on that frog. And sometimes-- if it's a brand new piece that I'm doing-- I might step on it and really, just with all might, get that in there really secure. So I test it with my hands, make sure it's not going anywhere.
And then what I do, is with that little extra piece that I have, I roll it. And feel down around here, and see where your gaps are. So I take this, and I do an extra layer. I used to be a cake baker. So this, in a way, reminds me of frosting my cakes, and making sure every little nook and cranny was covered. So push all that down there really, really good.
Sometimes, some people like to use a hairdryer just to warm the putty up a little bit, get it extra sticky. I think that's great. If your container is at all damp, this will not work. So it's very important everything is very dry. And a little bit more here.
I leave my frogs in my containers. When I buy a container, I buy a frog. And that makes it very efficient. Because when you're in the middle of doing weddings back-to-back-to-back, it's nice to be able just to come home, pull the flowers out, rinse the containers out, put a little bleach in them, and then just to jump right in and start over again.
So those are some perks of using the frog. Now some people combine using a frog, and they'll put a layer of chicken wire over it. I prefer not to. It's a little bit bothersome to me. Just it's tough to get the flowers in there with all of those things in my way, I feel like.
So what I like to do instead is I work from the outside of the frog in. So as I'm putting my heavier things-- my branches and my structural pieces in first-- I'm going around the outside of the frog first. And in doing that, I'm allowing space in the middle for things. So if you just haphazardly put your flowers into a flower frog and you aren't thinking about it, a lot of times with your stems, you're taking up all of this valuable support system that you have. So it's important to work from the outside in, to be very mindful of that.
Let's see, what else is important about frogs? Think those are the two main things. Get it in there really tight and then work from the outside in. Like I said, if you feel like you need a little bit of a safety blanket or your transitioning from chicken wire to just using a frog, go ahead and put a layer of chicken wire, put a grid of tape here. Just jump in and try it without it.
These travel really well. I've had great success. I live in the mountains, and every time I'm delivering a wedding, it's up one mountain and down the other side. And sometimes on dirt roads.
And so, like I said with the chicken wire, I just had a lot of trouble with things settling as I drove. But with the flower frogs, they seem to do better, with things looking pretty close to how they looked wherever I left the house. So I really appreciate that about the frog.
So one other thing. Another situation that I ran into and I was like, ah, neither one of these things are working very well for me and I need some other way to go about this was whenever I had a bride who was maybe doing a smaller wedding. And she was picking her flowers up here at the house. And she was using a less expensive disposable container that I was just sending out the door with her, and then I was never seen again. I didn't want to give her my frogs, but then I knew that when she got to her venue, her flowers would settle a little bit. I didn't like that either for her.
So that's when I decided that I was going to go ahead and use the flower foam in those situations. It's not something that I love because it's not really earth-friendly and it's not great for the environment. Also, just don't like the way that it smells. There's a lot of different reasons.
But there are some situations where it's the best thing to use for your client. And you should know how to do this as well, I decided. So with the flower foam, it is possible to do a really lovely loose arrangement in foam. I've done it many, many times.
And the trick with it is just to give yourself some space. So this is a really-- probably I need my-- I don't have a knife that I cut that I cut Oasis with. I usually cut it with a wire, but I forgot to grab my little wire holder whenever I came in here earlier. So you improvise.
Now, one of the problems and one of the hesitations I had when using foam was that I didn't feel like the flowers lasted as long or held as well as they did with the frogs and the chicken wire. And I still think that to be true. But through experimentation, I have come up with what I believe is another way to help the flowers last longer.
First thing, I soak my foam much longer than the package says. The Instant Oasis should be good to go in 10 minutes, and I believe it. But I've tried it, and I really didn't love my flower arrangements came out. So I've decided that I like to soak overnight.
And then I also, once I get the foam situated in here, I will fill the container still to the brim with water. And I've had a lot of successful with that. The flowers still look good for quite a while after the event takes place.
And I'm pretty pleased with how it goes. It's a bummer, some things that are more fragile or have a soft step just don't like to go into Oasis. And having that water in the container as well is something that I found that helps a little bit with that.
Oh man, [INAUDIBLE]. I need my wire. The whole studio is full of cameras and lights, top to bottom, so I can't just run out there real quick and grab it.
Oh man, guys. Look at this. Woo wee!
So that's about the height that I like. Now that I've made a complete mess, you'll be much more on top of things when you do this for your next event. So I put the foam in here. And now I'm going take a pass at it with the tape.
Now I didn't take a pass at it with the tape for one of the weddings, the first wedding that I tried this at. And the foam started floating and rocking back and forth. It was fine when I was moving them just one at a time. But when they were all in the box and rocking back and forth, my box just went crazy on me and flowers were flying everywhere. So that was a bummer.
But anyway, this is what foam looks like. And then, fill this, of course, up with water. And as you arrange, you just leave room.
You do want to start and do some foliage low and get this area covered. That's a perk about the flower frog, is you don't really have any area that you have to have covered. So you can do things that don't have as many flowers in them.
But this is what that looks like. And another benefit of doing this is that the client can simply pull the flowers out, put it into another container if they want if you've decide that you're in a hurry one day. Sometimes arranging in a frog or in chicken wire can take just a little bit longer. Foam is very quick. You can just put everything in and nothing really moves very much.
So if you were doing an event where you were going back to pick your containers up and you went this route, I'd be very easy just to pull the foam out and set those out on a table. Let them drip off a little bit. Then people can take the full arrangement. So that's three ways to set up your centerpiece.
I think I got everything. Let me just double check. I think we covered most of the pros and cons. I don't know that I mentioned this, but if you need to get a frog out of a container that you've used, it's a little bit challenging, but it can be done. And if you get a hair dryer and warm up that putty, get it malleable. And then, take a screwdriver, and pull that thing right out.
So those are the three different ways. So I hope that encourages you to try new things. Before we go today, I'm going to go ahead and answer three of the questions that you had written in. I'm sorry that I can't get to all of them today. But let me just answer a few here.
So the first one. Ashley from Minnesota writes, what has been your biggest success marketing-wise attracting local brides? I don't do fairs and I don't pay for magazine advertising because I know that those things don't work. I've tried them.
Yes, very smart. And I agree. From the very beginning, I talked to a photographer friend who told me I don't pay for any advertising. And I think that everyone's markets are a little bit different.
I think that some of the people that are watching have probably had success with doing ads or doing bridal shows. I personally haven't. So I think that the important thing is to know your market, and know what works in your market. Again, using this principle of experimenting with a lot of different ways.
So personally, Ashely, what works for me is networking with like-minded people who have a similar client that they're looking for. So I make friends with not just people here in my immediate area, but inside my region that have a similar aesthetic, and have similar goals and are going the same place. And so I network with a lot of people. And some of my favorite weddings and my strongest leads have come from those relationships. And it's a lot of fun to do it that way.
So that is what I would recommend, Ashley from Minnesota. Do some research in your area and find some people. Wedding planners are great. Photographers. Just network with a lot of people.
And then I have Kersty from England. And she writes, what is your favorite variety of rose? My is currently a majolica spray rose or the quicksand rose. But I am enjoying learning new varieties all the time.
Well, Kersty, I think what I would like to recommend to you is the champagne rose. And that rose looks very beautiful. It's like the tone right in-between the white majolica rose and the quicksand rose. And it's a slightly different size.
So if you're working on a blushing white wedding-- which is very popular and oh so classic these days-- the champagne rose is a really great option. It opens beautifully. It's one of the standard roses that I think looks the closest to a garden rose. It's something that just popped right out of the garden. So I love champagne.
And then, the last one, Rachel. She asks, what should I name my business? That's a really tough and personal question. But let me tell you my two thoughts on it.
Whenever you are choosing your business name, you can go in two different directions. You can choose a name that isn't your name, and you can do a doing business as Philosophy Flowers, or Buds and Blooms or whatever you might like to call your business. And when you choose a name like that, that has flowers in the name, it's a perk because it tells you what the business does right off the bat.
But then it also limits you. So if you think that you might want to someday add planning to your business or someday add coaching or some other aspect of you-- maybe interior design or something like that-- sometimes it's nice to be able to use your name because then, people still recognize your name. And you can be constantly adding new products and services under that name, and it's still pretty clear what you do.
So those are my two thoughts about it. Consider who's around you. Consider what other people in your area what they're doing their businesses. Not that you should follow suit because of that.
With me, whenever I chose Philosophy Flowers, one day I was on a walk. And it just came to me, and everything about it felt right. Why I do what I do is very important to me, so having philosophy in the name was a great pick for me.
So those are the two views that I have. So just consider long-term what you might like to do. If your name might be more effective then using something specifically flower-related.
I think that's all the questions that I had. Before I sign off, I wanted to wish you a very Merry Christmas. And I wanted to share a little something from my walk this afternoon that I picked up here in the woods. And this is called-- oh, very messy-- this is called ground conifer. And this is an evergreen vine that grows on the ground that you might like to go outs on a woods walk, and just happened to notice and add it to some of your Christmas centerpieces.
My grandpa used to go out and pick this up out of the wood every Christmas. And he would make these beautiful garlands over my grandparents' door. And since I hadn't seen it in the wild-- at that time, I was very young when that was taking place and going on-- when I discovered it here in boon in my backyard on a little walk, I was really pleased and excited.
So ground conifer or ground pine. It's called ground pine as well. And it has a sweet little pine cone bloom that peaks out.
Well, I think that's all for now. Thanks again so much for joining me. I hope that you learned something. And I hope that what you saw here today will encourage you to take the next step.
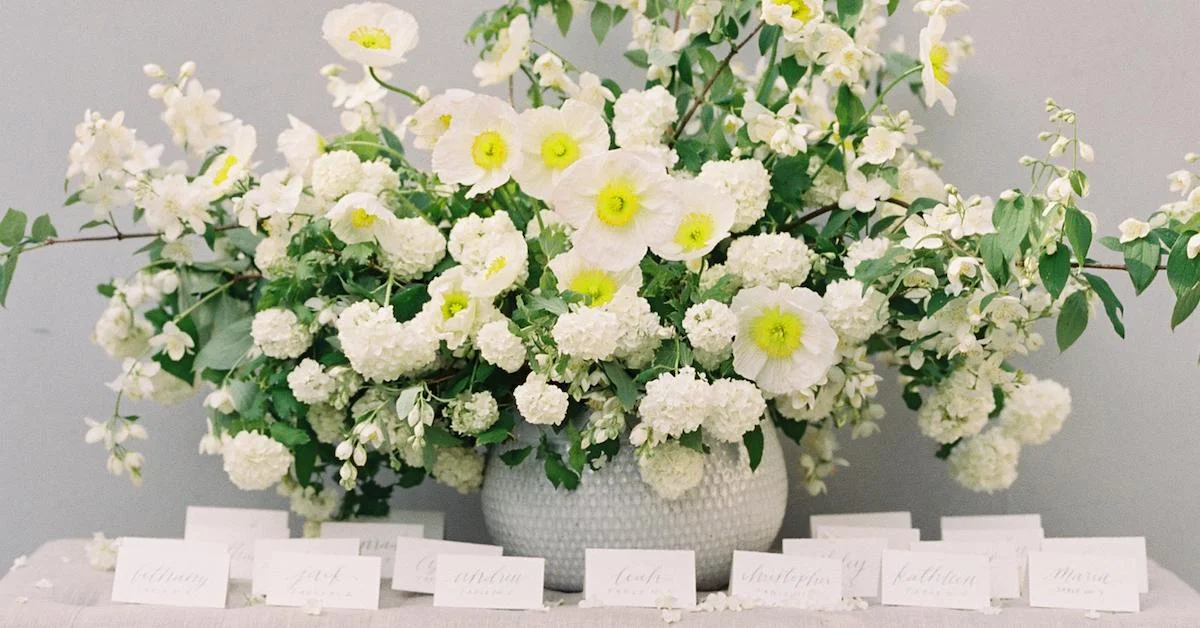
In this video, Kelly uses one of her favorite planters from TJ Maxx with a liner for a fresh-flower arrangement. The key ingredients are Viburnum, Mock Orange, and Poppies. You'll learn about the undertone colors in flowers and how attention to this can bring unity to your ingredient choices. As you watch, notice that each of the flowers are of a creamy white color palette. However, they also bring in a yellow hint in the center of the flowers, especially the poppy and mock orange.
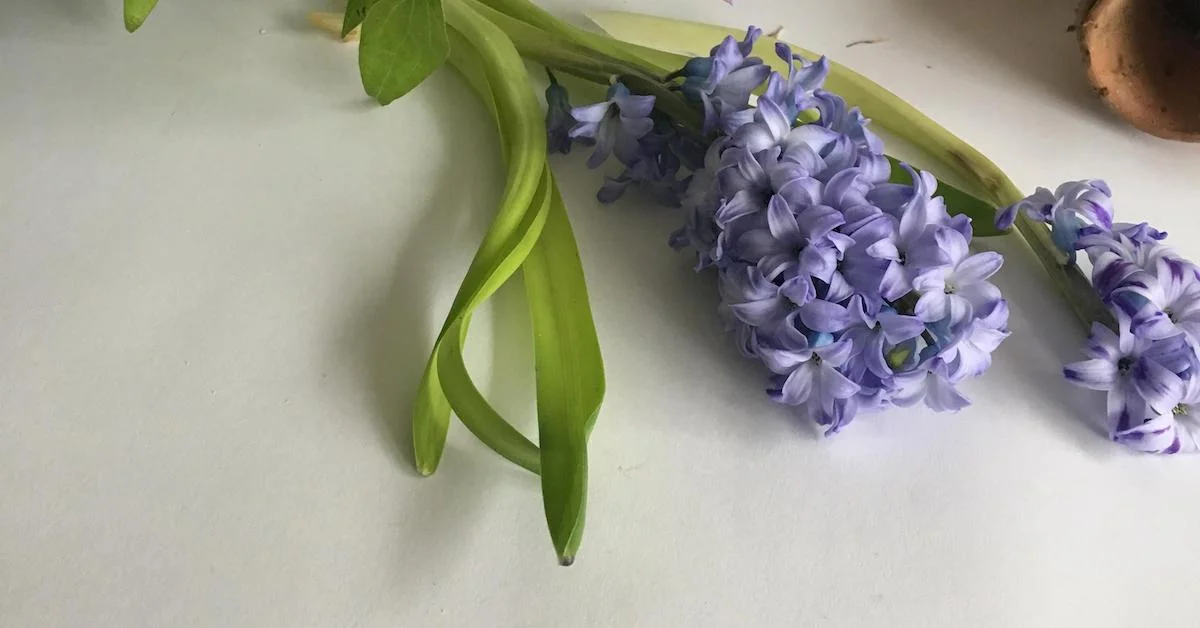
In this video, Kelly Perry of Team Flower demonstrates how to wire flowers for a floral comb. Wiring is a very important part of a florist’s toolkit as it allows you to do so many different things with various types of flowers. For this floral comb, Kelly is using white hyacinth and pieris.
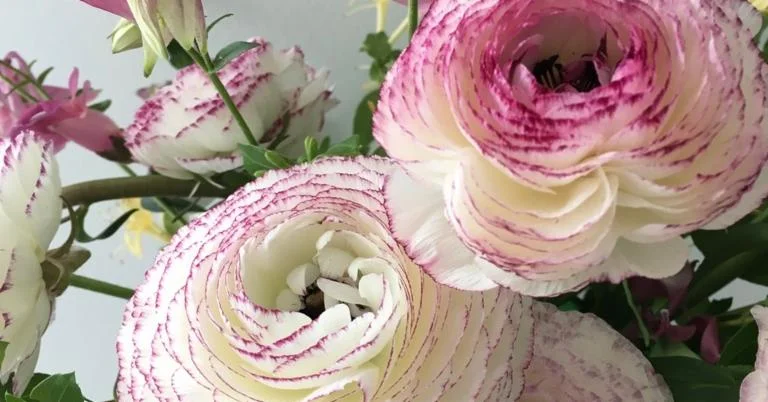
Kelly demonstrates using complimentary colors in a small arrangement using only three ingredients. The ingredients used are Honeysuckle, Chantilly Snapdragons and Ranunculuses in a yellow and purple color scheme. As you’re choosing your ingredients, pay attention to the undertones of the colors in your flowers. This is key in creating a transition piece in your arrangement. Keep the triangular placement pattern in mind to create balance i.e. long piece on one side of the arrangement with a short and medium piece placed on the opposite side. Remember to disperse the colors evenly along with balancing each side to keep the arrangement symmetrical.
In this excerpt from the Team Flower Advanced Wiring Techniques class, Kelly demonstrates how to wire large, over-sized flowers. Wiring flowers is a skill that can be incredibly useful as a floral designer. Not only does it enable you to move and direct a bloom in a specific direction, but it also allows for extra support for top-heavy flowers.
This arrangement represents a quick-come-together piece if you have some leftover flowers at an event! You could place something like this on an escort card table, use it as decor for seat assignments, or as a beautiful addition to welcome guests into the ceremony space.
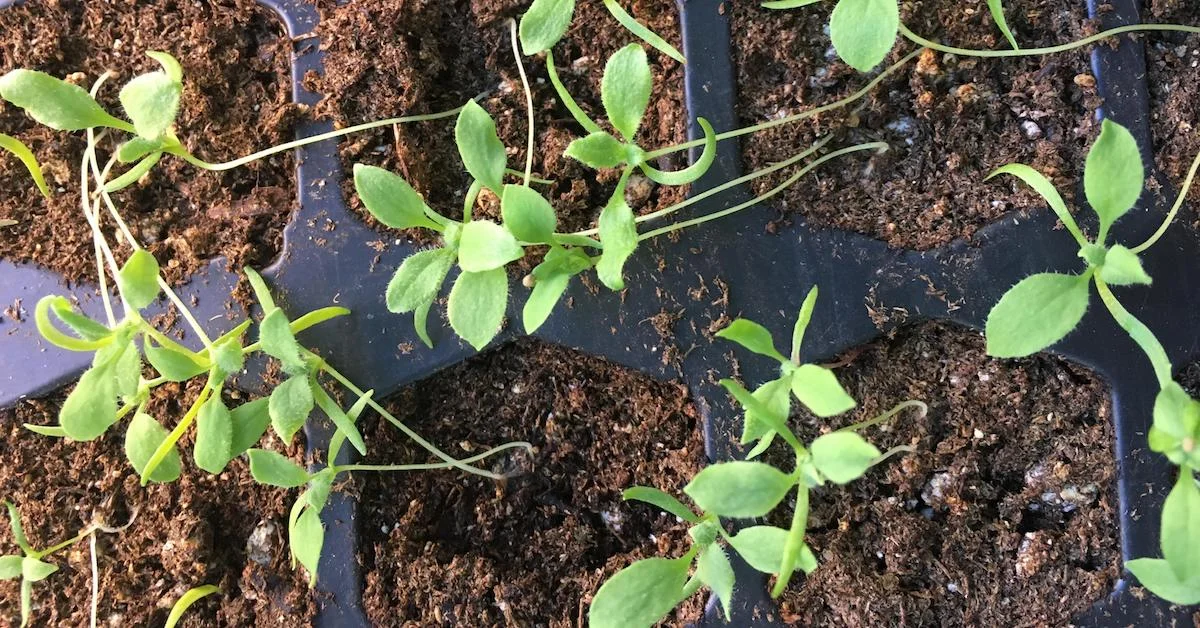
In this clip from the Foundations for Growing Cut Flowers class, Kelly from Team Flower and Kathleen from Primrose Hill Flower Co. are providing a hands-on example of transplanting your seedlings. You’ll want to be sure you have healthy balanced soil that crumbles in your hands. A common misconception in transplanting is the idea that the roots cannot be disturbed. In fact, it’s the exact opposite! The goal is for the roots to reach down and out in the soil, so loosening them up before planting is key. This also allows air to circulate through the roots and keeps them from tangling around one another.
Wiring leaves and flowers is such a helpful skill to have when doing small pieces like boutonnieres and gives you a lot of control on how the flowers lay and hold out of water. You’re able to bend each piece to fit and mold well with one another, and highlight those that need to be highlighted.
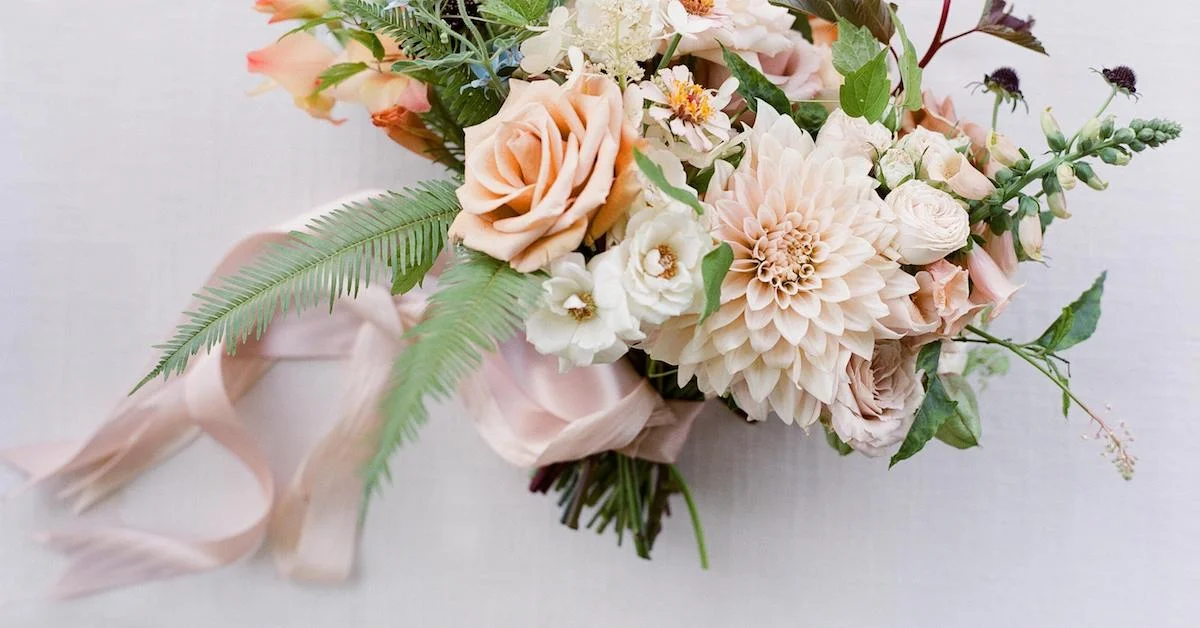
Adding ribbon streamers to a bouquet can add a touch of whimsy to your design, and can be the perfect touch to the overall design for your client’s special day.
Watch as Kelly Perry of Team Flower uses three materials to create a little extra magic for the bride and groom on their special day. Notice how quickly something sweet and elegant can be fashioned, and how little stress and skill it requires. Now, go grab your wire and your ribbon and forage a flexible vine to make one on your own!
In this video, Kelly begins a creatively inspired design made from ingredients from her garden. While she is purposefully designing something unique and professional, she is allowing herself freedom in expression - both in design and in color - as she chooses her ingredients and places each bloom.
In this video you'll hear how Kelly approaches bridesmaid bouquets. Typically, the bridesmaid bouquet is a scaled back, smaller version of the bride’s more intricate bouquet. While often times the bridesmaid bouquet uses many of the same ingredients as the bridal bouquet, there are instances where the bridesmaids only utilize greenery so that the bride’s flowers pop even more. Ultimately, that decision is up to you - the designer!
This clip offers a sneak peek into the Team Flower How to Photograph Flowers Class. Heather Payne of Heather Payne Photography takes you behind the scenes when choosing a backdrop for photographing a flower arrangement. You’ll learn about using a simple paper backdrop, and how choosing various colors brings out the colors of the flowers in the design. Heather and Kelly discuss lighting, reflectors, and diffusers. Watch to receive tips on how you can take a simple yet great quality iPhone photo.
In this video we are going to make a late summer, three-level bouquet! Watch to see how Kelly implements design principles with each layer in the arrangement.