Flower drawings for design inspiration
As florists, sometimes it can feel like we’re creating the same bridal bouquets over and over – especially when many of our brides are choosing timeless color palettes that are all very similar! If it seems like you’re constantly ordering the same flowers, in the same colors, and creating the same style of bouquet, now may be a great time to explore drawing bouquets for your clients instead of using photos for inspiration!
It may seem intimidating to begin drawing your bouquets, especially if you have no prior experience with drawing, but it is a really great way to create unique bouquets for your brides – even if you just used the same color palette last weekend!
The great thing about drawing bouquets in the early part of the design process is that they do not have to be perfect – they don’t even have to allude to a specific flower! When I draw bouquets for my clients, I use a mixture of very quick strokes to create a shape that resembles a bouquet. Today I’m sharing with you the process I use to create a bouquet drawing. This drawing took me 10 minutes to create! Most of the time I use the ProCreate app on my iPad with my Apple pencil because it makes the process so much quicker when I don’t have to worry about scanning and cleaning a file, but I use the same process for pen and paper, too! If you’re new to drawing, it may take you longer at first, as you develop your style and get comfortable with the motions of drawing, but with practice you can easily create these drawings in just 10 minutes, too!
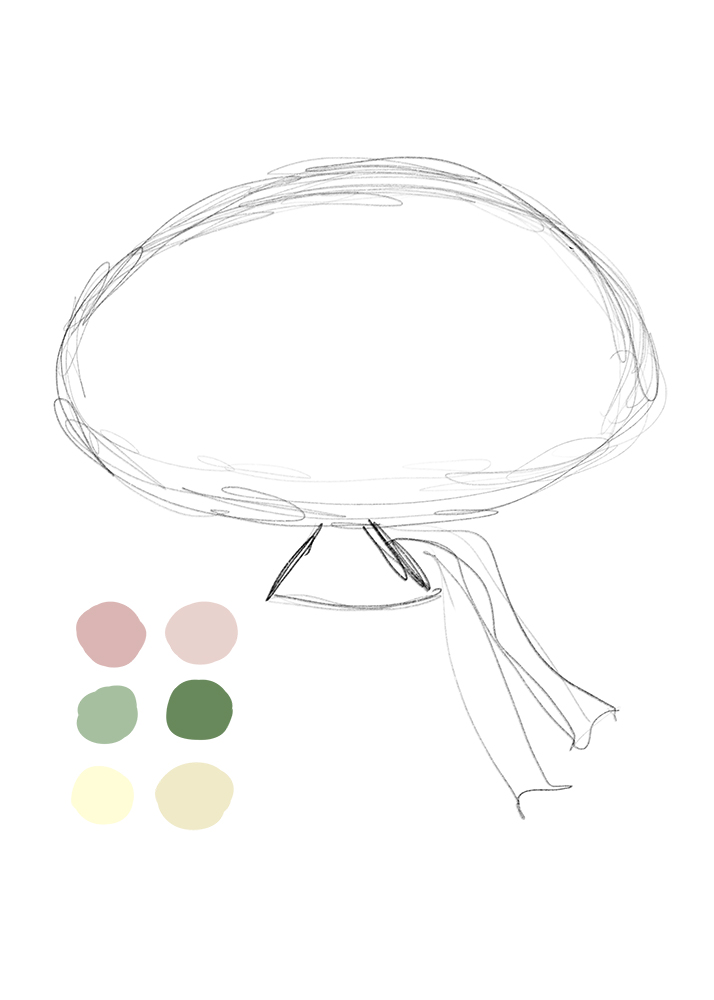
1. Create a Rough Shape and Color Palette
Before you begin, you’ll need to quickly sketch the general shape of your bouquet and develop a color palette. These are both quick and easy questions you probably already have the answers to through conversations with your bride. Don’t spend too much time on this step, it may change as your drawing starts to develop. For this particular bouquet, I wanted it to be a structured garden-style bouquet – so not perfectly round and formal, but not completely wild and foraged looking. An oval shape worked perfectly for this scenario.

2. Draw a Quick Outline
Now that you have a general shape for your bouquet, it’s time to create an outline for it! This is the point where I just start using quick strokes and lines to form shapes. In my head, I have an idea of where I want flowers placed and where the greenery will fill in the bouquet. I use more circular shapes to represent flowers (and if I know what flowers I want to use, I’ll even try to make the petals look similar to the style I’d like to use – for instance an anemone is going to have much different petals than a garden rose) and smaller, more angular shapes for foliage and greenery. At this point, the shape of my bouquet may change slightly if I feel like there is an empty space at the top or bottom that needs additional foliage or filler.

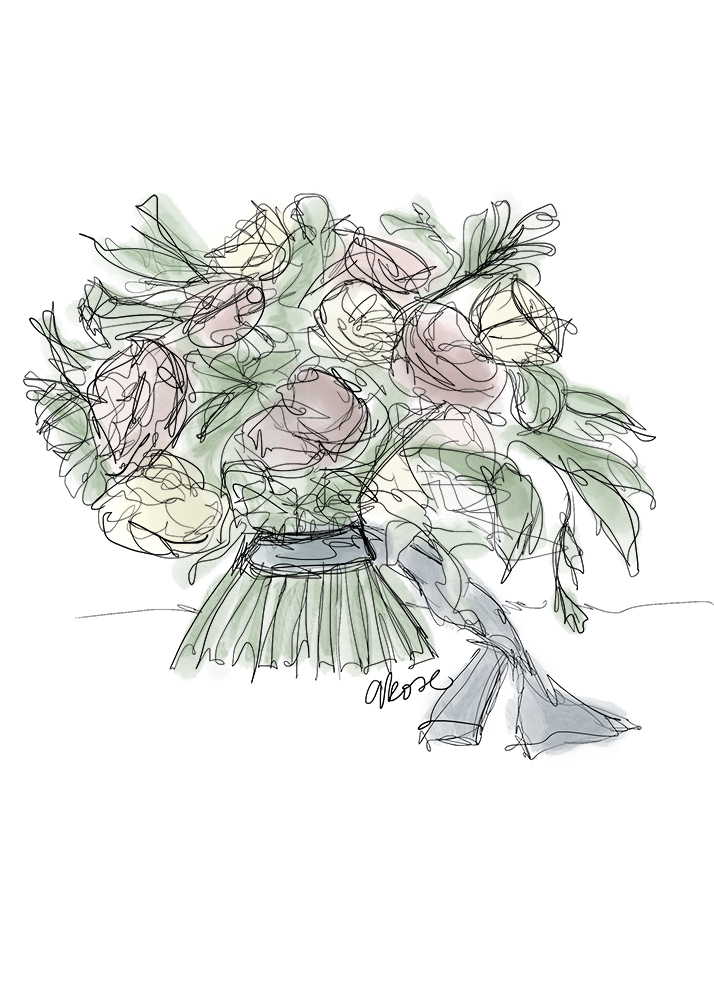
3. Add Color
This is when the bouquet really begins to take shape! I use the watercolor tool to add layers of color inside the outline. I start off with the flowers because I already know where I’d like those to be placed. I then fill in with greens to represent the foliage.
4. Add the Finishing Touches
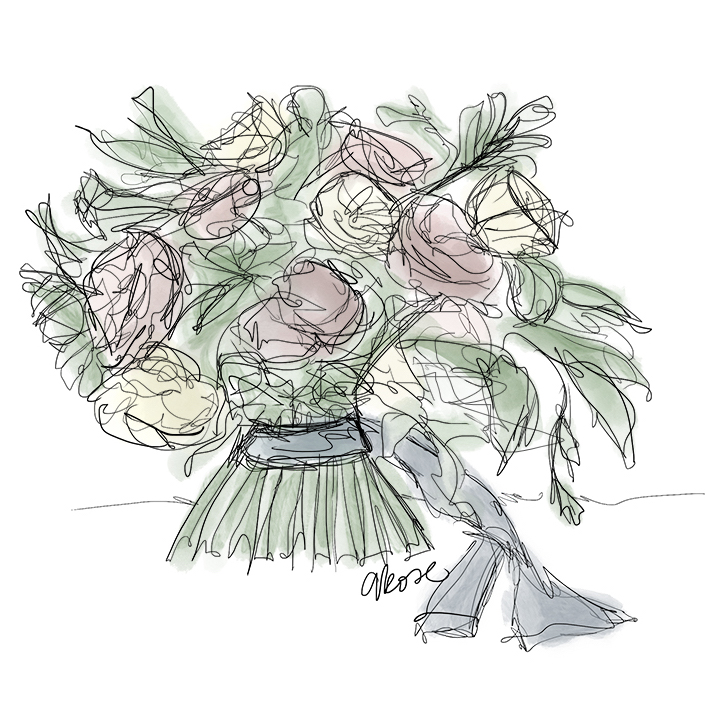
For the last step, I almost always have to go back and add darker outlines to create a little more depth as well as some more vibrant areas of color. Sometimes I’ll end up with a large area of green that doesn’t have any sort of “shape” to it, so I’ll add a few strokes to represent greenery and fill in the overall bouquet. I’ll also add a quick floor line for depth and some ribbon streamers to show the bride what my thoughts are for her ribbon choice!
5. Execute Your Masterpiece
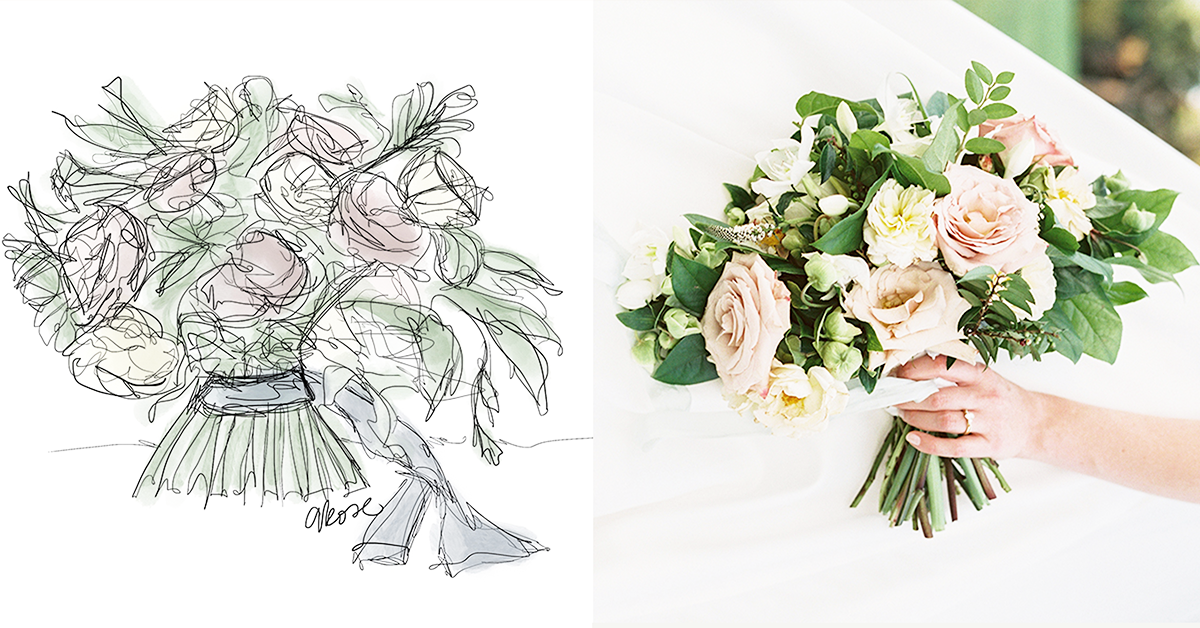
When it comes time to create your bouquet for your sweet bride’s wedding, you now have a really great resource that is unique and special just for her. Below is the final bouquet creation from the drawing I did.

Amanda Castle Photography
That’s it! It’s not nearly as intimidating as you may have thought it is to create unique drawings to share with your brides. Once you get comfortable with the bouquets, you can expand your drawings to installations and centerpieces, too! Just remember to have fun with it and it doesn’t have to resemble a specific floral or foliage source to give your bride an idea of what you have in mind for her!