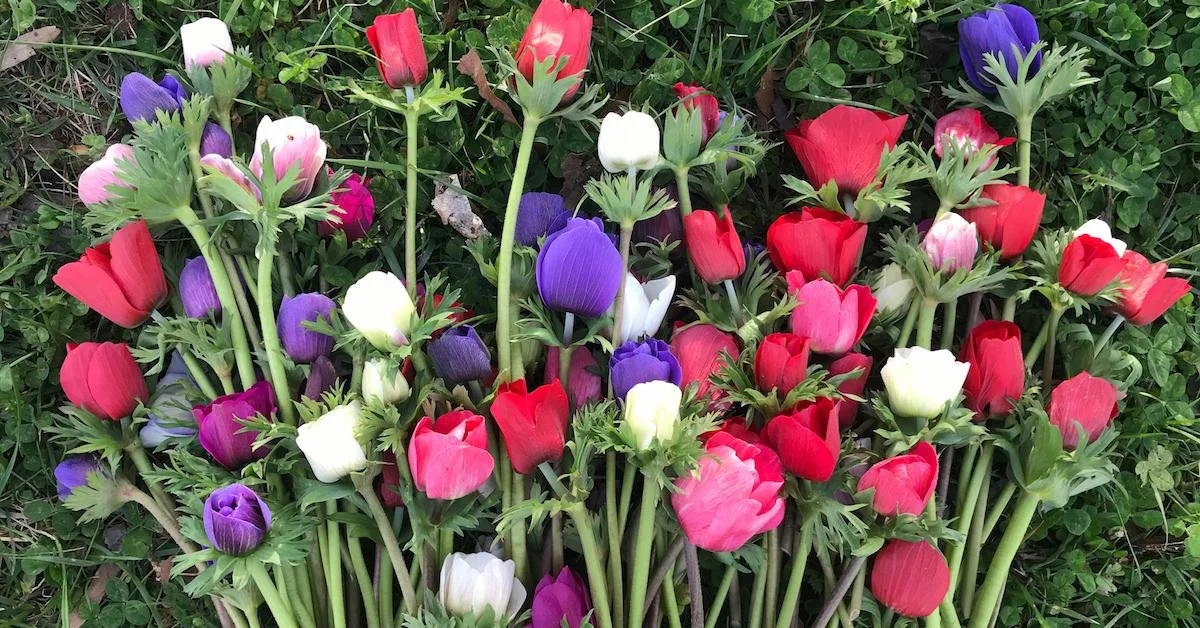
Your Quick and Simple Guide on How to Grow Ranunculuses

Are you hoping to grow your own field or patch of gorgeous and sought-after ranunculuses? Here’s a quick guide on how to grow ranunculuses to boost your growing confidence and get you started this coming season!
GROWING CONDITIONS and WHERE TO PLANT
The first thing that you want to do before growing ranunculuses (or planting anything on your farm or in your garden!) is to have a soil test completed through your local Extension Office. This will give you a good baseline of what type of soil you're starting with and how balanced the basic nutrients are in your soil.
You may need to add lime depending on the pH of your soil as well as more organic matter depending on the percentage that you're starting with. Soil health is always a work in progress! The dirt on my farm is reasonably well balanced and drains nicely because I farm on a slope. This can be good in wet seasons and challenging in a drought. We also have widely varying winter weather here in Western North Carolina (zone 6a/7b): it can be in the upper 60s during the daytime one day and then reach a low of 25 the following night. For this reason, I always have row covers handy to add an extra layer of protection if the temperatures are dropping below 28 degrees. I uncover the plants in the morning as soon as the sun hits the field. Having a hoop house or tunnel is not necessary to plant a great crop of ranunculuses, though it is helpful.

SOIL PREP
Because the soil on my farm is fairly well balanced, field prep primarily consists of adding organic compost and fertilizer. Once the soil is dry enough to work, I go through with the tiller—starting with a shallow till first, then do a deeper pass and finish with a light till to smooth out the bed. After tilling, I lay down landscape fabric in the pathways so that there is no weeding or maintenance required.
After tilling and laying fabric in the pathways, I spread organic compost and fertilizer in each bed. I use a 7 - 5 - 10 organic fertilizer and mix them into the soil with a wide rake. (The beds are about 36" wide.) I do not plant into landscape fabric because it adds too much heat to these cool-loving plants.
PRE-SPROUTING
About 10–14 days before I'm ready to plant, I soak and pre-sprout the corms and will usually prep the beds after I've started this process.
There are many different ways to pre-sprout your corms, and I have had great success by keeping it simple. Because ranunculuses are very susceptible to bacterial issues and we tend to have lots of moisture in the winter, I soak ranunculus corms in an Actinovate solution. Actinovate is a concentrated beneficial microorganism that establishes itself on the plants' roots. Even though I shy away from using any chemicals and grow "organically," this product is approved by OMRI for certified organic production and helps protect my large investment in the corms.
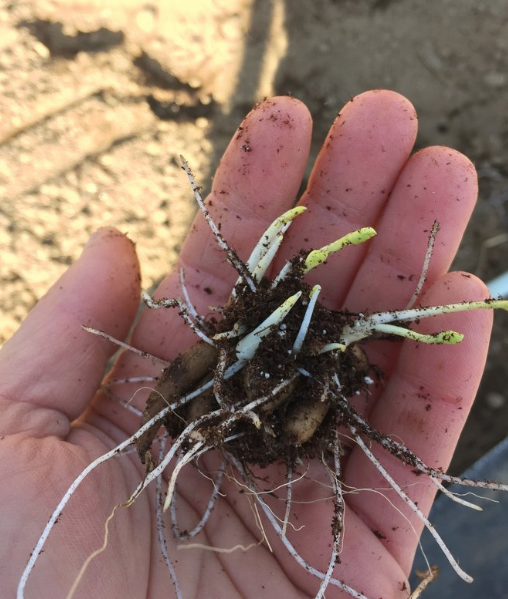
I soak ranunculus corms for about 12 hours until they start to plump up and double in size. After soaking, fill large seed-starting trays (the bottom trays without holes) with a blend of soil and vermiculite. This is the same mix that I use for all seed starting. I gently "plant" each corm into the tray so that the legs or "bananas" are facing down and the corms are touching (but not overlapping) and then cover completely with a light dusting of the mix.
My basement is the perfect spot for pre-sprouting as it’s about 50 degrees with medium humidity and no natural light. I check the corms every few days to make sure the soil is slightly moist but not damp. Err on the side of too dry rather than too wet. After about ten days, the corms grow little white rootlets, and they're ready to go. Oftentimes I am so busy during this time that by the time I get around to planting, they have 1/2" sprouts growing. No need to worry—they continue growing in the soil just fine.

PLANTING
Although I grow almost everything at the farm in landscape fabric, I do not plant ranunculus into fabric. Cool-loving ranunculuses do not appreciate the extra heat and moisture retention caused by landscape fabric.
I aim to have the plants in the ground around October 31 but have also planted as late as mid-December. Ranunculuses bloom about 90 days after planting. They stop blooming once the temperatures reach about 75-80 degrees in the spring, so planting early enough to allow for at least two months of blooming is important.
I typically plant four rows per 36" bed of ranunculus with 6" spacing between each corm, planting them about 1–2" deep. My favorite planting tool is also super fancy: a butter knife from Goodwill. It's amazing how quickly you can plant a few thousand plants using this method! Depending on how damp the soil already is, I may give it a light spray after planting. After sprouting, I water about once a week with drip irrigation as needed. Again, it is better to be a little dry than too wet. I only water when the forecast calls for lows above about 36 degrees for several days at a time, otherwise you run the risk of freezing the corms.
Ranunculus grow so quickly and don't require much maintenance throughout the winter—except for occasional weeding and protection from those super chilly nights.
I wish you the best as you start growing this bloom in your garden and on your farm!