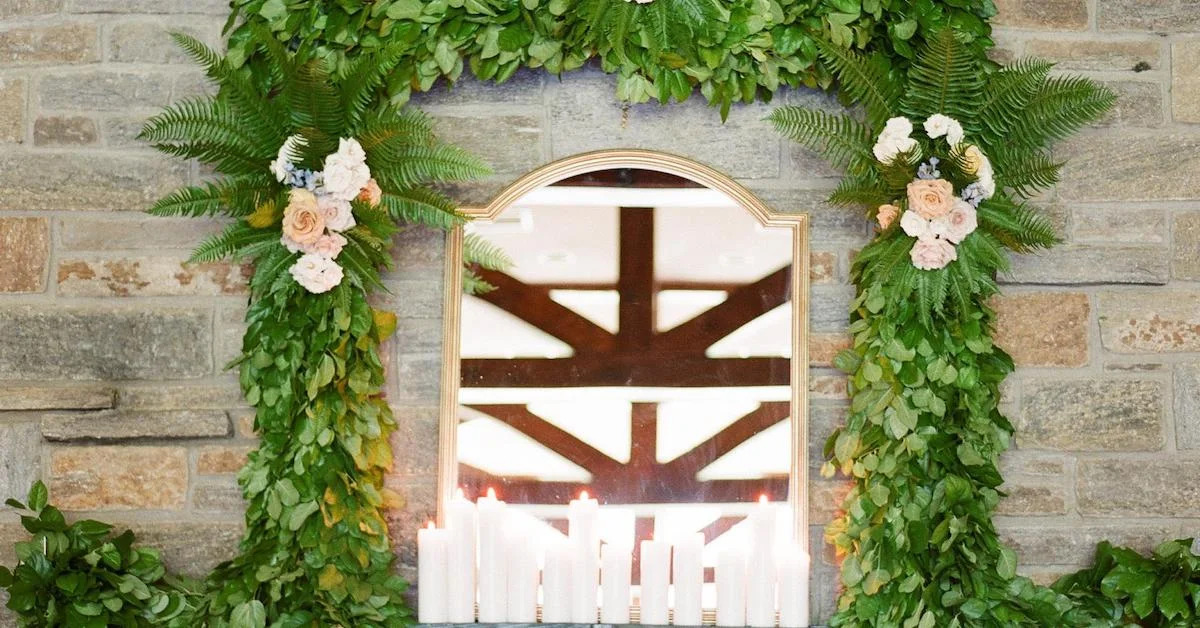
The classic flower garland is a floral design piece that is just as versatile as it is durable. Its functionality can go way beyond a wedding or holiday decoration. Discover more garland tips in this guide!

All tagged garland
The classic flower garland is a floral design piece that is just as versatile as it is durable. Its functionality can go way beyond a wedding or holiday decoration. Discover more garland tips in this guide!
This lesson is about putting together an overhead garland with florals. If you’ve never put one together before, here’s a behind-the-scenes look at my take from the time. Please laugh and have fun watching me wrestle with an 18’ piece of monster vine all by myself.
Transcript
Today we're going to have some fun with hops. You may be wondering, why is Kelly wearing giant gloves? Because Kelly's allergic to hops. That's why.
Taking one for the team today, because hops are a really neat ingredient. You can use them in a lot of different ways, super-super-large-scale the whole way down to little boutonnieres. So today, we're going to do an overhead hanging type of an arrangement using the bar up here. We've got hops, a little bit of lemon leaves, some dahlia, tuberose, cosmos, gomphrena. It'll be fun.
That's the ingredients that we're working with. Let's talk a little bit about the supplies that we have. This is just a simple small board from Lowe's. This type of design that we're about to make is something that you might attach to a beam that already exists in the venue that you're using, or it may be something that you need to hang to be lower from a beam in the venue. So if you're using it, if you need to attach, you can use this method to attach it directly to the beam and just kind of pretend that this is the beam at your venue.
Or you can use the same kind of materials that we're using here. This one is a little bit narrow. It's not a 2 by 4. 2 by 4s are pretty heavy. So I like to keep my mechanics light but still weight-bearing. We're not going to put a ton of weight on this, so this will be adequate for what we're working on today.
If you need to attach this to a beam, you can just simply drill a hole through the board and put a rope through. Tie the rope in a double knot there at the end. Make sure it's nice and secure. And then you can throw that up over your beam and get everything connected that way. So that's an idea, if you need to rig it on something else.
So we'll get started here. I'm going to use some lemon leaf, our salal foliage, as a base. And then we're going to work in our little Oasis pieces. And then we're going to go add in the hops around those.
So do you have to do this exactly like I do it? No. There's more than one way to do things, and I think that's an important distinction to make. So you might see this and think of a way that you can be more efficient or faster or something. This sparks a little node of inspiration, so please feel free to adjust as you need to.
And I also wanted to mention I have just a little delivery box that I'm using. Dad and I put these together, but they flip upside down really wonderfully if you need to use them as little step stool. So this is something that I love to have on event day, because it's multi-functional and it doesn't take up extra room in my car.
So we'll get started by just putting a little bit of this onto our form and I'm going to use zip ties to do this. You could use wire or tape if you wanted to as well. That is up to you. Everybody has their preferences there too.
I'm going to put a little bit above, put a little below. And I'm not that worried about covering the form per se. I just wanted to have a little bit of a base to start out with. The hops are really going to do most of the work for us here. But I think sometimes it's nice to have an alternate leaf shape and shade in designs, so that's why we're going to go with these.
It's also pretty budget-friendly, just another reason why I love it. And it really is a workhorse. The bunches are big so you can use it throughout your event.
It doesn't have a great shape for centerpieces in my opinion, or bouquets. But I think for installation work it's pretty great. And there are ways that you can use it in centerpieces and bouquets too if you needed to. But I prefer something that's a little bit less stiff. But this is great for garland-making as well.
OK. Next we're going to add in the Oasis. And I'm going to show you two different ways that you can do that. The first thing that I have is a little igloo Oasis cage. And it has the little things that you can attach a zip-tie or a wire to put it on the structure.
So I'm just going to space this out evenly. And since this piece is going to be viewed from the ground up, I'm going to focus on putting the flowers low. And these, I kind of like to run them through the actual Oasis pieces, because sometimes these little side pieces can pop off and I just would like to avoid that.
The other option that you can do is a little bit more budget-friendly but also a little bit more labor-intensive. I've taken just a regular cube of Oasis and I cut it into eight sections. And you can use this with a little bit of chicken wire instead of the cage if you need to.
So I have a piece of chicken wire cut here. And I'm just going to wrap it around the Oasis. And this simply keeps the Oasis from breaking into pieces once you get a lot of flowers in there. And then I'm just going to take that and attach it right to the form. You can run it through the wires if you'd like for just a little bit of extra hold.
And I think on this one I'm going to do five pieces. And I'll put the measurement for in the finished product and the recipe for how many flower we use so that if you'd like to create something similar for something that you're doing, you can easily swap out the materials and the quantities and just have a better idea of how to quote the event out.
I have raindrops. Oh. All right.
Let's add in some hops next. Let me get my gloves. These are pretty big. I sort of imagine-- they remind me of Jack and the Beanstalk a little bit or something. I feel like I should yell "bombs away" and just throw it over.
All right. I should also mention that if you haven't had hops before, there is the-- my skin just breaks out in a rash. But there also is an odor associated with hops. They smell a little bit like fish when you open up the box, so just be aware of that. It's not a deal-breaker, but if you're pretty sensitive to smell, it's going to be something that's a little bit unusual, you're going to want to watch out for.
And if you can't flip it over top of your beam, like I did, or if you wanted to have just a little bit more drape or something like that, you could attach the hops with zip-ties, just going along the main vein of the vine. And I apologize. I'm going to have to put my back towards you just for a second, but I want to just kind of assess and trim out some pieces in the hops that are maybe browning or too long, just get the shape of this. This is the shape component for this arrangement, so we just want to get the silhouette looking really nice.
And since these arrangements go so high in the sky and it's going to be dim and dark in the area that you're working, you don't have to obsess over every single little piece. Since these are something that come out of the box out of water, there may be a little bit of wilting and browning, especially if you're trekking them around in the sun. But for the most part, they're pretty sturdy.
And I'll put a source for these out of Oregon that ships in your Notes for those of you that are here in the States. And if you aren't, hop on community and chat with some people that are from your area and see if you guys can come up with a great source to find these where you are.
Now, this would be a fun arrangement that you could-- after you've got all of your flowers and things in, you could add them hanging candles down in here, like little twinkle lights, or you could do actual little electronic twinkle lights. OK. And we may edit that a little bit as we go along, but it's cleaned up and it's in a better place-- in a better place than it was when we initially popped it up there.
The next thing that I'm going to kind of look for is just any obvious areas that are exposed, where mechanics are exposed. And I just want to give those a little bit of attention before I start getting all of my flowers organized and incorporated in there. So I'm going to pop back in there with a little bit of the lemon leaf foliage. And I think we're mostly done handling the hops. I can handle them a little bit, but I don't want to give them a big bear hug.
So this area right in here needs some attention. So I'm actually-- I see a good opportunity here to just adjust the way that this vine is hanging. And that'll help with part of this.
And then I might tuck just a little bit of this in. And now the hops can be used as a base or a way to hold flowers in place as well, which is fabulous, all of those stems that are crossing over, weaving together. Grapevine is a great thing for that as well, maybe if you needed to do a big overhead installation. Grapevine acts as a similar type of thing, creating a net, a natural-looking net for flowers and things to rest in.
And then another thing that I love to have onsite whenever I go places is some moss, because you can just quickly pull off some pieces and fill in. So I'll do a little bit of that now, and then before I wrap up a project like this, I like to squeeze my eyes together just like you would when you're putting Christmas lights on a tree, just to see if there's anything that's standing out. You just kind of squeeze your eyes and look for that board. You'll see if there's any places that need to be covered with a little bit of moss.
Another idea for covering mechanics is to spray paint the piece that you're using, so this board we could have spray painted a green color. And that would have helped as well just to camouflage. So if that's something that you're very sensitive to, that's another little option for you.
Next we're going to add tuberose. I think I may have left this off the ingredients list whenever I first started talking about them. I love tuberose. They smell fantastic. These are so great to have in brides' bouquets and on tables and things like that, where people will pass them.
Up here, their scent is going to be overlooked a little bit, but their shape is important for this type of arrangement. We need a few things that are long and stretching, so I've done such a great job covering up my mechanics that I can't even see where my little Oasis houses are. OK. There's one.
So here we're going to use-- this isn't going to be one of-- the big show-stopper in this arrangement is the cosmos, so we're just going to put a few of the tuberose in there. And I'm using them to mark where my Oasis is hanging out, so one in here.
And today, I'm working on primarily the front side so that you're able to see and experience putting this together. But as you do it for your event, you're going to want to keep walking between all the sides. And you're also going to want to create depth. So for example, you can see how I have a tuberose hanging out back here in this area. And that's to draw the eye back in and through the arrangement. If they were all on the front at the same level, it wouldn't be quite as interesting for the people who are enjoying the flowers.
Next we're going to put the cosmos in. I love how light and airy these are. They're a really fun flower to include in your designs.
Another consideration-- I know I talk a lot about the allergy of hops, but just keep that in mind if you have people that are working for you. You don't want to put somebody in a place where they're feeling really uncomfortable and itchy all day, so take that into mind. If somebody seems like they're sensitive to it, put them on a different task. Just a good thing to know in advance. Keep everybody on your team happy and healthy.
And as far as placement for these, I'm just keeping an eye on evenly spreading them throughout the arrangement. And we have dahlias that we're going to add. And whenever I put those in, I'm going to concentrate on making an interesting line for the eye to follow with those. So these are just kind of little-- I guess you could call it a fill if you wanted to, but this is just our main cover.
In a centerpiece, these would be great as a finishing flower, because of their light and airy quality and just the shape of their stems. But this one can transition in quite a few ways. It's great for, in this situation, a fill as well.
And I've left a few of the cosmos in my little bucket over here, so after I get most of the-- I go through and get all the components in, then I like to just take a quick peek and sometimes there's an area that needs a little bit more so I have a few left over that I can go back in and make those adjustments if needed. But I think it's nice to get through all of the initial placement of all of your ingredients before you perfect. And if you run out of flowers to perfect with and you're kind of moving things around, it just takes a little bit more time. But no worries if you have to do that. Sometimes it happens.
So I've got my pretty white dahlias here. Since they're the largest component here, it's where the eye is going to naturally be drawn to. So we're going to focus on creating a few little focal points within this large, large arrangement using these dahlias. And we're going to do that by grouping them together within different levels and by arranging them in a little bit of a line.
This is called an implied line. It's like a connect-the-dots line. If you were looking up at the stars at night, how all the different constellations you sort of use the stars as your point to form all those different constellations, it's similar here, what we're doing with these flowers.
And if this arrangement is going to go at a point where there is kind of-- it's at an entry point, maybe, where the eye would be drawn up, you could-- at the center of your arrangement, you could focus on taking one of these larger flowers up high. You're going to want to keep an eye especially underneath, though. This is really where guests are going to view and enjoy it, so you're going to want to add some in there at varying levels too.
If you have a bride who's getting married in the fall that just really loves peonies, you can definitely show her dahlias. I call them the peony of fall. And usually once they've seen one, they're excited about them, especially the big dinner plate ones. They're becoming a little bit more well known with the girls. But some people just don't know what they are and haven't seen them before, so a little bit of education goes a long way.
And a word on dahlias. They can be pretty tough if they come wholesale, I think, to keep looking fresh and great. So I recommend finding a local source if you're able to and the Association of Cut Flower Growers is a great place to go for that.
You just really lose a lot of the life of the dahlia, since they are a shorter-lived flower. Their vase life typically you can expect to be from maybe two to four days I would say. So if you think about that they were cut at the farm and then they were shipped and then they came to you, they've already used up quite a bit of their life expectancy, so I think it's a good idea if you're able to get those local.
And if you hop on Community, there's a little discussion going on about wholesale dahlias and some things that people have been trying. I haven't experimented with the wholesale methods, with chemicals and things like that to maintain them. I just didn't want to go there, because I have some great local sources, so it just felt kind of like a waste to me. But they're sharing some possible solutions and things that you can do to keep those alive there.
So next, this is gomphrena. I'm just looking for my Oasis and popping it in there. This is a nice little kind of fun little accent piece. And again, don't forget underneath, and like I mentioned, the other side as well.
And I pulled one more ingredient that I was thinking about putting in this arrangement. And it's just a bit of Queen Anne's Lace as our finishing flower. So after I work in the gomphrena, we'll go there next.
Some of these pieces of gomphrena I'm having a hard time finding my Oasis spot. So you could have on hand-- I like to travel to installs with a few water tubes filled up. So you could have those on hand just to pop your stems in and then you can use the grid of your hops and put your flowers in that way if you have more than you can do with the Oasis, or if you would just prefer to do that instead of Oasis. It's kind of a matter of preference, I think. Oh. Found it there.
All right. Let's move on to our last ingredient, the Queen Anne's Lace. We're just going to use this to sort of finish it off and add a little bit of lightness to the design. So I want this to come out further than all of the other ingredients that I've put in here so far, since it is the last light, airy piece. And again, I'm just spreading these out like I did with the cosmos, pretty evenly. But if you wanted to use them to accent a specific line or grouping, you could pay attention to that as well.
All right. I'm going to step away for a minute and just take a quick peek, see if there's anything that I want to change or edit. And then I'll be back to show you the finished product. We'll be right back.
And I'm back to wrap up. I went ahead and I just did that little squinty eye and looked for any pieces of the mechanics that were sticking out and I covered with a little bit of moss and a few hops up there. And then I just wanted to show you before we sign off for today two little examples of something you might like to use or include in a design like this and the sources for those.
This is a little candle globe from Accent Decor. And then this is from-- I got this in New York at the flower market whenever I was there. So I'll show you-- I'll put links to these things in your Notes.
But I just wanted to show you how I attach them real quick. I just use a simple piece of floral wire to put those together. And I just make a little paper-clip-like piece to attach everything. So if you use a gauge wire maybe like between 16 and 20, you should probably be-- you'll be in good shape with something like that. 16 is a little bit heavier than 20, so just depending on how heavy your piece is that you're using. But I just wrap that up there, find a nice strong piece of the hops vine, and attach it like that.
I like these covered globes just because the flame is completely covered and you don't really have to worry as much about fire and things like that with something that is completely covered on top. These ones are a little bit-- you just have be a little bit careful. Maybe put them a little bit lower in your arrangement or your design.
Candles do generate quite a lot of heat, so even if it doesn't catch on fire, it might cause it to brown or something like that, so just something that you want to keep in mind if you decide that you wanted to put some lighting to this arrangement, you want to keep it pretty low. And just fishing wire is what I like to attach those with, but it's good to prep all those things in advance, because whenever you're doing a big install, oh, time just flies. So if you have all of your fishing wire pre-attached, you can just store them that way and then they're always ready to go and you don't have to rewire each time.
So that is the oversized hanging arrangement. I hope you enjoyed it and I hope that it encourages you in your next design. So we'll be back soon with another project for you to try. Thanks so much for watching and we'll see you soon.
Ready to learn how to make a garland? Check out the video below. This video is an excerpt from the Team Flower Arbors and Ceremony class. In it, I’ll demonstrate how to create a lush, full garland using only one ingredient. The techniques you’ll learn can be used in a variety of circumstances—from decorating a railing to creating a table-runner.
In this article, learn how Team Flower member Anne Bradfield attached garland and flowers to a long banister. This tutorial is done completely without floral foam as well, and she shows how she puts each step together.