A Guide to Building a Free-Standing Invisible Floral Arch

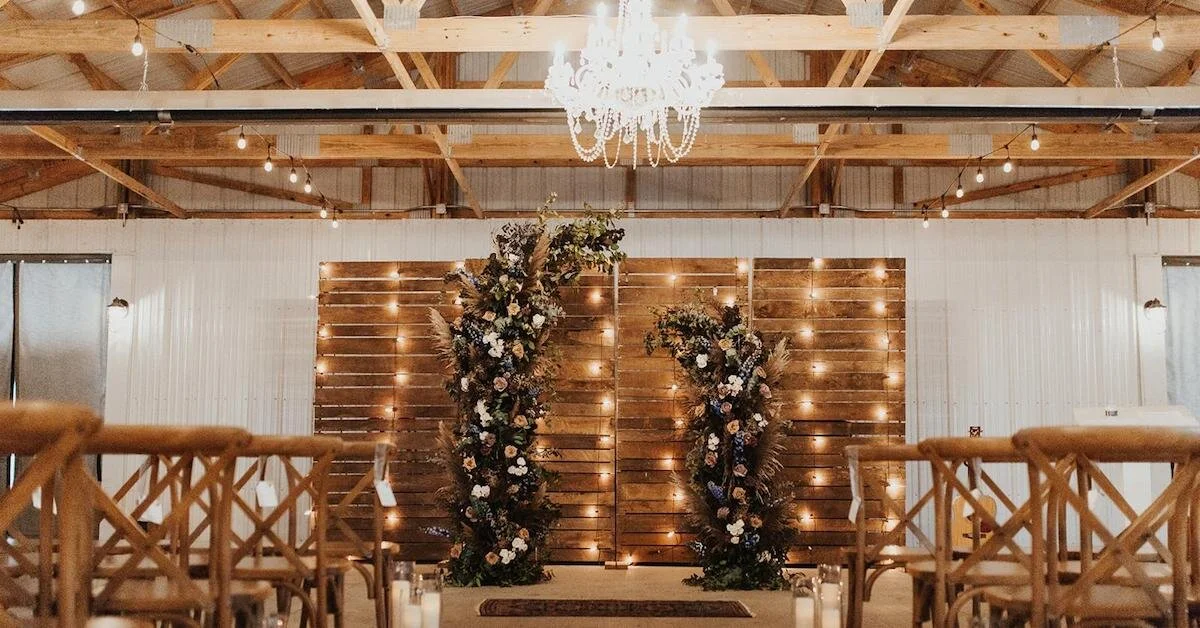
Freestanding invisible floral arch
After 7+ years in the floral industry—and especially after the most difficult year I've faced to date—I knew it was time to start my own floral company.
I earned resilience; love and passion grew from working with flowers from day to day, I built meaningful client relationships, and I became an integral part of such an important day with loved ones (something we need now more than ever).
I decided to plan a styled shoot to begin my journey as a wedding floral company owner. I knew I wanted to create a free-standing “invisible” floral arch.
When flowers are designed as if they have been growing on a structure organically for years, my heart and creativity soar! I purchased this invisible arch from Etsy and got to work. (I always love any opportunity to support another creative and small business—thank you, Etsy!)
Here, I'll walk you through each step of creating this piece, so you can create a free-standing invisible arch as well.

Sturdy mechanics make for a sturdy arch
Step One: Prepare the Mechanics for Your Floral Arch
First, prep the arch by zip-tying chicken wire around both arch pieces. (Be sure always to wear gloves when working with chicken wire—it bites!)
Wrap chicken wire around both arch pieces so it is fully covered. This will create the perfect grid for your stems to stay in place.
I purchased this chicken wire and zip tie combo on Amazon. There was plenty of leftover chicken wire for the next project!
Step Two: Add the Greenery to Your Floral Arch
When arriving for setup, you'll first want to cover the mechanics of the zip-ties and chicken wire.
I used seven full bags of smilax—four bags for the 8-foot tall arch on the left and three for the 6-foot tall arch on the left. (P.S. Don't forget to bring your ladder with you to install!)
The smilax can easily wrap around the arch and cover the mechanics right before your eyes. Once the free-standing arch is lush with foliage and no chicken wire is peaking through, it's time to add flowers!

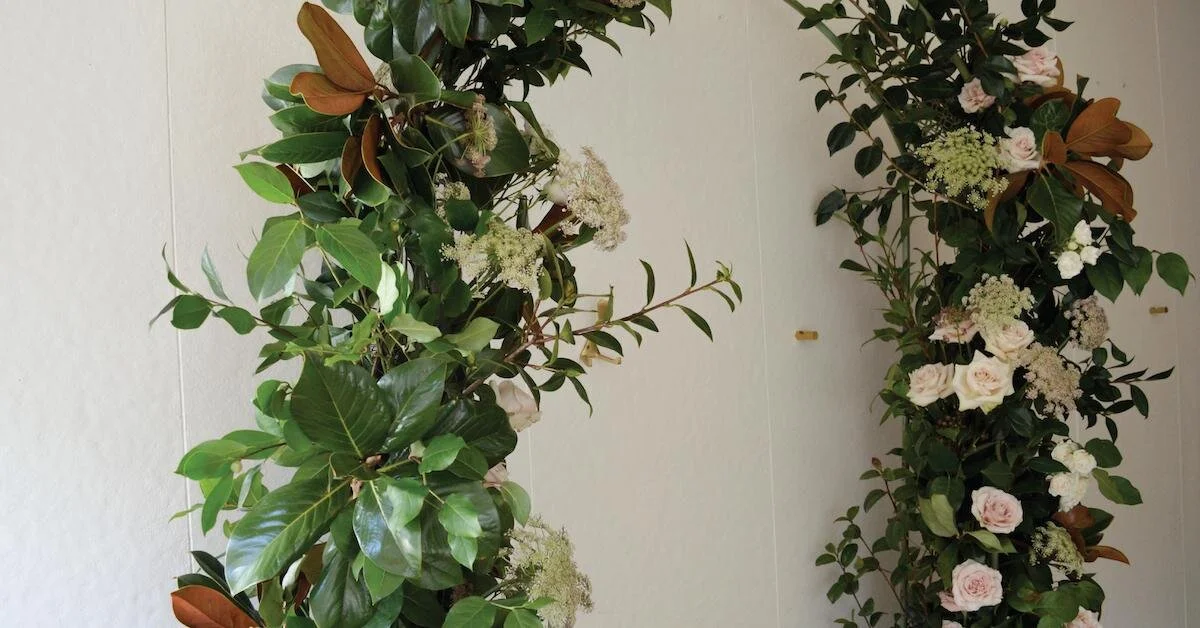
Ingredients used in this floral arch include lush roses and more!
Step Three: Add Blooms to Your Freestanding Floral Arch
Next is the really fun part! Cover the arch with FLOWERS!
You’ll see I used lush and draping pampas grass, hybrid white delphinium, textured calcynia, and roses of numerous varieties (quicksand, toffee, menta, and smaller spray roses) to add a touch of delicacy to the design.
The smilax and chicken wire create a base for the flowers to be stuck in and stay put, even with the strong gusts of wind we are so commonly blessed with here in the Rocky Mountains.
List of Floral Ingredients Used in This Invisible Floral Arch
Here's how many flowers I ordered—and I used all of them!
12 stems of pampas grass, 7 for the arch on the left, and 5 for the arch on the right
2 bunches of white hybrid delphinium, or 20 total stems, split between the two arches
1 bunch, or 25 stems, of each rose variety, divided between the two arches
2 bunches of spray roses, 20 total stems, split between the two arches,
2 bunches of calcynia, or 20 total stems, divided between the two arches

Completed freestanding floral wedding arch
Step 4: Clean Up and Photograph
Last, it's time to clean up to prepare for the photos.
Pro tip: Laying down a tarp before designing makes clean up a breeze.
Once the installation is complete, simply roll up the tarp, sweep up a few stray stems, and your beautiful free-standing invisible floral arch is done!
Now get to flowering; I can't wait to see what you create!


All photos by Sarah Goff Photography.