Creating a Foam-Free Floating Wedding Arbor
Katy Rose Photo
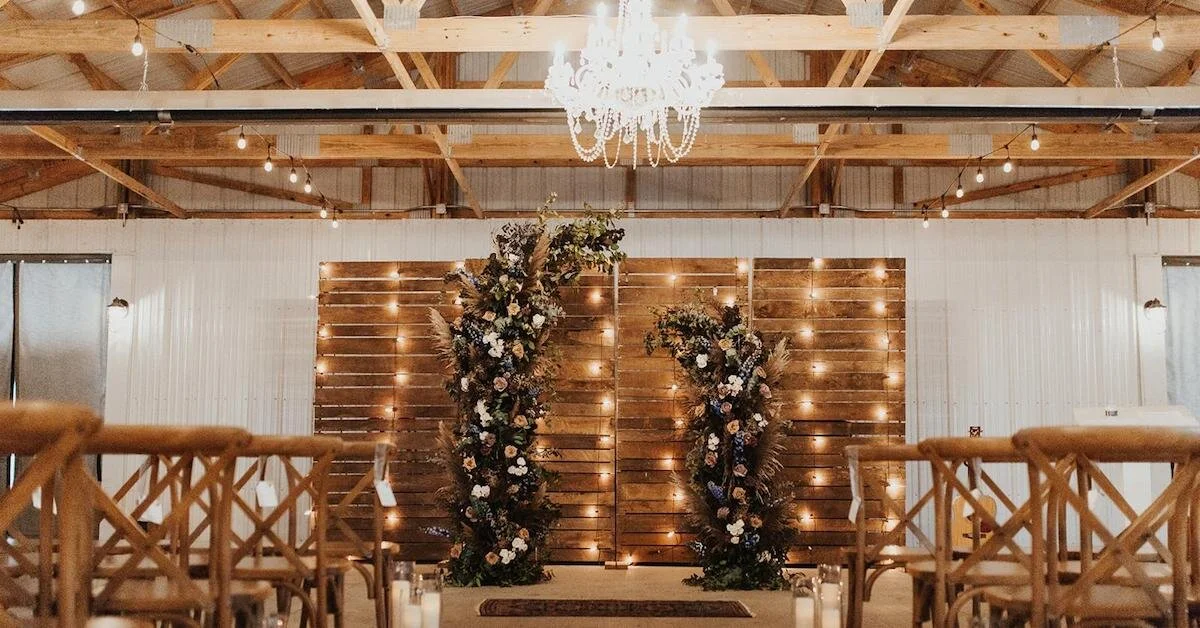
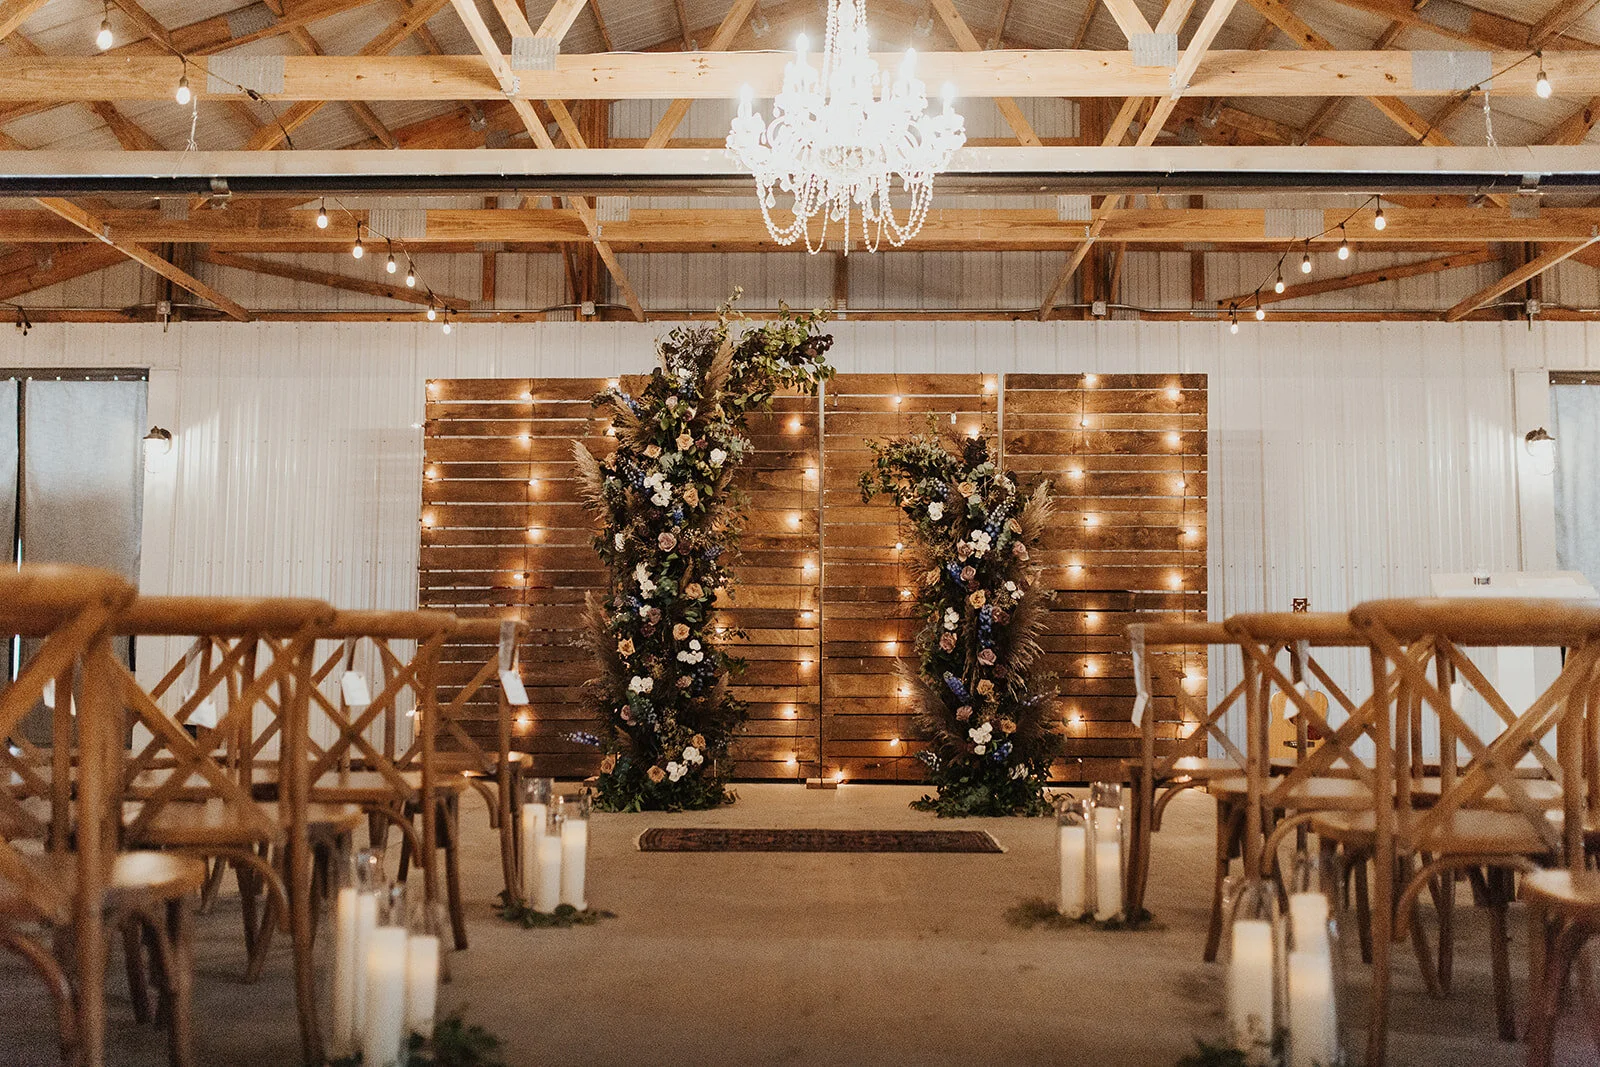
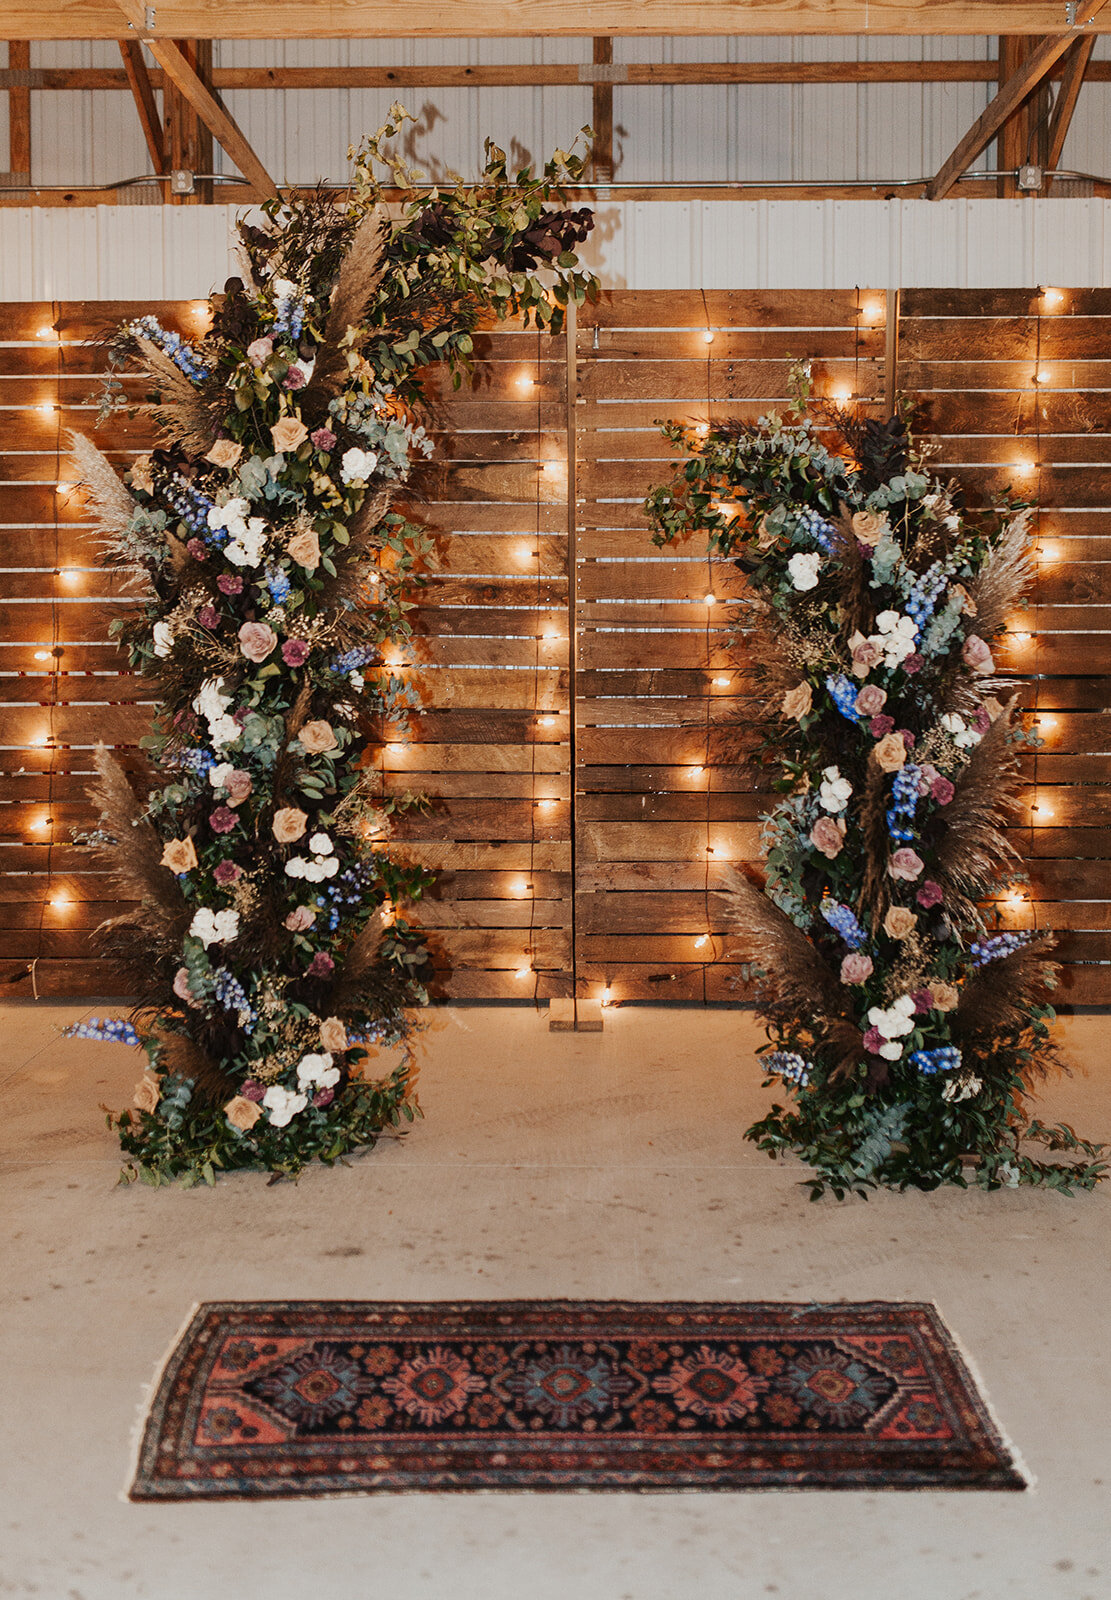
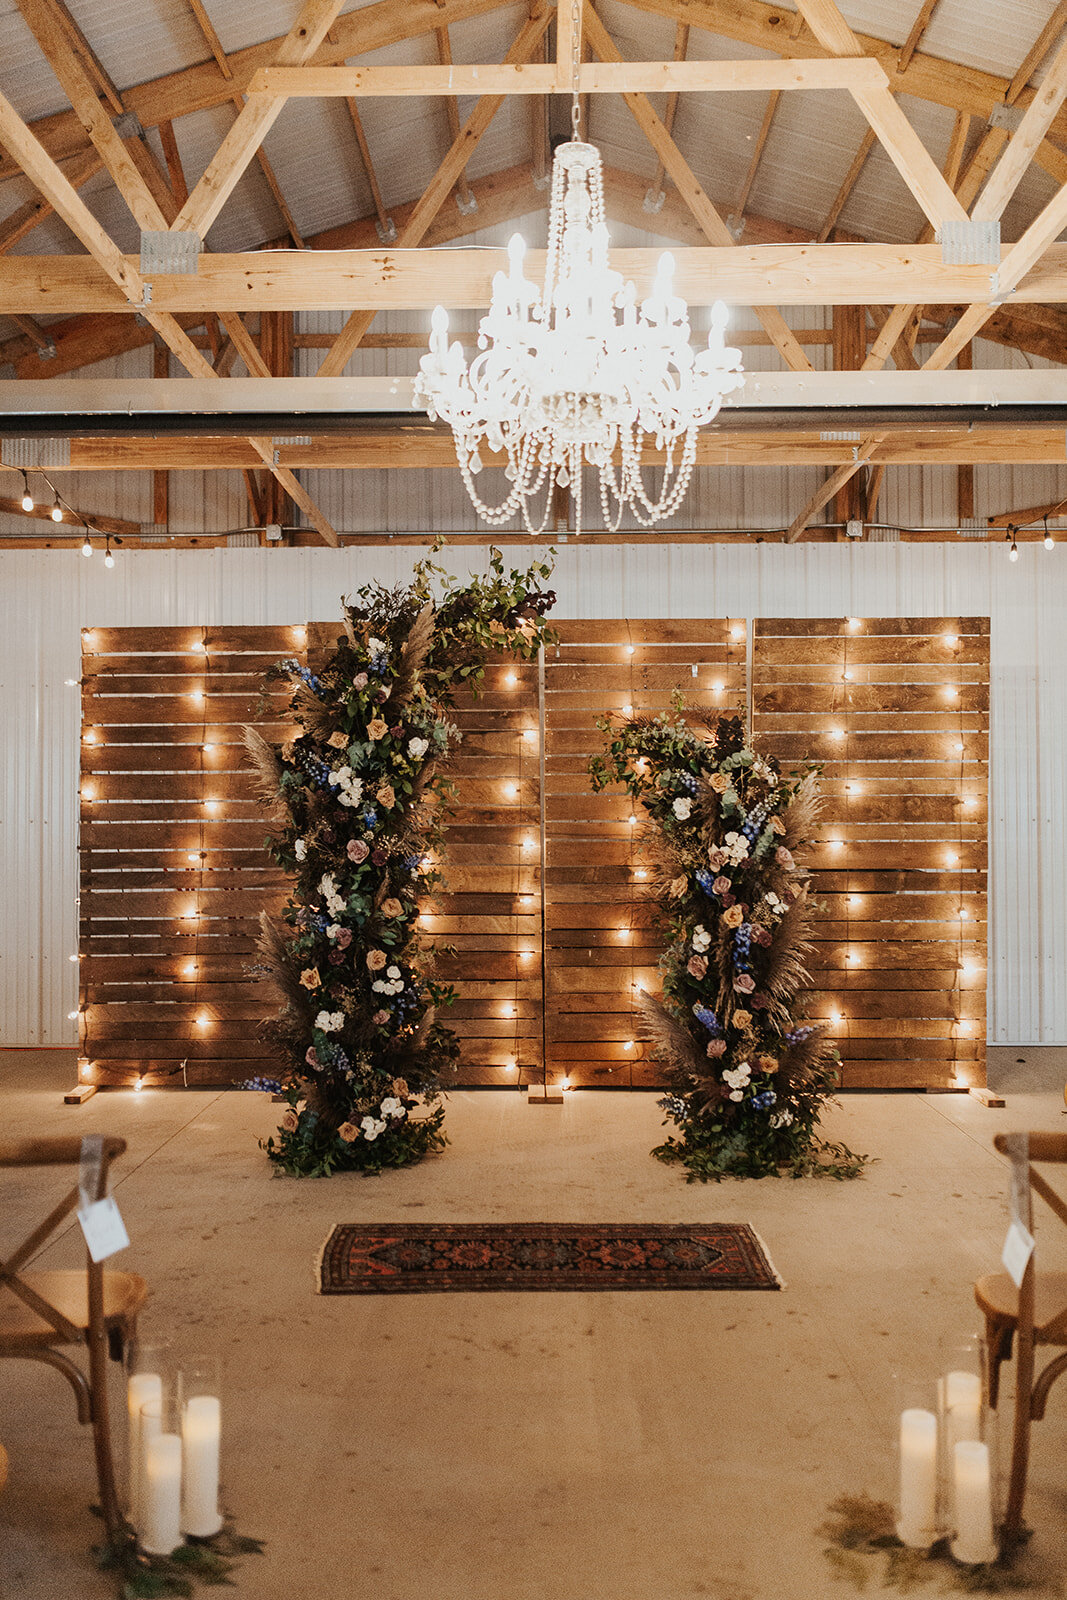
A picture-perfect wedding needs the perfect frame, and a custom floating wedding arbor is a great way to anchor the ceremony aisle and ensure all eyes are on the bride and groom. Given its mobility, your client’s investment in a floating arbor goes further as it can be moved and repurposed after the ceremony for photo backdrops, sweetheart tables, and more! This is a great selling point for couples who may shy away from larger investment pieces.
In this article, you’ll learn how to build a base structure for your floating arbor and the mechanics behind a foam-free floral design.
Building a Solid Base Structure for Your Floating Arbor
For your design, you’ll need a few basic supplies that you can easily find at your local hardware store.
Supply List for Arbor Base

3/4” plywood
1 1/4” wood dowels
Cast iron plumbing fixtures (floor flange and 1 1/2” diameter, 4” height threaded nipple)
Wood glue
1 1/4” bolts and locknuts
Drill and a saw
Ceramic tile piece
Stain and black spray paint (if desired)

Steps for Building Your Base
Step 1: Start by choosing the height of your wood dowels. In this particular design, a seven and five-foot dowel were used to achieve an asymmetrical look.
You can easily swap out different length dowels to create several unique looks. Staining the dowels help give the structure a more polished look in case any were to show through, or if you’re opting for a lighter, airier aesthetic. Copper pipes can also be used.
Step 2: Construct the base for the dowels. For the base, cut the piece of plywood down to roughly a 16” x 16” piece. Cut 4 smaller 4” squares and glue them to each corner of the larger plywood base to create feet.
Attach the spray-painted floor flange to the top side of the base, followed by screwing the nipple down into the flange. The dowels then slide snuggly into the threaded nipple with no additional security needed. The best part? They can easily be removed and swapped out for different length dowels depending on the design!
Step 3: Add weight with the ceramic tile. For additional security, glue a piece of ceramic tile to the bottom of the base to give the overall structure more weight. Sandbags can also be placed on top of the base before designing if the structure will be outside and subject to inclement or windy weather.
Gather Materials for Your Foam-Free Floral Mechanics
Now that you’ve built the base for your foam-free arbor, you can plan your design. First, you’ll need a few basic floral supplies to attach florals to your base.

Supplies Needed for Foam-Free Wedding Arbor
Chicken wire
Zip ties
Water picks
Paper wrapped wire
Clippers and wire cutters
Ladder
Tarp for clean up
Steps for Securing Florals to the Wedding Arbor
Step 1: Start by wrapping a “tube” of chicken wire around the dowel. Zip tie the chicken wire onto itself as well as to the dowel in a few places.
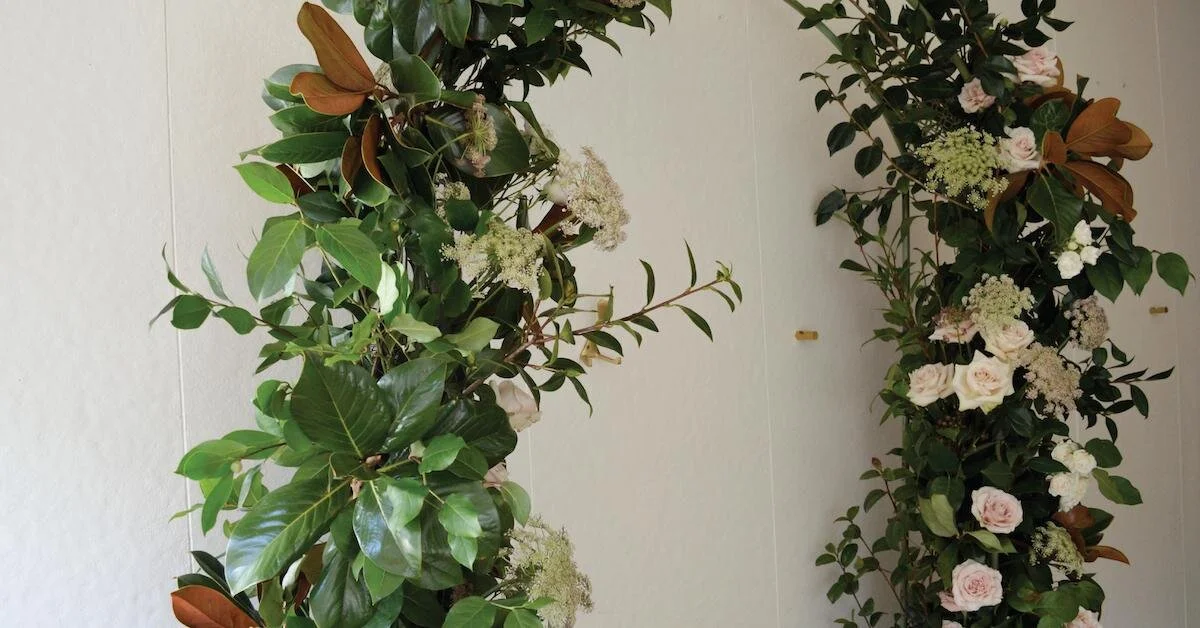
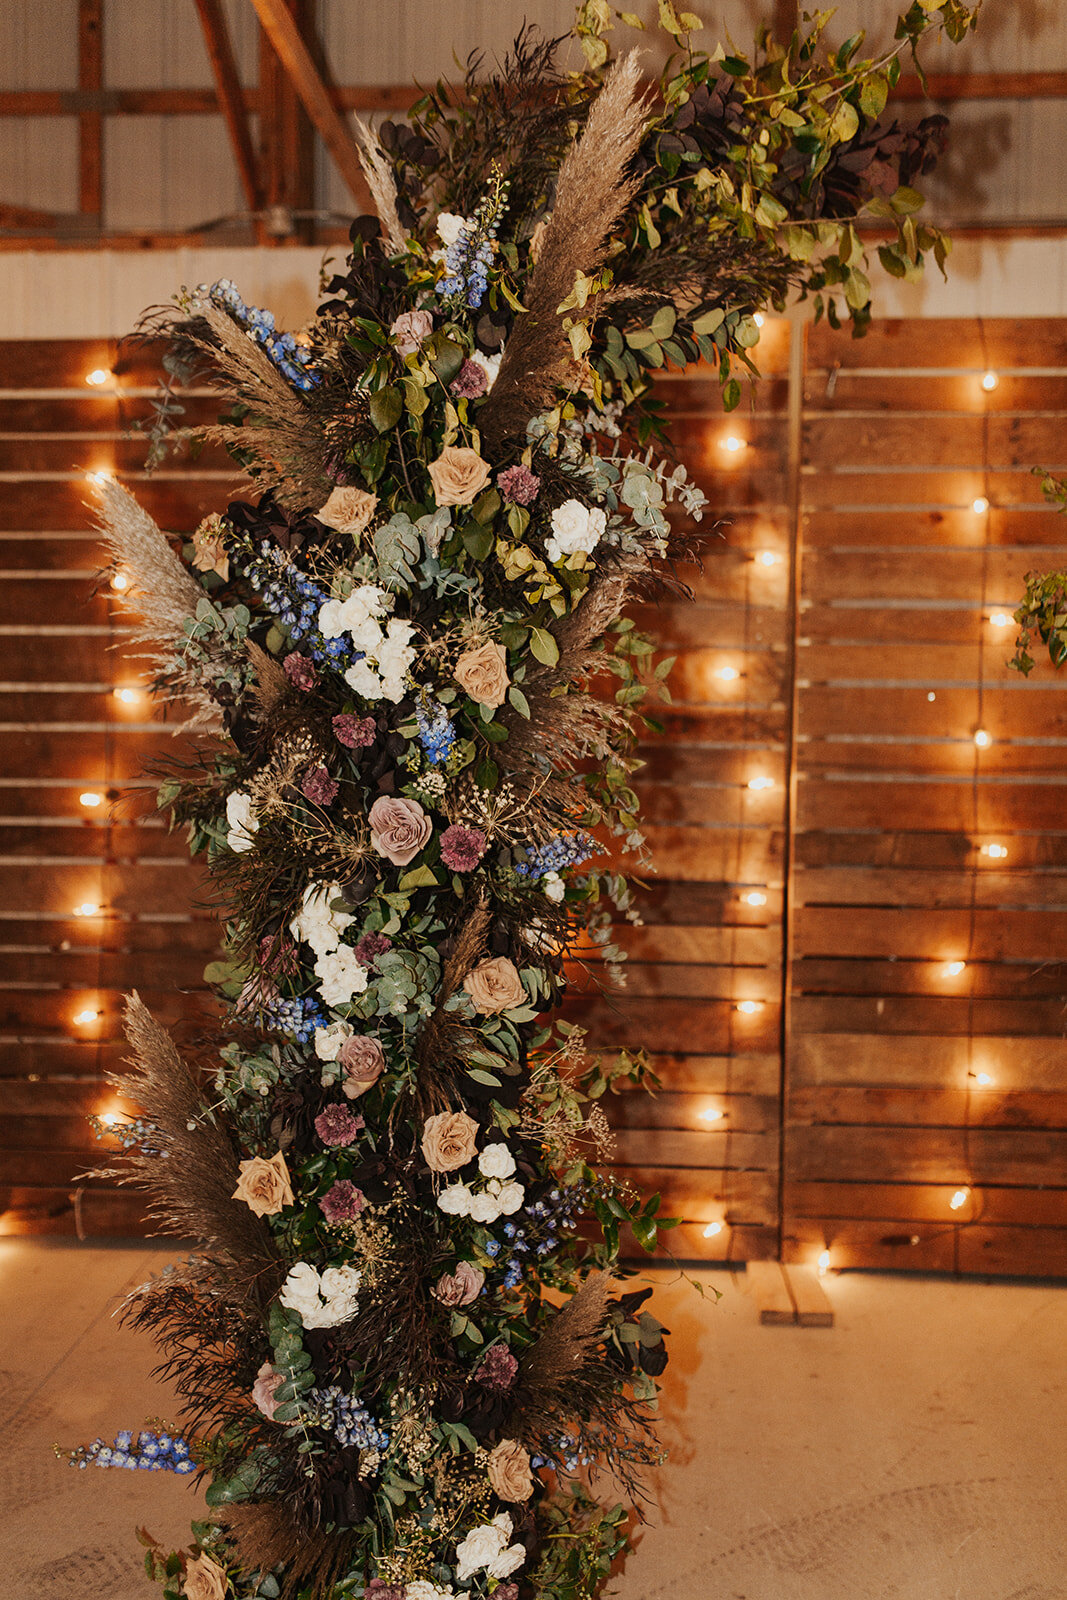
Step 2: Once you have the chicken wire in place, insert several leafy branches or stick material into the wire tube. This helps give the design a sturdy base that other stems can lock into. Be very intentional about the placement of the branches at the top as they will help create the implied arch shape.
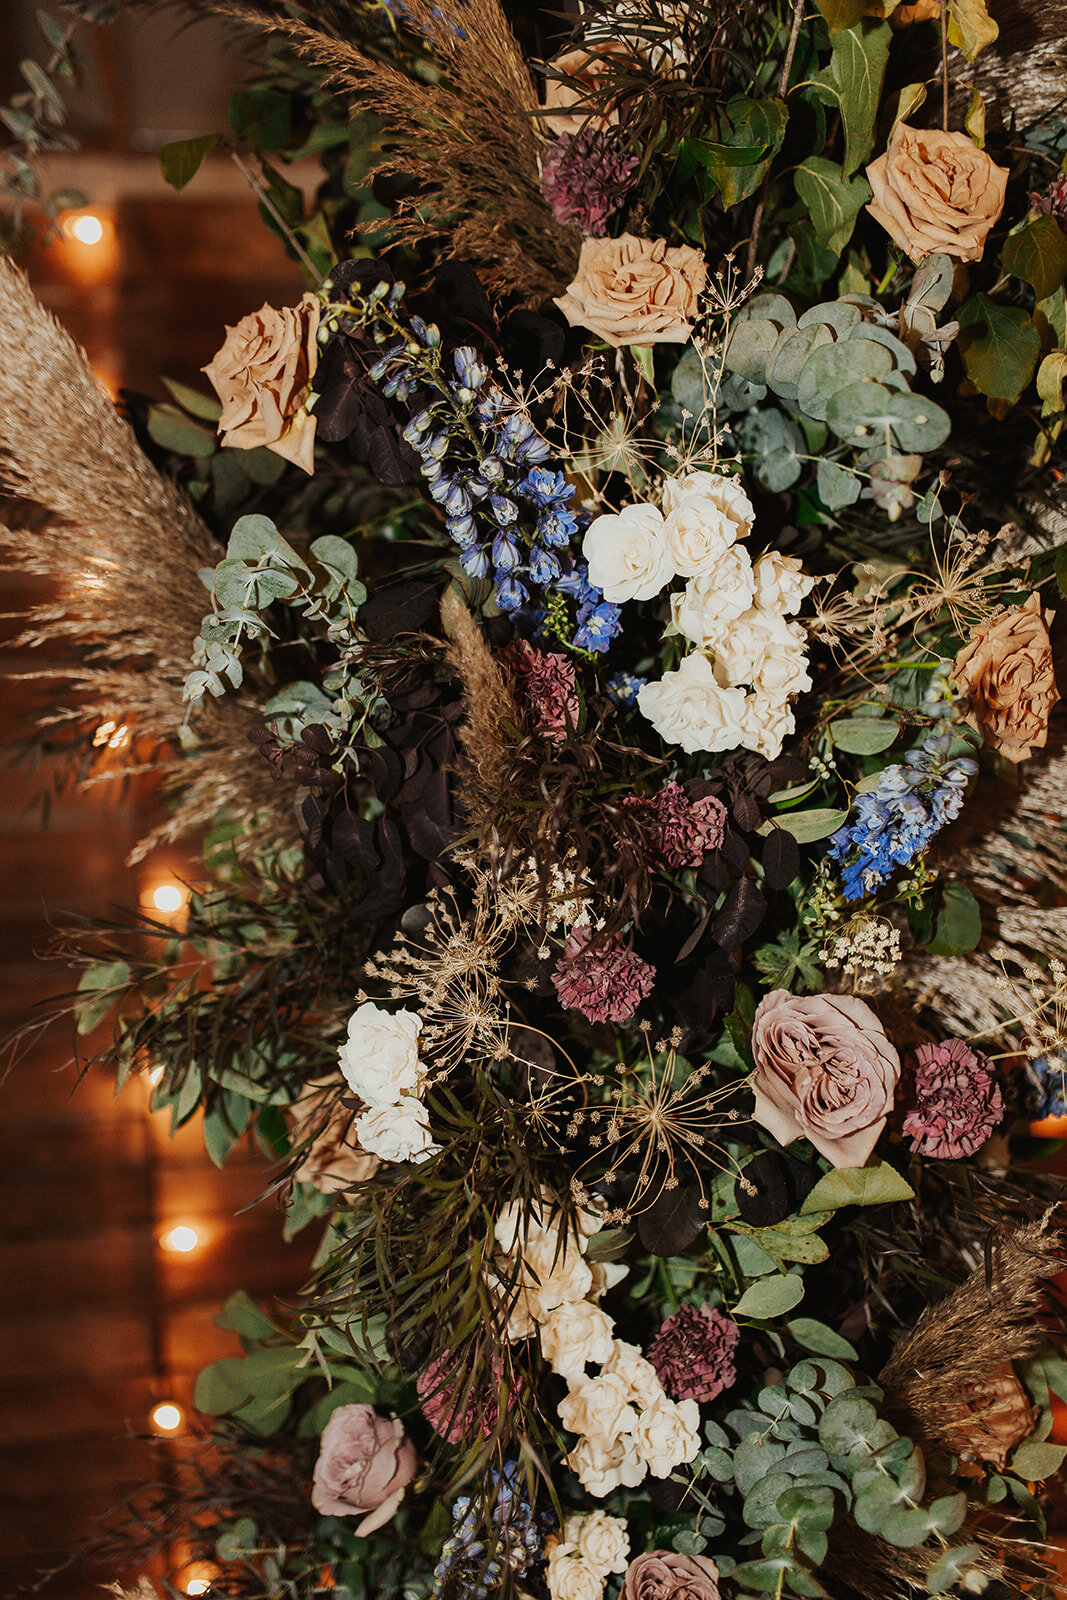
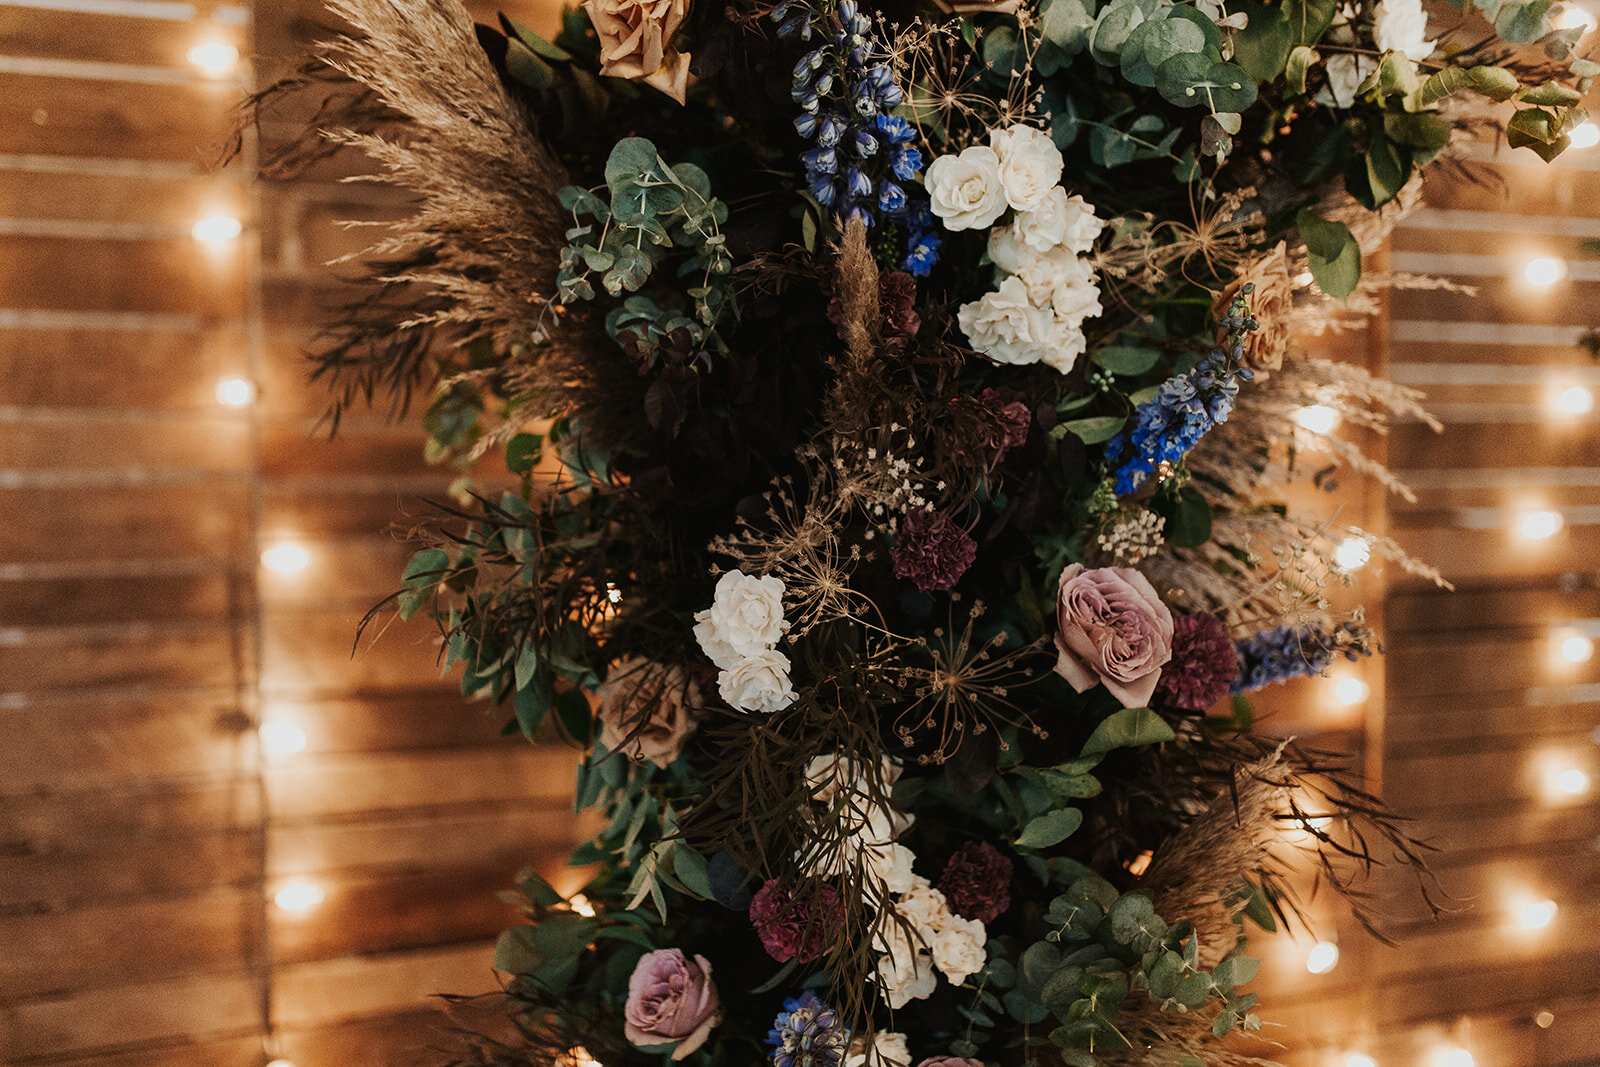
Step 3: After your branches are in place, start by adding in greenery using paper wrapped wire or zip ties to secure it to the dowel. For this particular design, smilax helped with the initial coverage, and then additional greenery was added to create fullness, including eucalyptus, agonis, smokebush, and pampas grass.


Step 4: Lastly, place water picks on each bloom and insert them into the design. For stems like delphinium and carnations, water tubes weren’t necessary given it was a cool, fall day, and the arbor was inside. Remember, adding water picks to each bloom takes time. Plan ahead!
As you’re designing, it helps to have one person on the ladder inserting stems, one person handing materials up, and another who can step back and review the work in progress to help guide it to the finish line.

Katy Rose Photo
Floral IngredientS Used for This Foam-Free Arbor
For this particular design, the following materials were used. This covered both the front and the back of the arbor and was a full design. Therefore, fewer materials could be used to create an airier aesthetic.
3/4 bag of smilax
15 stems of pampas grass
4–5 bunches of baby blue eucalyptus
3–4 bunches of agonis
120 stems of Dutch smokebush
15–20 stems of toffee roses
25 stems of carnations
15 stems of delphinium
20 stems of white majolica spray roses
12–15 stems of cafe latte roses
20 stems of dried Queen Anne’s lace
10–12 foraged branches or sticks (curly willow is another option if you can’t forage)
Large installations can be intimidating, especially when it comes to the mechanics behind them. But once you take the leap and create a few, you might just come to love them!
Katy Rose Photo