Floral designers Emily and Angie from Bloom Babes are joining us on the Team Flower Podcast! They’re talking with us about working in a partnership, floral installations, designing with silk flowers, and more!
All tagged installation
Floral designers Emily and Angie from Bloom Babes are joining us on the Team Flower Podcast! They’re talking with us about working in a partnership, floral installations, designing with silk flowers, and more!
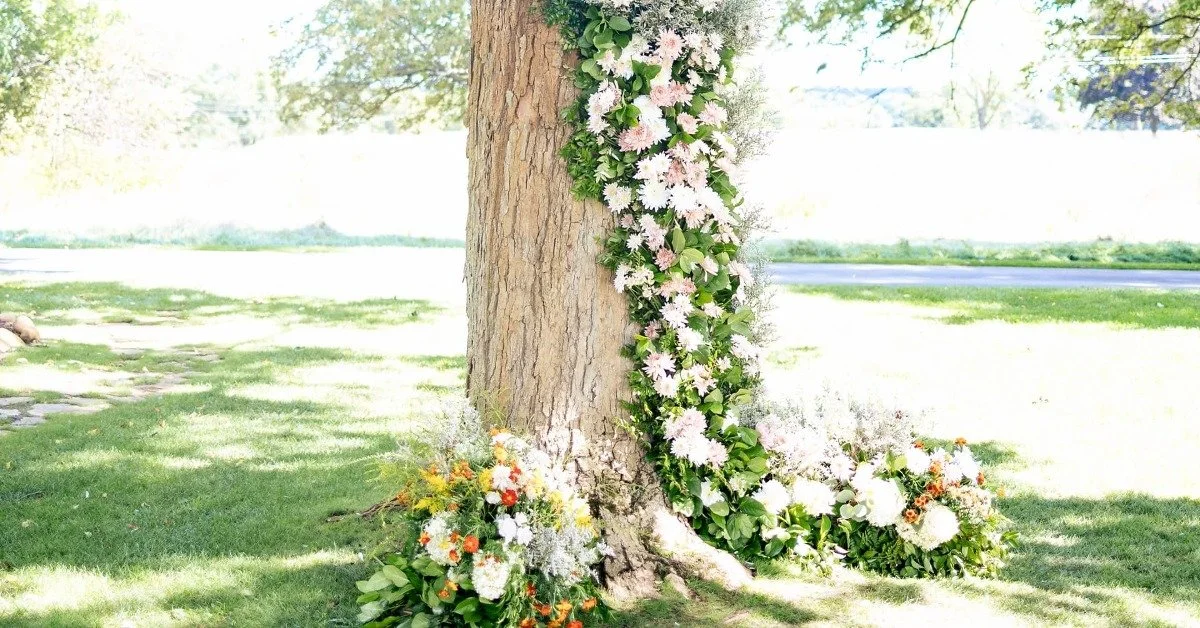
See how to create a foam-free tree installation step by step!
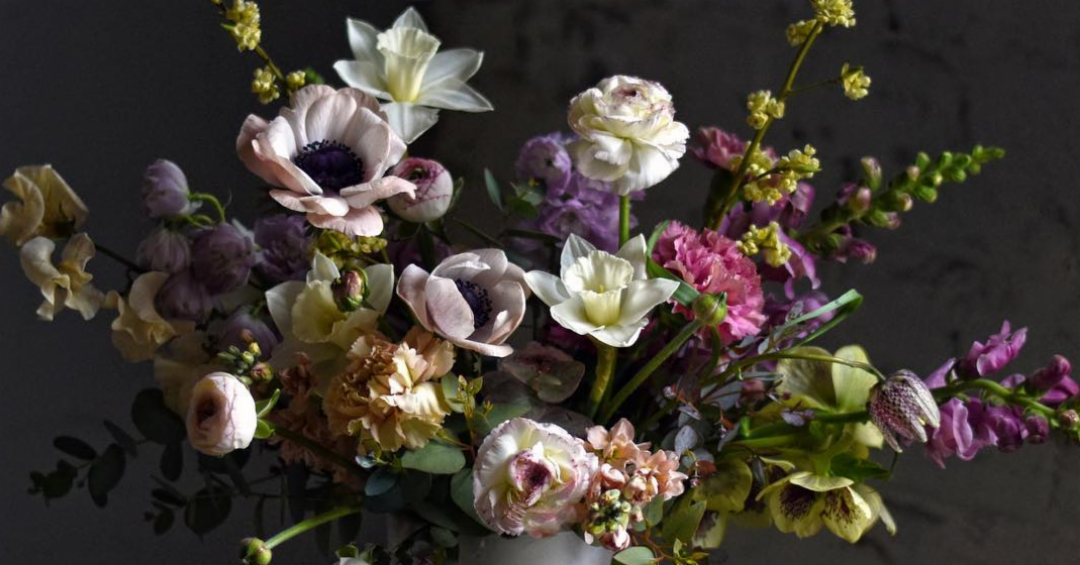
Have you ever had a bride send over an image of greenery sprawled on a wall and think “How on earth do I do that?” In this article, you’ll learn how to create and hang these masterpieces. Courtney shares her tips, tricks, and toolkit for building some unforgettable greenery displays on a variety of surfaces.
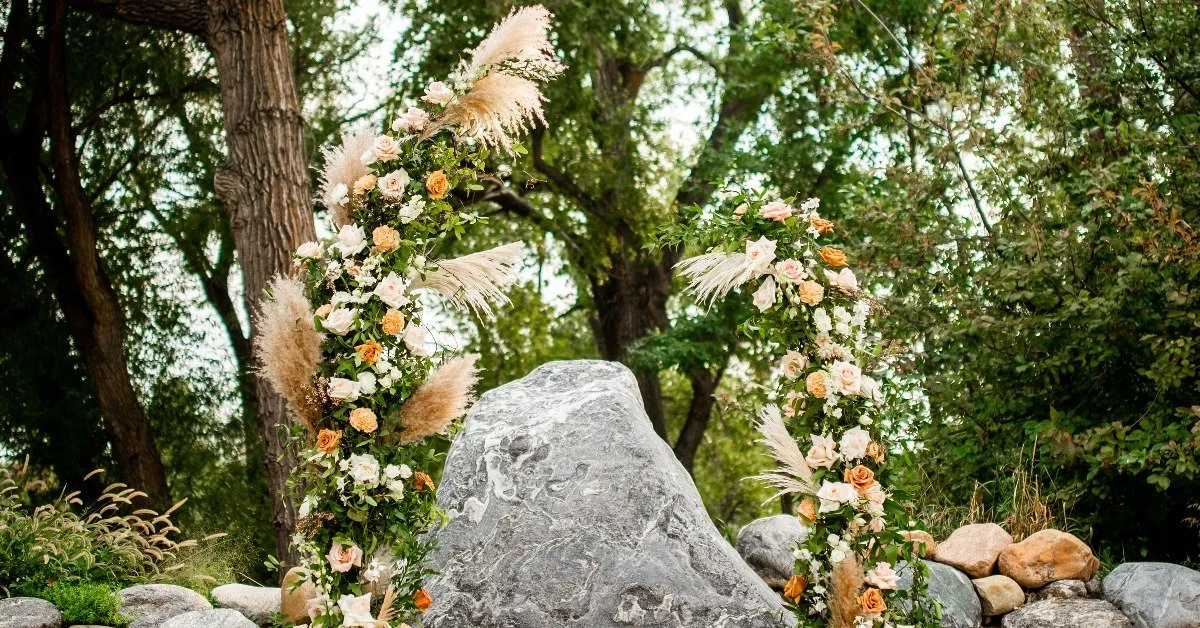
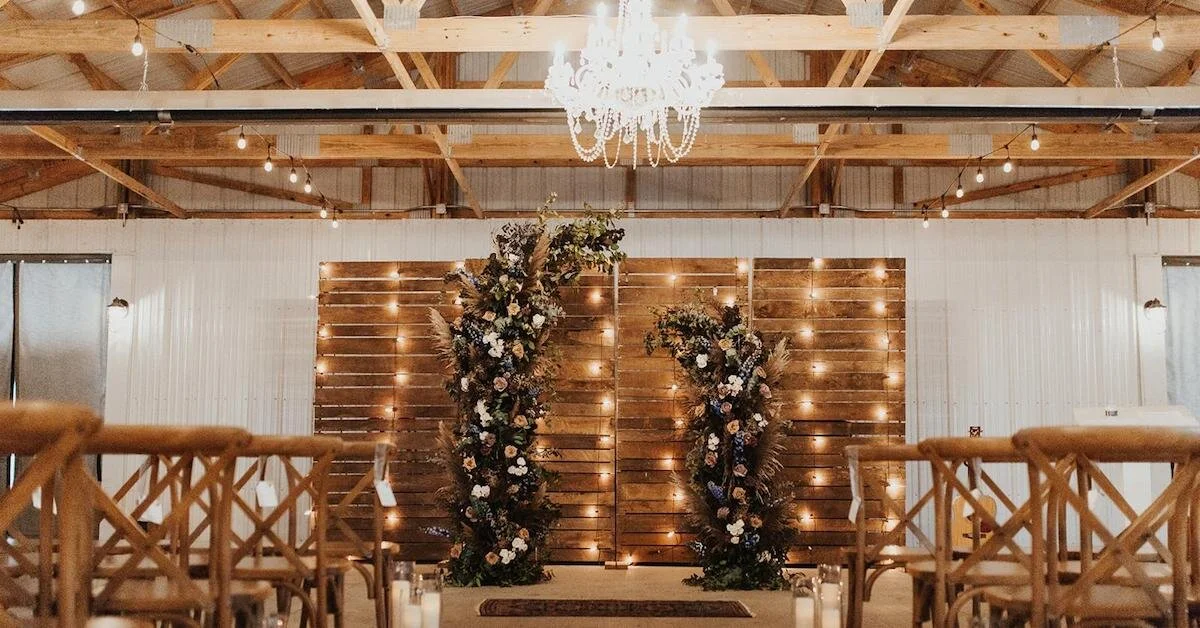
Learn how to create a free-standing invisible arch in this guide. Photos, steps, and a detailed floral ingredient list are included!
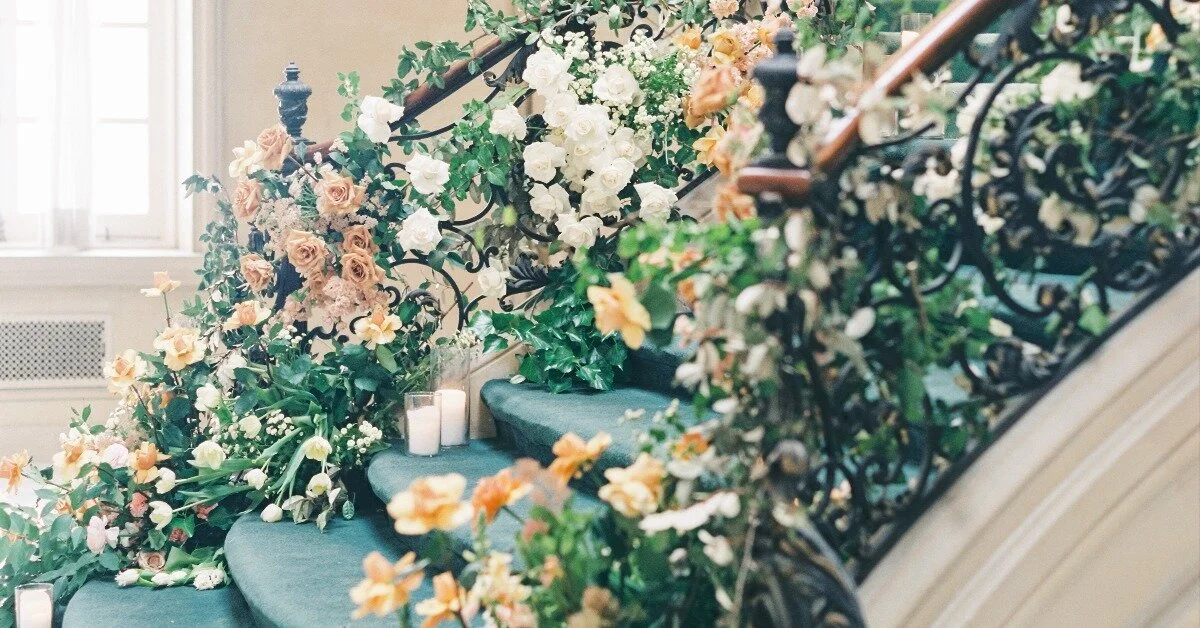
Lidia from Twisted Willow Flowers joins Kelly Perry on this episode of the Team Flower Podcast. This episode is full of various floral industry tips and tricks. You’ll hear from them about flower delivery, flowers and mechanics for installations, creating staircase installs, their go-to greenery, and more!
They’re the floral arrangements in every luxe wedding photo. You know the ones: gorgeously tall floral centerpieces. In this article, floral designer Gerry Rogers takes the mystery out of the set up, supplies, and steps needed to create these stunning pieces.
Hanging greenery overhead to hide the top of a tent is a request that is made quite often in the event industry. In this video, I’m sharing some tips as well as a few different types of foliage (as alternatives to smilax) that you can use to make a tent space feel like a botanical garden.
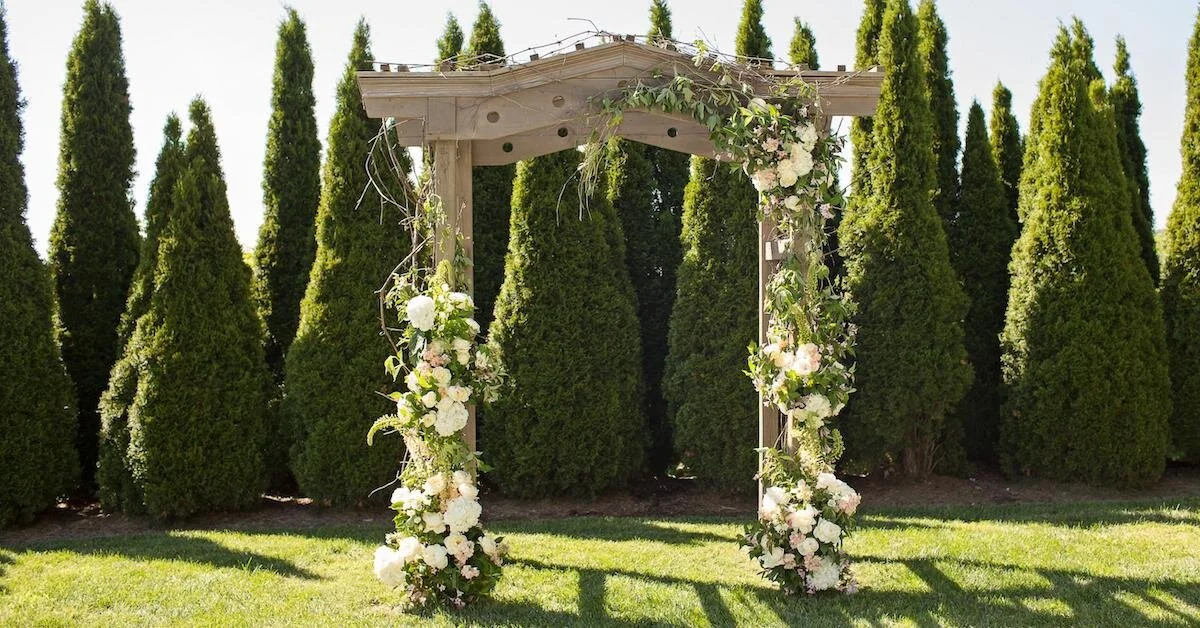
Large floral installations can be intimidating, especially when it comes to the mechanics behind them. In this article, you’ll learn how to build a base structure for your floating arbor and the mechanics behind a foam-free floral design. This step by step guide to creating a foam-free floating wedding arbor shows you large installations can be more straightforward that you might imagine!
Danielle Hahn of Rose Story Farm (@rosestoryfarm) is joining us on this episode of the Team Flower Podcast! Rose Story Farm is located in a small rural farming community on California’s Central Coast. After starting in 1998 with 1000 rose bushes, the 15-acre farm has grown to be home to 30,000 bushes of over 300 varieties! Currently, the premiere boutique garden rose grower Rose Story Farm supplies floral designers nationwide with thousands of stems a week of consciously produced domestic garden roses that value scent, beauty, and the land and people that produce them.
Hanging wedding decorations overhead—whether they’re flowers, candles, lights, etc.—all seems to add a little bit of magic to an event space. I’ve discovered several tricks and tips specifically for hanging candles that I’d like to share with you!
Are you wondering how to create a floral installation? As a relative newbie into the floristry world, floral installations were a rather daunting concept to me. Like many florists, I started by perfecting smaller flower arrangements and working to themes, focusing on table centres, ceremony pedestals, and hand-tied bouquets.
I’m designing on a windowsill using rocks and chicken wire. I love chicken wire! Not only is it moldable to various shapes, but it’s also a multi-use product (so you can use it more than once). I’m using dill and bupleurum as my base for this installation.
Like it or not, pampas grass is the Queen of Boho right now. From fresh feathery, ostrich-like stalks to dried, fluffy shedding-like-crazy stems, couples planning their wedding are into this look.
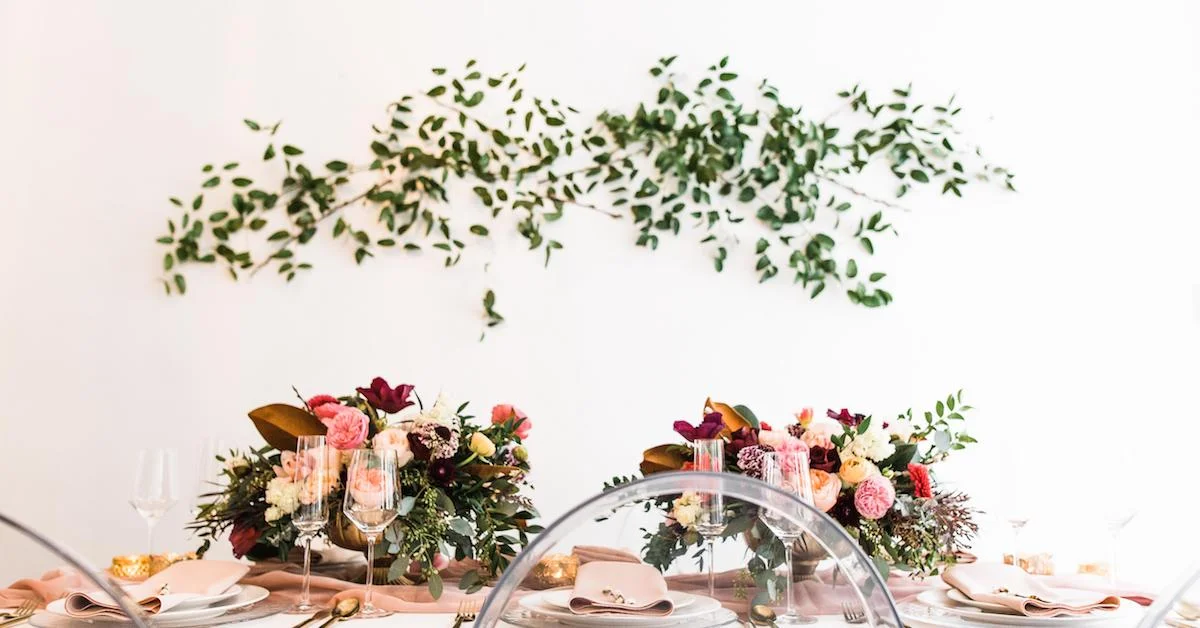
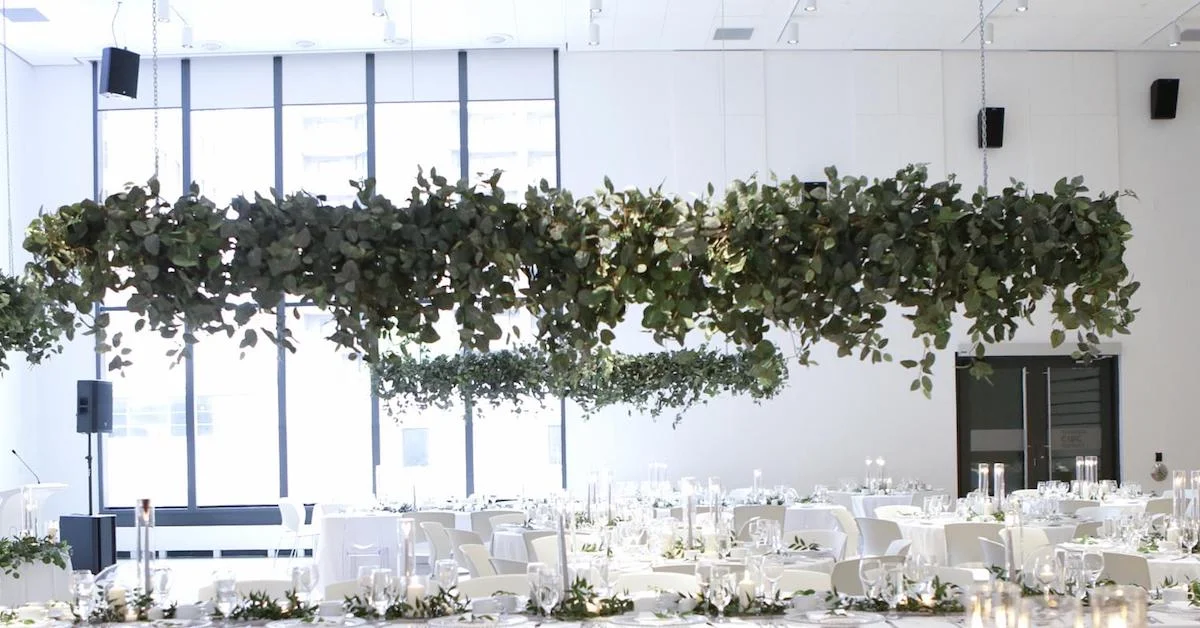
Who doesn’t love that dreamy look of hanging event and wedding flowers from the ceiling? I love creating floral arrangements for the ceiling. They’re so beautiful and can completely transform a space. They also tend to be creatively challenging! In this article, I’ll cover tips and steps to creating simple and elegant (and reusable!) floral ceiling installations.
Sue is sharing tips and mechanics on how to create foam-free floral design installations utilizing chicken wire and investing in a welder to create custom pieces for your collection. You’ll hear details about an install Sue is working on, as well as her inspiration and how it’s all coming together.
Jenn Sanchez is joining us on this episode of the Team Flower Podcast! Born and raised in Southern California, Jenn Sanchez is a floral designer with an affinity for strong emotive representation in design. She grew up with a paintbrush or pen always in hand, and she hoped to pursue a career in the arts yet fell into florals in 2010 shortly after high school. As an unexpected medium of expression, flowers have given a sought-out tangibility to her work. Using dramatic gestures and a compelling use of color, she seeks the balance of the familiar and the unexpected with each new client. Jenn is also a speaker at the 2020 Team Flower Conference in Pasadena!
With an ever-increasing installation trend in weddings and event work, as well as the emphasis on foam-free floral designs, I was eager to figure out a way to create a ground installation, or living meadow, with foam-free mechanics that offered flexibility in multiple installation scenarios. There are so many options for foam-free installation mechanics out there, but this is the method that worked well for me. Hopefully, you will find it useful—or maybe it will provide you with a starting point for additional foam-free floral designs!
Foam-free floral design installations are all the rage in the floral industry, and there are countless resources that give advice for the mechanics of these designs. But what about the flowers and greens? What if you’re unable to give them a water source?
Should you do mock-ups when in the consultation process with a client? It's a popular question and Kelly weighs the pros and cons in this video. She'll also share how you can use a mock-up internally to help in the process, even if you never show it to the client.
Transcript
We're here today to talk about mockups. Mockups are something that occasionally clients will ask for. Sometimes clients, depending on your business model and who you are serving, they may ask for them frequently. It might be something that you already offer or include in your packages. It might be something that you don't and you're wondering how can I handle this? When is it a great time to do a mock-up? When is it really not a great idea to do a mock-up?
So I think that what we're looking at here today is for an event that's happening later this month. And while it's really difficult to copy something exactly, this is a really great way for me just to get an idea of how much time it's going to take to complete the project. An idea for this piece, in particular, it's being suspended from a tent ceiling. So I wanted to have a general idea of how much it will weigh so that our rigging and all of those kinds of things are safe and and thorough.
I also wanted just to test and see how full things could get. The ingredients that I'm using are a little bit different than the photos that the client and I had reviewed and looked at together. So I just wanted to take a peek and see, well, can we actually maximize their budget by just adjusting some of the flower varieties, choosing things that open wider than maybe what was pictured.
So this event is a larger scale event. And whenever I'm doing something that is bigger, it's great to get those recipes down perfectly. Because if you overshoot, you overshoot by quite a lot. If you undershoot, you undershoot by quite a lot. So in this case, for me, it's really helpful to get an idea of exactly what these things could look like.
So I had some flowers left from the wedding that we did previously. And whenever I'm experimenting and putting things together, a lot of times after a wedding's over if there's flowers that they didn't want to use or that were being discarded, I'll just pull them together and put together just a quick little mock-up.
This was something that I haven't had a need to do before. So I wanted just to test it out and see so that I felt really great about it. It's a win-win, because now I know how many people I want on the project and I know exactly where the Oasis will go and just a little tweaks that can make that will make things so much easier on event day.
Something that I noticed when I was putting my pieces together for this one was that the candles that I had chosen, even though I bought the holders and the candles from the same place, they don't fit into the holders properly. So now I know I can save a lot of time on event day by just taking some Saran Wrap now and wrapping that around the base of the candle. And then this gives us some stick and a little extra body whenever it goes into the candle holder. So you just get that tidied up. And now it fits down in there and there's no wobbling around. It's a nice, easy little fix.
I also took note that I wanted to have some flat leaves that went underneath each of these candle holders. So that just in the event that there was some wax that dripped, I want to keep that away from linens as much as possible. So I'm just going to underlay each place that there's a candle with the foliages.
One more a little candle tip that I picked up somewhere from a friend, but I thought oh goodness, I'm going to get out those white gloves. That's a great way to save some time and to up the ante a little bit. But back in the day I was little tea party queen. And so I have all these fancy little white gloves.
And these I see at antique shops all the time. And I'm sure you can get them. I'm sure you can also just get them on Amazon.
But now whenever you're pulling these glass hurricanes out of boxes and putting them into place and maybe you see fingerprints or a smudge or something, right here, you don't have to carry around a bottle of Windex. You can smooth them and take care of it right there. So you're avoiding getting fingerprints on your glass in the first place. And then, if you happen to see a little smudge or something that you want to clean up, you can just take care of it with your magic gloves. So those are a few things there.
I'm going to go ahead and take apart this so that you can see the behind the scenes of what's together. It's not perfectly manicured and put together since it is a mock-up. I just did like the front half of everything. And then I can easily multiply. So that's a way to save some costs if you did want to mock something up.
Another little tip like these things here, once they come out, then they can go in and they can test out fullness for another type of arrangement for an arbor or something like that. So you can really reuse, reuse, reuse and get a great idea of what the pieces will look like for the full event
And it's also a great opportunity to snap some photos for your Instagram or some other things that could be helpful to grow your business. Maybe after it's all apart, you want to take some of these things apart and donate them to the hospital or you want to take them to a local business with your card or something like that. So there's a lot of ways to use and to make the most of these blooms even if they aren't being sold. You can use it in some of those ways as well.
So what I've done here, whenever I do the actual event, I'll have some pre-made garland coming in, just a base that will go the whole way down the table. For today, I was pulling some things out of the yard that I could use, again to save costs on the mock-up.
So I am going to show you. What I have here is a little block of Oasis wrapped in chicken wire. And I have all of my flowers for the garland tucked in here. And then I'll also do a little bit of foliage in here on event day.
So this piece I'll be able to make an advance. And then whenever I arrive on site, I can take my garland, have it run down the tables and then just simply attach each of these little blocks of flowers. They're all in water and ready to go. So that makes for a really quick and easy install.
But what I have done just for the mock-up here is I have taken just bundles of foliage like this. And I've wired them together. And I've laid them down the length of the table to get that garland base. And the ingredients that are in here, I have some forsythia, oregonia and oak leaves is what I had pulled for that. So that's same thing that's happening here. Just multiplied down there, down the side of the table.
Now let's talk about what's going on up here in terms of mechanics and what this looks like. Whenever the event is actually taking place, there is a custom box that the rental company has built that is 32 feet long by 16 inches deep. And the most similar thing to that I have available to me is a simple lattice from the hardware store. So we'll take this apart so you can see what's in there.
Let me just get rid of these little glass pieces. And I'll be right back.
All right. I'm back to pull this apart. Here is my trusty StepRight ladder by Werner. This is my favorite ladder. It looks so rough because it's been loved so well. But there's a little spot here you can put a little mini bucket to have your zip-ties, and your scissors, and all those kinds of things in. And the steps really wide. So it's nice whenever you get up onto the top step, you have like room to work.
So I'm going to pull this apart just in the reverse order of how I put it together. My finishing foliage in this arrangement was the smilax. And I did smilax in the beginning and in the end. So I weaved it through the arrangement right there at the end to soften things a bit. So I'm just going to pull that out so you know that that was in and that came out.
And then the next thing that I had, reverse order, so the last after that what I put in was a bunch of spray roses. I did a few at the end and a few at the beginning. So it's really nice to have a base and to get that color spread out among the length of the piece. And then it's nice to also go in there and like finish it with a couple ones that come out even further than the main focal point roses, just to soften it a little bit. So I'm going to pull a couple of those out.
OK. Next thing. These roses, I used two varieties, quicksand and wedding spirit. And I put in quick sand first. I made a little line with them. And then I followed them. So each little area had a little pair like this that followed along in the line just to add some fullness, body, different shape. And I really love how those two color tones work together. So I like that a lot.
These wedding spirits, if you give them just a little bit of help, they can open to be really gigantic. So this is easy to do whenever they're a little bit older, softer. And the pedals need to be moisturized. So a little crowning glory or a spritz of water on top makes it easy. And just gentle, gentle hands so that they aren't bruising.
Can't do it with every variety of rose. But I mean hello, look at that. This is our little before was. So you can see that really makes a gigantic difference.
So I had like a concentrated moment here, and then a little puff here a little puff here. And then on the table below, I had kind of a medium size that came down right in between these two to help puzzle piece the whole look together. Since they're going to be seen together. OK.
I have a couple that trailed down underneath. Also had a few dahlias in here, but those don't hold as well as the roses for something like this where I was using flowers for a couple of days. So they've gone on. They've had their moment.
And I wasn't real concerned about getting all of these into a water source. I will on the event day. There's a little piece of Oasis here. One in the center here that will be used for the top both front and back. And then there will be another little Oasis square back here.
So we have flowers that are concentrated that start here and go out. And then at the top, that's our way of getting things to come up, but to be centered and balance back in the middle. And then also to have room for a little couple of things to come out under here.
So just like whenever you're doing a simple table arrangement, that physical balance is really important. So that's why we have Oasis, Oasis on the end, those two ends, and then one right in the middle. So we don't have like wonky weight happening.
And then some of these connector pieces that you saw in here. I might add just a tiny, tiny little piece of Oasis in here, or use little water picks. Or if it's happening like right away that day, and like those wedding spirit roses, and even the quicksand, they're so tough. They don't even necessarily need to be in a water source for that kind of event work where it's something that's happening.
As long as the pedals are moisturized, they do quite well out of water altogether. If you think about how they're shipped to you, dry. They are kept cold. But if they're well-hydrated before they go in, they've got time before they go down.
So I have two varieties of hydrangea in here. I have the little tardiva. You also will hear it called like quickfire or pink diamond, the cone-shaped, lacy hydrangea. And I have one here and here. And then a set of, there's technically four, and then this little guy was up just little bit higher. So there's five, six, seven. This is a nice way to get some texture into the arrangement and to start building color out to the side. So that's the function of this piece. I love this ingredient. Take it big, take it little.
If you're looking for some things to plant at your house or to have in a cutting garden, I think this is a really great investment. They're not an inexpensive plant, but they give a lot. And they can be used in a lot of different ways.
Forsythia, that you see in here as well, this is another great one. This can, late in the season, does really well out of water. So none of the forsythia that you see here, this has been used and in and out of water for a week now. So it's very hardy. We also have this southern smilax which is great out of water as well.
These are a little limelight hydrangeas. And by little, I mean they're actually quite large. This is one of the things I keep both of these kinds of hydrangeas in the garden. But these can get even bigger than this. And you can cut them apart and use the top in one place and the bottom in another place. Great coverage. OK.
Got all the flowers out, that second round of spray rose I had mentioned. I'll take the smilax out. And this I have weaved among the lattice to stay in there. And it's great because it creates a net, all of the vines, and moving around it, creates a net and adds support to the arrangement. So whenever you are using water tubes, and that kind of thing, the flowers have a place to stick and to live.
I think Jesse's grabbing this back side. So you can see how the back I didn't finish that out, but I'll just multiply by two to get my weight and to get my flower quantities. OK.
Last thing is the forsythia that I have in here. It is zip-tied and tucked into Oasis. So bundled it up and just zipped it right on there. All right. Off because that Oasis piece. This one I had secured in three spots so it wouldn't twist on me.
There you have it, the little lattice piece that we created everything on. So maybe you don't have little stands like this. These were something that we had dad put together for me for a friend's wedding long, long time ago. Ah, man. How long have they been married? Probably 8 or 10 years now. Anyway.
So if you don't have that, another thing you could do is just set up two tables. And you could create it right here at this height. And you could have a table here and a table here to balance it out for you, saw horses, really anything that you can just suspend this on and to have a little flat place to work.
Now something I was thinking about whenever I put it together. I put it together as it would be so. I left it up here this way. And I did the top. And then I kind of crawled underneath a little bit and did the bottom. Depending on the design that you're eventually trying to get to, with this having some more drape foliage and that kind of thing on it, I think it was helpful to do it this way.
However, whenever I put the forsythia on next time, I think my preference would be to have it upside down and line the whole thing with forsythia and then flip it over and start doing my Oasis up here and adding in the forsythia coming down the sides and more of the shape of it. But for coverage, as I was doing it, I was like next time I'm going to flip that. I'm going to flip that over, cover the whole bottom so that that's all taken care of and covered in and then flip. If I did something like that again and was like picking up and delivering.
This all, since this isn't the structure that I'll be using or suspending from since we have another one that's coming in, all of that will be done on site. So we will be assembling it like right there in the air. It'll be hung at about chest height and we'll go from there starting with the forsythia and the smilax and working in the Oasis and the spray roses, and the regular roses, and back to the spray roses. And we'll have-- oh, and all of the hydrangea, of course, too, before the roses go in.
But anyway that's a little undo of the mock-up. And I hope you enjoyed it and it helps you whenever you're trying to decide, should I do a mock-up, should I not? Putting together a big piece, how should I go about that? Here's just a few ways that you could do that.
Just another quick word on mockups. I think that whenever you do anything in your business, it really does need to be win-win for you and for your clients to keep you in a place where it's sustainable and you're moving forward. If you started offering mockups every time and you did it for free, it would be helpful to you, it would be helpful to them. But your profit margins are going down. So that's kind of a minus one for your side of the thing. Now if they paid for it, then OK. Then there you go. So you get something that's working and that's moving around the whole way and that it works for both parties.
Every situation's a little bit different. I don't typically do mockups, but since this was a place that I'd never gone before on a scale I haven't, I thought it would be really helpful and wise just to invest a little bit on the front end. My client didn't ask for mockups, but she'll be excited to have them.
With timing on mockups, something that I think is a little bit of a risk, is showing somebody something the month of their wedding. I know that the flowers are probably a closer fit and all those kinds of things whenever you're doing it really close in. But if there's something that pops up, there's just a lot of stress going on. So they might be like oh, I hate everything. And you don't want to be in a place where you're like redoing everything. But actually if you showed up on event day and it was there, it would be fantastic.
So that's something to think about and just to gauge like is my client-- how is my client feeling right now? Is this something that's actually going to help them or will it make them doubt their decisions? Or will it make all of us feel great? So that's something to consider whenever you're thinking about if you want to offer it and the timing for that as well. So those are my thoughts. Thanks for watching. We'll see you soon.
On this episode of the Team Flower Podcast, we’re talking with Ingrid of Tin Can Studios. She is deeply passionate about sustainability in the floral industry and is sharing the various ways in which she practices this concept in her work. Ingrid is well-versed in creating large installations without flower foam, and she’s sharing a few practical tips for how others can do so as well. We’re talking about everything from water tubes to watermelons—you’ll be surprised at how creative you can be in sustainable mechanics!