Designing and Implementing a Tree Floral Installation
This past fall, we were asked to create a tree installation at a venue to be used as the backdrop for a wedding ceremony. Utilizing a tree as the structure for an installation was something we had never done before, so there wasn't an existing image of our work to share with our client. Note to the designer: If installations are a product you want to offer in your floral business, expect the unexpected! It is important to show the client what they can expect with installations. This also ensures no misunderstandings about what the client is expecting and what we can deliver.
Create a Drawn Mock-Up
Since we had never done this installation before, we had to start somewhere! The process began with creating a drawing on a free online graphic design website. There are many free options, and we've chosen to use the free version of Canva. This program took some time to learn, but it was worth it! Installations are an expensive add-on to a wedding, so we believe it is important to go above and beyond when communicating with customers about our vision for them. It is also a good opportunity for the customer to "see" what the product could look like and to allow for feedback and conversation regarding their installation piece.

This is the mock-up image we created for our clients.
If Possible, Conduct a Site Visit
We did a site visit to the ceremony location and took several images of the tree. The tree was also measured for width and to determine how tall the installation would be. Once we had this information along with the images, we uploaded the photos to Canva so that a sketch could be overlaid on the picture of the tree. Below is the image that we provided to the couple for their approval. Then, we were ready to roll!
Mechanics and flower choice
We are a foam-free and sustainable florist, so consideration was made for hardy flowers and foliage that do not require foam or water tubes for at least 7 hours. Team Flower, as well as other sources on Google, offer great options for hardy foliage and "waterless" flowers for installations. (Click here for a list of flowers that last out of water.) Of course, it is important to consider the color palette you are working with for the wedding. Luckily, we have access to a wholesaler, local farms, and our garden for blooms. Consider reaching out to local flower farms if this is something you have yet to do. Since it was Autumn, there were great options, especially with beautiful Cremons in blush colors and white! We also ordered Pompon Cushion Chrysanthemums and standard white Mondial roses. We used marigolds from our garden and grasses for added texture and interest. Limonium and Phlox also offered great color and filler. (Tip: These two products can last a long time out of water!) For foliage, Salal, Leatherleaf, and Huck were used. These foliages are bulletproof and can stand up to whatever is thrown at them in terms of heat, wind, and humidity.
The flowers were cut, leaves on the stems removed, and then well hydrated before the wedding day to ensure they were at their best performance. We do not own a floral cooler as we are a home-based studio, so keeping the water fresh and the flowers stored in a cool and dark place (our basement) was also important.
My husband and I planned on using the green-coated chicken wire as the base mechanic for this structure. We had already measured and photographed the tree, so we knew what we were working with. It was helpful that the tree had a rough bark because the chicken wire caught on many of those pieces and provided extra stability. Allow yourself extra time to build this (and any!) installation, so you are not rushed.
Floral Recipe
6 bunches of Leatherleaf Fern
12 bunches of Salal
14 bunches of Huck
80 stems of Chrysanthemum Disbud in Pink
80 stems of Chrysanthemum Disbud in White
50 white Mondial roses
10 bunches of white Limonium
14 bunches of Pompon Cushion Chrysanthemum
Homegrown Marigolds, Phlox, and Grasses for texture
Tools and supplies
Green-coated roll of chicken wire as the base mechanic
Heavy bind wire to secure the installation to the tree
Staple gun and staples to secure the installation to the tree (if necessary). These staples are pulled out post-event with needle nose pliers
All your well-hydrated and processed (all lower leaves and thorns removed) flowers and foliages
A toolbox with floral snips
Any other supplies you think you might need. Remember, over plan and overpack with your toolbox for installations!

Choosing flowers that lasted out of water was essential for our choice of mechanics.
The Installation Process
My engineer husband came up with this, and it worked extremely well for this application!
First up is to create two tubes 8-10 feet in length and 6-7" in width. Lay these two "sausages" next to one another and zip tied together (this was done at home days before so we would not have to take up time at the venue the day of). Secure the sausages to the tree. Next, place another layer of the coated chicken wire over the sausages and attach the two layers together by looping the cut chicken wire ends over the chicken wire below it. This creates a strong yet flexible, multiple-layer base mechanic for the installation. One of the beautiful things about chicken wire is that it is so flexible and pliable that it can easily be bent to whatever shape and design you want. This design was in a very "relaxed S" as we were looking for that natural way that vines climb up trees!
Next, we measured out a long length of the heavy bind wire, looped it through the multiple layers of the chicken wire around the tree's trunk, and secured it by twisting it together. This bind wire, along with the chicken wire catching on the tree's trunk, works very well! Another option is to use the staple gun and add a few extra staples for security. Remember to pull out these staples post-event. Using staples on a thick-barked tree, as was the case for this installation, was a viable option that did not harm the tree. However, using staples on a thin-barked or young tree is not recommended. In that case, the heavy bind wire at the top and mid-section of the tree would be sufficient. Take some time to pull on the mechanics to check for security and strength before proceeding with the next step of inserting the greenery and blooms.
Secure the hardy foliage (like Salal and Huckleberry) into the chicken wire throughout the installation. We decided to save the Leatherleaf for the lower base part of the installation. Next, add the blooms! In our install, Cremons, Roses, and Chrysanthemums all tumbled together to form a lush and ethereal look. The Limonium was saved for the last placement to add lightness and fill in any gaps in the installation.
Extra Arrangements
Our installation also featured two corner mini-installations to the left and right of the tree. While this was not necessary for the tree installation, I'm happy to explain how these sections were also made! Supplies needed for these corner sections were:
Recycled large salad greens tubs with the plastic lid removed (4)
Two thin pieces of plywood, each were 2' to 2 ½' in length by 1' in width
Green-coated chicken wire
Staple gun and staples

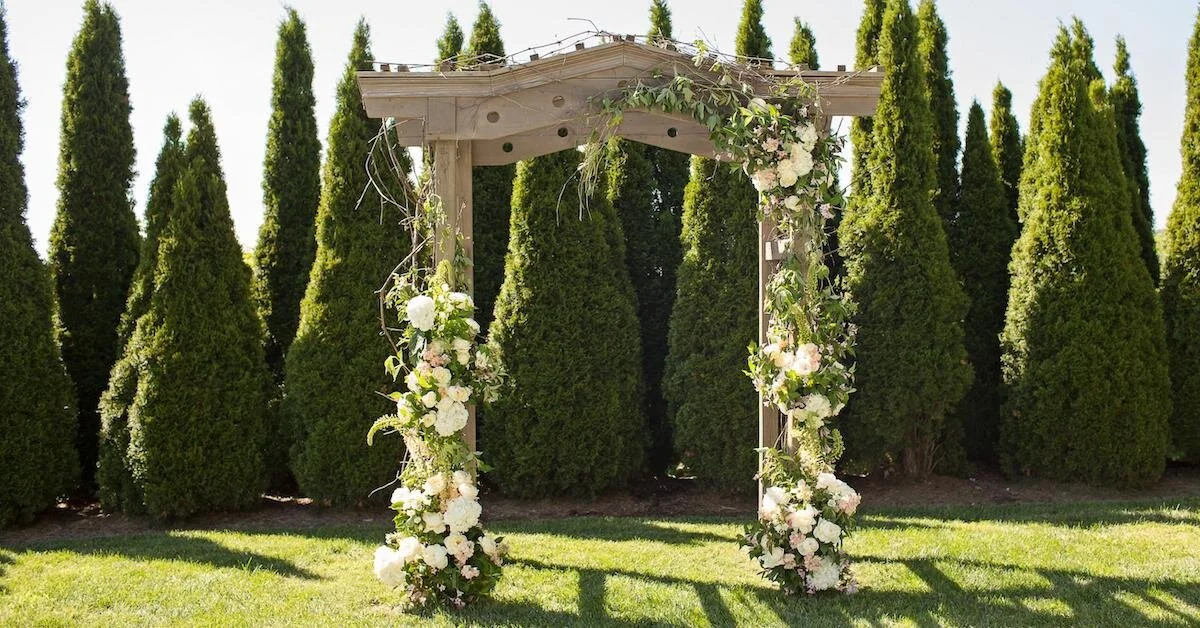
The two extra arrangements really completed the look for the ceremony site.
These two corner installations were created by placing one salad tub inside the other for extra stability and then securing these tubs to a section of the plywood using the staple gun. Next, fill the plastic tub with chicken wire and then finish the whole piece by wrapping another piece of chicken wire over the entire setup. Consider that these tubs could also be filled with fresh water if you want to use more delicate flowers or do not perform well without hydration. These mini-side installations should also be also greened with foliage and then completed with hardy and reliable flowers. Finally, spray the entire installation with fresh cool water and Crowning Glory.
The flowers held up incredibly well for our installation, and it was an 84-degree day with low humidity. We were able to repurpose almost all the flowers into small bunches that were given away in our neighborhood as a "flower flash." The flower flash was posted on our neighborhood FaceBook page along with a picture of the installation, so it was a good opportunity for free publicity! AND, every bunch was picked up, so it was a win-win! No waste and no need to even compost any of the ingredients.
Tips on Pricing
For pricing, we used a 3x markup for the floral product. Don't forget your hardware items like the chicken wire and the bind wire, for which we use a 2x markup. Also, it is essential to add a design fee for this type of work and the setup and strike/take down fee. It took my husband and me 3 hours to complete this installation, so six total hours. It is always a slower process the first time doing something new, so be patient with yourself and, as mentioned before, try to leave as much time as possible for the construction and setup.
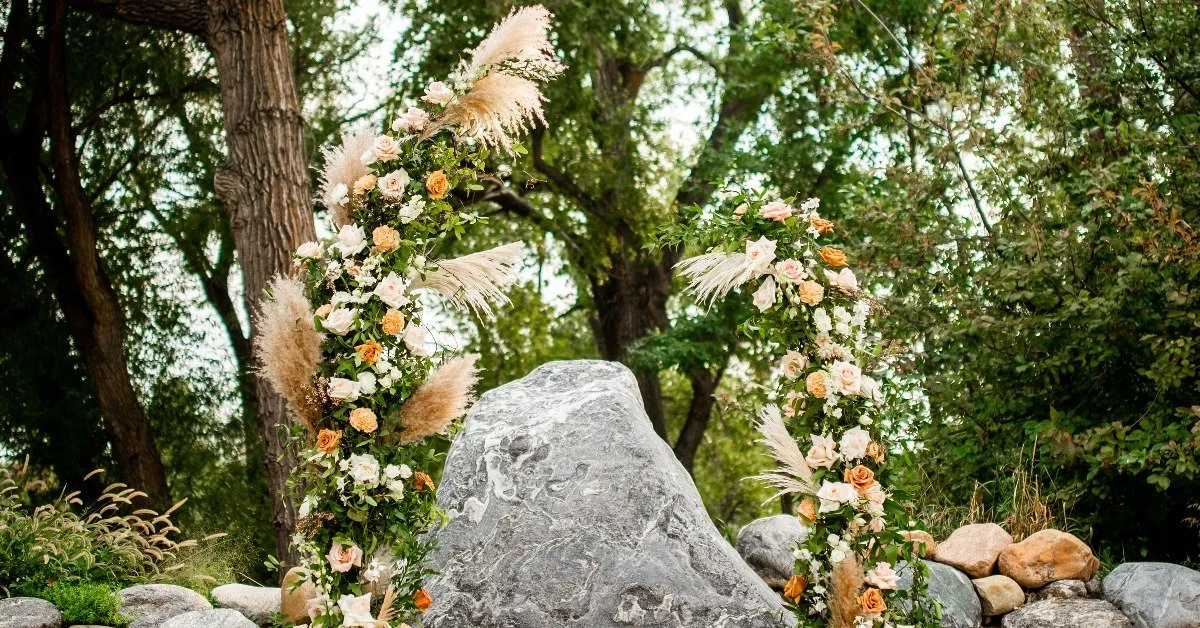
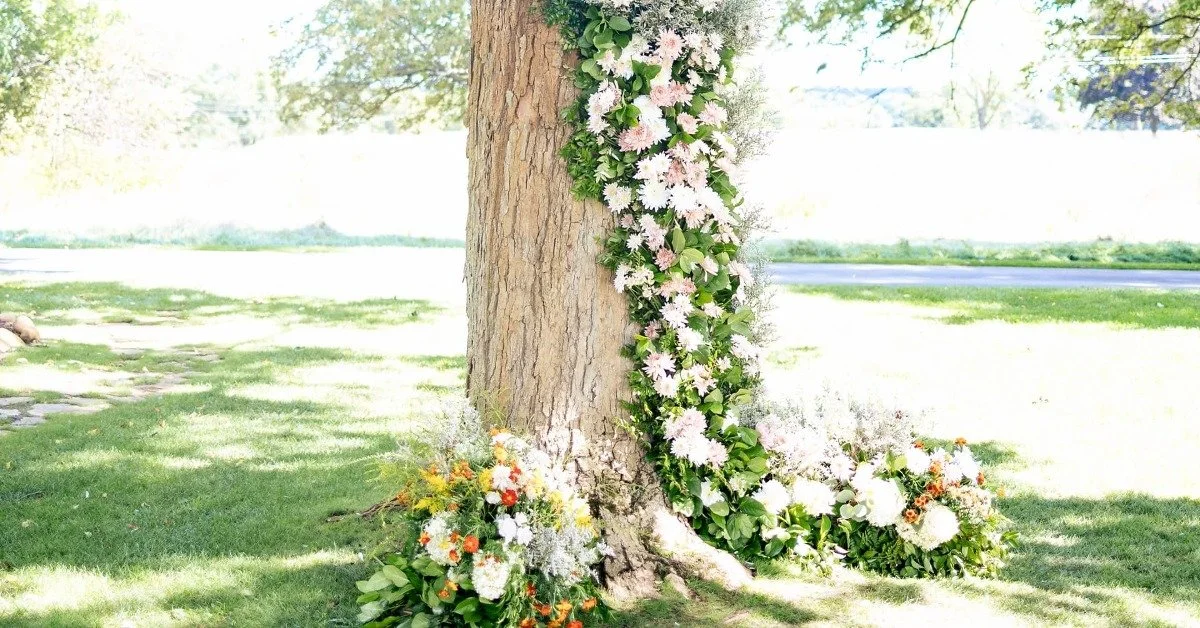
Below is an image of the completed tree installation. I hope you go out and try it for your own business! Keep on blooming!