Learning the Art of Floral Installation Design: A Quick Guide
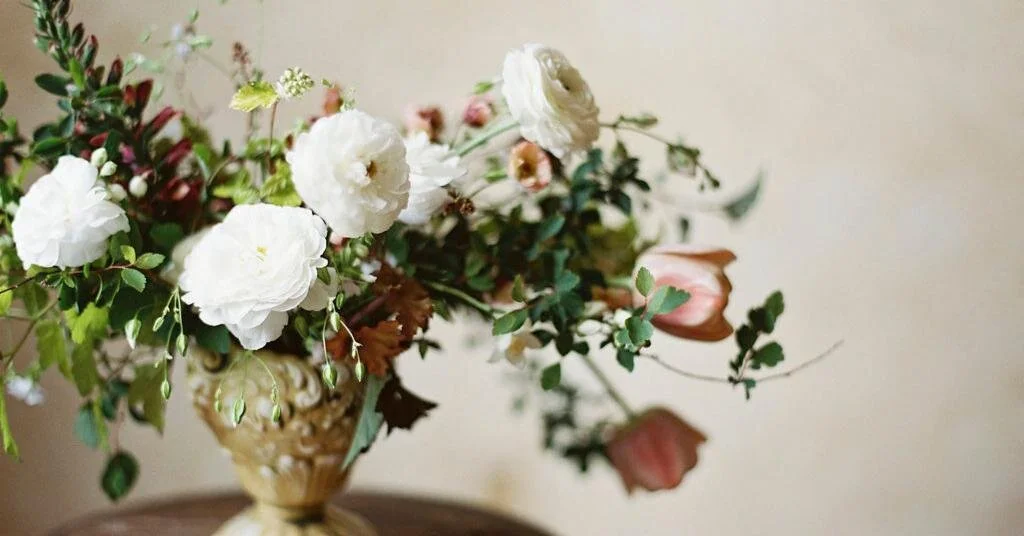
Are you wondering how to create a floral installation? As a relative newbie into the floristry world, floral installations were a rather daunting concept to me. Like many florists, I started by perfecting smaller flower arrangements and working to themes, focusing on table centres, ceremony pedestals, and hand-tied bouquets.

However, working with flowers is an ever-growing and developing experience. It's one of the reasons I love floristry so much. The more events I made arrangements for, the more confident I became, continuing my learning where I could and moving on to armature ('egg') and fully wired waterfall bouquets.
Floral installations, though, still loomed over me—they enchanted me but were still a little bit out of my reach. I began to worry that clients would ask me for one, and I had no experience of where to start, how to approach the mechanics, how to price the piece, or how to manage my time. Now that I’ve worked through some of these aspects, I thought it would be helpful to share some steps to help others get started. And I hope it inspires you to take that step and make a floral installation yourself!
Step 1: Inspiration, Not Perspiration (that comes later!)
Part of my journey into floristry has been about finding my floral design style, which is different from learning floristry techniques. The way you would approach designing a floral installation is similar to how you would approach meeting a bride's vision for her bouquet. It's a piece that she wants to be unique—something that will be looked at, admired, and commented on—yet you need to move forward from confining yourself to a rigid theme that has been set.
One of the key features of all floral installations is movement (and sometimes the lack of it). So rather than fixing your inspiration to one word or theme you have been given, try to work around that word, too. Take inspiration from emotive expressions. Listen to what your client says, rather than try to fit what you know they are describing. This means forget the floristry mechanics around it for a moment, look to what warms your client when she talks, extract what interests you about what they say. Whether it’s a natural element, a fashion image in a magazine, or a painting that's caught your client's imagination, use these things they provide to explore.

Step 2: Create a Floral Installation Just for Fun—Get Comfortable with the Base Mechanics
Yes, it's your business and you have clients, but work is more fun if you get enjoyment out of it! And your client will also engage better with the process if you display happiness and creativity. The mechanics are not as daunting as they might appear. Remember, as a florist, you already have skills—thinking through an installation is similar to the thought process you go through for a table arrangement.
Think through the following for your floral installation design mechanics:
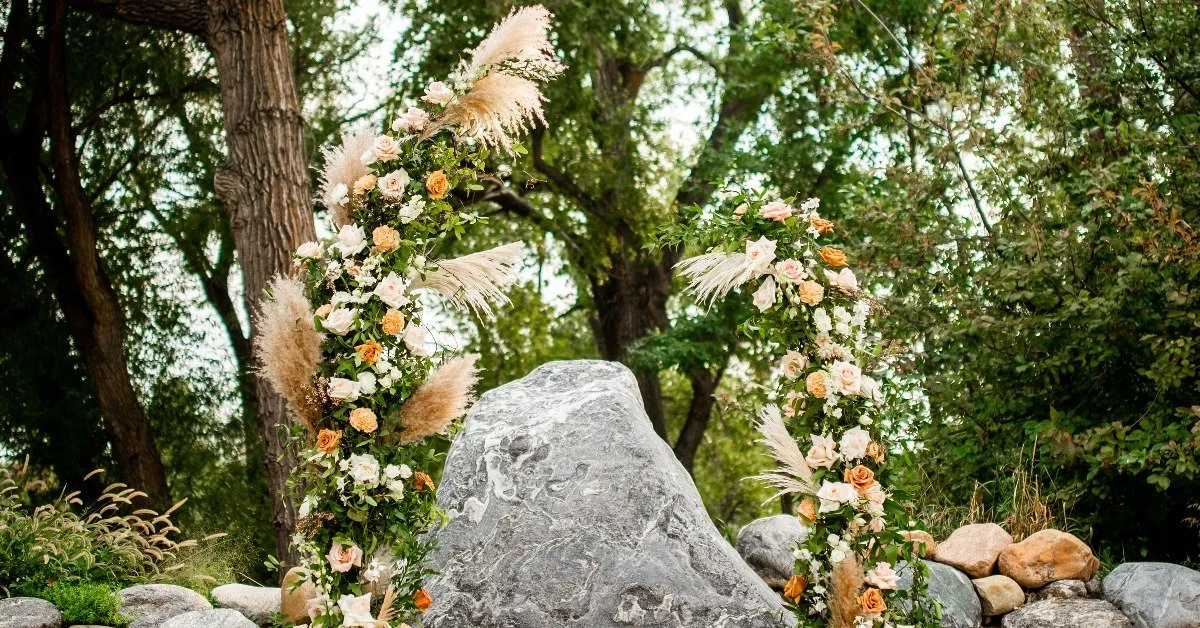
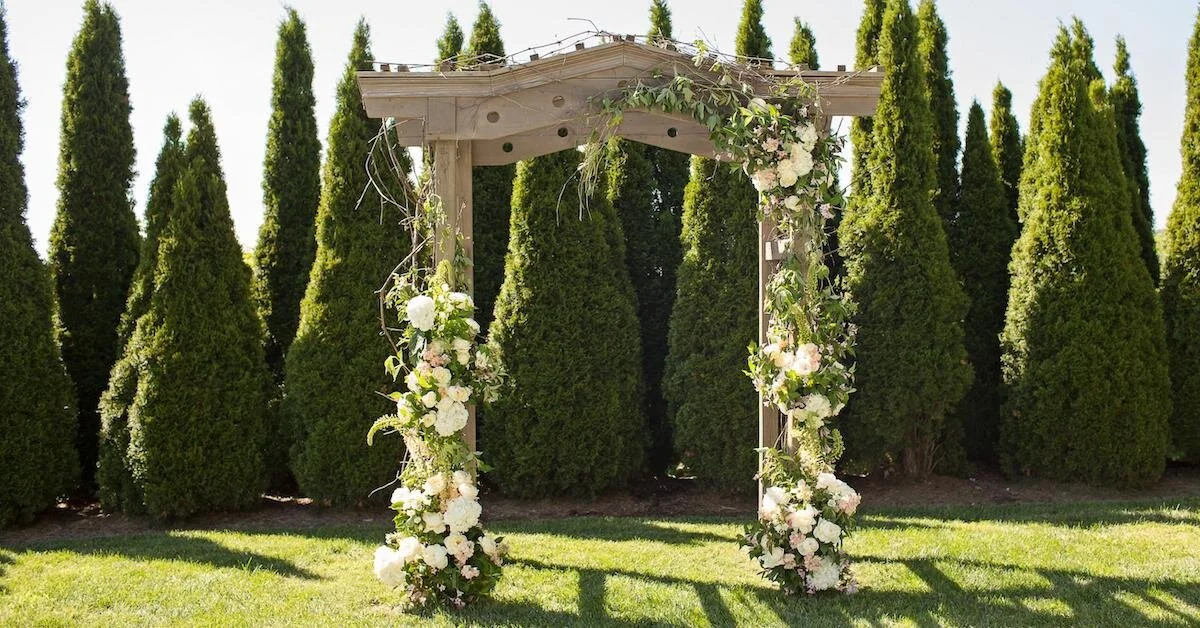
What type and shape will your design be? For a table arrangement, you must determine if it will be central and tall or short and trailing. For installations, determine if it will be an arch, moongate, or chandelier shape.
How will the flowers and foliage stay in the vessel? For smaller arrangements, you might think through mechanics like chicken wire, moss, or tubes. For installations, decide if “mossages” (chicken wire and moss sausages!) or tubes will work best.
Does it need to be moved somewhere else? For centerpieces, you might confirm if they move from the ceremony to reception tables. For installations, can it be moved at all?
What angle will it be viewed from? For tables, your piece will be viewed from all sides. But installations may only be at the front of the ceremony and seen from the front, sides, and underneath.
What scale do you need to design for? Venues have similar tables, standard widths, and predictable floor layouts—which helps when planning your scale for table arrangements. However, for installations, you must think through where the piece will be. View or test the frame from every single angle of the room (even above your head!).
How will you support the weight? In a table arrangement, you design knowing where the weight will be held. And much like a table arrangement, arches need a stable base. Chandeliers, however, need to have a light framework.
Where will you install the piece? If you need to hang your floral installation, does the venue have pulleys? Can you see the supporting ropes/chains? Do you need to dress them?
Step 3: Watch, Learn, and Practice, Practice, Practice (Perspiration)
This step is where you can indulge and find the floral installations you like and aspire to create.
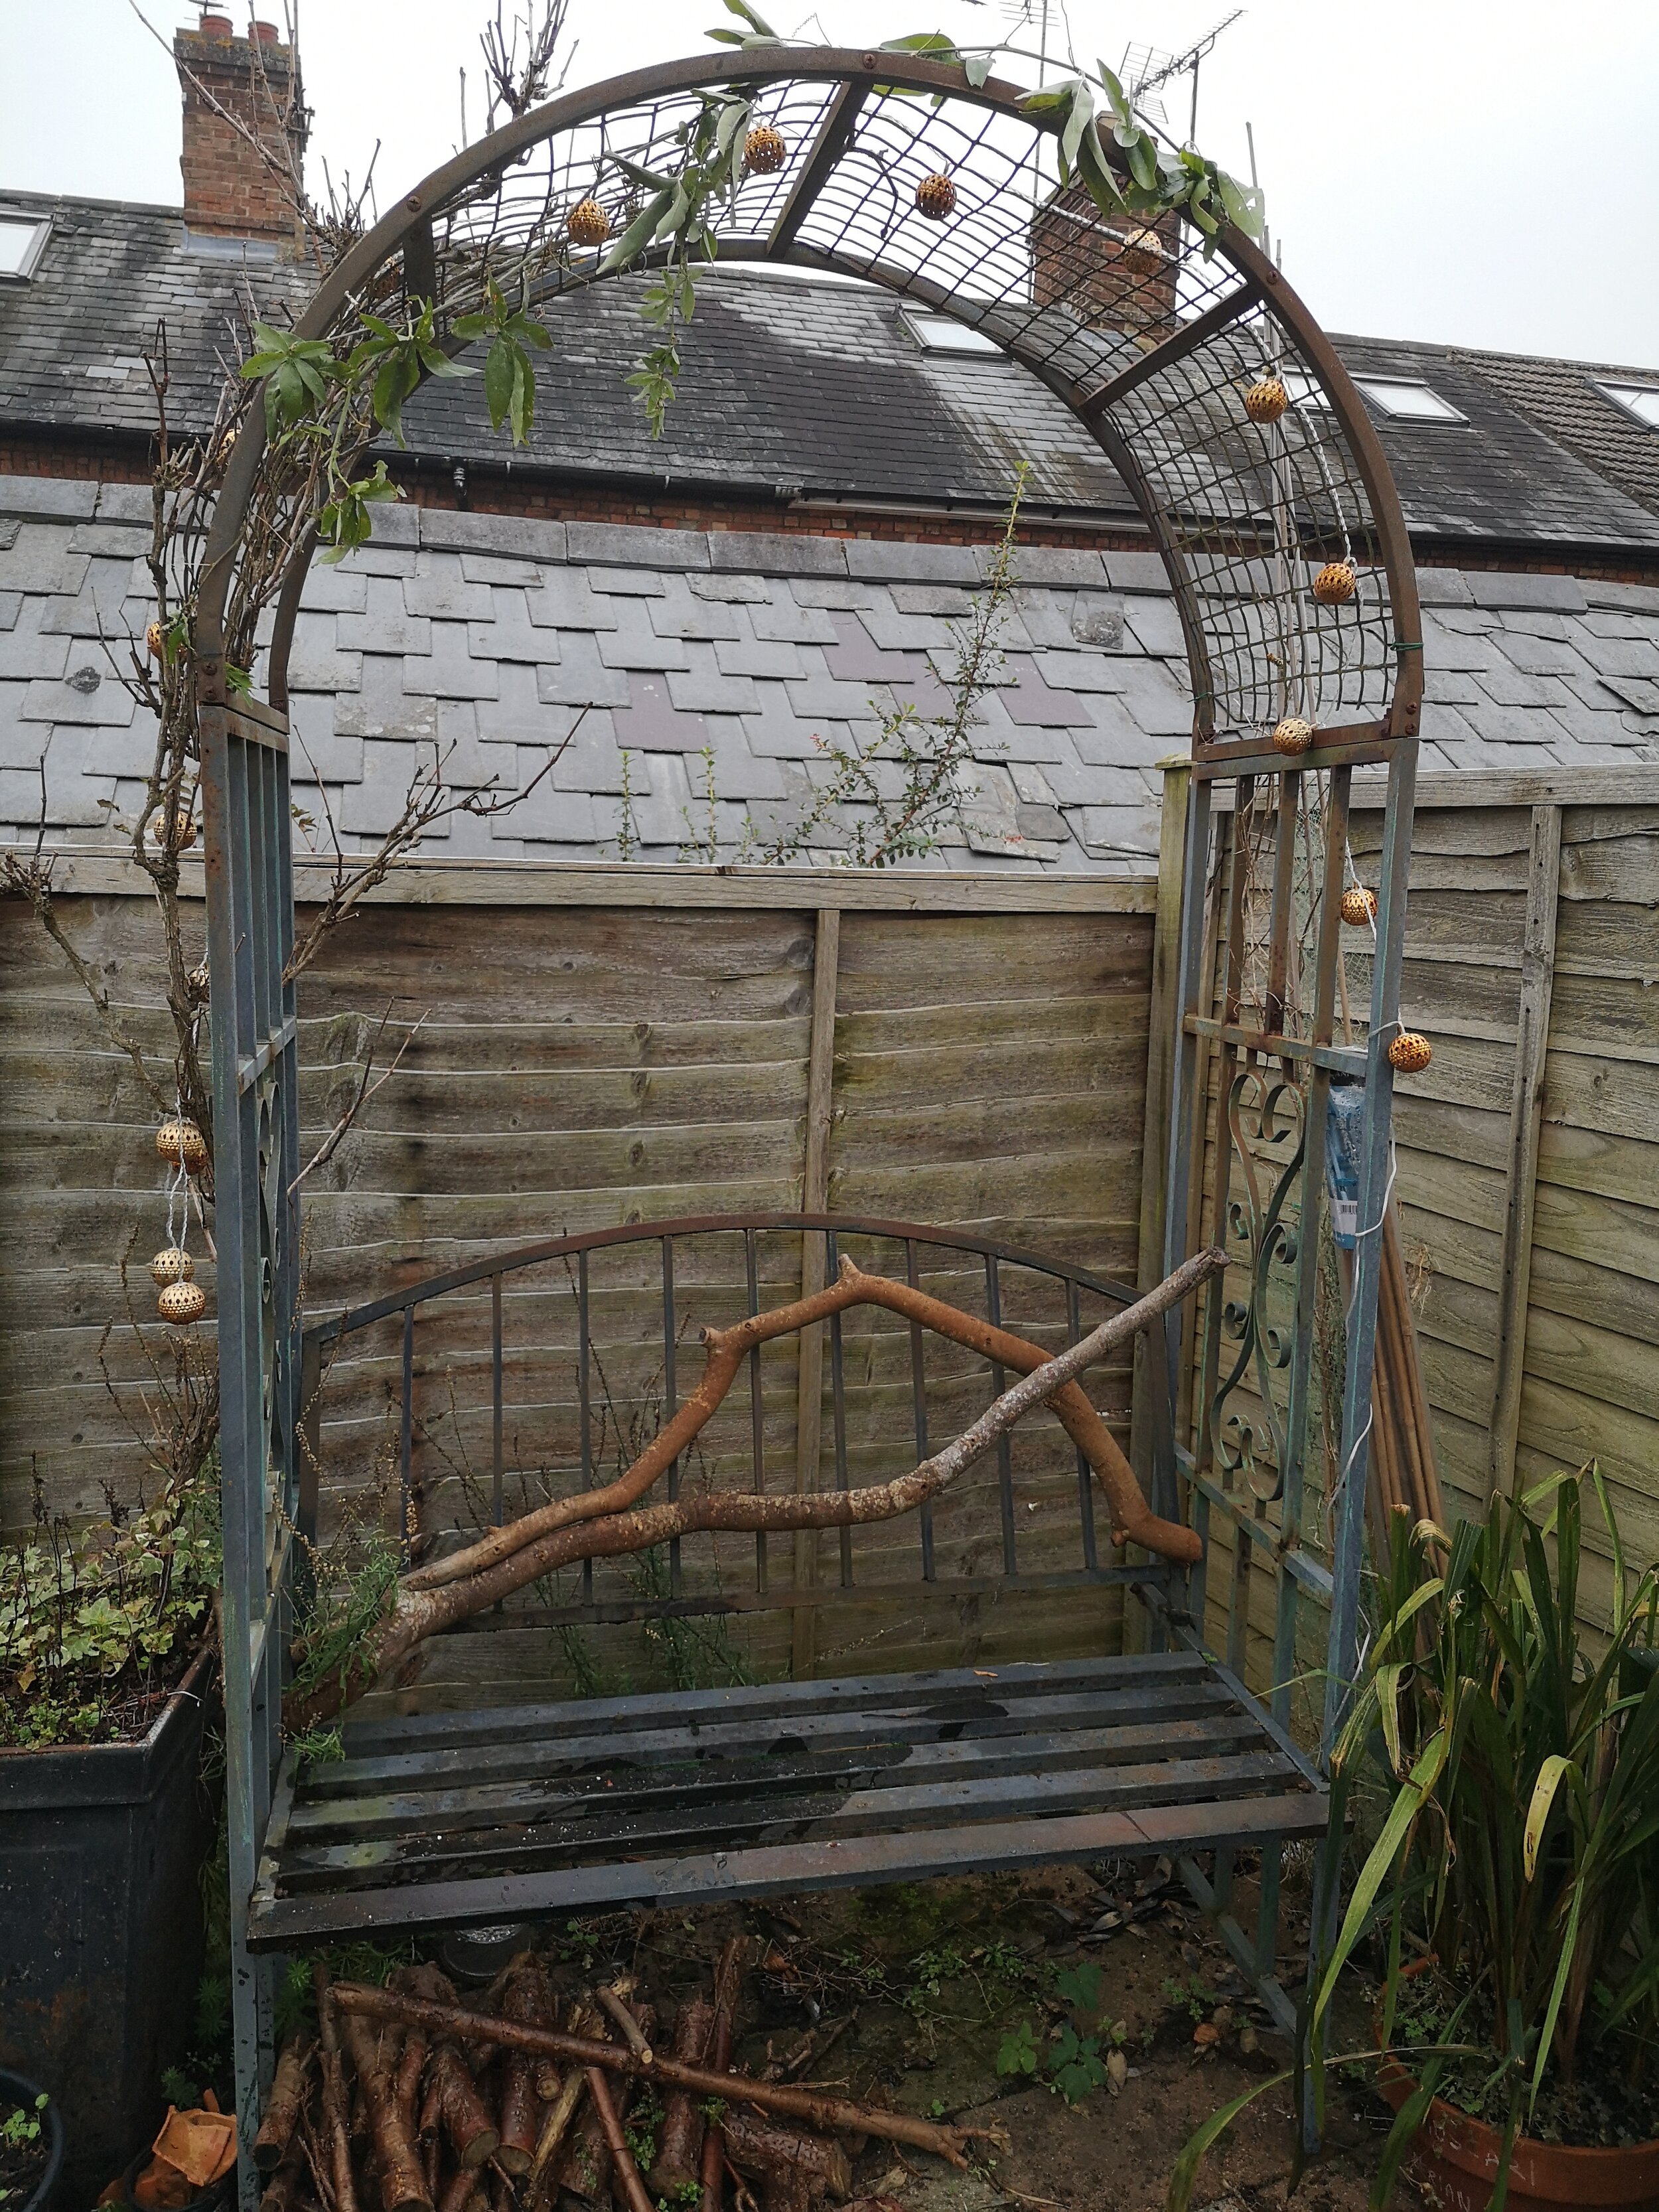
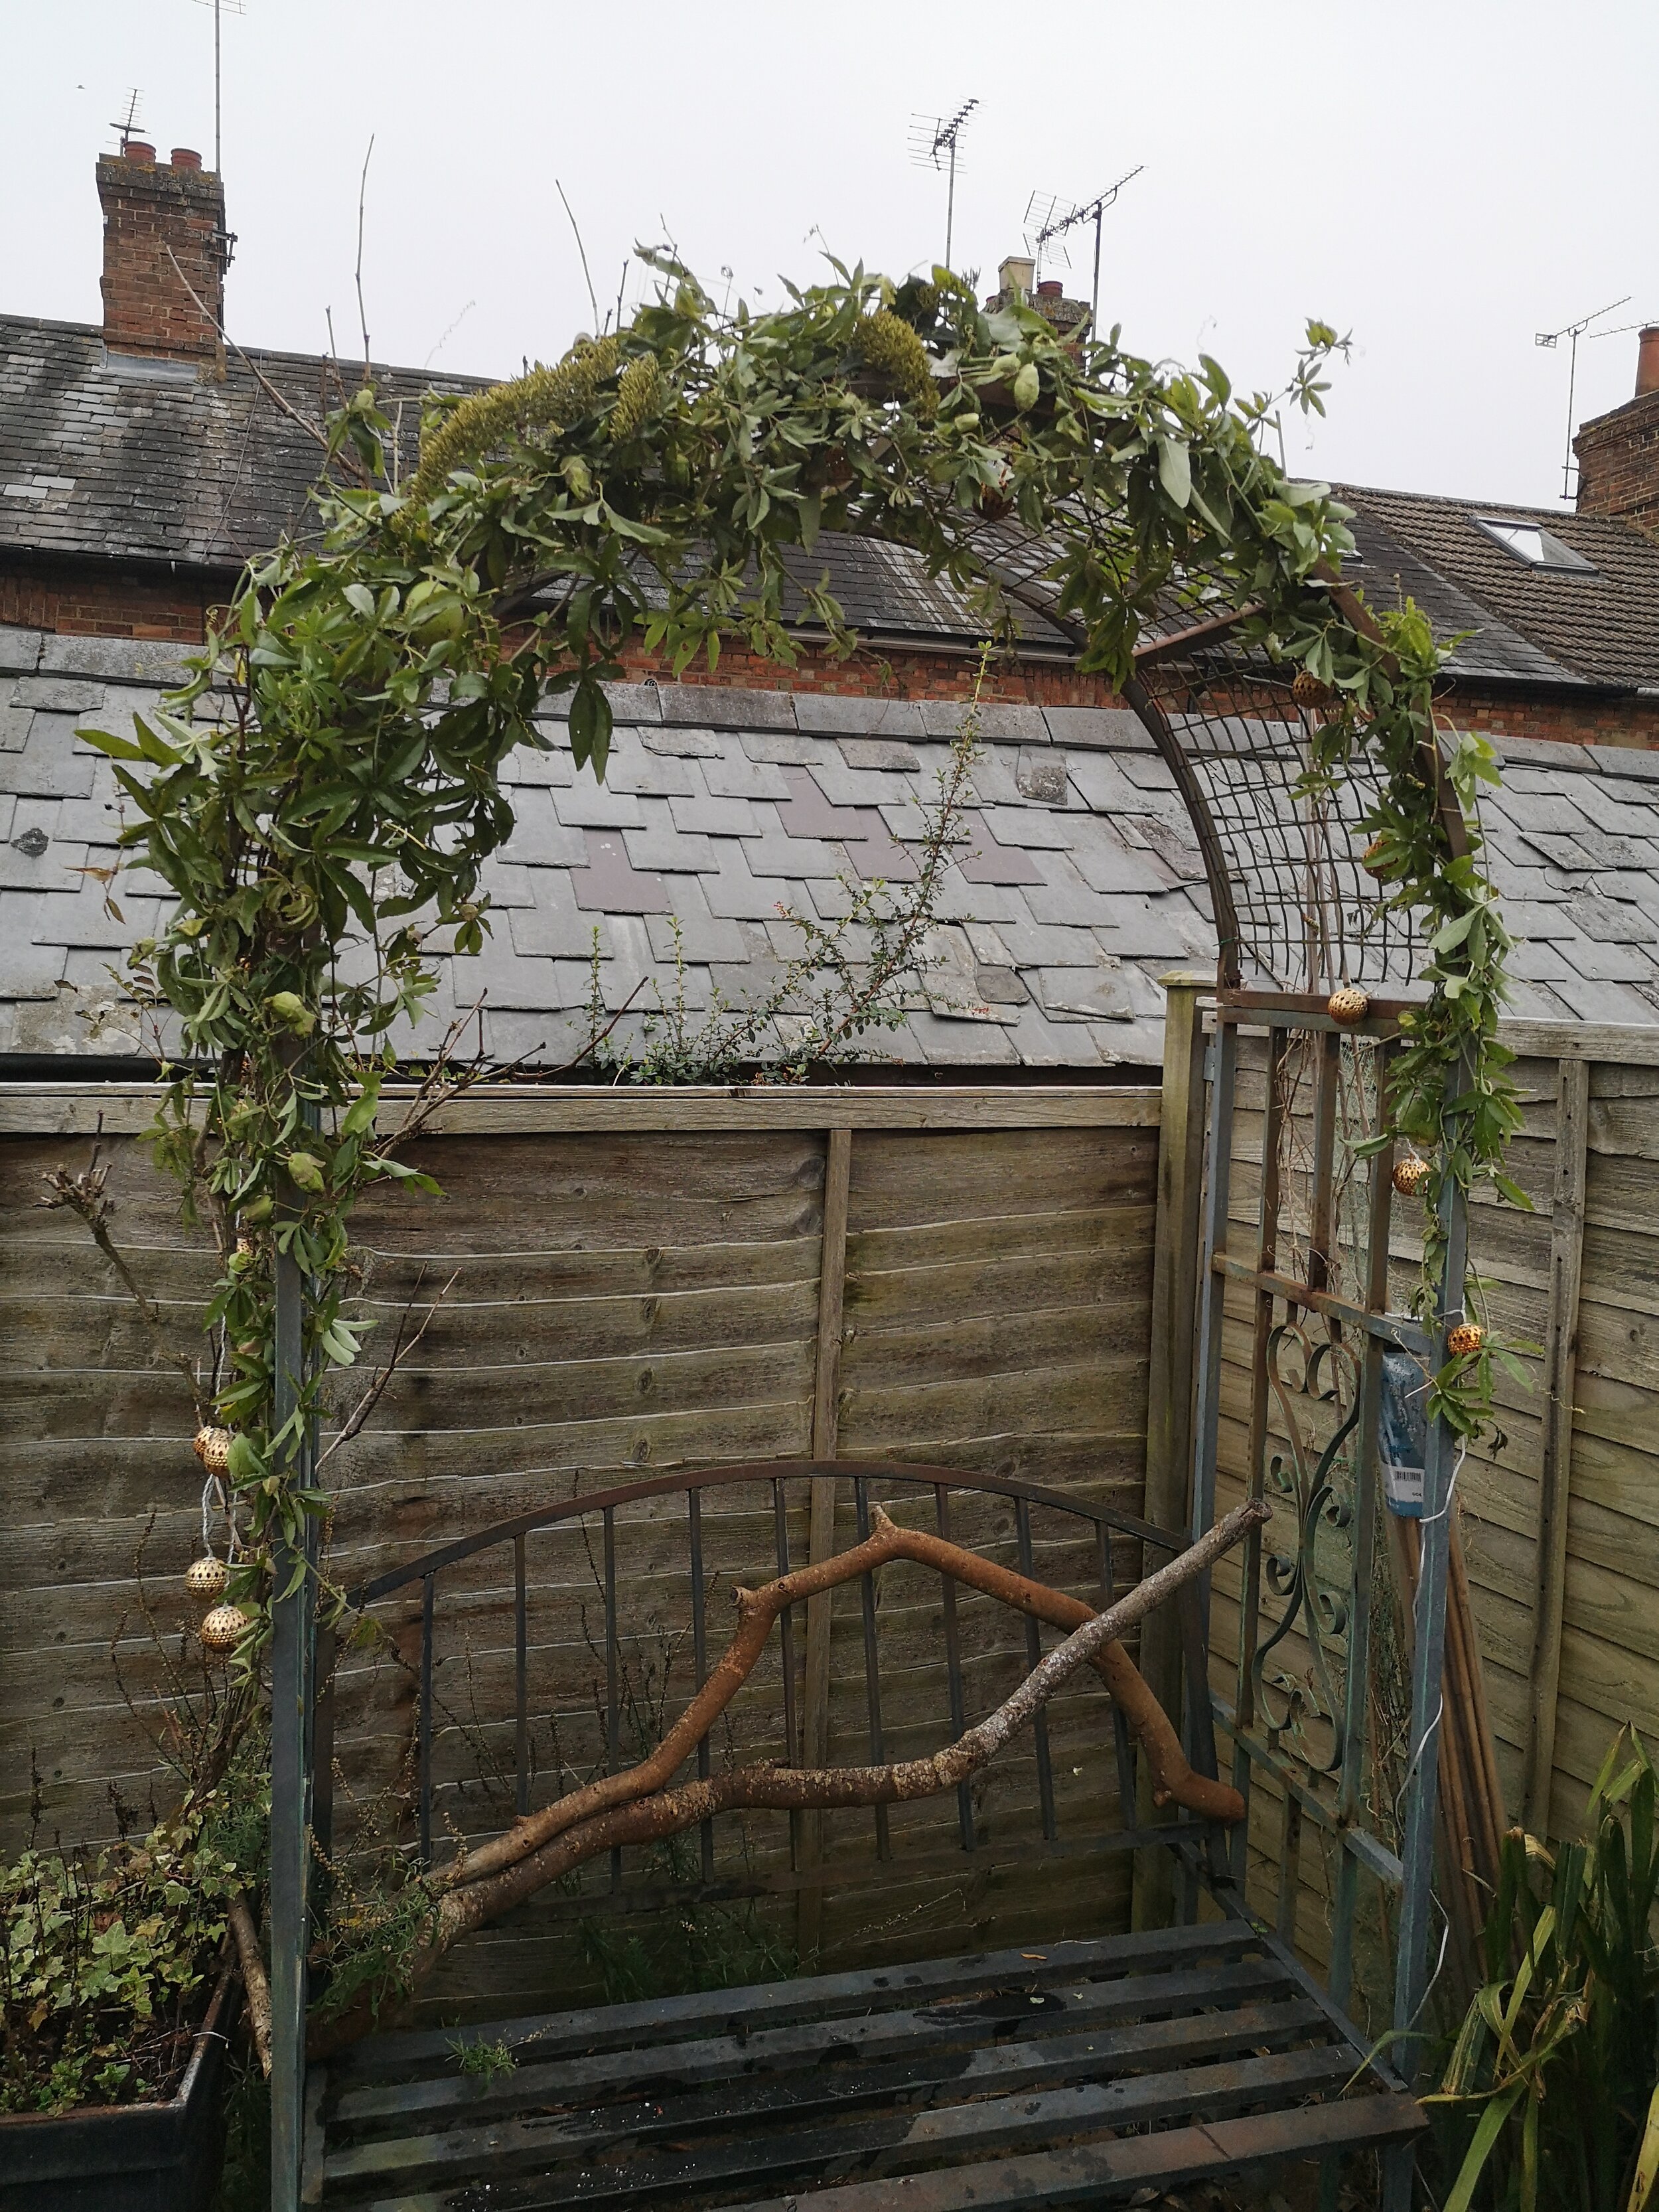
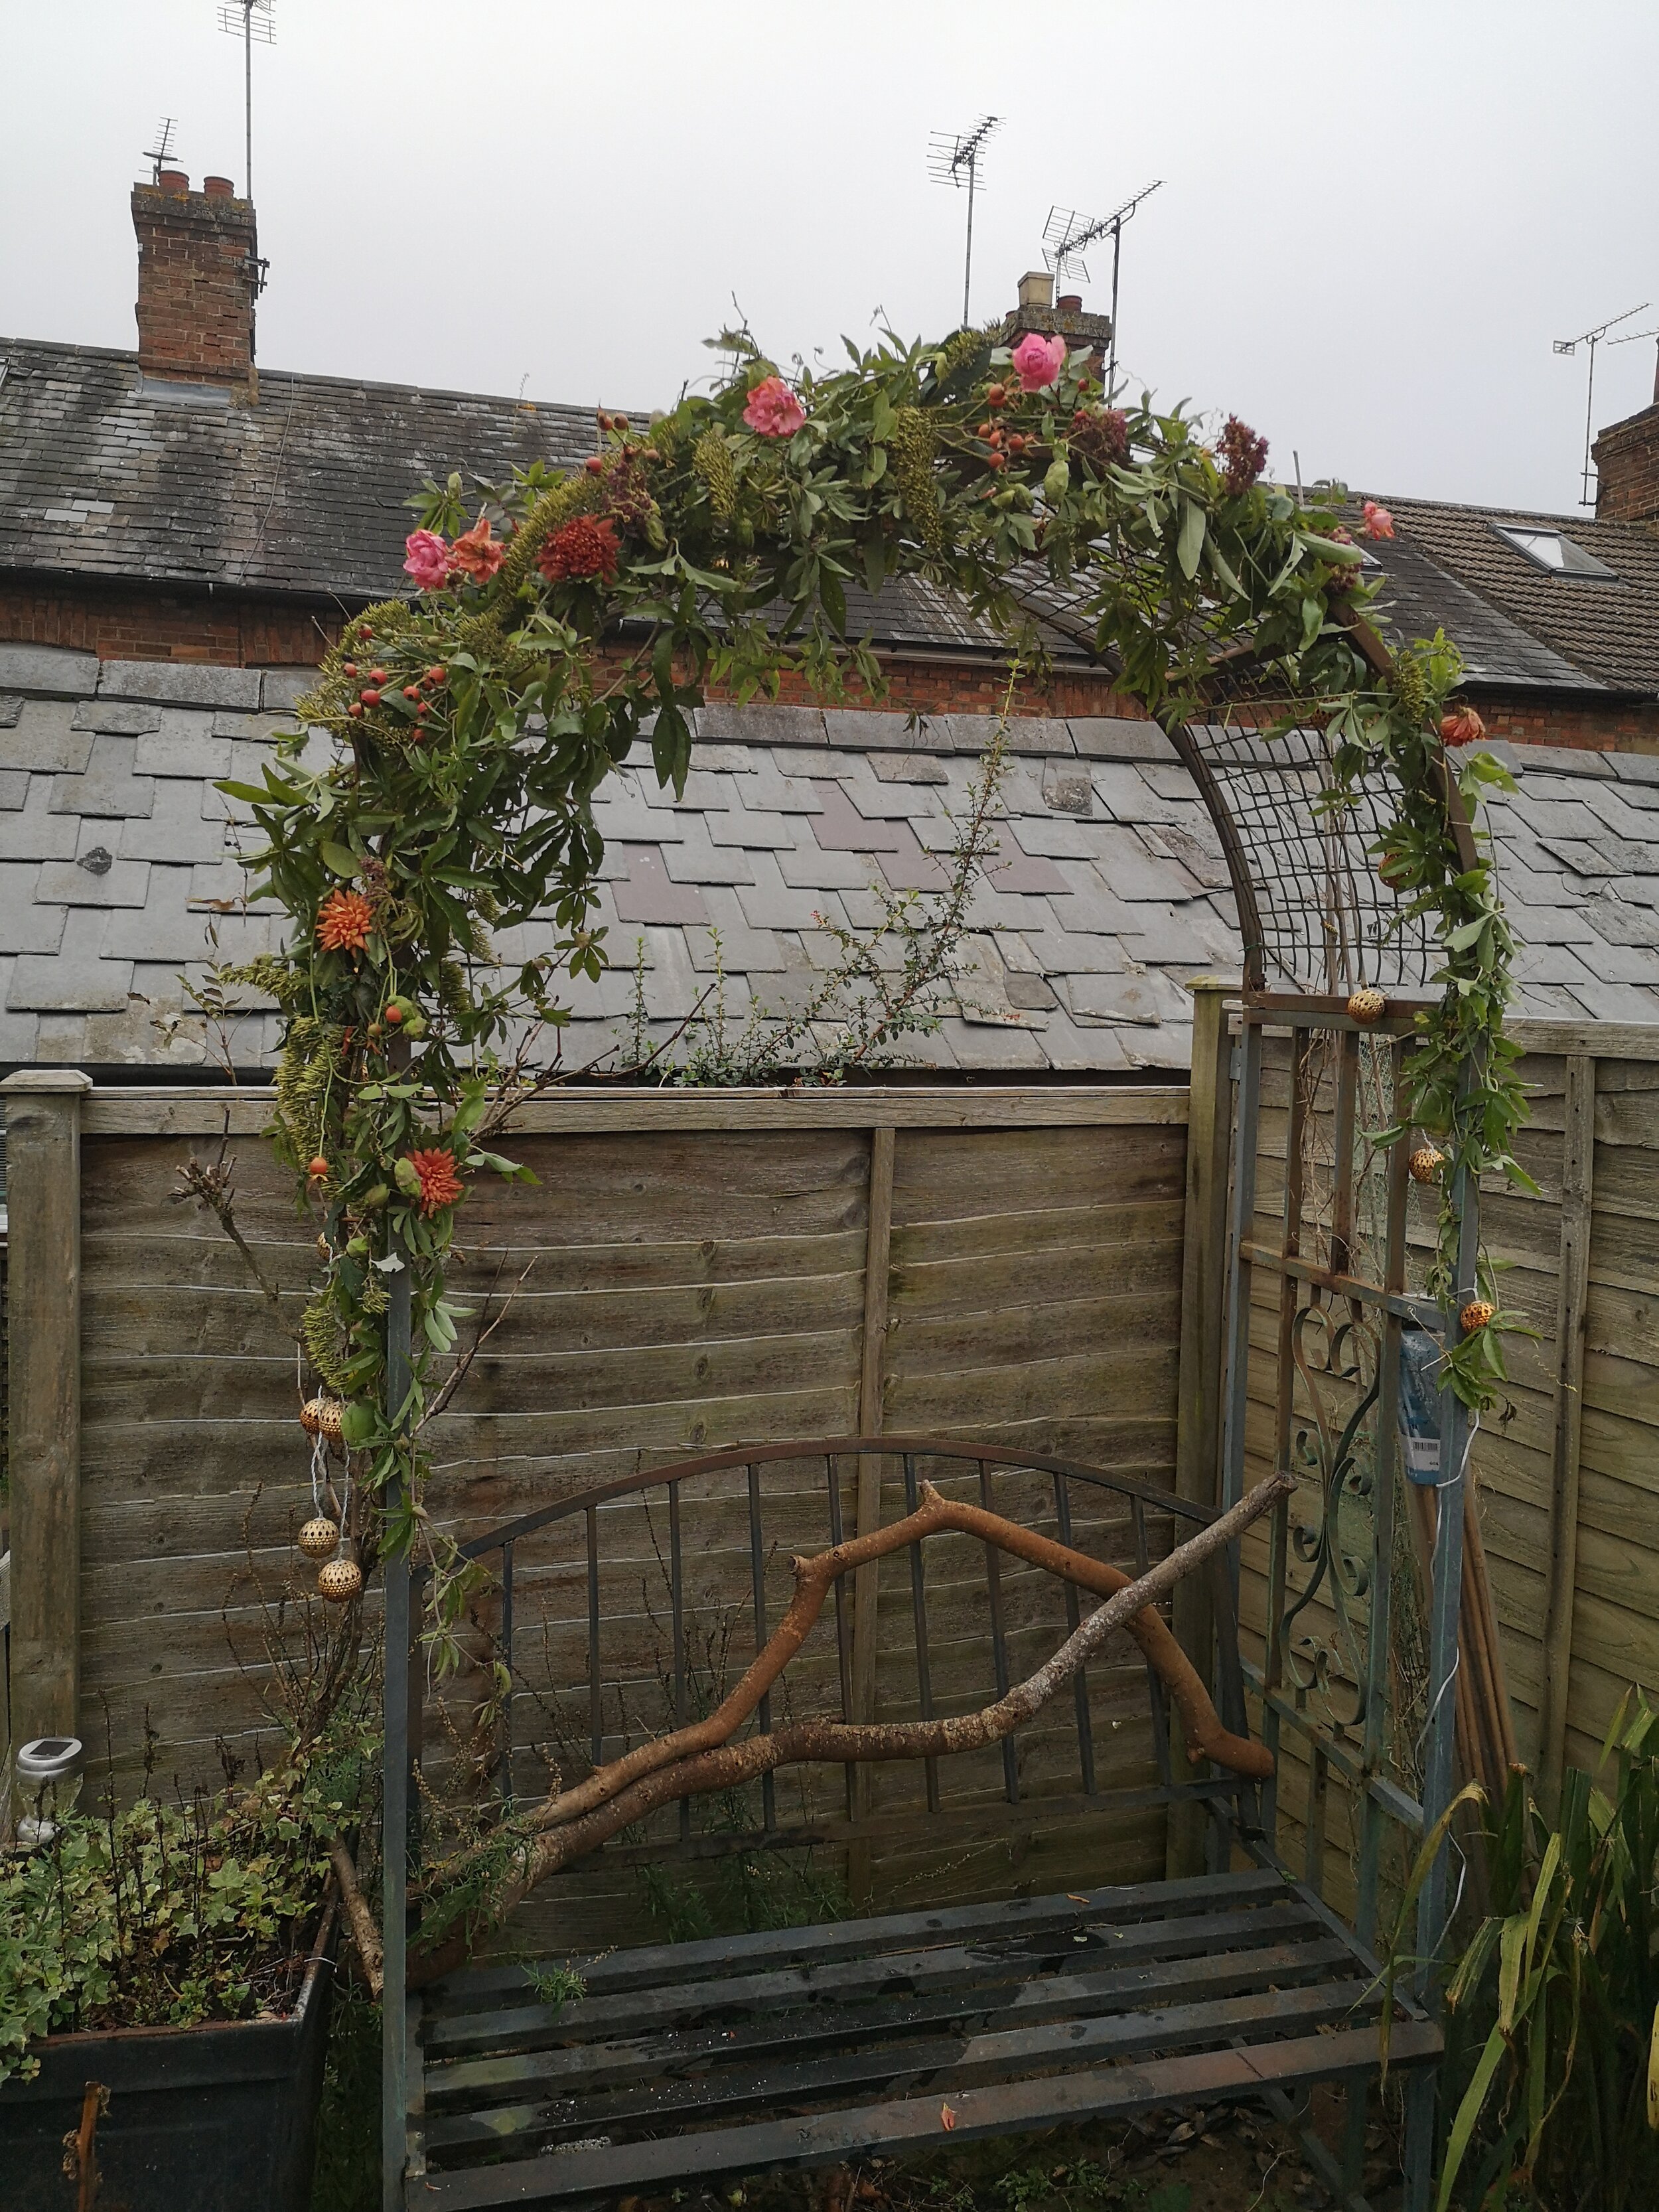
Mock-ups: Make a mock-up using garden foliage or leftover foliage from other work. Practice different shapes, test weights and stability, and view your work from different sides. Below is an arch I was practicing in early November in my garden when most flowers are long gone. I used passionflower vine from the garden fence, dead buddleia heads for spire shapes, and some roses and chrysanthemums I'd grown. It's not the prettiest, and the colors are faded, but they had the shapes and weights I was going to work with for an event.
Work experience: Installations predominantly need more than one person, and other details need attention at a wedding. Try to do some freelancing for another wedding florist so that you can practice your technique under their guidance. It also gives them more time to focus on other aspects of the wedding. After some work experience, you'll feel more comfortable marketing installations as something you do as well.
Finding a mentor: Slightly different from work experience, this is about finding a florist you admire—and not just in their design skills, but in their inspirations and style as well. Ideally, this will be someone who engages you and is responsive. Your interactions can be through social media, workshops, or volunteer event work.
Learn from florists you love: There are a range of groups and florists who enjoy sharing and helping others learn. If you are focusing on technique rather than the style, sometimes it helps if you turn off the sound. Click here for a fab example from Team Flower.

Step 4: Grow Your Confidence in Designing Floral Installations with Practical Workshops
The reason I haven't mentioned workshops sooner is because I've attended quite a few courses where the expectation is on the tutor to prescribe exactly what to do, flowers are counted out, and you work step by step, so everyone is on the same stage in the process. These are great if you need to learn a new technique, and your style will show through despite the prescribed design! Just keep in mind that most often, you're not leading the design here. Instead, you're following someone else's design and focusing on mechanics.
Remember, you are already a florist. You may already have a business and clients, no matter how small. Having your ideas and style formulated first helps you take the workshop in, confidently ask questions, and develop new ideas linked to the techniques you are learning.

For me, it helped me when I found the following:
Tutors who spoke to me on the same level as another florist, not as a junior or subordinate. I was still the student, listening and learning, but I gained more confidence in myself.
Courses where the choice of flowers was completely yours. I found that if flowers were supplied with a stem count, it restricted my creativity.
Tutors who observed and consulted but didn't move or rearrange my work. This is a pet peeve of mine; for me, it's better I make a mistake and have to redo it, even if it takes me longer. A good tutor will step in at the earliest opportunity when they see you may be taking your learning in the wrong direction.
Workshops can also help you with the business aspects of floral installations, such as how to price the piece, the timing for preparation on the day, and general logistics, such as establishing and moving an installation.
Step 5: Build Knowledge of Go-To Flowers to Use in Floral Installations
You probably already have this in your recipes for bridal bouquets and centerpieces, but these flowers may not transfer well to installations—especially when considering the time it takes to build a floral installation on the day of a wedding. One crucial aspect to remember is that wedding or event installations are often not expected to last longer than a day, and you will have made your client aware of this in advance.
Think outside your comfort zone. Is there foliage that lasts longer out of water? Check out this article to learn more about flowers and foliage that last out of water.
Can you use dried flowers/foliage such as Honesty or Pampas grass, and maybe even potted plants?
Think horticulturally seasonal. For example, a sweet pea vine is easier to find for a summer wedding while hops are better for autumn. However, you can also buy and dry your hops to use for a spring wedding, where you may want lighter textures and shapes.
Hopefully these steps help encourage you to get started. You still have to be brave, but learning something new can be so enjoyable. You can do this!