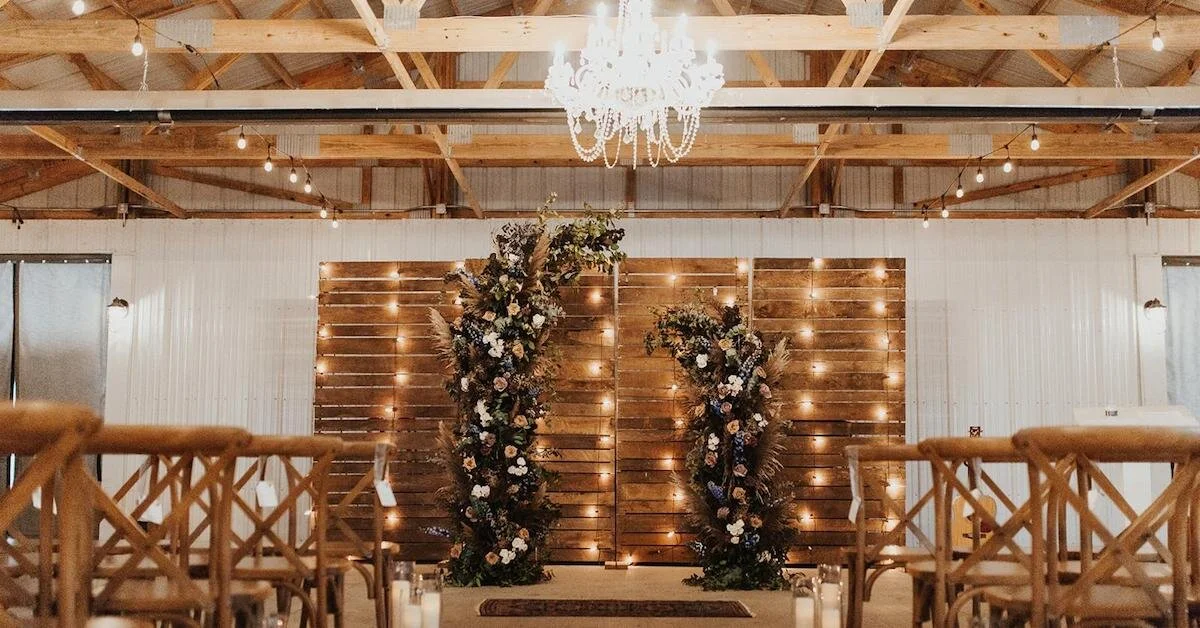
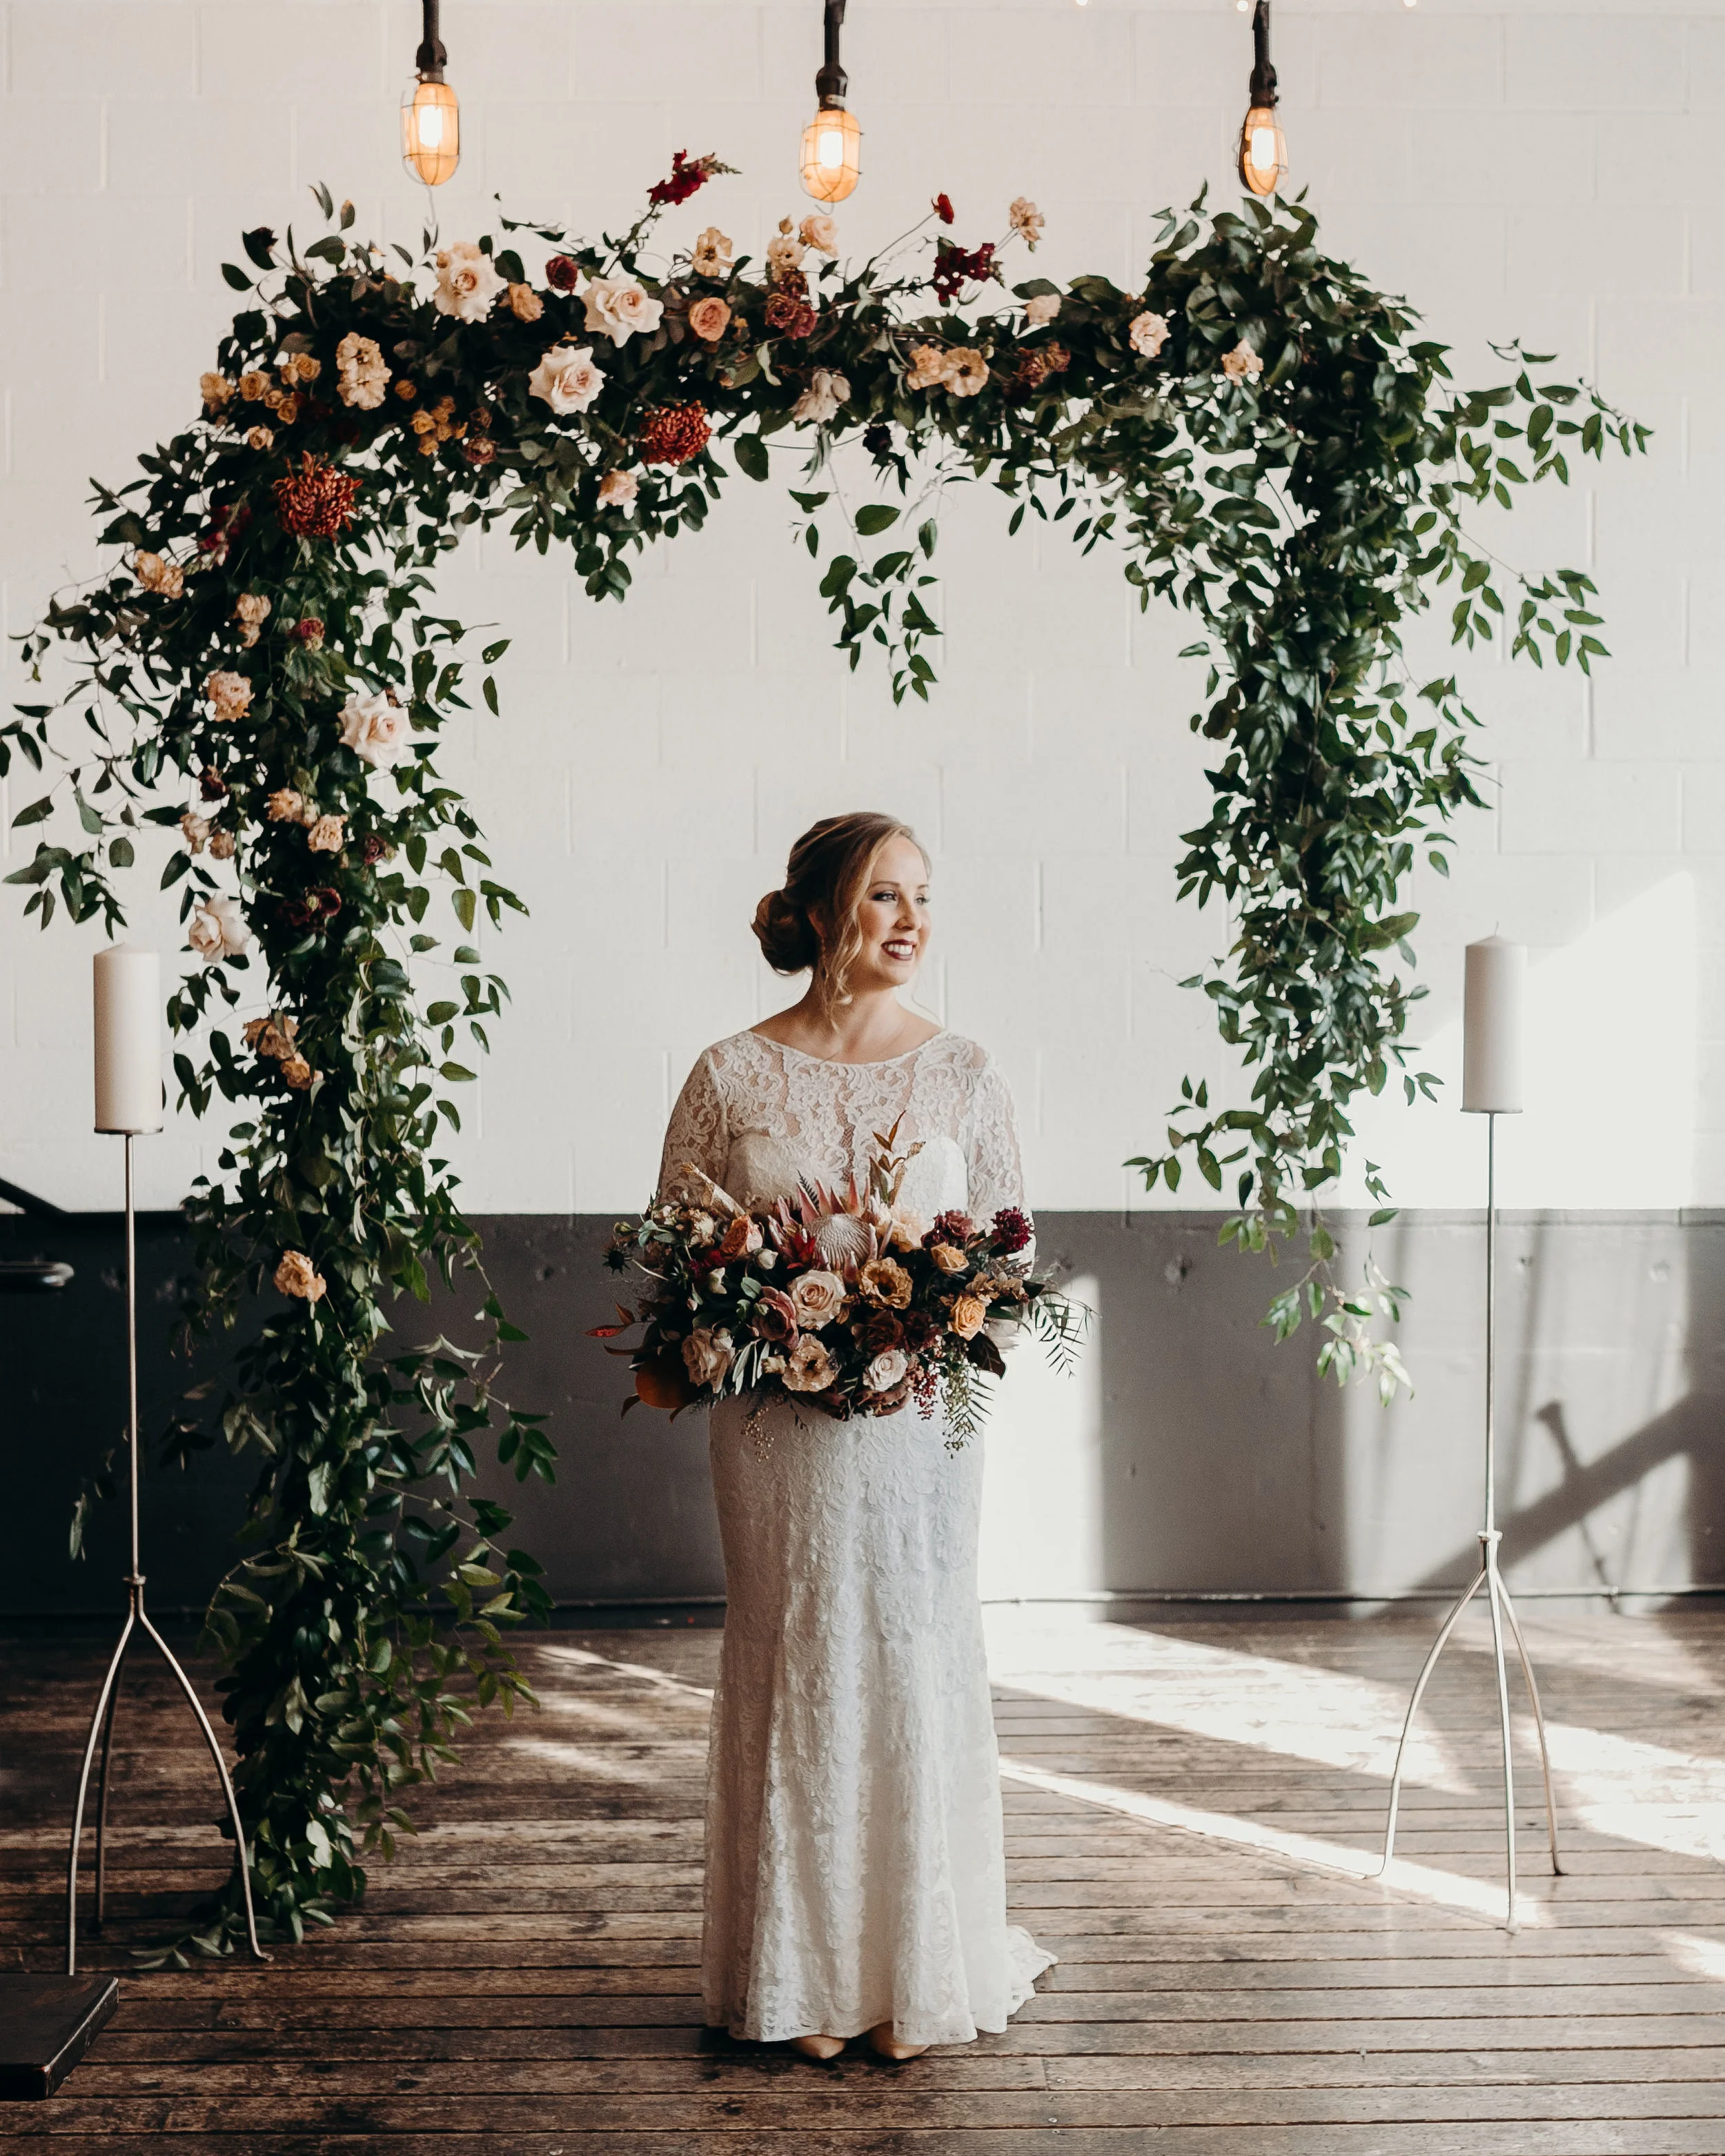
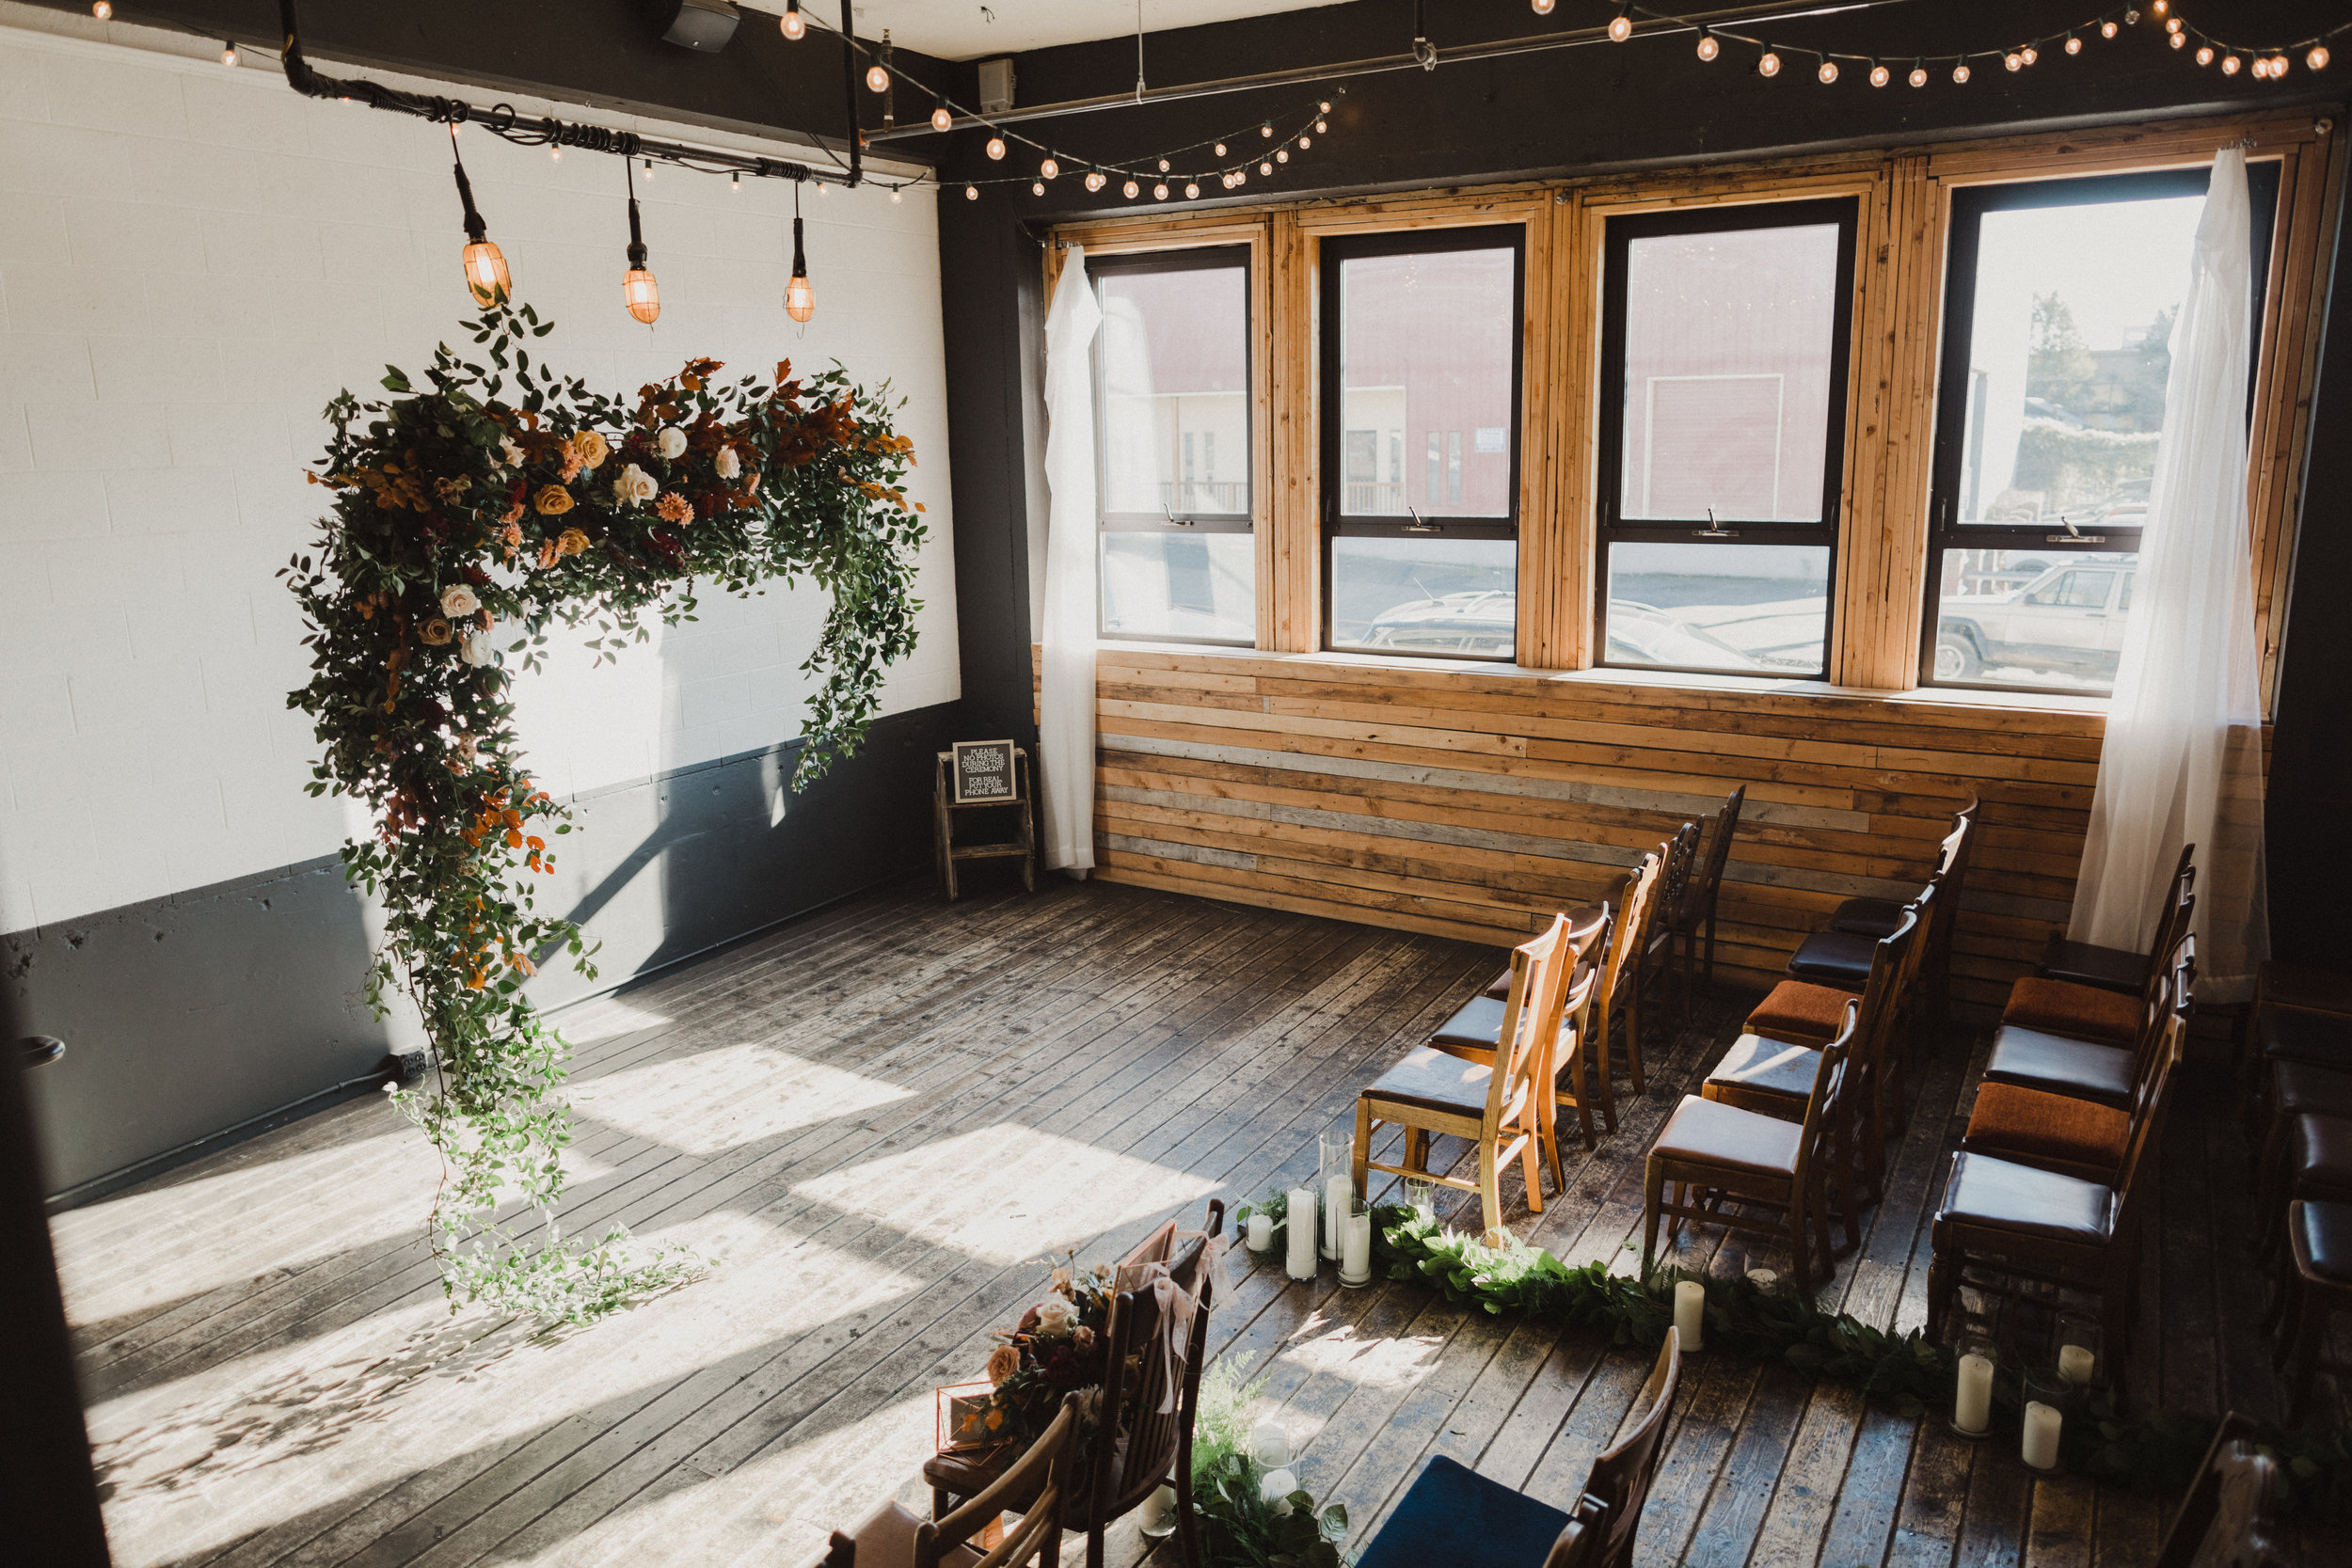
Floating Floral Arbor Installation: A How-To
Hey there! We are so excited to share a design element with you that is in so many of our weddings: floating arbor installations.
When we first decided we wanted to incorporate one of these into our weddings we were VERY intimidated. There were so many questions! What would we use? How would we get it to stay level if it’s asymmetrical? How would it be strong enough to not cave in the middle?
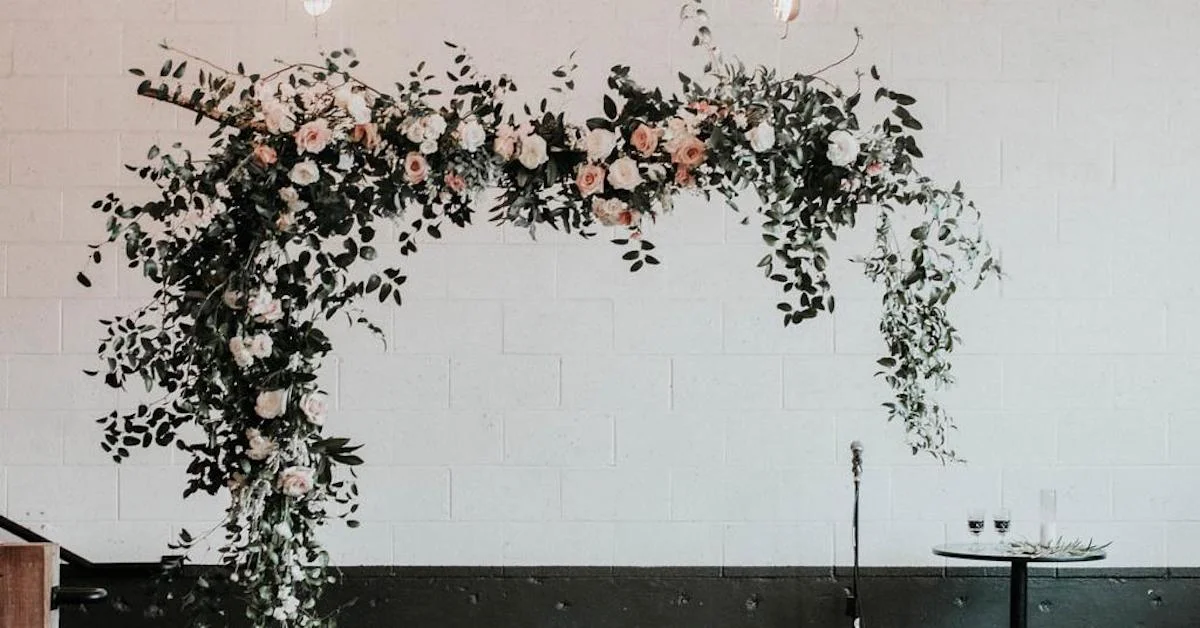
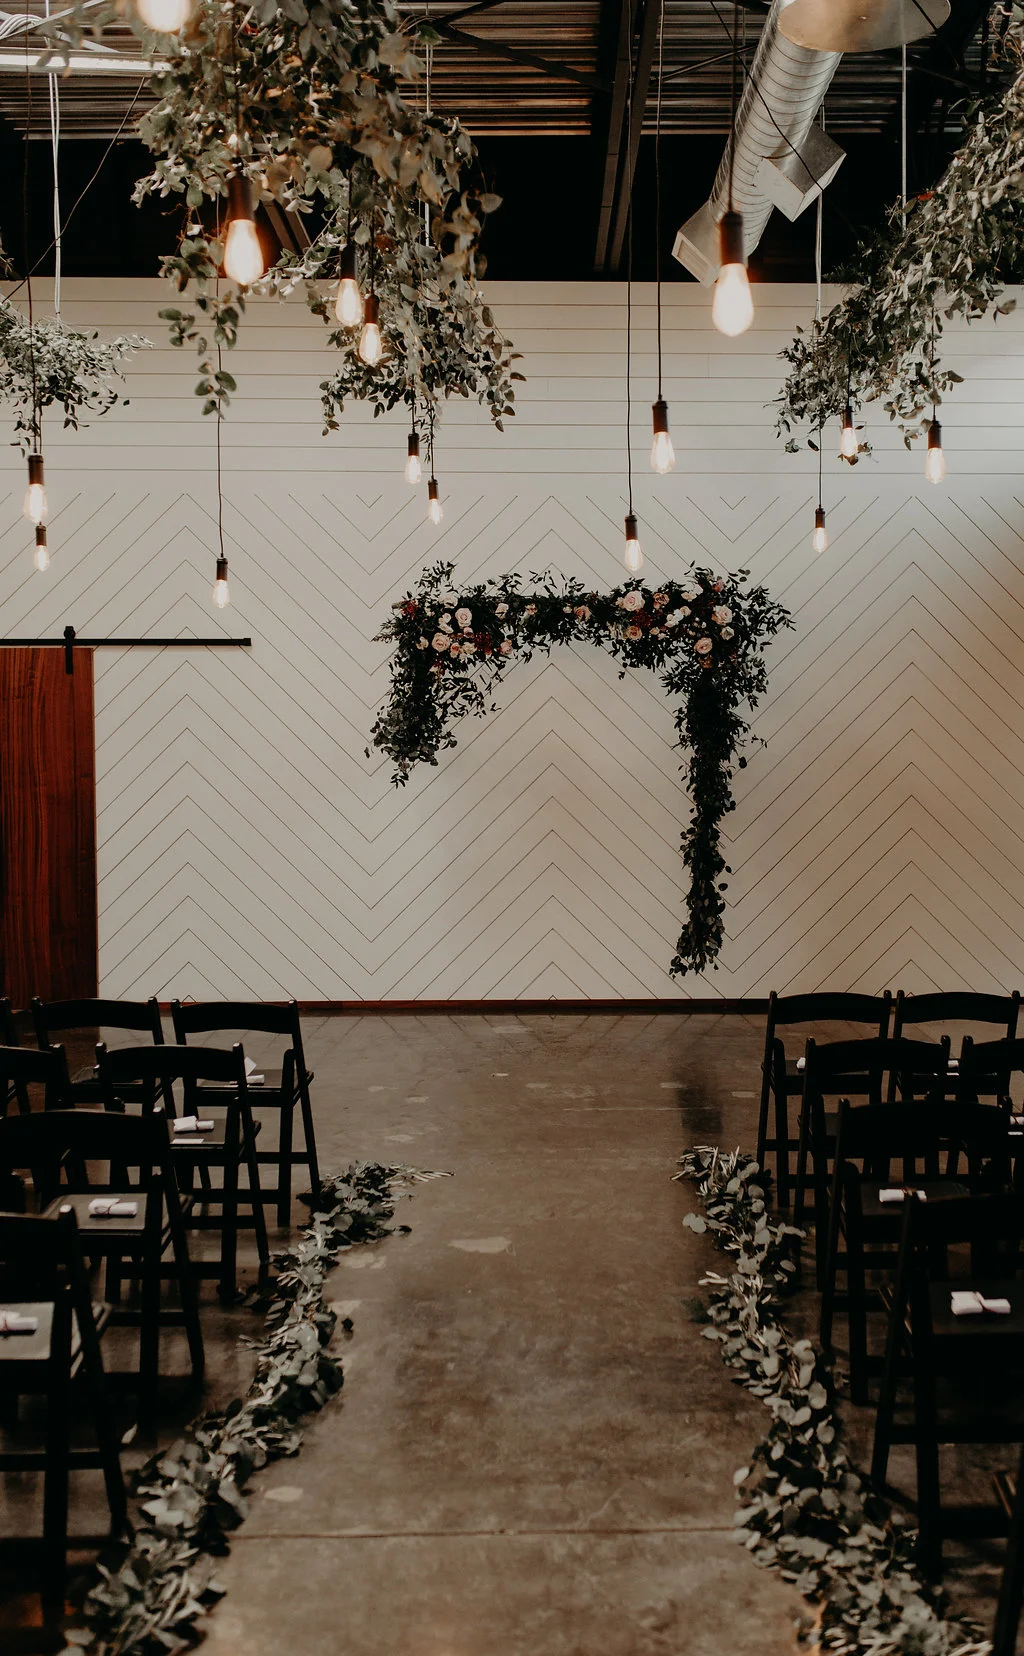
There were so many questions, and we didn’t know anyone who had done something similar to go to for advice, so we just decided to give it a go. And it turned out so well, we kept doing them! For this post, we’re going to be focusing on asymmetrical floating installations (as these are the most difficult in our opinion!).
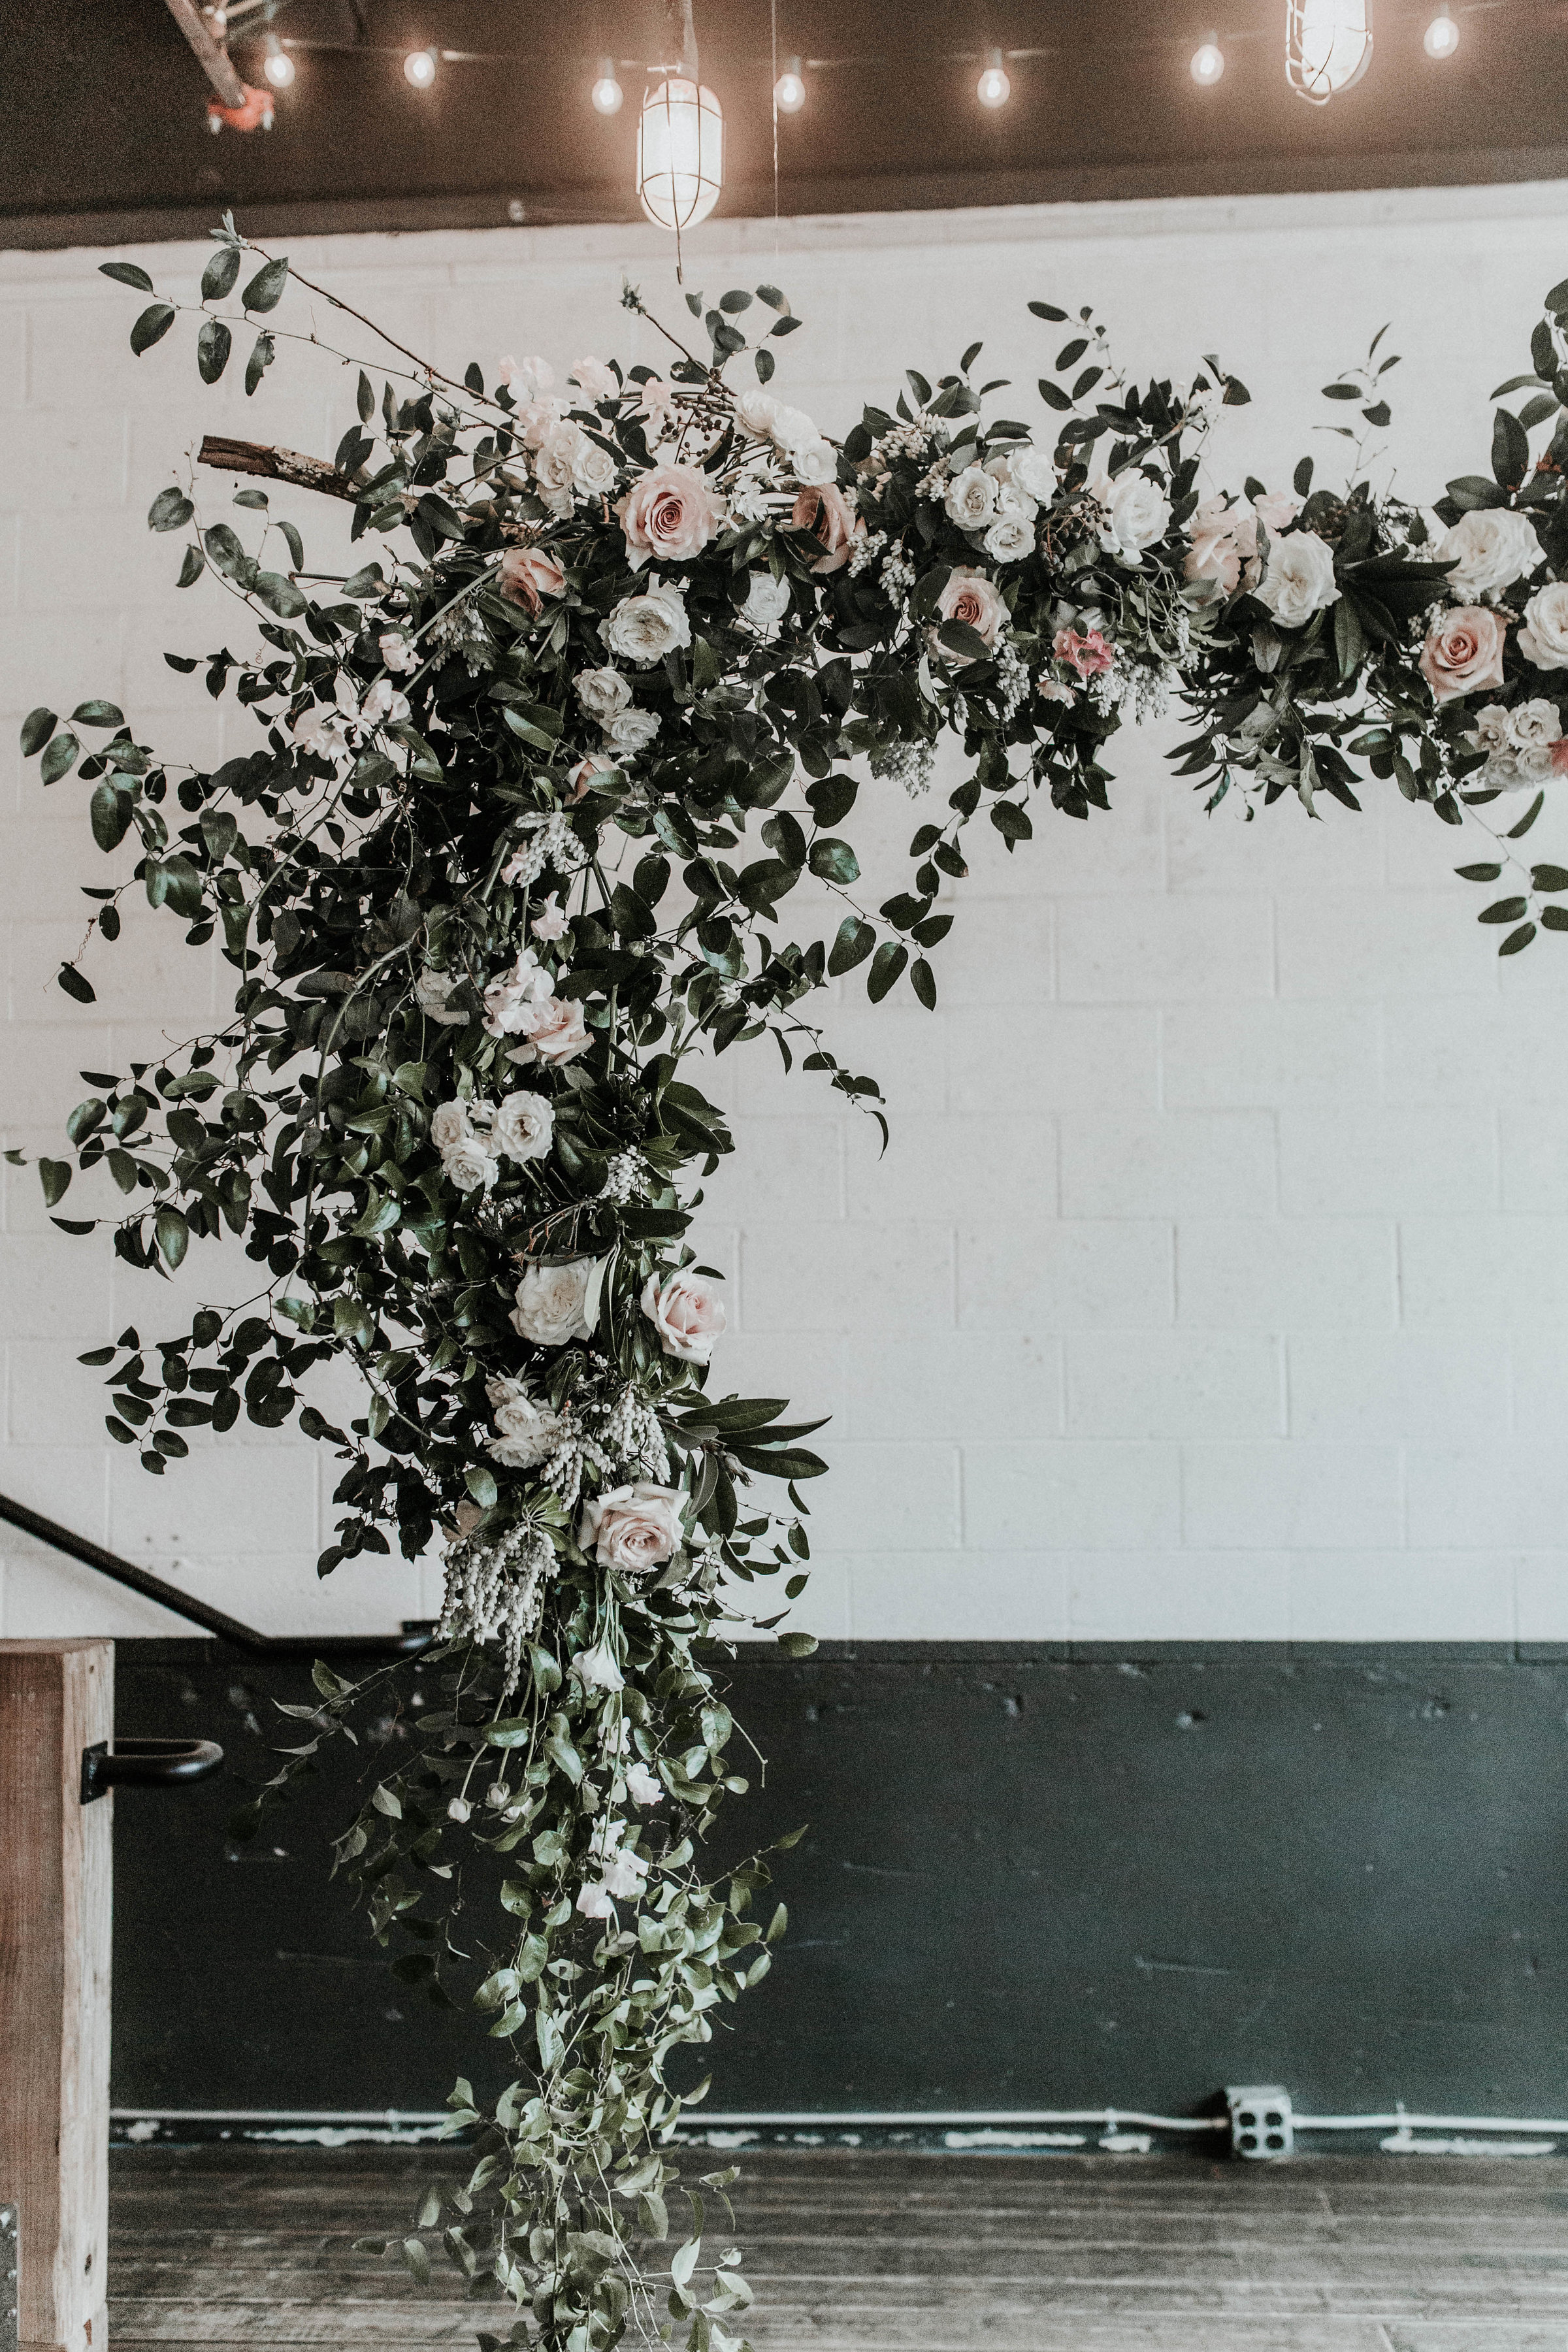
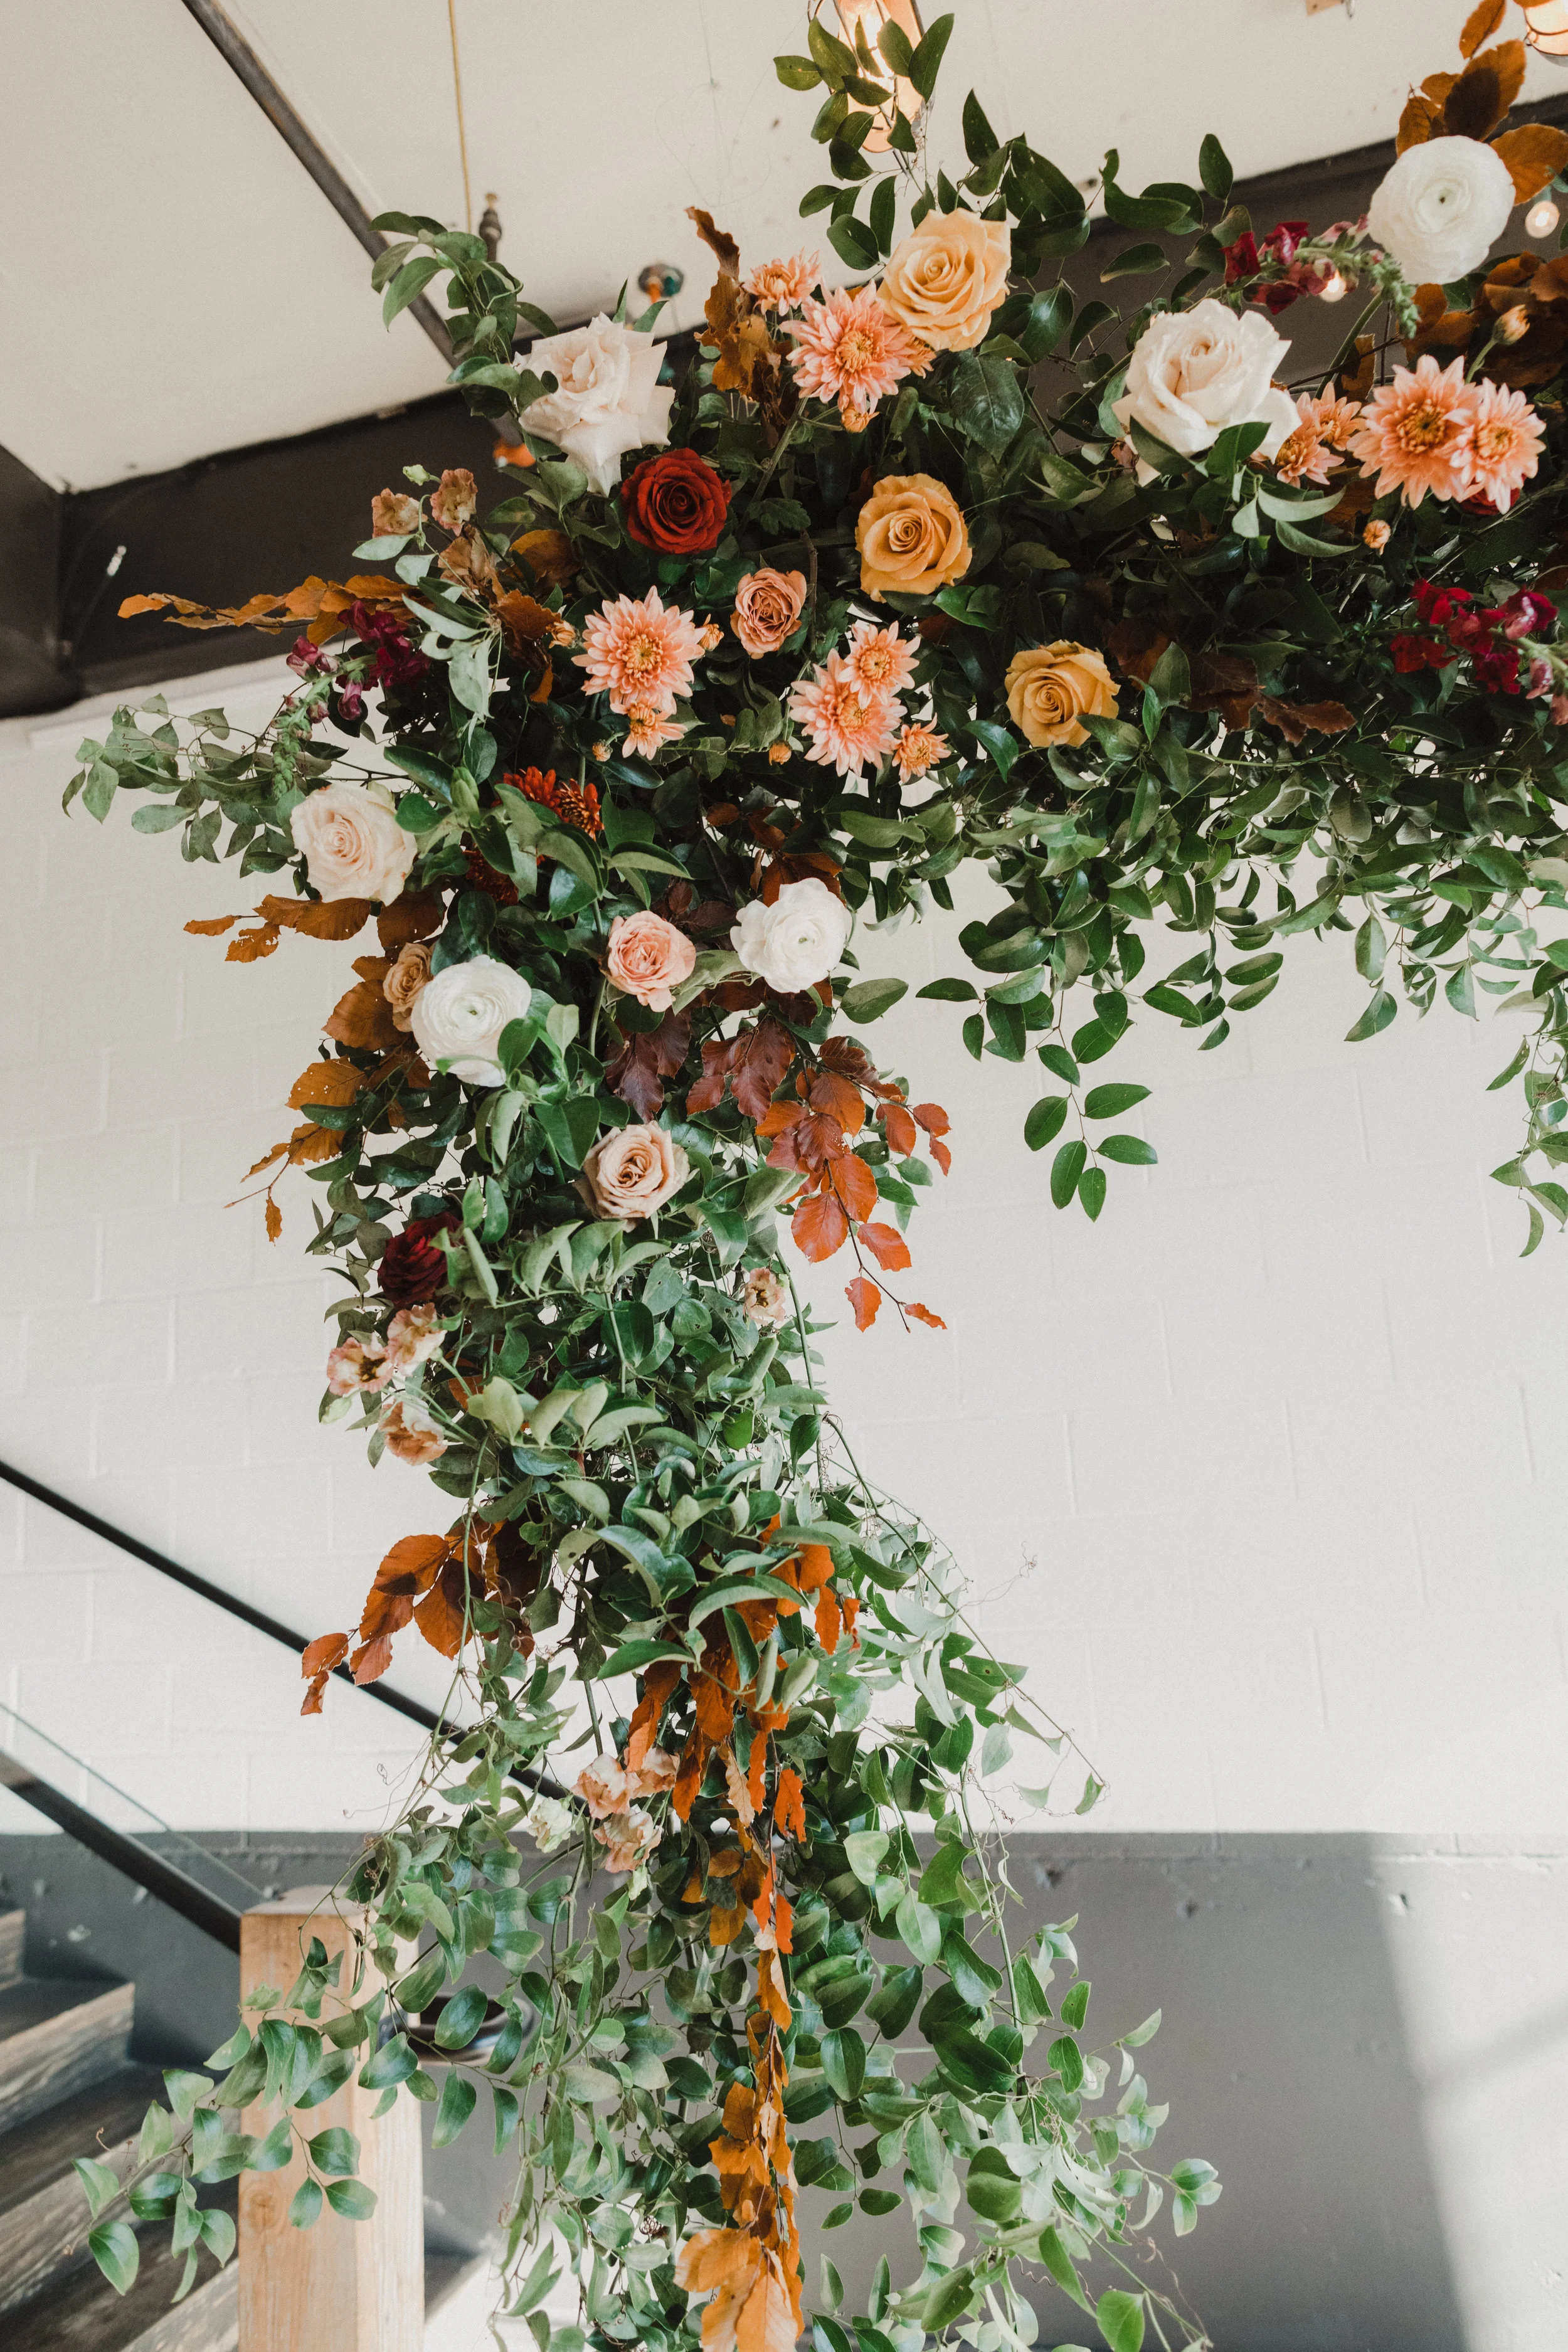
First, you want to have a good structure. We use a long tree branch that we (no joke) usually forage at a park or in our backyards. It’s become so common that we actually stop our cars and grab fallen, sturdy branches whenever we see them! It’s the best, most eco-friendly way we’ve found to build these. And then we can reuse them the next time! We try to find ones that are slightly curved at the end so that we can create the cascading part off of that.
The second thing to think about is hanging the branch. We use a very strong clear fishing line for this - preferably one that doesn’t have a lot of stretch. Because the design is asymmetrical, it’s hard to determine where the ties should be, so when we tie the fishing line around the stick, we tie it so we can move it around on the branch a bit. We usually do a little bit of guesswork and then make sure it’s loose enough at the beginning to move. For example, if you tied them at the same spot on either side of the branch when building the greenery and floral, it could be slightly lower on the side with those elements.
If your ladder does not reach high enough to tie the fishing line onto the ceiling structure directly, tie a small branch or something similar onto the ends and throw them over the bar (or whatever you are hanging from) and then attach that end back to the branch. This allows us to pull it higher or lower more easily. There is honestly a lot of engineering that goes into this part of the design! But don’t be intimidated. Just take things one step at a time and make sure everything is level at the end.
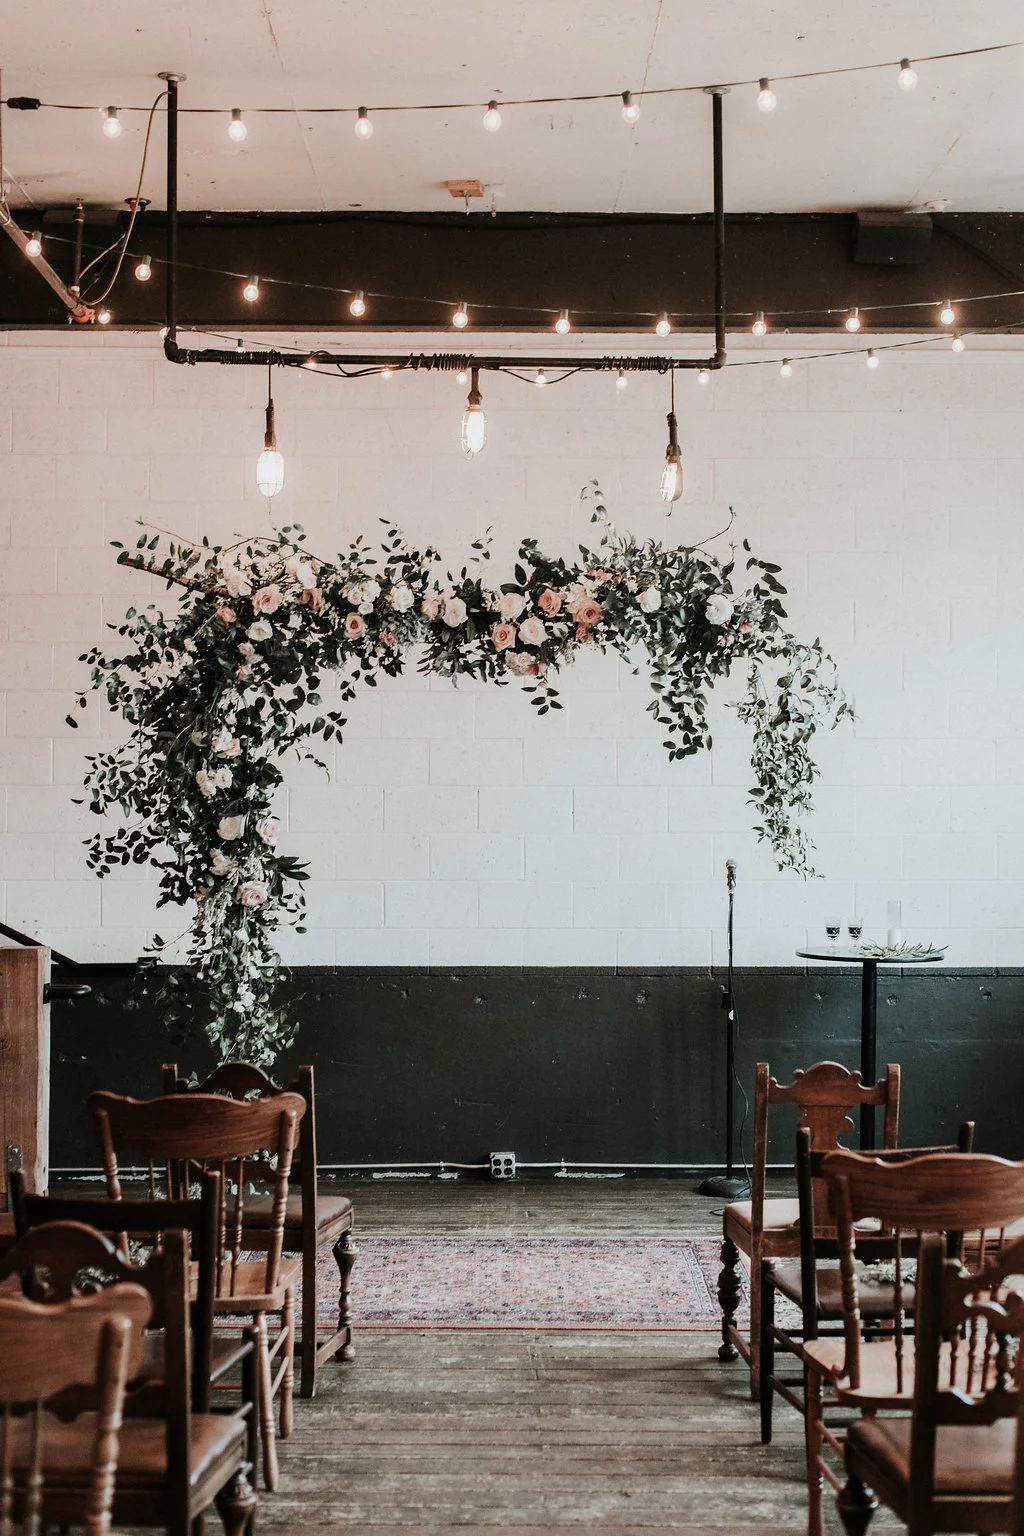
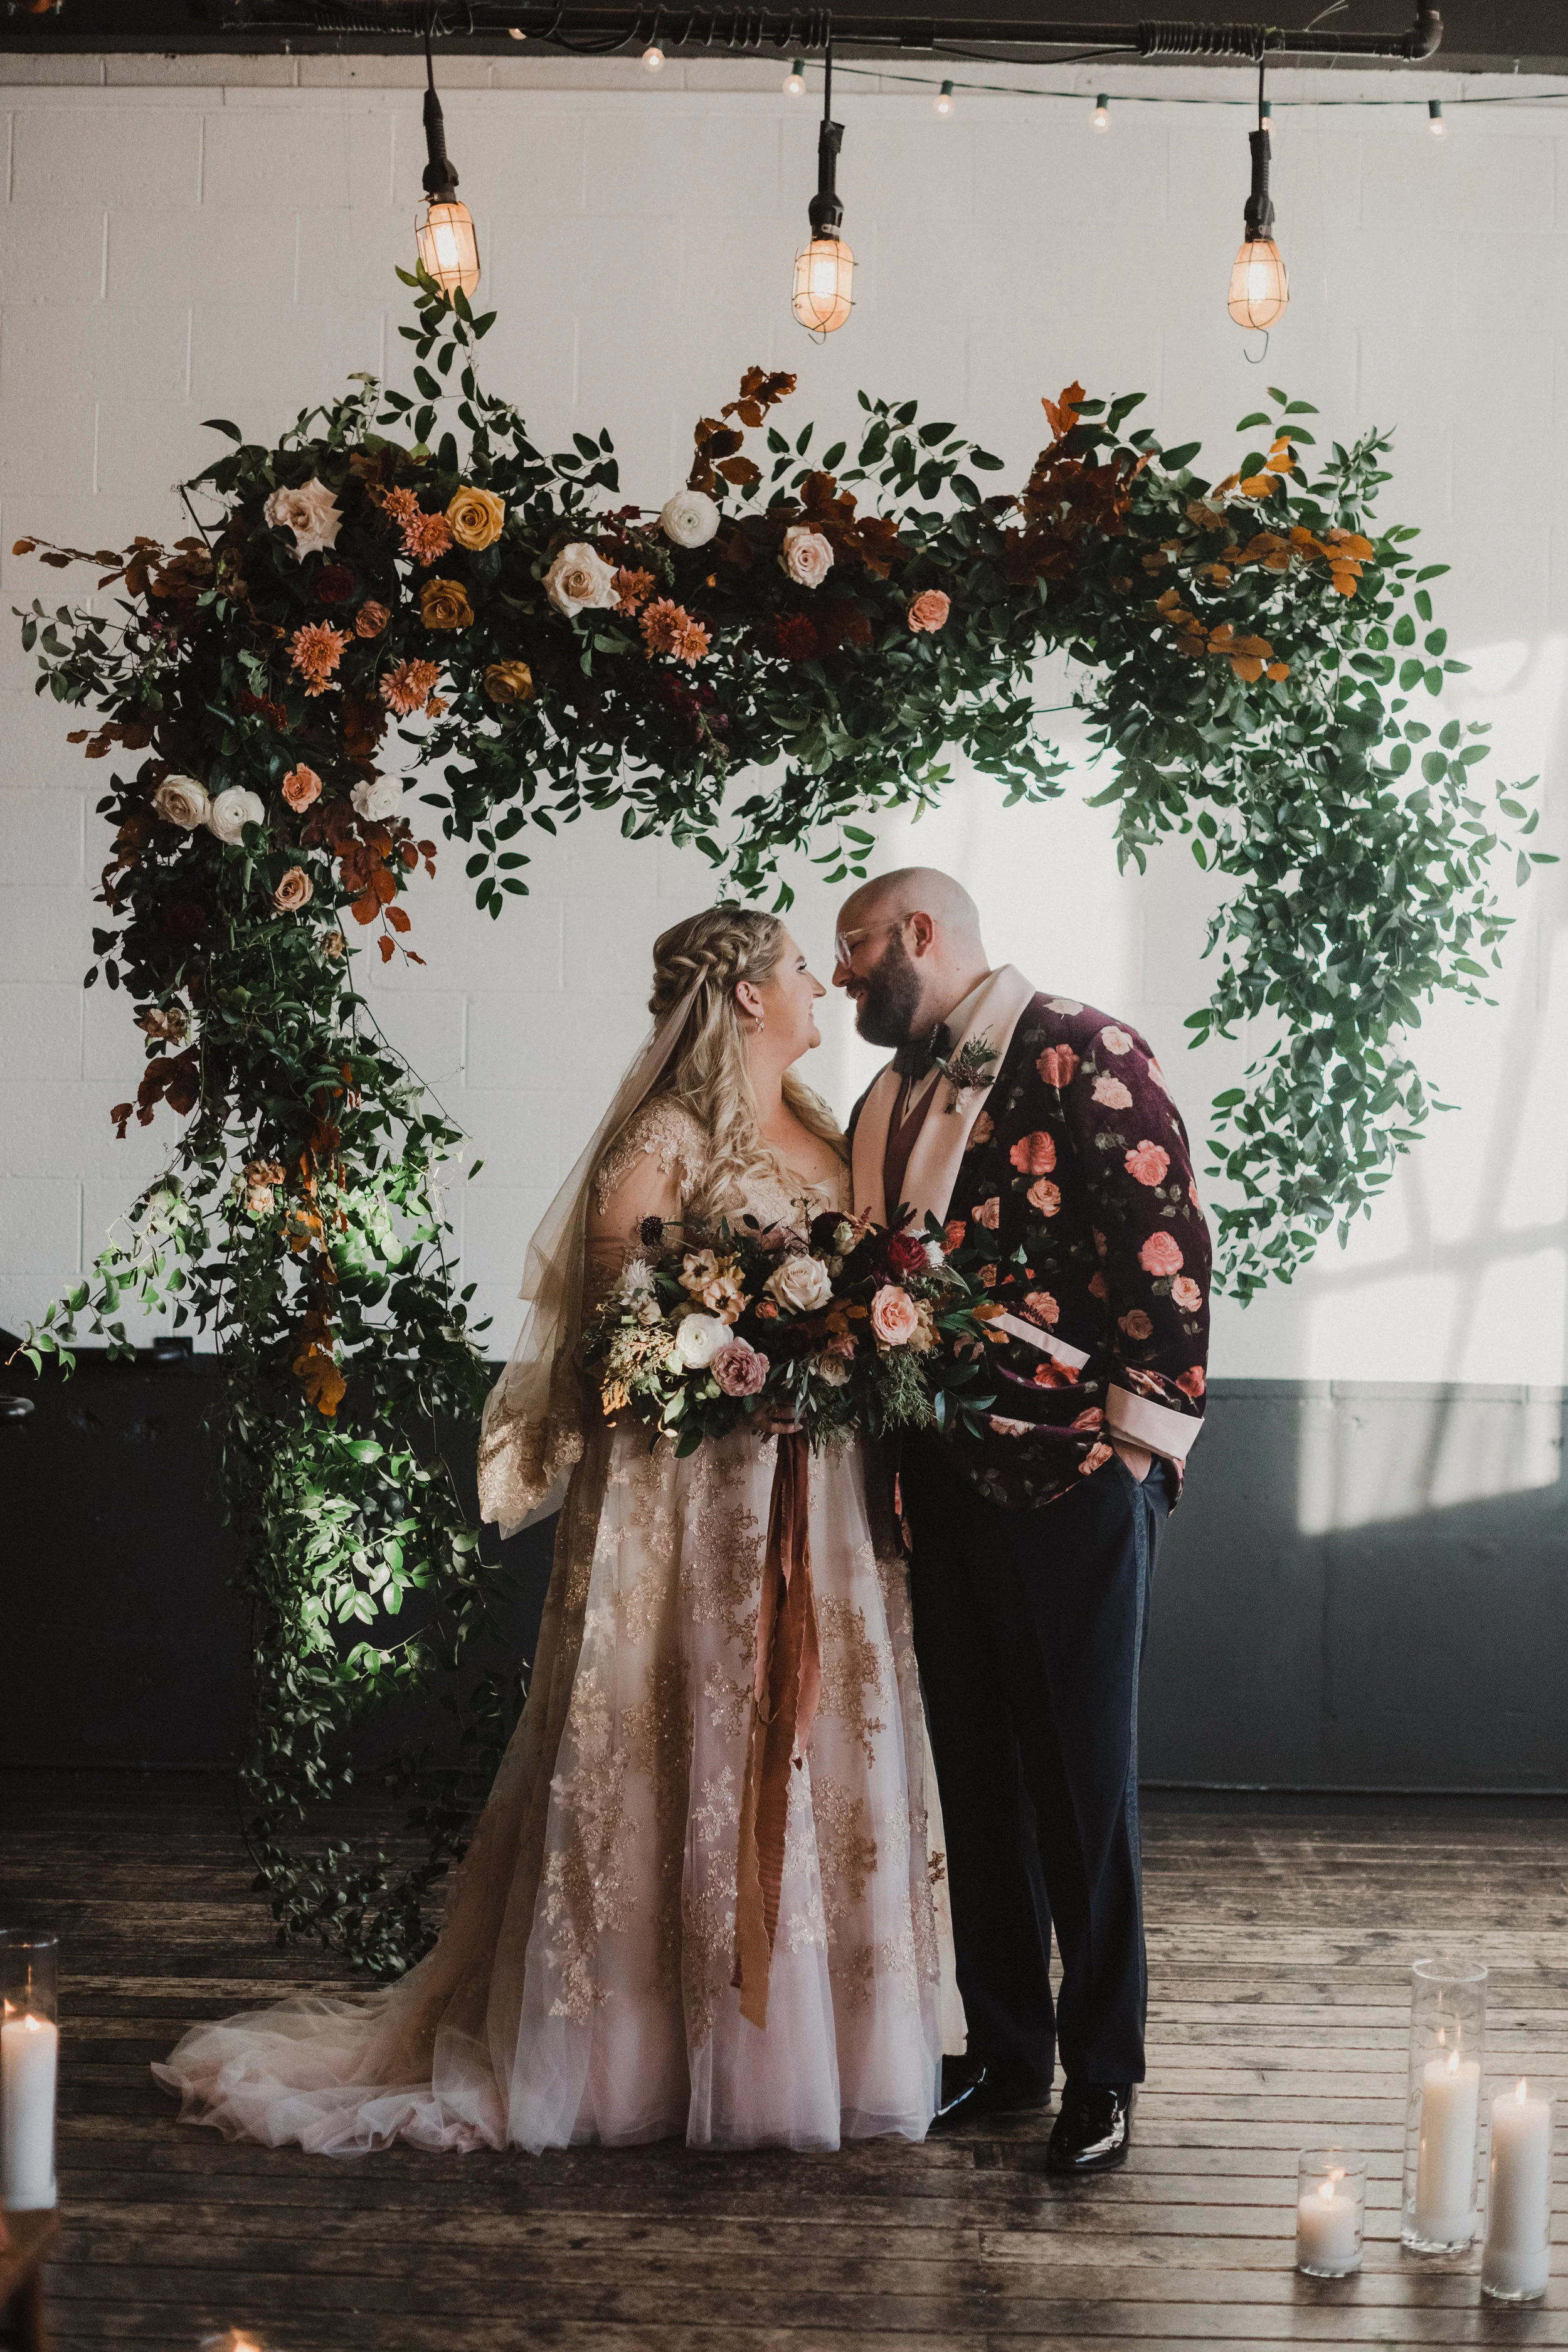
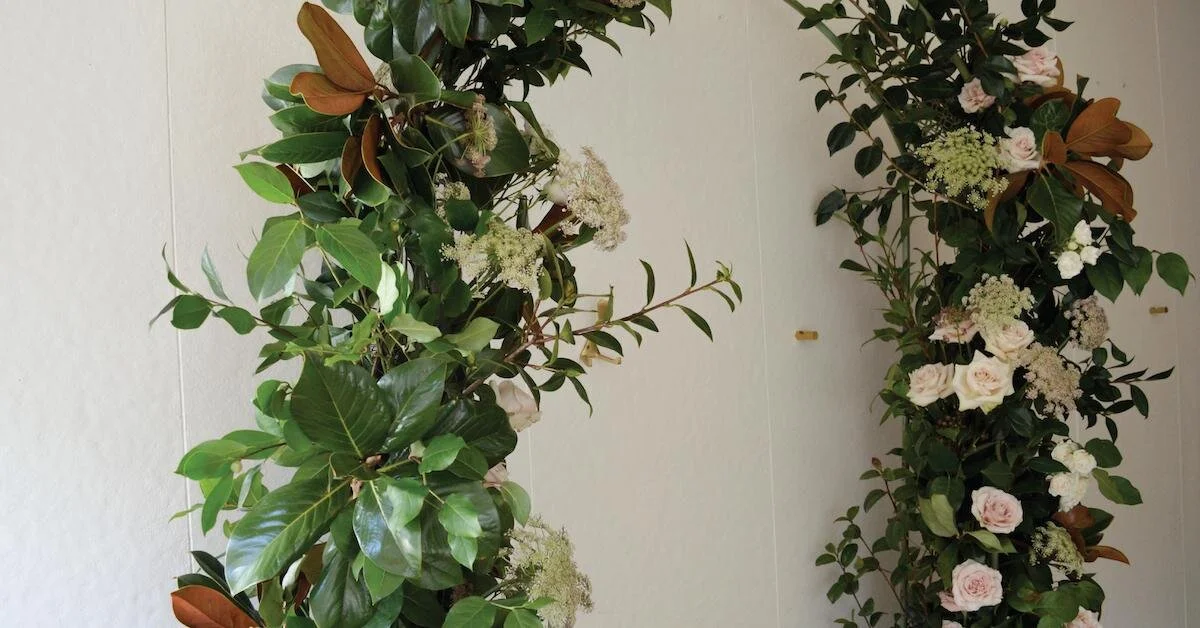
As for structure, we like to wrap chicken wire around the branch and secure it using zip ties. Then we place smilax or a greenery garland along the branch and down one side using the chicken wire, zip ties, and wire. Whether or not we use a premade greenery garland or smilax depends on the design we’re going for. Smilax will turn out very airy and light feeling whereas a garland will seem denser and lusher. A premade garland is also heavier and can make for a more complicated set up, so plan accordingly!
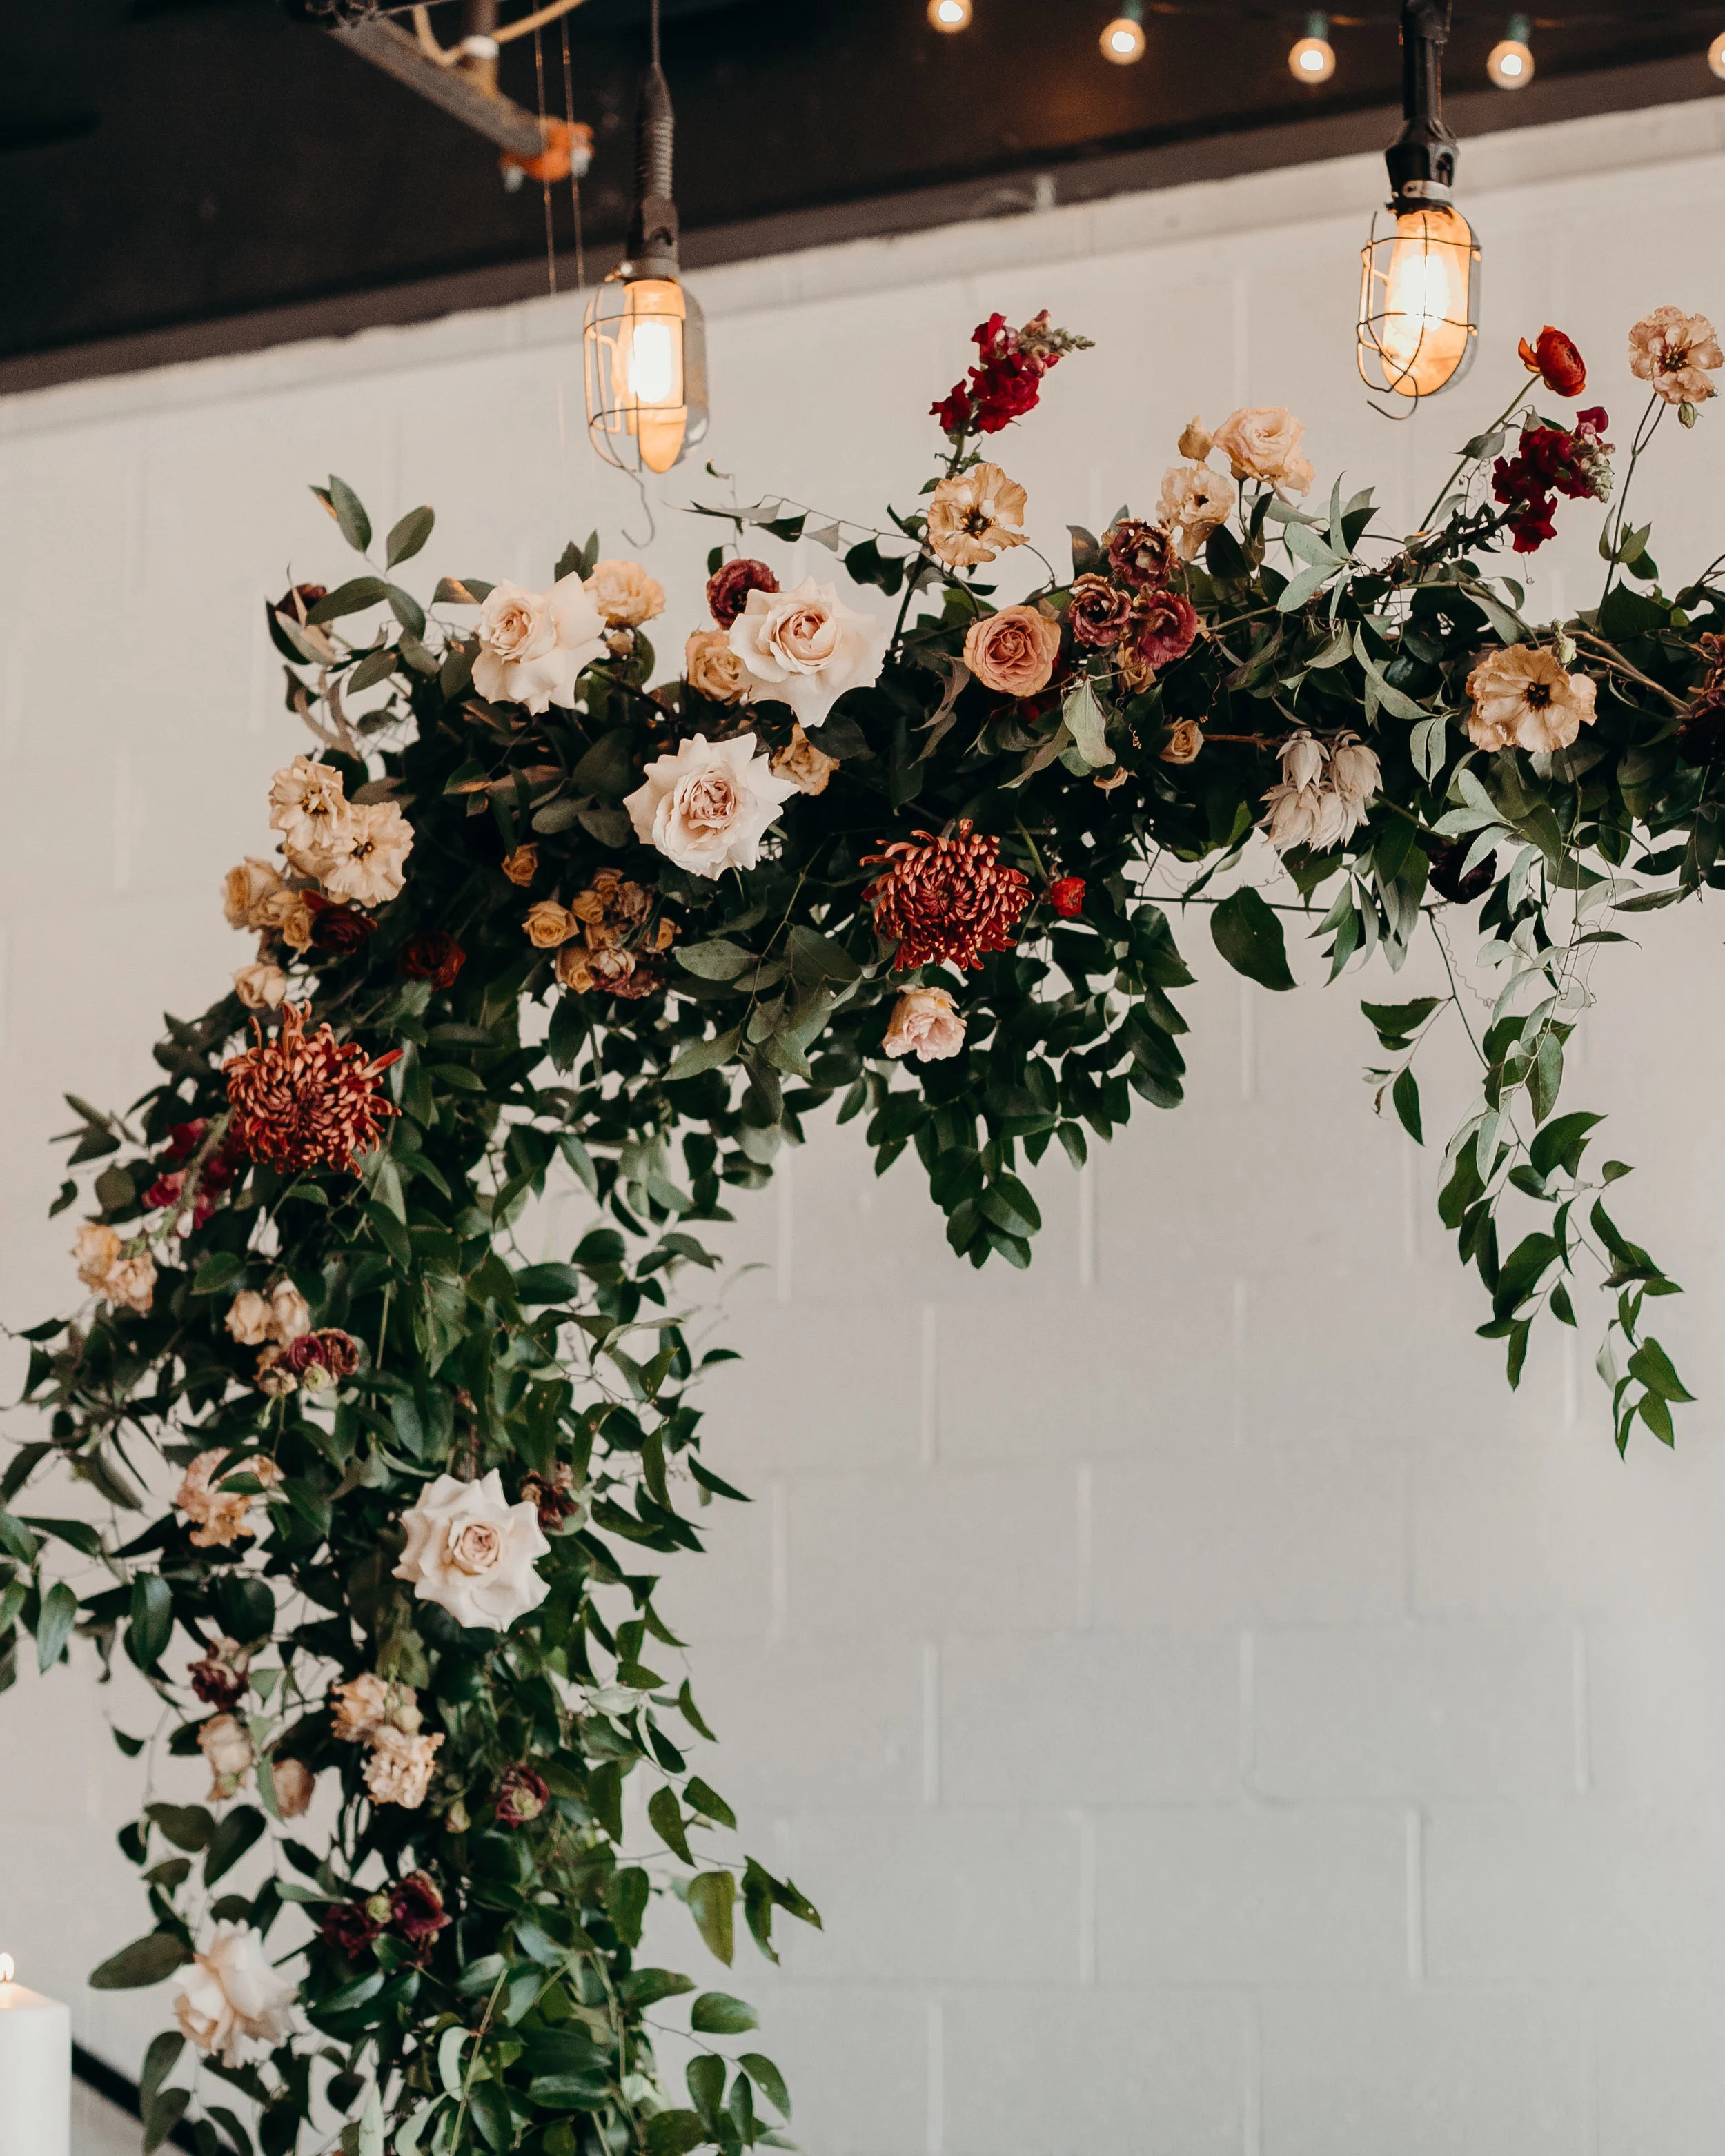
Once we have the greenery base across the top and hanging down one side, we will stick in flowers in water tubes to the top and sides where needed. This also depends on design, but we love focusing the floral on the top corner (wherever the greenery is spilling down) and trailing out lightly to the sides. We also tuck in texture and smaller bits of greenery to fully cover the branch. The chicken wire and water tubes are better than foam because they are less cumbersome and allow for a more organic, natural design.
Our favorite elements to use for this are larger roses, fun, light-textured blooms, and contrasting greenery. For example, if we were using smilax, we would use peonies, quicksand roses, polo roses, cappuccino, or secret garden roses for the focal elements, lisianthus, snapdragon, spirea, and queen anne’s lace for the texture, and spiral eucalyptus, bay leaf, or olive for the contrasting greenery.
In the past, we have run into problems with keeping them level. This is primarily a trial and error scenario (unless you double as an engineer and can calculate where the fulcrum is—and if so, do you want to work for us? Haha!). The most important part is to be able to move the fishing line back and forth on the branch until you have it at the right level. Make sure you don’t have too many zip ties on the branch. Otherwise, you'll be prevented that movement while you’re getting it level! You can always add a third point as well if you need to.
The best way to approach one of these is with an open mind and a lot of “just in case” materials. Here are our favorite ones: a branch, zip ties, strong fishing line (a few different kinds), tall ladder, water tubes, paddle wire, bind wire, and a level. And of course, know the hanging rules at whatever venue you are using! We would suggest a site walk-through before installing one of these.
Finally, be creative! And give yourself plenty of time for your first couple of tries. I think it took us two hours to do our first one!
Thank you guys so much for reading! We hope you feel more confident and prepared to design your first asymmetrical floating install.

Photographer Credits: Karra Leigh Photography, Alix Anne Loosely Photography, Hazelwood Photo