How to Create a Circular Flower Installation
In the last two years, I have created two large circular flower installations. One was an altar at an outdoor ceremony, and the other hung over the dance floor under a tent at the same venue. After every event, I take time the next morning over coffee to reflect on my work and make a list of what went well, what could have been executed better, and, if there were any crises, how could they have been prevented or how we could have been better prepared to handle them. I have come to find the product of these reflections to be one of the most valuable assets in my design business. This particular installation was no different.

These two weddings that called for a circular installation were booked very close to each other. In scheduling the first, I found a round hoop structure that was intended to be a garden arch and ordered it online. (You can check it out here.) I knew greenery and flowers could be wired directly to the structure and created an estimate based on the dimensions and how much product I would need.
Shortly after, I booked the second wedding. Using the same information for estimating a quote, I also coordinated with the planner and lighting company to hang the structure. I’ve had this lightning company hang several installations for me. The upside is, they bill the client—usually a few hundred dollars—and do the work to make sure it’s secure and works with everything else they usually have rigged such as other lighting, draping, etc. Since they are generally familiar with the venues and have all the tools, ladders, crew, etc., I don't need many team members and/or to haul the equipment along. The only downside is that I’ve learned to make sure I'm present when they are ready to hang them so that I can make minor “repairs” to the florals, as their team is not always “delicate” in handling them.

Shortly before the first event, I received an email from the planner letting me know that the bride no longer needed me to provide the structure. They had had one built (her father was a builder and hired one of his carpenters to create a large wooden structure) and just wanted it decorated. My first reaction to receiving this email was to panic! I was going into the craziness of fall wedding season, it was only three weeks before the wedding, I had already priced the installation based on my initial calculations, and now I was going to have to create an installation on-site on the day-of on someone else’s structure! I knew saying no wasn’t an option as they had already had it built, so I responded to the planner that I needed to see the structure and needed exact dimensions. She sent me photos and dimensions, and I set to work creating Plan B, Plan C, and Plan D!
I looked over my initial estimate and decided not to change it. I had added in the cost of the structure I had purchased as well as a transport fee since I had planned to book a rental van just for this structure which I now wouldn’t need. I also no longer needed additional break-down crew for after the event as the client was responsible for disassembling and moving the structure the next day. I determined that I would need the same amount of greenery and flowers (or possibly less) as the structure they created was not as wide/deep.
In hindsight (over coffee the next morning), the structure they built was a much better option for this venue as the ceremony site is on the water and is always somewhat windy. The dense wood had a huge base and wasn’t going anywhere. The metal structure I had planned to use is relatively light, and I would have had to spend time anchoring it into the ground with stakes.

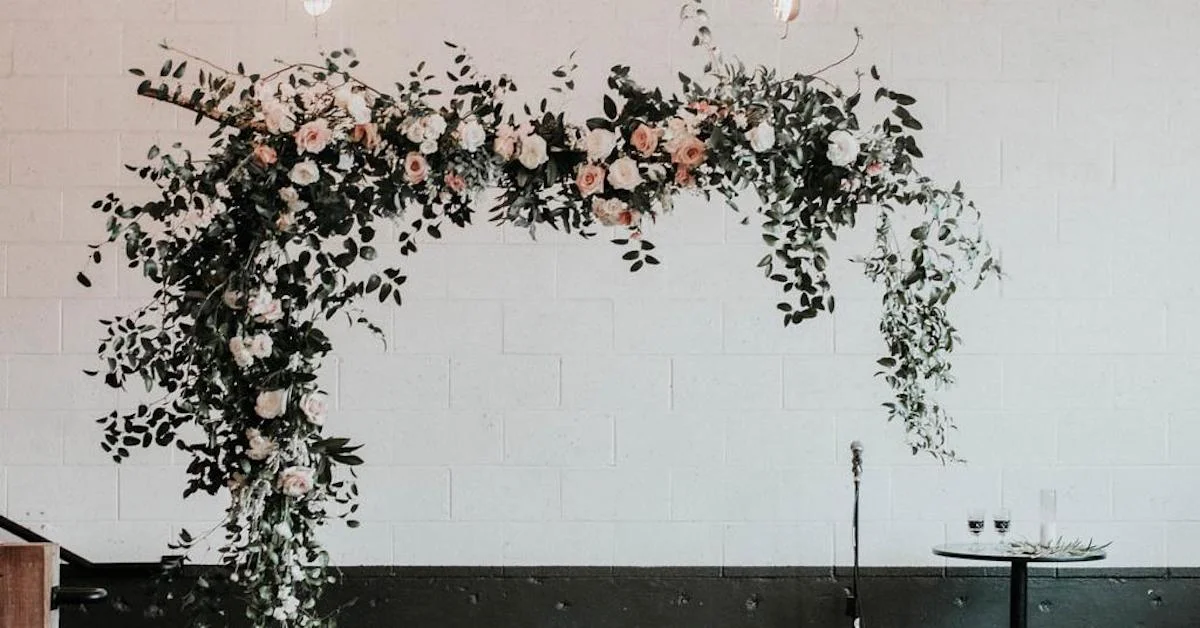
To decorate it, I decided to use finish nails to attach rows of wire to the structure that the greenery and florals could be tucked into. I booked extra help (in addition to what I already had for set up) to have a second set of hands just for this project. I chose greenery that would hold up well out of water so that I could go early in the morning to decorate the structure. I am lucky enough to have two massive magnolia trees in my garden and planned to use the big, glossy leaves as my primary greenery to best cover the wood. I supplemented with salal and pittosporum for different texture along with two types of hydrangea and white roses to add the white flowers the bride wanted.
The morning of the event, I arrived with two huge boxes of greenery (flower shipping boxes that I packed full of loose greenery to avoid lugging buckets). I quickly hammered tiny finish nails about 9-10” apart up going up and over the inside of the hoop as well as along the outside and strung wire the whole way, wrapping once or twice around each nail. This created a space to tuck the stems with the greenery poking out toward the front of the structure, covering the wood. The whole process took about an hour and a half, and I barely needed help for most of it. During my usual set-up time (about 2-3 hours before the ceremony), I came back and added flowers in water tubes throughout the greenery. I loved how it looked, and the client was thrilled.

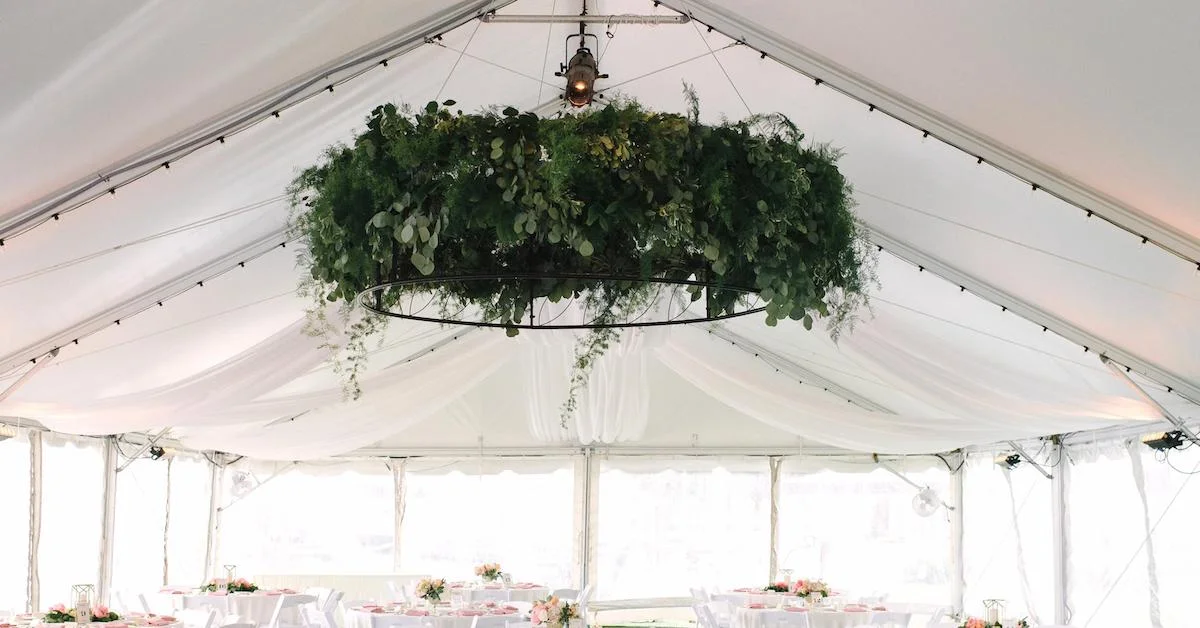
For the second installation, I wired small bundles of salal, pittosporum, sprengeri fern, plumosa fern and seeded eucalyptus directly on to the structure, taking care to wrap them tightly. I decorated the metal structure I had purchased in two halves. That way, it could fit into the rental van for transport, then bolted them together and wired into a circle shape on site. Everything stayed in place perfectly, and the greenery held up wonderfully from the time I created it about 24 hours before the event. I brought along extra greenery to add finishing touches if there were any visual “holes” once it was hung, but the greenery was so thick that it almost wasn’t necessary.
This metal structure would be perfect for indoor use as an altar or outdoor use in an area without wind. It did come with stakes to put into the ground, but I feel like I would not be comfortable trusting them entirely in a windy location. I loved using it as a hanging piece as the metal was fairly light to begin with and had plenty of places to wire greenery directly onto. It was approximately 6’ in diameter so was large enough to be a focal piece over a dance floor. I also love that it breaks down into two or even four pieces so can be mostly decorated in advance and then assembled on site.
Feel free to comment below or contact me if you have any questions about either installation. I always love to talk flowers!