How to Create a Large-Scale, Foam-Free Summer Floral Arrangement
Summer's bounty gives us rich sunset tones and beautiful dahlias to enjoy. In this tutorial, we'll be creating a large-scale, foam-free summer floral arrangement in an urn that transitions from shades of dark rust and orange to warm golden yellows and earthy creams. Once the warmth of summer has left us, this step-by-step floral arrangement lesson can easily be applied to any season with available flowers.
Gather Tools and Flowers
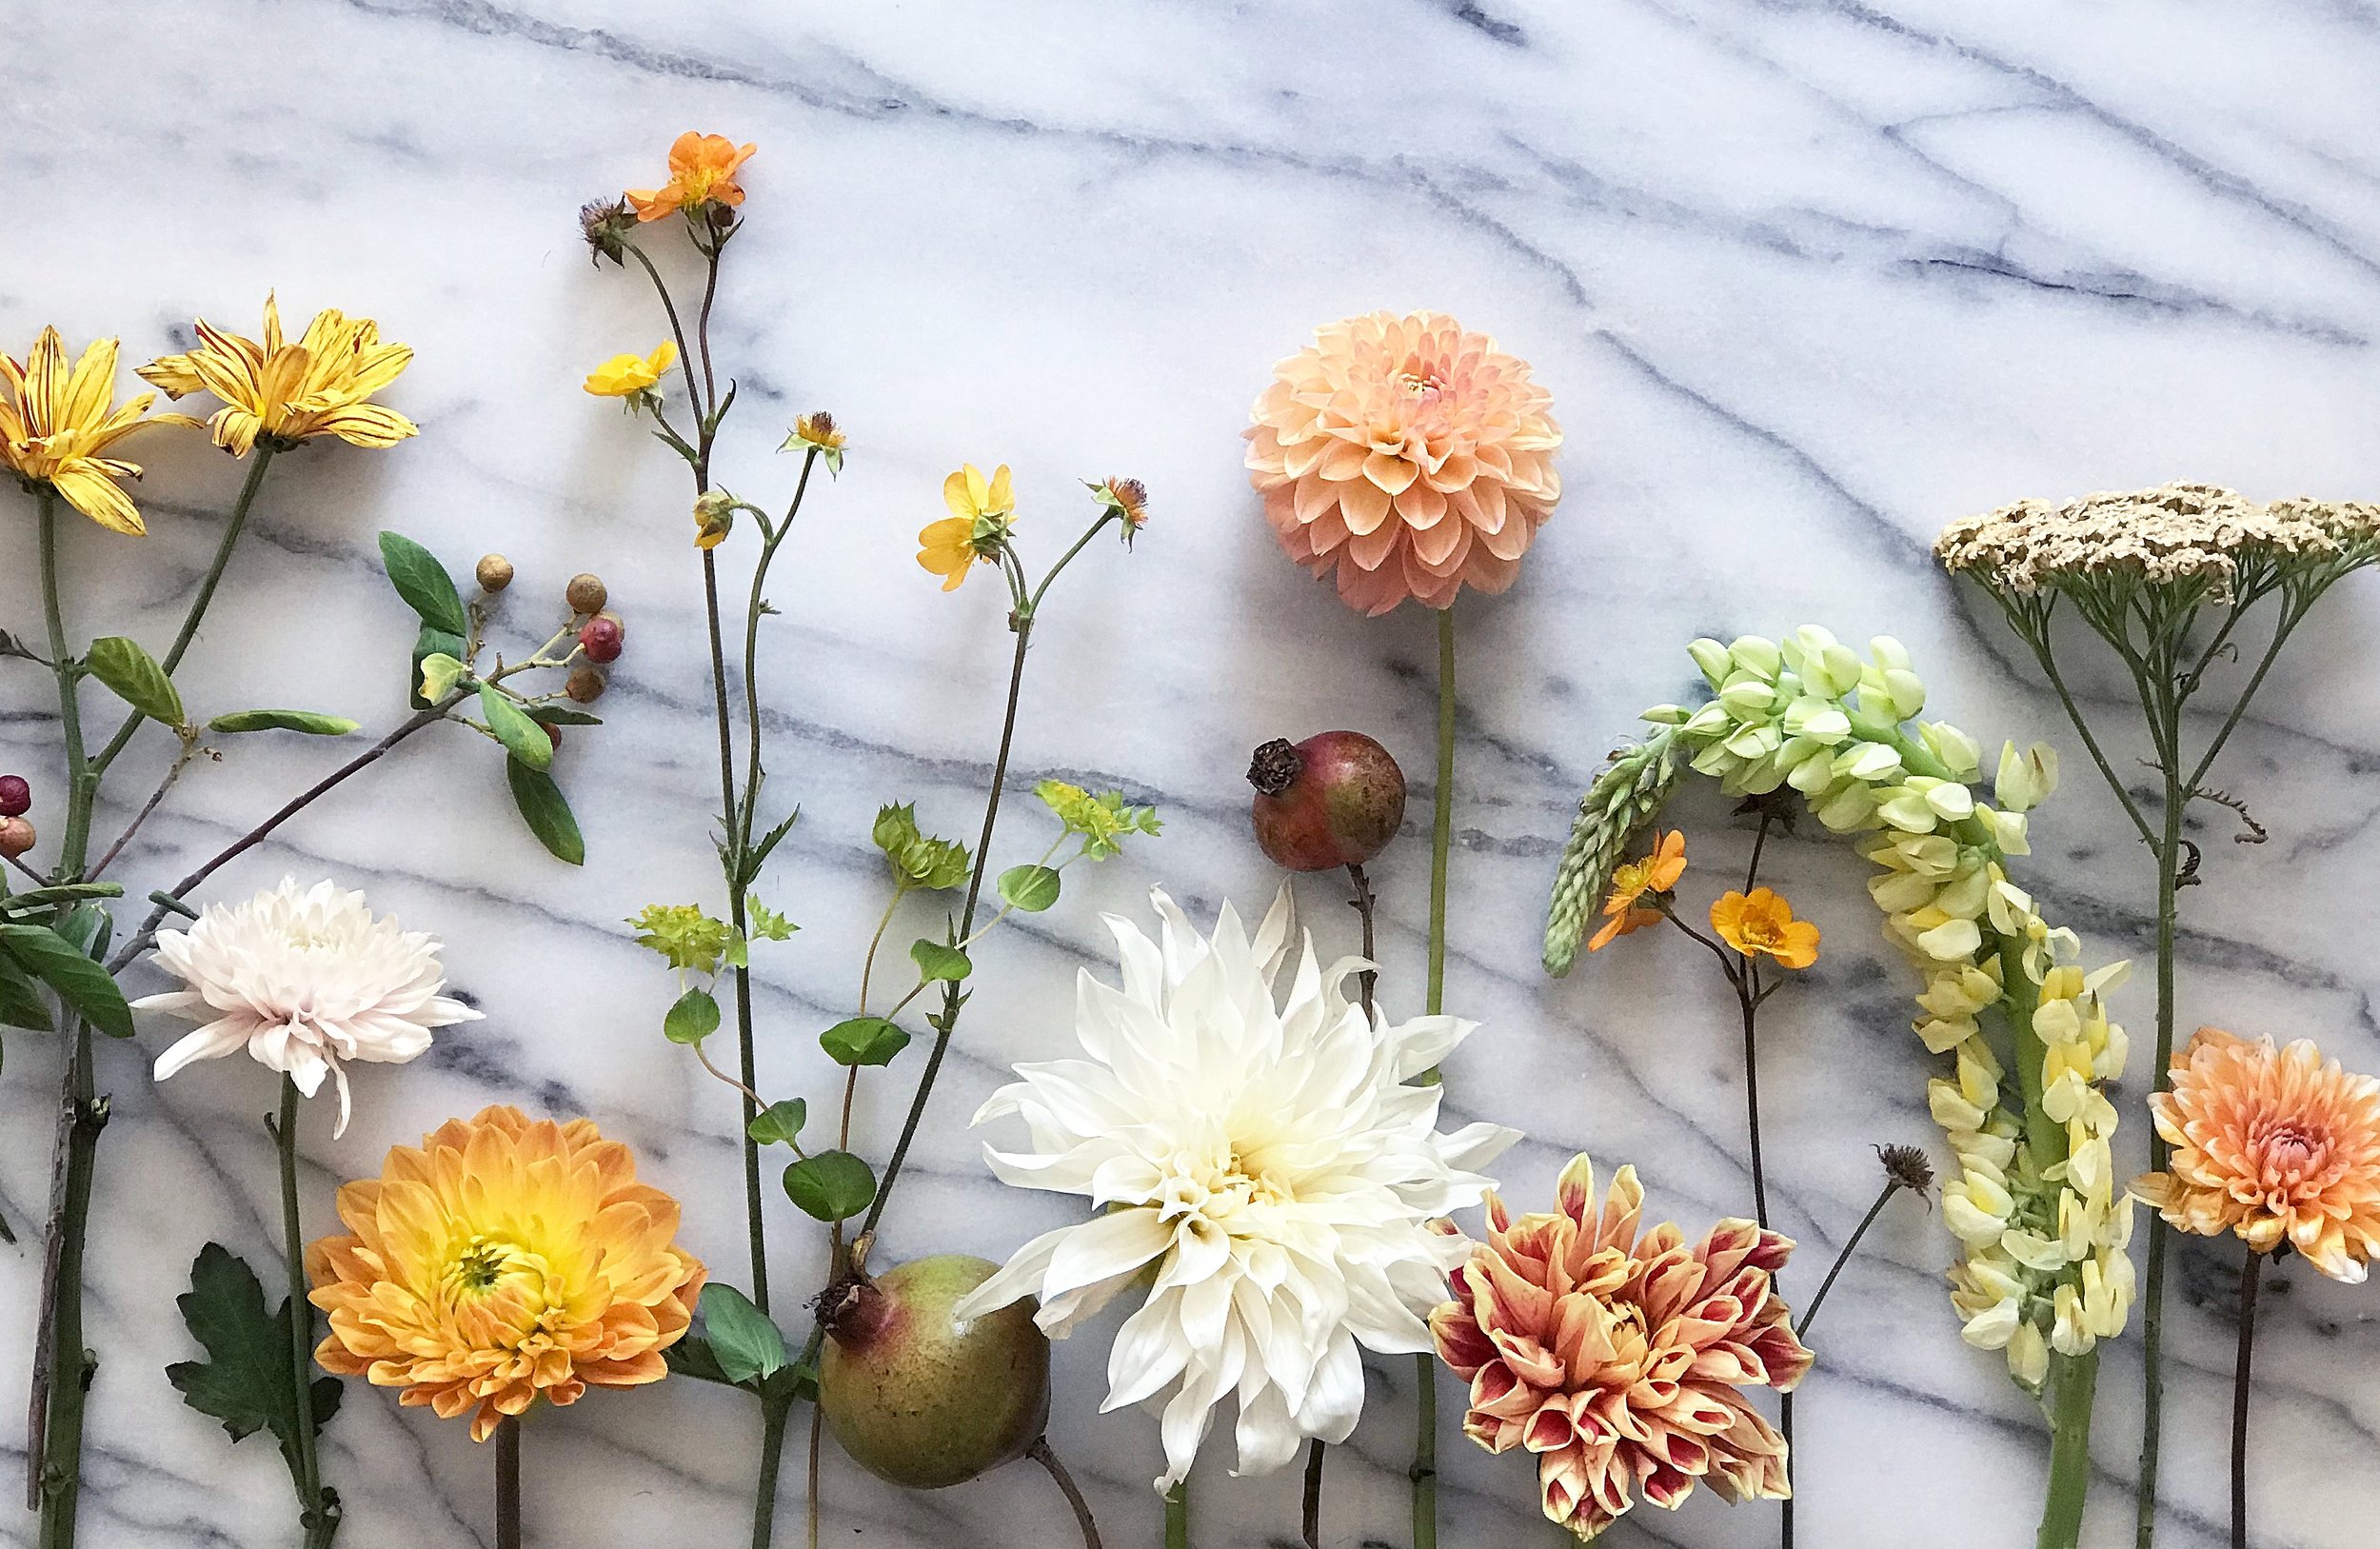
For this large-scale, foam-free urn arrangement, you will need to gather the following materials. Flower ingredients are by no means limited to the list below.
Chicken wire
Waterproof tape
Clear tape (if desired)
Clippers
Dinner plate dahlias
Smaller round dahlias
Cotoneaster branches
Bupleurum
Achillea
Pomegranates
Chrysanthemums
Lupine
Geum
Optional:
Dried palm leaves
Smokebush
Prep Vessel
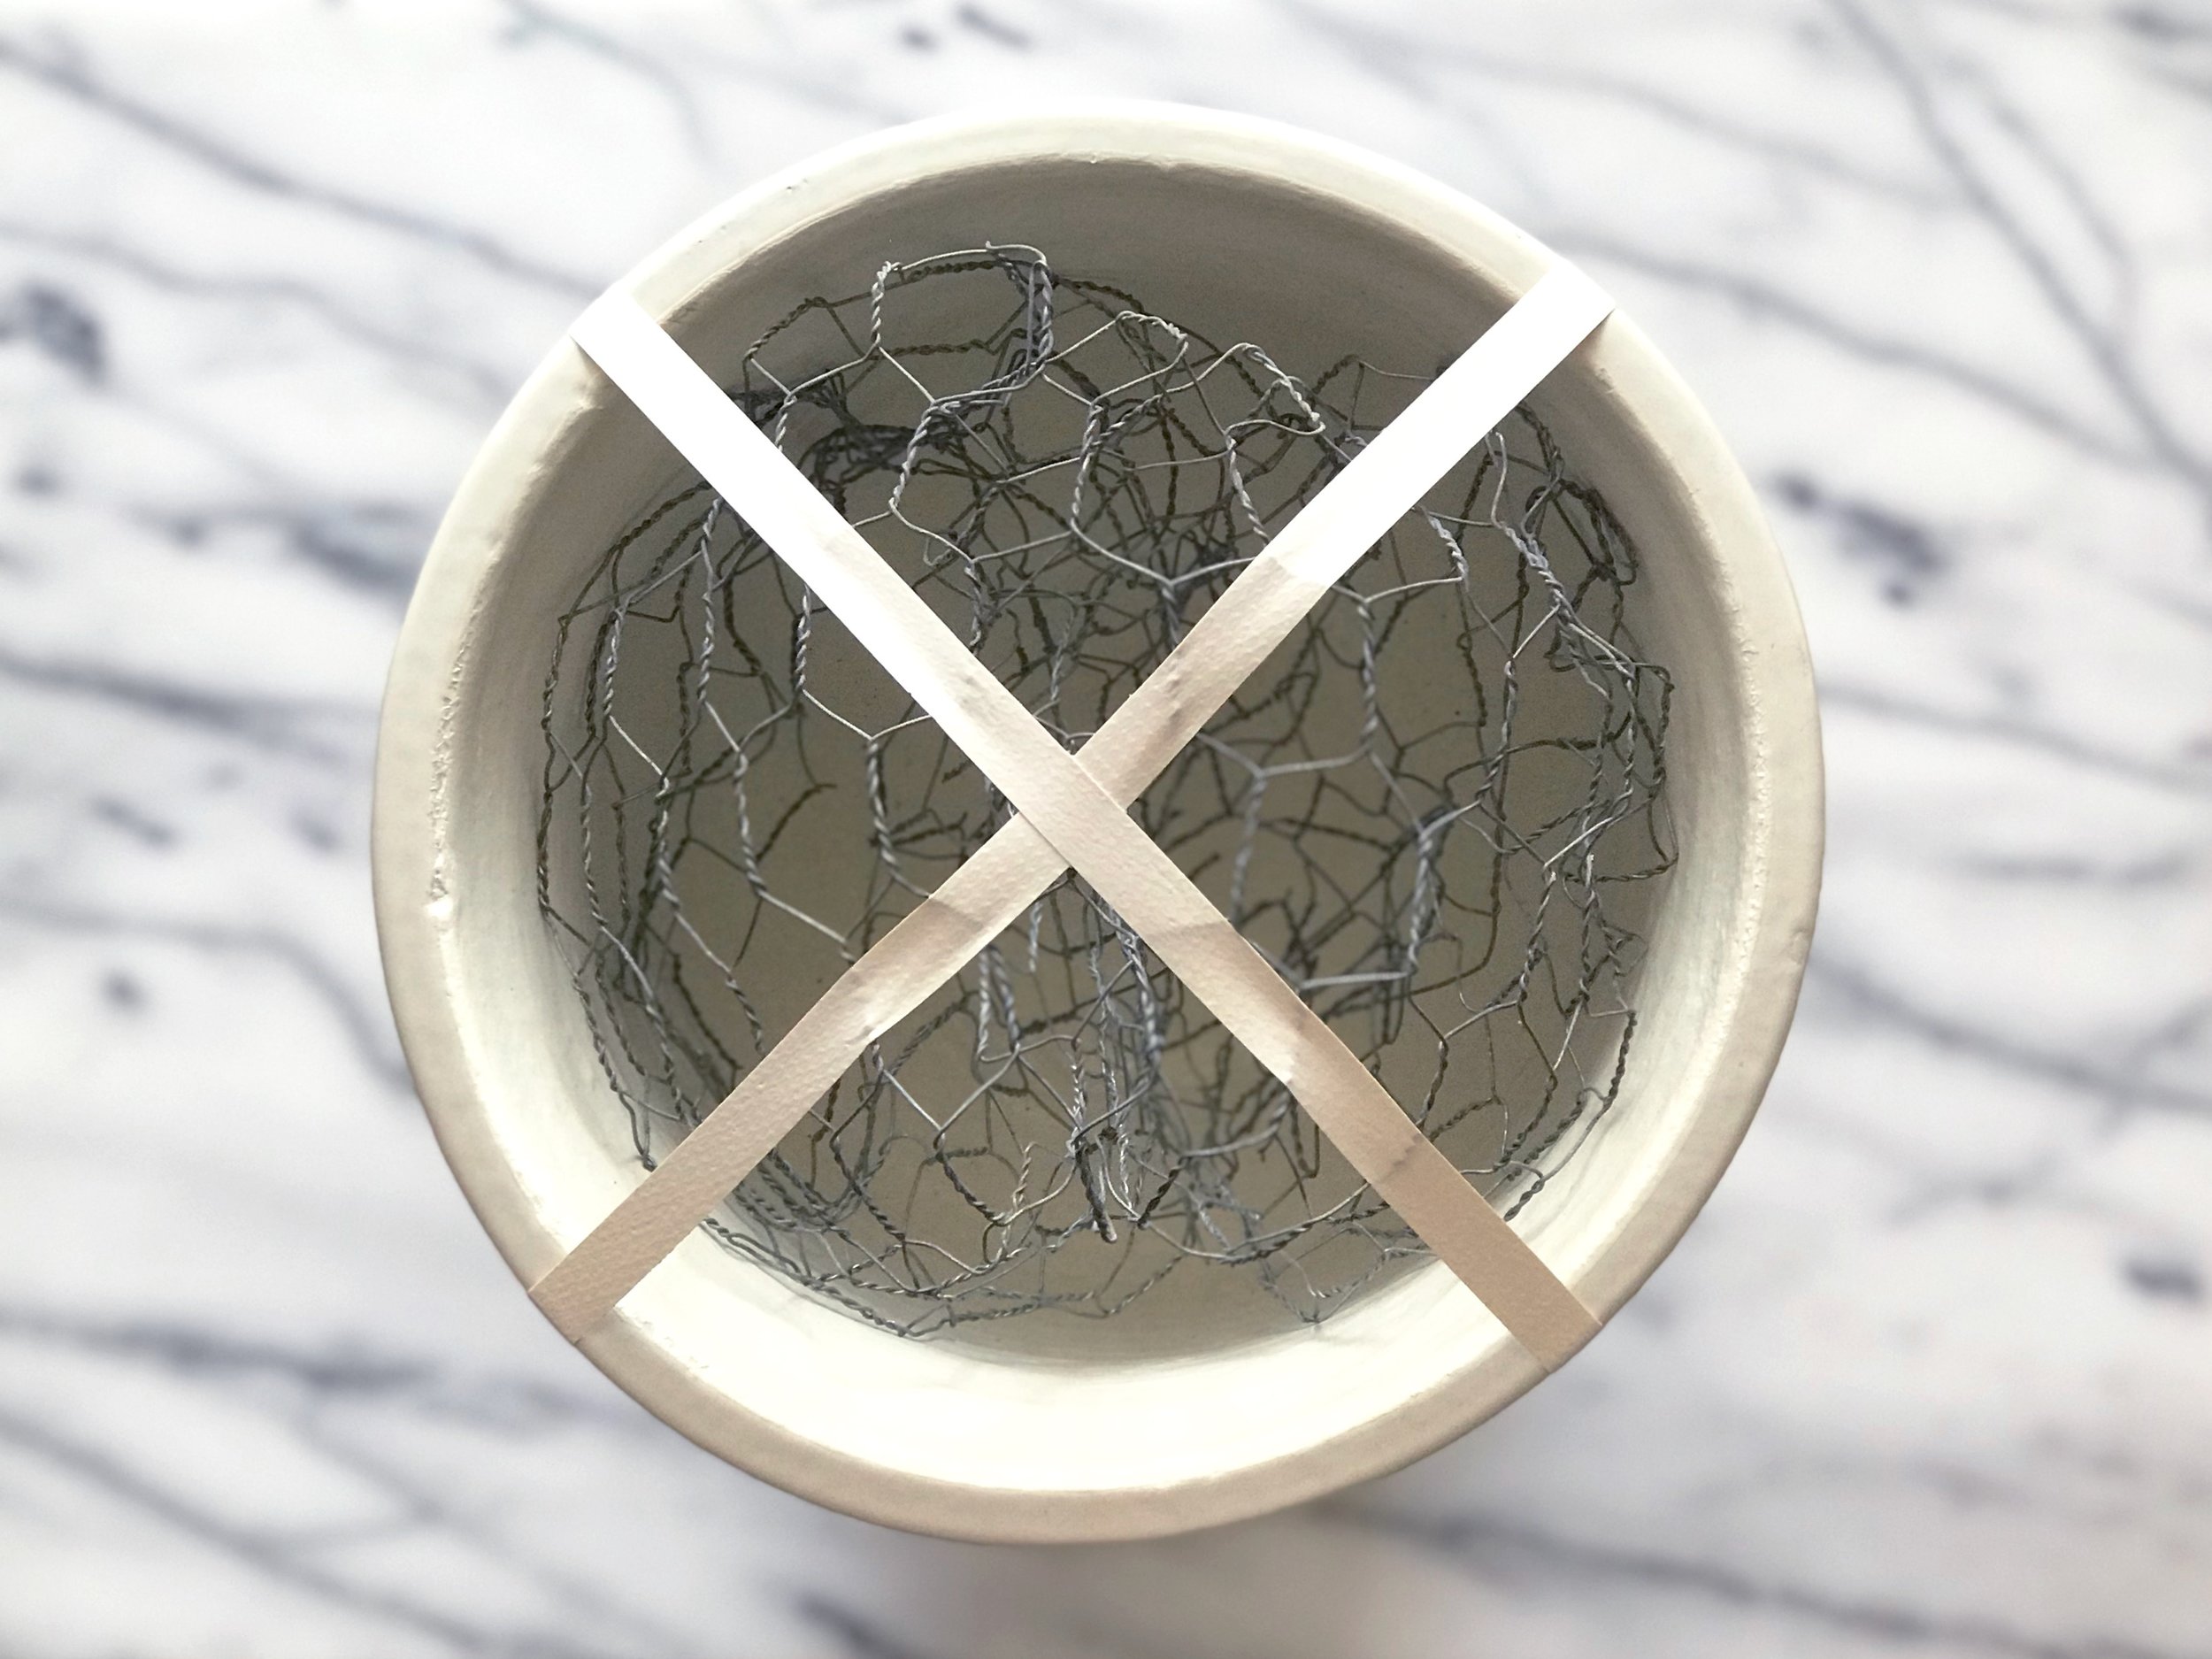
For this foam-free arrangement, we'll start by forming a large ball with our chicken wire. The chicken wire ball should be able to sit at the bottom of the urn and also extend a little above the lip of the vessel. Secure the chicken wire tightly with waterproof tape in an 'X' formation. For extra strength, you can place waterproof or clear tape around the lip of the urn, so the taped 'X' stays put. Be sure the tape is pulled extra taught, so the wired ball has no chance to wiggle around in the urn.
Add Branches and Filler Flowers
With the aid of the chicken wire, begin to create the basic arrangement shape with the cotoneaster branches. The ends of the branches (cut at an angle and up the stem) should hit the bottom of the urn, ideally connecting with two points within the chicken wire ball for stability. For heavier branches, try to lean them against the side of the urn for extra support. With some additional bupleurum, bring stems in at multiple angles, leaving room to place flowers, while also creating the overall asymmetrical shape of the piece. Ideally, branch placement should help carry the viewer's eye through the arrangement, from the top to the midsection and sides, traveling below the lip of the urn to the table. With regard to proportion, make sure the tallest point is about 1.5 times the height of the container.

Add Fruit and Additional Filler
Next, add the heavy fruit on the vine as well as color and texture with more filler flowers. Pomegranates, with their short stems and heavy weight, should be placed at the edge of the urn so that they rest on the side of the vessel for support. I love how they spill over the sides of the vessel, creating a drippy look. I've added champagne and rust achillea, grouped by color a bit, for texture and placed it at varying heights to create depth. Grouping achillea colors in a cluster helps create a focal area for the eye to rest.

Add Statement Blooms
Dinner plate dahlias, a beautiful summertime favorite, are the stars of this show. Cafe au Lait's and bi-color beauties from Mexico are placed at different heights and depths (high, mid-level, low) and also help carry the eye through the arrangement. As in nature, not all flowers' faces have to look forward. I love seeing the sides and even the backs of flowers, just as they would grow in the garden. I also like using not only the fully-opened dahlias but the buds and semi-opened blooms to show the life of the flower in all its stages. Focusing on the rust color, group like colors to make a focal point, bringing in a few Cafes for a pop. To show movement, place a few dahlias below the lip of the urn, for that drippy, overflowing effect.

Add Secondary Blooms and “Sprinkles”
For added depth and abundance, layer in your smaller blooms like round dahlias and various mums. Tuck some in deep, and stretch some out farther than your larger dahlias. For color transition, you'll see a bit of grouping with the round orange dahlias next to the larger rust-colored dahlias, and yellow bi-color dahlias and mums connecting to the lighter Cafes. Add a few stems of lupine for more texture, as well as the wispy geum for delicate sprinkled "flutter."


Play!
If you have time, play with the arrangement's tone and overall vibe by adding additional elements. Deep smokebush gives the arrangement a more moody feel, perhaps even a bit of a masculine aspect. To me, adding some dried palm leaves gives it a bit of a desert, Southwestern vibe. What do you have lying around that you could add and play with to create a new feel?


Fine Tune and Photograph
Once your arrangement is complete, set that baby up to shoot! If you don't have immediate access to a professional photographer, phone captures are great! (Check out the Team Flower How to Photograph Flowers class for more how-to on this.) Find a clean backdrop, some natural, side-entering light, and an attractive base to set your arrangement on. Always shoot at eye level, adjusting the light setting if you need for exposure.
Once you've taken an initial photo, look it over to see what, if anything, you'd like to change or adjust. Sometimes seeing an image of your work can help you notice things you might not notice just by looking at the arrangement. In this case, I decided to edit some of the Cotoneaster branches to be a bit lighter and give a more airy feel. Your last step is to make sure your arrangement has lots of cool water to drink and enjoy the summertime beauty you have created!