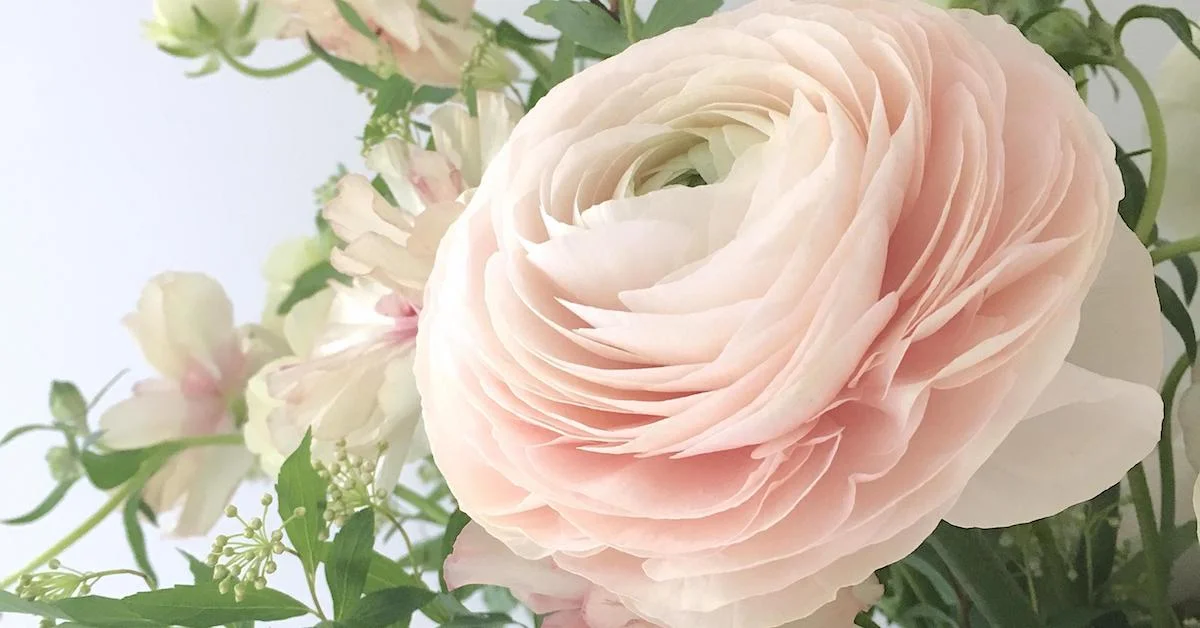
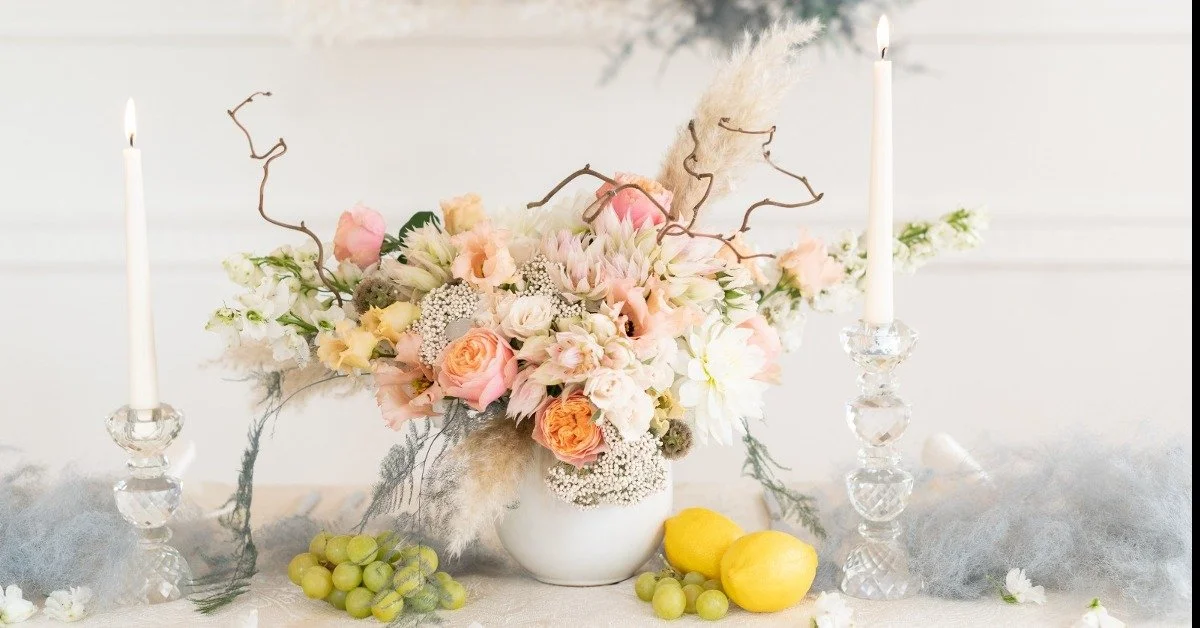
In this Team Flower Seasonal Design Highlight, we're featuring an arbor design by Raysa Farah of LK Verdant, a wedding and event florist who is committed to offering timeless arrangements of flawless quality.
All tagged Centerpiece
In this Team Flower Seasonal Design Highlight, we're featuring an arbor design by Raysa Farah of LK Verdant, a wedding and event florist who is committed to offering timeless arrangements of flawless quality.
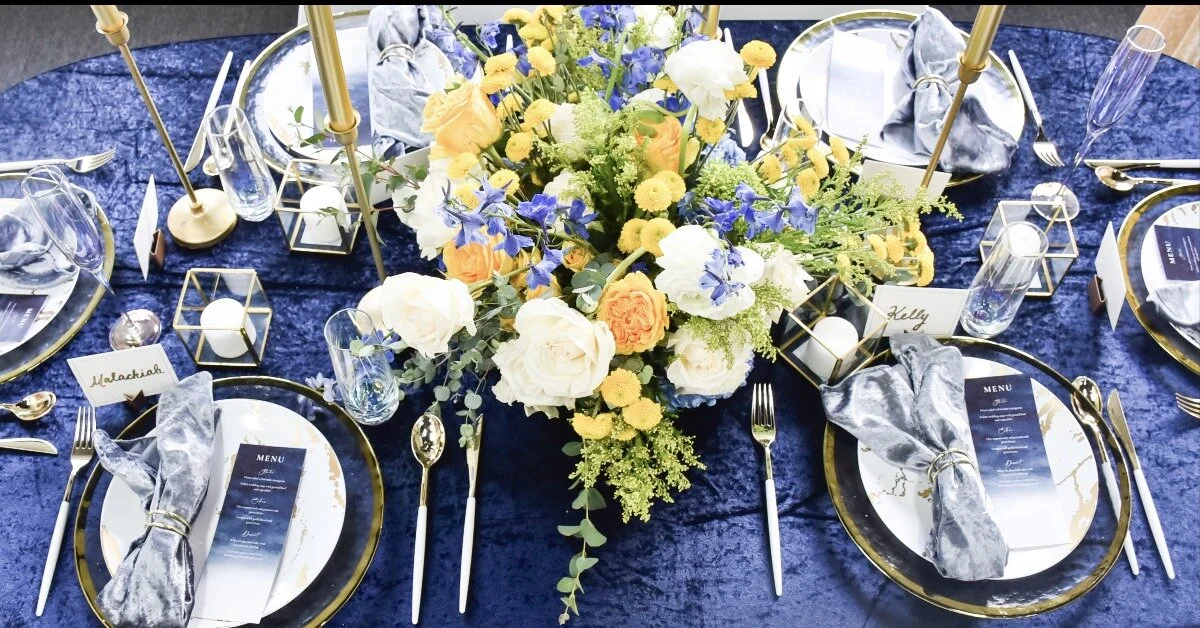
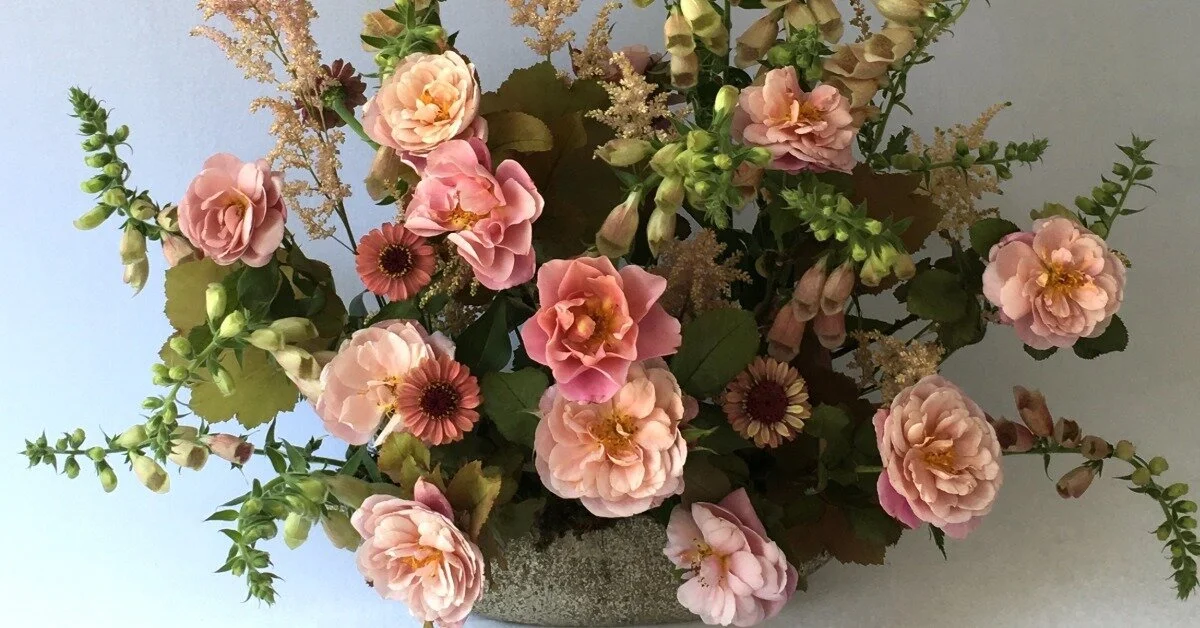
Looking for exquisite tablescape ideas for yourself or your design clients? Discover the building blocks for confident, gorgeous tablescapes, no matter the style of your dinner party or event!
Can you really make a beautiful cocktail accent arrangement using only ONE ingredient? Kelly shows you how in this short tutorial! She demonstrates how to maximize both budget and style by purposefully placing every stem, leaf, and bloom, bringing the principles of design to life in this sweet piece. Knowing how to make an impact with a small amount of blooms is a great way to add value to your client's wedding designs.
Have you used the classic floral tape grid mechanic in the past? It can be time-consuming, and it isn’t reusable. Enter the DIY Floral Grid—it serves as the reusable fix to the traditional tape grid used in flower arranging. In this article, learn how to use it (as well as how much time and money it can save!)
Need to be a budget master for your client by scaling back on larger pieces and mixing in some smaller ones? Small arrangements don't have to look cheap or boring! You can maximize both budget and style, and Kelly shows you how in this video.
What are the three levels of an arrangement, and why should we be thinking about them as we design? In this video, Kelly walks you through the design principles of balance, shape, and rest and how she used them to guide every piece she creates. These three principles are the building blocks that lead to efficiency, balance, and freedom in design!
I took some supplies you would find at your local hardware store and made a beautiful 8 foot long centerpiece. In this arrangement you'll find bunny grass, yarrow, love in a puff vine, tiny hands (Japanese foliage), standard peonies, and much, much more! You can create a long table centerpiece following these simple step-by-step floral design mechanics. Watch this video for a quick how-to.
Transcript
Hi, it's Kelly with Team Flower. I wanted to pop in and show you the mechanics behind this table runner that we've created for a styled shoot recently. It's driven with me all the way back from Atlanta. It's still in one piece. It's looking a little tired. But I still wanted to bring it on and talk about it for just a minute, because I thought it might help you with a future project that you're working on.
So what we have here-- I'm always trying out new mechanics for how I can-- different materials that I can use and ways that I can put things like this together. So you may have seen another video where I did something similar to this, where we used garland and oasis. And we had a little system for working like a floral garland that way.
Well, this is actually, underneath-- I'm going to flip it up so you can take a quick peek. This is a piece of molding for a house. And Jessie, if you can get a little close up right here, you'll see underneath I have oasis bricks lined with a little bit of chicken wire under here. So that is there. And then I have just connected it with tape the whole way down.
So I'm going to pull one little section of this apart so you can see underneath. Is this a good section, Jessie? OK. So I'm going to pull these little guys out of here. And then I'll just tell you what's in here, too, in case if you see an ingredient that you like for a project you've got coming up.
These flowers came from Cut Flower in Atlanta. Really loved shopping their cooler. Alex helped me with my order that day and was super friendly.
So if you're looking for a source in that area, you have a project coming out, I highly recommend them. Beautiful cooler, one of the best coolers I've ever walked through. So Cut Flower Atlanta for these materials.
But you can see here-- can you see that, Jessie? What I've done is I've taken one piece of oasis and I've cut it into four pieces, but lengthwise. So it's nice little skinny pieces. They fit into this piece of molding from Lowe's hardware perfectly.
And then the little cup shape of the molding, you can see it just has a little dip here. That catches all the little bits of water under the oasis. So whenever we put this together, I could just tip the water off the edge.
And that kept it easy for traveling in the car. I didn't have water in my car. And whenever we set it onto the eight foot table with the linens and everything, it stayed nice and clean and dry. So I was really happy with how this piece performed. I liked it a lot.
I put just this little bit of chicken wire over here. I like to do that with oasis. Just in case, if you're repositioning stems quite a bit, sometimes it can break on you or just pop off. And so I just have just a little piece over the top of it to keep it all together.
This does take two people to move. It's eight feet in length. If you just have one person that was moving things, I'd recommend just snipping in half and doing four foot sections and working those together. But I loved the convenience.
If you just have a buddy going with you, you can just grab here and here. And they can grab there and there. Fits perfectly into the back of one of the U-Haul cargo vans. Or I have a Sienna minivan that it fits straight up to the front whenever you take all of the seats out or fold them down, however your car works.
In terms of ingredients in this piece, this is for like the blushy fall bride. I really love this palette a lot. I have some yarrow in here that I used low for coverage of the oasis. And I also brought a little bit of it out higher for some texture in the arrangement.
I have a little bit of bunny grass in here. It's what it was labeled as. It's a little bit different than the bunny grass I typically get, so I'm not sure if that's actually-- I'm not sure.
I'm not completely convinced that's exactly what it is. But it might be just maybe a different variety of that. But some type of grass. I've also seen grass that looks similar to this called foxtail grass. So it might be that.
I have some like love in a puff foliage down here. This foliage here is called tiny hands. It's from Japan. I have, of course, these big pretty peonies, spray roses.
A couple of these little-- I think this is-- I want to say this is cappuccino. They were unlabeled. But I have seen something very similar to this labeled and cappuccino is what it was called. So that's what I'm thinking for that.
These are beautiful tree peonies. These are from Japan as well. So peonies are now becoming available more year around. The tree peonies less frequent than your standard ones here.
But it's so interesting. They're coming just from different parts of the world throughout all of the growing seasons. And with shipping and just the logistics that they have available to them now, we're able to see and have these different things that are happening in different parts of the world, which is fun.
So we've got that. I have some of these pretty ranunculus scabiosa. Have a couple little acorns here. And I think I got almost-- I think got it all-- oh, bay leaves. That's what we used for our base coverage there.
So I'm back with my list. I forgot a couple of things, so I wanted Jessie to add this in at the end. But I missed this ingredient here, just pretty, blushy, real deep, and again nice texture and coverage low. And I'm going to spell it for you H-E-P-T-A-C-O-D-I-U-M, $9.50.
I also missed the amaranthe that I had pulled out. So this is the rose amaranthe. It's pretty. A lot of local growers have this now. So it's something that you can check around with if you're in an area where you have a couple local growers.
And then this leptopods-- they're very small, hard. They almost don't look real in a way. And I'm sure they would dry really well. But, yeah, little leptopods.
And these are porcelina. These and these came from Mayesh in Charlotte on the way down. So I picked those up along the way. And I think that handles all of it. Ranunculus are from Chile, in case you're interested. Yeah, that's all.
OK, just wanted to make sure you have this. Thanks, so much, for popping in. I hope that this inspires you for one of the projects, and maybe just makes your burden a little bit lighter. Thanks, so much, for watching. Have a great day.
In this video, Kelly creates an arrangement step-by-step in this video. As you watch, pay close attention to how the colors compliment one another. Can you find the common color between each of flowers? Each one highlights the other as they work together to create a beautiful arrangement that draws the eye from one ingredient to another. Learning to understand the principles of color in an arrangement will take you one step further in your floral design.
In this video Kelly demonstrates how to create a flower arrangement step-by-step. As you watch, think about the shape and size of each ingredient and the role it plays in the overall arrangement. Like people, flowers work together like a team, each playing a part. Learning to observe and think through the roles of flowers is a core competency in successful career with flowers.
In today’s time-lapse, I used apple blossoms, carnations, tulips, caladium, nerine, and scabiosa. I didn’t love the result, but I did love the idea of sharing it with you anyway. I hope that leading you through the gentle process I use for observing my work will help you be more graceful towards yours. Your artist’s heart is valuable. Hidden within the walls is a wellspring of creativity.
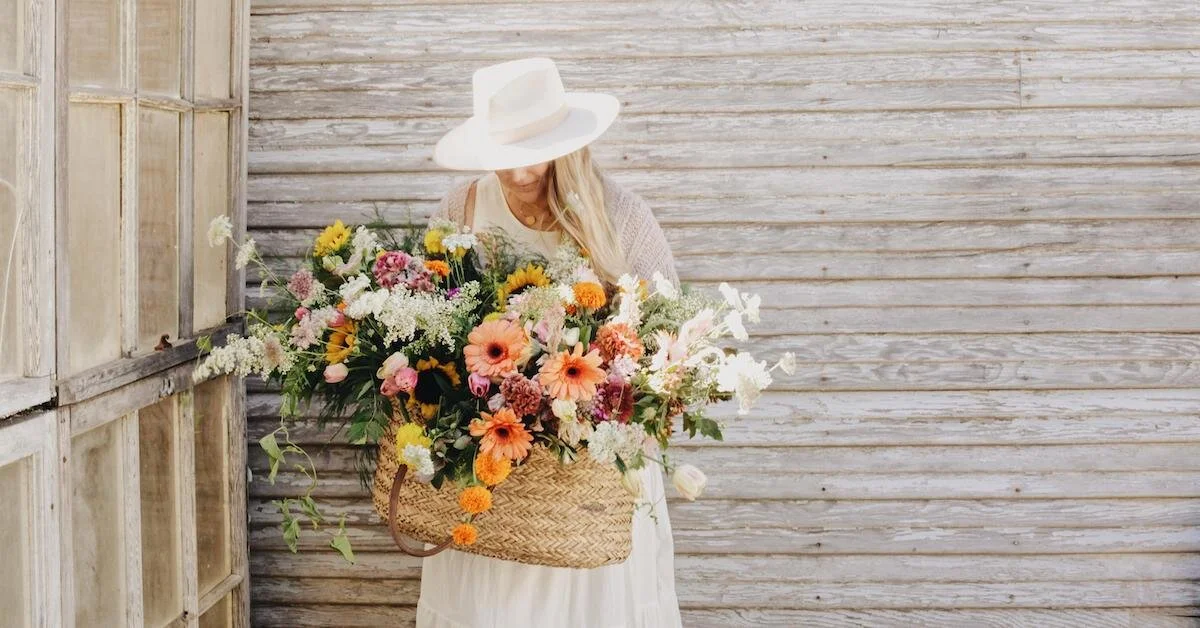
Ready to make a cheerful modern basket flower arrangement? This one is perfect for an outdoor summer picnic or BBQ. If you want a large floral arrangement to put on the ground of your outdoor buffet table or in front of your door to greet guests as they arrive for a summer brunch, then this design is for you! You can’t go wrong with a big basket filled with beautiful flowers.
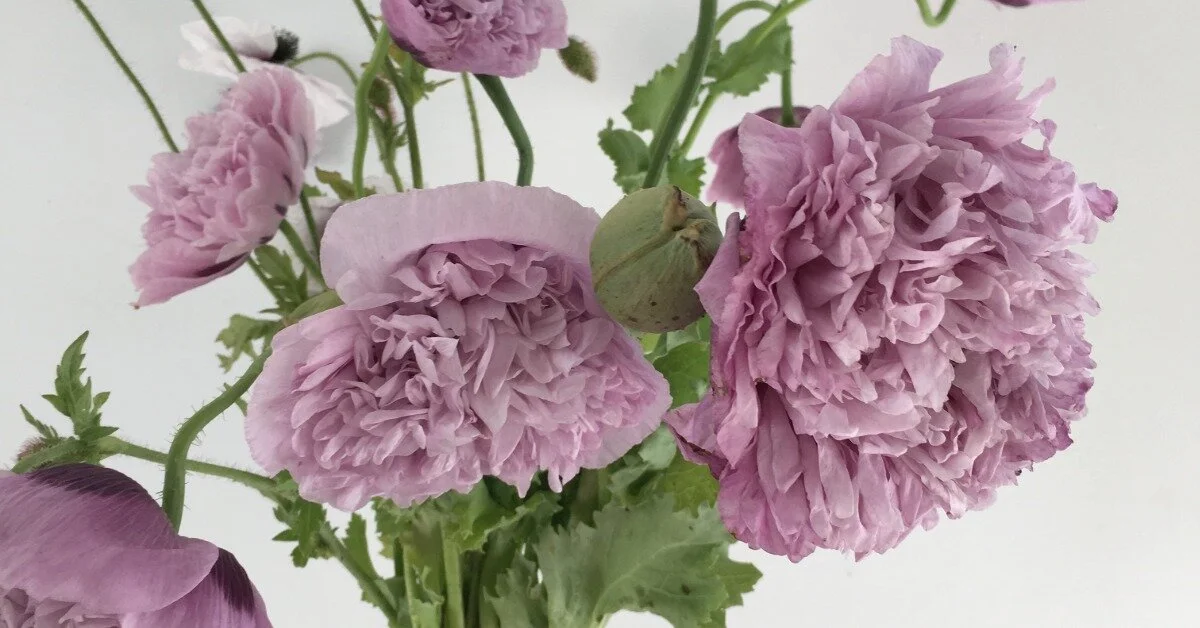
In this video Kelly puts together a purple centerpiece. Watch quickly as this time-lapse of the purple flower arrangement comes together. Carnations, eucalyptus, parrot tulips, white ranunculus, and more await!
As I design, I’m taking time to really look at the flowers and enjoy them—stem by stem. Foxglove is one of my favorite ingredients. I love their little freckles and the fact that they are a place for bumblebees to take a rest.
What do you think about monochromatic flower arrangements? This week, I’m sharing about working with black flowers—specifically in the summertime! Designing an arrangement with dark flowers using a monochromatic color scheme really creates an interesting mood, and it helps you notice the texture of all of the flowers. I’ll share some of my favorite varieties and their little nuances, and I’ll walk you through the dark centerpiece I’m testing.
In this fall-inspired centerpiece tutorial video, Kelly pulls together an arrangement using gomphrena, zinnias, foxglove, pokeweed, asiatic lilies, hydrangea, and dahlias. Learn how to become a florist and take floral design classes online with Team Flower. Here you can even learn tips on flower gardening for beginners. We'll show you how to do flower arrangements in flower arranging videos.
Transcript
Hey there. I'm Kelly Perry with Team Flower, and today I'm going to do a little centerpiece demonstration for you using beautiful peach, pink, white, orange flowers. I hope you enjoy it.
We're going to get started today with some pokeweed. I love using this in the summer time. And we are going to use this to establish the shape of our arrangement. So you can do this with any kind of flowers. You just have to think through, what can I use that serves a similar purpose?
So you don't have to use pokeweed whenever you go and try this at home. You can use something else that has a similar function.
It's really fun. Everybody's regions are so different that are here with us on Team Flower, and it's fun to see what you guys are using in your neck of the woods. And I would love to hear more about what you have in your yard.
I'm using a flower frog today, and I have it attached in there to my compote dish with some epoxy. Now, it will not come out if you decide you want to go that route. It's kind of a permanent thing. But I really like to-- I really like to have them in there good and stuck.
OK, so that's our basic shape. Next we're going to work on covering some of this area down in here, and then we're going to build it up with beautiful flowers. I'm going to use some geranium leaves, and I'm going to use a little technique called layering, where you simply layer the leaves one on top of the next. And I'm going to work that back in and through the arrangement to get a little bit of a line going.
Every time you put a flower in you have to think about, OK, where's the next flower going to go that's going to balance that one out. So it doesn't necessarily have to be the exact same flower that you use to balance things, but you just need to kind of keep that in mind so that you don't get lost along the way whenever you're making your arrangement.
So when you step back and evaluate regularly, you'll catch when things are kind of going in a direction that you want to change or edit.
So just low in the arrangement, these little guys in there. And then I'm going to do the same thing with some hydrangea.
You definitely don't want to miss this step of building the shape and getting the shape to a place where you like, and then working on this covering aspect is really important. So that gives a place for all the rest of your beautiful flowers to shine.
I have two different kinds of hydrangea that I pulled, and I'll see which one I like in here better. But they have different shapes, and so they can be used in different ways. Like this one is more round, and this one really lends itself to being able to be cut pretty low and tucked deep inside.
Sometimes hydrangea can be a little bit overwhelming because it's so large and round. So I like to pull it apart in different sections, kind of use it in this way. Also looks pretty as a mass grouping. Like a lot of hydrangeas all in one place, I think is another way that you could use them.
I'm getting close to where I feel like I have an adequate amount of coverage, and that I'm ready to start pulling this color from down here up into the arrangement with some foxglove. This is called pink dalmatian. It's really sweet variety.
And I'm going to use this to bring color higher in the arrangement. It also reinforces the shape of the arrangement. And I love how it's going to act as a transition flower, taking us from the peaches that we have-- or the pinks that we have-- to some peachier tones.
It's little speckles in there are really sweet pink. And as I'm choosing the flowers, I'm thinking about the shape that they naturally have. This one would really lend itself to kind of going out this way. So that is where I'm going to put it.
You don't want to be fighting the natural shape of the flowers or you'll have a hard time getting everything where you'd like it to be. But if you need to just zhuzh it a little bit, you can kind of go like this, soften the stem-- stem fibers a little bit. It's especially helpful with things like tulips.
Tulips are wonderful, aren't they? I cannot wait to have those back in the spring. So many different varieties. Love them.
Next we're going to use zinnias to create a line. You could also use ranunculus, but if you are in a situation where you need to have two different options for a bride because you're working, maybe, at a different price point, ranunculus of course are more expensive. These can range anywhere from like $1.30 maybe to over $2 a stem, depending on the time of year.
And then there's zinnias which you can get from most cut flower farms. And these are kind of one of those more, like, two or three for a dollar flowers. But very similar as far as shape and kind of, the way that you could use them. I really think that zinnias rival ranunculus in the summer. I think they're so sweet. Absolutely love them. Would choose them over ranunculus every time.
What we're going to do with these is create a little bit of a line in the arrangement. And I'm just going to take notice of the size and the shading on all of the ones that I have. These ones are a little bit more peach so they'll look prettier together in a group. Hmm, these ones have more of a pink and white tone, so those would look really pretty, like, next to some pokeweed because it has those same tones in it,
Have some white. This might be pretty up there near the foxglove. There's a little touch of white up there. This one coral piece that's really pretty and bright. That might look pretty low in the arrangement next to something peach. So we'll start there.
And I like to observe how they look from different angles because want to put them in a place that really showcases their special shape and coloring.
Now what we're making is called an implied line. It's a connect the dots kind of line. And that helps to guide your eye through the arrangement.
So you can start implied lines anyway that you like. They're really fun. It's kind of the unscripted part about this, in these more organic style arrangements. You can make up the path that you want them to go in and decide based on how their stems fall and all those kinds of things.
This is a pretty strong vertical implied line right here. Not something that I normally do, but I want to play with it a little bit today and see where it goes.
There's my frog. [LAUGHS] So I like how this kind of comes down, and then it pops back over and up to these ones and then around the side.
So again, you could do something very similar with the ranunculus if you wanted to. I just wanted to have those here as a little example for you so you could be thinking about it. And I have some dahlias.
It's good to work just one ingredient at a time. Helps you to focus and see how things are falling sometimes when there's all these buckets of flowers in front of you, and you're like, oh gosh, where do I even start? You just need to get everything organized in the way that you're going to put it into the arrangement. And then don't think another thing about it.
Start with what you're going to use to create your shape then what you're going to use to cover, like we used the hydrangea to kind of cover the bottom and the geranium leaves. Just put everything in order.
OK. I have another line going here. I really like lines. They keep the-- sometimes the organic arrangements can start to look a little bit messy, and the lines keep things organized. I really love, love, love, love lines. Super, super important.
OK, are big star of the show is this Asiatic lily that I found from Peterkort. They grow a lot of roses but I happened to see these, and I was like, oh, please add a bunch of those to my box. So I'm excited to play with these and see how they come together.
I think the coloring in them is so lovely. This really just-- oh, rich, rich, brown red. And I love how that plays with the richness of the insides of these zinnias. It's one of the reasons why I wanted to choose those over the ranunculus today.
Mm, those look so pretty with the zinnias.
I think lilies get overlooked sometimes. We need to bring them back. They're beautiful flowers.
I'm kind of wanting to work one in high. I'm going to try it and see how it looks. Might be too much, might be awesome. You always have to give it a whirl. And of course, beauty is one of those things that's a little bit subjective. Some people might love it and think that it's awesome, and then others are like, whoa, where'd that come from. So you have to decide-- you have to decide what you love.
And that's what really makes your mark, and makes your work unique. Everybody worries about, oh, what's my look? What's my look? It's just naturally what you think is beautiful. That will become your look. So you don't have to over think that a lot. Hopefully that takes some pressure off.
I'm going to leave it there for now. Something I like to do at the end of the arrangements, just take a quick little iPhone picture of it. So maybe I'll do that and see if I want to leave that in there or take that out. But I'm OK with it for now.
Last thing I'm going to add is gomphrena. This is something that a lot of the local flower farmers will grow. And you can dry it, so it does really well as a cut. A lot of things that you can dry will do well as cuts, and in boutonnieres and things like that need to be out of water.
These do have some wilty stems if they're cut at just the wrong time, so just be cognizant of that and do a little test run if you wanted to use these in boutonnieres or something like that. They're kind of like zinnias. If they're cut just a little bit early, their stems can get floppy and they don't hold as well.
The purpose of these little finish flower, what adds that little bit of lightness to the arrangement. Some other things you could use with these lilies, chocolate scabiosa or black cosmos would be pretty.
Now, we talked about that implied line. What this is doing in the arrangement is an actual line. That's the two different kinds.
And I do like this little bit of negative space that I have going in here. I kind of want one other thing that's up just a little bit higher so that it's not at the same level. So let's see if we can get that, and if not maybe we'll just pull that gomphrena and make it a little bit shorter, and have that be the high point in the arrangement.
OK, I we're just about done. Add one more over here I think.
OK. As always, after you put something together it's a good idea just to walk away from it for a few minutes and just check it. You might come back and look at it and see something else that you want to just change a little bit. So whenever you're going through and practicing this, just feel the freedom to, at any point, walk away if you need to and come back. A lot of times that gives us a lot of clarity.
So we'll just review the flowers real quick and the purposes of them in the order that we put them in. First it was the pokeweed. And that served as our shape. Then we put in some pink hydrangea, and that helped us cover the base of our arrangement and also added a little bit of structure and stability because it has all those different-- just the shape, you can put flowers down through to help hold them hold them all in.
Then we added some geranium leaves to cover the bottom as well. And then from that, we built up and we started using some zinnia-- or you could use ranunculus-- to create an implied line. After that we went for the dahlias. And we created another line, both on the front and the back, with the dahlias.
And then we added in some of these beautiful Asiatic lilies. And finished it off with gomphrena. And I forgot the foxglove. That came after the geranium. And that's-- I think this is called the dalmatian, peach dalmatian.
So there you have it. I hope you enjoyed this little centerpiece tutorial as much as I did. Get out there and keep moving forward one step at a time. Happy to be a part of the process with you I'm Kelly Perry with Team Flower. Have a good day.
Summer's bounty gives us rich sunset tones and beautiful dahlias to enjoy. In this tutorial, we'll be creating a large-scale, foam-free summer floral arrangement in an urn that transitions from shades of dark rust and orange to warm golden yellows and earthy creams. Once the warmth of summer has left us, this step-by-step floral arrangement lesson can easily be applied to any season with available flowers.
Learn how to make a cascading garden-style summertime centerpiece in one of the trending color palettes of the year. I’m using one of my favorite vessels from Accent Decor (that is perfect for 60” (or larger!) round tables) with a flower frog attached in the center with clay.
Watch Kelly put together a unique patriotic-inspired arrangement using stars and stripes. Learn how to become a florist and take floral design classes online with Team Flower. Here you can even learn tips on flower gardening for beginners. We'll show you how to do flower arrangements in flower arranging videos.
Transcript
[SINGING] Three cheers for the red, white and blue! Can you please include that? Today we're going to make a patriotic centerpiece for-- perhaps you'd like to have a party for the Fourth of July, or Memorial Day or any number of American holidays. Perhaps a president's birthday. Perhaps you're taking a trip to Washington, DC.
That's my favorite city, by the way. I just love going there and walking the streets. I feel like it's very inspirational. I think I might go there sometime and just make some flowers. So I'll invite you if I do.
Going to start by using elaeagnus, which is a type of wild olive. This stuff grows-- the place where I've seen it the most was when I was in the Outer Banks earlier this year. It was everywhere. And I am going to use that to get my base set up.
To set up my base, I went a little bit out of order. But let me take this out. So I like to go in a triangle just to get things started, with the long, short and medium.
Then go back there and put one tall-- I'm creating space for the rest of the ingredients to rest. Deciding if this is going to be a long and low or have tall points. Just seeing where the ingredients take me.
Sometimes, I plan where I want to go first, and then pick the ingredients based on that. And then sometimes, I do it the other way. I like to just see where things end up.
So that's the nice thing about today because I can just choose, and take you along with me. A nice refresher after you've been doing things that are more scripted. Like if you have to decide what you're doing for a wedding, or an event or something. Nice to just see what happens.
So that's where I am with my shape. In the back here, I'm going to add this a little bit more in the back so that I can balance this out back here. Just needed a little bit coming this way because it was leaning forward. Pop that in there.
Next thing I'm going to do is go in here and cover this area with some lower foliage. And I like this to be a different shade and also a different shape when possible. So this is a little bit bigger, different texture.
This is celosia, a different kind. We had some peach in another lesson. This is the red kind. And we're going to go right in here, pretty low. And we're going to cover up this area in here where the bowl is and prepare to add some flowers.
So I'm still going around in a little bit of a triangle, just to get started. Then you can jump out and go crazy. Sometimes, if I have like a lot of different greens I'm using, I like to use one kind of green on one side and the one kind of green on the other side. But this whole way of getting your base established I think's really important, regardless of whether you're using the same ingredients again and again or you're using the same one.
I want to take this a little bit high here to reach up and hang out with that for a little bit. But had to go back down low and do the work of the celosia, which is to cover up the base. You can see I'm just trimming from the same piece several different pieces. And I'm talking away that piece that I cut out in there deep inside the arrangement, so that you won't see it. Let's do maybe three more pieces, just to get some good coverage down there.
Like that, like that. Just need to put a little bit more back here. I have a little bit of an opening. Put some more in there. So that celosia, I'm going to save a little bit in case I want to come back and add some more later.
The next thing I'm going to add is a flower that will cover the base of the arrangements. So this is going to go after the celosia. It's going to go in nice and low. This is a variety of hydrangea that blooms earlier in the year up here.
So a lot of times, the temptation is to start going high with your flowers. But you really want to keep these deep. They all have to do their job, right? And you can bring some of them out longer if you wanted to. If you wanted to show it off, you could bring it out more.
But the main reason why I chose these was for that purpose of coming in low. So anyway, I have this one left over. I'm just going to keep it.
I might bring it out. Well, let's just do it, and then take it out later if we need to. So we're just carrying the carpet out here a little bit.
Next, I'm going to add-- see, I'm having this thing where I can't decide between these two. And I think it's cool to go with both of them, so I'm going for it. We'll see where we end up.
This has a lot of different names, it's cute. Gooseneck. Sometimes veronica's what you ask for wholesale. There's just a bunch of different varieties. It's all pretty similar. Similar shape and everything, so gets interchanged a lot.
And I'm going to use this to follow the main shape that I started. Take some color out long. The purpose of this one is to reach. Everything has a purpose. Each person has a purpose.
Each time the season. Foods have different purposes. Fun to think about, how different everybody is. It's a good thing.
So these are my stripes. I'm going to add some stars in a little bit. I just have one more. And I want to put it-- you can see, everything's out far. And I want to add one that's a little bit closer in to the base.
Actually, let's put them back here. Perfect. Didn't like that place.
Then you go for the fox gloves next. These serve a similar purpose. But I think I can mix them all right because they're two different sizes. So similar shapes, and they both have many flowers on a stem. But since the fox glove are really big and those are smaller, I think we can all work together and be in a happy place.
Sometimes, if you're making something and it doesn't look right, check the sizes and the shapes because you might be competing. That can throw you off sometimes. I'm just going to focus this in on the left side of the arrangement. Going to do something different on the other side.
This is nicotiana. I've seen this in a smaller size, which is actually what I prefer. This is big, and honest to goodness, it is so hard to manage. Just it's heavy, and how it sits is a little bit tough to manage. So you just have to be careful with it.
But the other variety that I really like to use is just much smaller and it droops over completely. And it's just really sweet and fun. I love it so much. These are just a little bit heavier and harder to manage.
So just have to maybe edit them a little bit. Actually might just take that off so I can plan where this bloom will go. So these are the stars in the stars and stripes arrangement.
I was at Chick-fil-A a few days ago. My usual granny meals. And anyway, Buster and I, we were eating our sandwich. And there was this really sweet man. He was over there, and I was waiting on something.
And he said come over here and sit down. And so anyway, I went over and sat down. And he told me all about how he served in the military for-- well, between him, his son and his grandson, I think it was 93 years combined. And it was really fun to listen to him and hear his story.
So I have stars in there. I'm going to put one more back here. See how I don't have any there? Going to add that.
Now I have these red lilies. I think I'm going to add that in next so I can get an idea how this wall will finish out. Just have one prize lily, so don't cut too short. That's where that's going to go.
Oo, golly. Think I'm getting some bug bites. Another fun part of this time of year. Those lousy mosquitoes.
All right, this is bee balm. Real fun one. This one grows-- oh, man.
My mom grew this in the yard growing up. And it blooms here in boon right around the 4th of July along the parkway where we live. You just saw it out today.
So I'm going to make a little line down the back of my arrangement with these. And I have one prized zinnia, so that'll be my little focal moment over here. I'd love to have more than one or a bigger one. But sometimes you got to work with what you got, so that's what we're doing. Fun.
This bothers me. It looks like you're just hanging out here because the stem. So I'm going to just tuck it in to go more along that line that I started out originally. That's a little bit better.
OK, my one zinnia. Going to tuck it in back here. I don't know, guys.
I wish I had a few more. I'm not going to go for it. This is just going to be the back.
But see how they all are about a very similar size? Just looks weird. So put that in a bud vase somewhere.
Have some blue to add in. This is delphinium. My friend Lee grows this.
You can get this pretty easily wholesale too. I think it's a really sweet blue. It's hard to find a true blue in the flower world.
A lot of times, you've probably experienced the frustration of the wholesaler sending you something that they said was blue but actually it was very purple. Just hard to find true blues in the flower world very often. But I think delphinium's a good one.
And then I have forget-me-nots today as well. We're going to not forget all of the people who have served. And the families who've supported them and have also served a great deal. So this one's for you guys.
And I was trying to keep the shapes of all the flowers whenever I was setting up for this one to be-- I don't have a big, round peony or anything in this arrangement. Well, it would be nice and it would look pretty. But I wanted to keep everything stars, and fireworks and things like that.
So we have a little blue moment going on over there. And I'm going to finish it off-- well, maybe. I might add some Queen Anne's. Queen Anne's will probably be-- I'm just going to put one of those down in here since I don't have more zinnias.
It'll be all right. Put a little trio of three of them back there. And we'll punctuate the little line of three with one more there to balance things out.
And then the last one, the forget-me-nots. I like to group these together since they are so little, to put a little handful of them together. Put them in as a team, this little group.
And while I'm here, getting bit by a lot of mosquitoes, I'll be happy to tell you about my favorite mosquito repellent. It is by Burt's Bees, and has a little green label on it. It smells good-- I don't mind the smell-- and I get bit a lot. And it really works better than DEET or anything like that on me.
So if you're one of those poor people that just gets eaten alive. Think I'm going to regret this arrangement but not regret it. But I think I'm going to be very itchy the next few days. Love you guys.
That's my patriotic arrangement. I'm going to put one more back here. Then I'm going to call it a day and run for my life. There you have it. Wishing you all the best, and lots of success [LAUGHS].
In this springtime video, Kelly will show you how to pull together an arrangement perfect for an Easter lunch table. Learn how to become a florist and take floral design classes online with Team Flower. Here you can even learn tips on flower gardening for beginners. We'll show you how to do flower arrangements in flower arranging videos.
Transcript
Hi, I'm Kelly Perry with Team Flower. And I wanted to share an Easter centerpiece with you today. I'm reading this book called Flower Arranging Through the Year, by Daphne Vagg.
And in it there is a little idea. They call it pot-et-fleur. Literally means pot in flower. It evolved about 20 years ago to describe an arrangement of growing plants that are still rooted with a few cut flowers.
At times of the year when flowers are scarce or expensive, a pot-et-fleur can provide a type of decoration which has never really enjoyed the popularity it deserves for its economy and long life. A well-planted and cared for bowl will last for two or three years.
Well, maybe not if it lives in-- maybe not if it lives in my house. But if you're a good house plant person and very attentive, this is a great idea.
I love the concept behind it. In the book that they show here, they have some begonias, succulents, dusty millers, ivies, things like that. And then they've added in some little lilies.
A great idea to have some simple house plants that then you can, throughout the year, go back to and simple little if you need a little extra in a boutineer. Or just to have something fresh and growing in your house all the time that you can then take things they're blooming outside and add into your bowl, just to keep things fresh and fun. But it doesn't take maybe quite as much work as an arrangement.
So that is what we're going to do today. And I am using some things that I would probably plant these things out. It's not house plant kind of materials. But these are things that are available at the garden center now.
And we're going to plant them, pop them up here for our Easter bowl. And then after frost passes we're going to go ahead and plan these things out in the garden.
So my version is not as strict. But that's something that you could do is plant the house plants. And then follow the same kind of set up and concept to have something that's fresh and growing throughout the year.
So we are going to start by taking our terracotta pot. And I'm going to flip it upside down. I'd kind of like to age it a little bit, but I don't have time to go through the whole process of covering it and letting that process happen.
So I'm going to do a quick little cheat. And I'm going to just use some chalk. Some simple classroom chalk or some sidewalk chalk if your kids have some.
And I'm just going to go back and forth on my bowl with the chalk. And then we're going to smooth it over and kind of blend it all together just with a towel.
You will, of course, want to be careful when you pick this back up to take it in your house so you don't have chalk all over the front of you. But this is just a really quick way to get some interest, and texture, and age to your pot instantly. It's fun.
Kind of like we're giving her some makeup. Putting on the powder.
Now next, we're going to add some-- get a base level of some potting soil in here. We'll go back over where I just put a little thumb print. OK.
And I'm just using a simple Miracle-Gro potting mix from the hardware store that has some nutrients for the plants in it already. This is only designed to last for a little while in terms of nutrients for your plants. So you'll want to check the brand and the bag that you have to see what's in it, how long it will last, and what you'll need to add or supplement to keep your plants looking great long-term.
I know a lot of times with house plants-- I'm getting a little bit better at them. But I was on a real losing streak with them because I kept getting insects in the soil.
And so I did some Dawn dish detergent and have been doing flower food in them regularly. And that's really helped. So maybe my black thumb of death is going to leave here pretty soon.
OK. We're going to add these first. They're just a sweet little-- what was this called? Saxi-- frage? Fr-ah-g? Did we look this-- we looked this up and-- oh, man.
If I haven't heard it said before. I have a tough time with that sometimes. But it is spelled highlander white. And it's S-A-X-I-F-R-A-G-E.
I'm just going to break up this little bit at the bottom so that the roots can move around in the pot. And I chose two different ones. This one has more compact flowers and this one was a little bit leggy looking. But I liked that because I can have this one that is doing a little bit more movement come and drape down the front like this.
So I'll tuck that little baby in the there. I'm going to add-- I have some different kinds of lettuces. I guess this is a lettuce, a kale, and I think this is cabbage. Yep. A little bit of cabbage.
That one I lost. I tell people a lot with cut flowers, feeling the flowers to know if it's going to hold well for use a cut if you're cutting some things from your garden. If you feel lettuce it feels very tender and soft. And then if you feel this cabbage down here it's very leathery.
That Cabbage will do just fine out of water. But the lettuce, you'll have a little bit more wobbling around. And we're experiencing that even now just here on the plant. The cabbage and kale over here, same thing.
And I wanted to have a little bit of lettuce in here. Have a little spring garden. Thought it would be sweet. So we'll see how it does.
Let's put a little thyme in here next. Thyme is one of my-- this is a lemon variety. I love thyme.
It's very sweet smelling. It's great to have on hand for cake decorating flowers if you do wedding flowers. I like to use that on wedding cakes a lot. Of course, I make little cookies and Jesse and I had it in scrambled eggs the other morning.
When I was choosing these plants at the garden center I was thinking about the different shapes of the leaves and how they might look grouped together. I wanted to have some varieties, so that's why we have long lettuce leaves.
And these cabbage leaves have just a little hint of purple in them, which I really liked. Just add a little bit of depth to our green. It's, of course, primarily green. But I wanted to have a little hint of color.
Now This, you could plant the whole thing in the ground I suppose. I want to liberate it for what we're doing.
It has become-- the roots have come bound around the bottom of this. Try not to disturb them too much but let them go free so they can keep moving.
Easter is one of my favorite-- well it is my very favorite holiday. So I'm excited about this one. Parents are coming down to visit. And we'll have our little brunch with this centerpiece.
Nice thing about these is you can do them in advance and keep an eye on them, keep them watered, and happy. And that's one less thing you have to do when company comes. You don't need to be arranging fresh flowers. You can just touch your potted arrangement up and pay attention to your guests.
OK. I think I'm going to reserve these last two, just in case we need them. And I'm going to fill in with a little bit more potting soil. Then we're going to add some fresh flowers.
And these daffodils will be-- they will be all done blooming. They will have lived their life by Easter for me right now. But there will be more in the garden when Easter rolls around and I'll run out pick some more.
Same with-- I think we're going to add some forsythia to this. It's a great plant to use.
But again, that forsythia will actually very likely still be looking great for me around Easter. Forsythia is one of those flowers that roofs in water. And those kinds of things are always very long lasting in arrangements.
I don't know if you've ever noticed ivy. If you cut ivy and put it in a vase, it will start to shoot out little roots at the bottom. Maybe after about two weeks of being cut.
And forsythia acts the same way. That's how it spreads in the ground and multiplies is by putting out roots. So that is a great, great cut. Great thing to have in your garden if you don't have already. OK. Cute.
So to put these flowers in, I'm going to use some little water picks. But I wanted to show you a few other options.
In the book, whenever they talk about putting together the pot-et-fleurs, they have thin little containers or little vessels that they actually plant in the soil that then they can put their little bouquet in. So I wanted to show these. These would be great little things that you could plant in there. With what we're doing with it being so low and just the shape of what we're doing today, this isn't what I need.
We could, if we wanted to, perhaps use this. This is a little pin frog cup that you can put a little bit of water down in here. And then you have the pins that you can set the flowers in and around.
So I'm going to just-- there's a little place right here that I've created that would be fine to put that in. Since it's green it mixes in with the things that we have. I'm just going to put a little bit of water in that.
And since I might want to put some flowers in a spot other than this or maybe just one little flower over here, I also have some water tubes to use as well. And they just look like this if you haven't used them before. They have a little poke and you just poke it down in there. And then kind of hide the mechanics of that as needed.
So I'm going to start with the forsythia. And I'm going to use this to create the kind of more interesting shape at the top. We've filled in the base of our arrangement. But now opposite of this rosemary that's probably the most prominent thing that we have coming up, I'm going to do the forsythia right over here.
And I'm not getting real serious about precisely how this is going in there. I want it to feel casual and just that it was a walk in the garden. But naturally, just because that's how my eyes bend, I'm thinking about the lines and the movement that I'm creating in the arrangement with the pieces that I put in.
And then the little daffodils. You can see how they get this little-- where they've been living and forming. You can just pull that off and liberate the flower. So there she is. Glad and ready to roll.
I'm going to take a quick peek at my flowers. See which ones are the biggest, which ones are medium, which ones are small. That helps me as I place them.
You place larger flowers at the base of the arrangement and smaller ones higher. It feels a little bit more grounded, I guess is the word you could use to describe that.
And as I place the flowers in, I'm thinking about just putting maybe one a stair step above the other, rather than crunching them together. Because I want this to just look like they're growing there.
And as you go out and gather your flowers, you don't have to use daffodils. You don't have to use forsythia. Use whatever is in your garden.
But notice as you bring it in and as it's growing there, just the natural bend to the flower and how it seems to grow. And if you mimic that kind of look as you arrange it in the bowl, you'll get a nice garden feel.
So I'm going to show you-- I have this one in here and I'm going to take it out. And I'll show you why I think-- I mean it could stay there.
But I kind of think it's a stronger composition to me if I just pull this out and we have that. These were kind of on the same level and similar. So I'm just going to readjust how this one is facing. Maybe use it a little bit further back in the arrangement.
So now I'm going to work this angle. And see how as we do this we're creating depth in the arrangement. You can tell that it's moving backwards here just a little bit more. Movement.
You really could, I think, stop there with the flower placement. What I might do with some of these other smaller daffodils that I have is just create a small little grouping in a little bud vase and put these in front of each person seat. I think that would be a sweet way to use the rest of these.
And I wanted to add in my little bunny here. I have two younger sisters. And the one next in line to me, her name is Kristin. But we-- from the day she was born she just looked like the sweetest little snugly bunny. And the name stuck.
So this is little bunny right here. She can't make it down to Easter. So we're going to put this little-- we're going to put this little bunny in here to remember Kristin. I think we will put that right here. Cute.
And just these last two that I have. There's a little spot back here. I'm going to fill them in.
OK. I think that took care of that. I think we're done.
Another thing you might want to do down the ends of the tables. I know everybody's dinner tables are a little bit different. Some people are eating family style. Some people are having it on a buffet or something like that. So just a few other things.
So the daffodils in the bud vase is another way that you could add and make something with this. And then there are little sweet terracotta pots that you can get at the hardware store. They have little tiny mini ones too. That might be something that's sweet that you could put at each person's place setting.
And I also have some carrots and I have some cabbage leaves. I took some leaves off. And I have the actual cabbage head here. You can arrange these down your table and make it sweet and special.
Or you might even consider using one of these cabbage leaves as maybe a place card. Maybe you paint, just with some little-- bit of acrylic paint, you paint their little name in there as a place card. Or you could serve a chicken salad in it, you know. Whatever you think.
But there's so many sweet ways you can use something like this. And what a beautiful leaf, all the colors and veins within the leaf. So those are a few little ideas for you with that.
I already mentioned planning it out after you're finished using it as your centerpiece. And don't want to forget to give it a little bit of water here before we sign off as well, since we've disturbed those-- disturbed those roots, go ahead and get them some water back to their way.
So that's what I've got for you. Wishing you a wonderful, wonderful Easter. And hope that you enjoy spring and all the beautiful things that it has to offer.
Talk to you soon. Have a great day.
In this centerpiece video, Kelly makes a unique arrangement using a forest floor as inspiration. Watch as she pulls together unique mechanics to design an idea you can use in your next ceremony. Learn how to become a florist and take floral design classes online with Team Flower. Here you can even learn tips on flower gardening for beginners. We'll show you how to do flower arrangements in flower arranging videos.
Transcript
Up next, we have a really fun long table centerpiece display that we're going to work on together. I've partially constructed and deconstructed part of it. So we're going to go back through, and I'll show you kind of how to get up and to this point. And then, we'll keep finishing it out.
So what we have here, in terms of supplies, this is from Lowe's hardware. We have got a piece of siding that they use on homes. And what I did, it had a lip on one side. And I took the-- I think it was 12 or 14 or so feet in length-- and I cut it in half and put them end to end so that I would have a lip on both sides.
And I just used some packing tape to make them together-- to put them together, so I have kind of like a little tray, which is great because it makes it a little bit sturdier, you know, for lifting and things like that. But it's perfect for this type of project. The width on it is really nice.
We are working on, this is going to be a six-foot long runner. It's going on an eight-foot table. And whenever I get it on site to install, for Amy, we're going to put just a few more little pieces of moss on the sides. And then, I have just one more candle like this that's going to kind of sit and fill in the area on that last little bit.
So that's what we've got. It's sitting in. Then, I have some oasis foam. And it's just a simple-- it's not a fancy kind or anything. It's just a simple brick of oasis.
And what I did was I cut it. I just made little notches. And I cut it the whole way down in thirds that'll be nice and flat.
And once I did that, and this is kind of what it looks like once it's cut, just nice and narrow there, I took some Oasis waterproof tape. And I have gone down the entire length of it. And I just have everything taped in there to keep it from sliding one way or another. I think that's a really important thing to keep kind of everything in check.
If you wanted to, you could use some Oasis glue. But I just really don't like glue. But some people don't mind it. I seem to get it all over myself so I avoid it.
But you can use this tape instead if you'd like. And then, just with a couple of the leftover pieces of Oasis, I've made-- you can see here-- a little bit of-- a little bit of a level, or just a rise-- a rise here to make it a little bit taller. And that's so that my moss kind of can go up and down throughout the course of the display. So I just have one here and here and one here.
I have three different types of ferns. And I just left some space in between my Oasis. I sort of kind of laid everything out before. And then, I just left some space as I took them out of their pots. And I'm kind of, like, just temporarily potting them in there between the pieces of Oasis, and I've got three here.
And then, the other thing is these candles. And I just press them down into the Oasis so that they kind of had just like a little-- a little bit of sturdiness there. Then, it's going to get covered in with some moss and we'll adjust whenever it's in its final position, just to make sure everything's upright and in good shape.
So those are the supplies that we're working with. And I have this beautiful sheet moss, some local sheet moss. Since it is local-- it came out of the woods-- I put it in some water just to hydrate it.
And then, I also wanted to get the critters out. So that helped me get the critters. I just put it on a towel, squished it out, and then just kind of pressed through to make sure that I didn't have anything in there that I was carrying along that I didn't want to have with me.
So that's where we stand with that. We're going to go ahead, and I'm just going to layer some of this moss in here so you can see what that looks like. I'm using some pieces of wire. And this is, I think this is about a 20-gauge wire. You could use, I think, anywhere between 18 and 24 probably would be fine for this.
But I just made these little pins. And as I put the moss in, I just pin it into the Oasis. So the Oasis has several different purposes in this arrangement.
One is to give a little bit of different levels. Another is to have a place where we can pin in to secure the moss without using glue. And then, I'm going to be adding some fresh flowers to this. And I wanted to have a water source for those.
So I'm really just right now going to focus on the edges. And again, when it's in its final position on site, I'm going to go through and maybe just kind of, like, make this a little bit more irregular down the sides. But I want to leave some of that Oasis exposed right now so that I can see where to layer my fresh flowers in.
And that's the next step. So you can see over here, I had some umbrella fern that I just took apart. And I have that sort of spread throughout.
And then a little bit of this hydrangea. I'm going to add some more hydrangea, a little bit of seeded eucalyptus to get things started here. And then, we're going to kind of build up from there.
I love this hydrangea because it can go large scale. I have another project for this event that is very big. And these transition nicely from very big things to very small things.
You can see here, it has these sweet little berries and things you could pull this off, and this could become a part of a boutonniere or a corsage. It's also great to cut here in this area. And you can use this in a centerpiece, kind of to frame out the bottom of a centerpiece container or something like that. You can use it for what we're doing right now, or you can cut just each little piece off from the sides and kind of start popping those in like your seeing here.
I just love the lacy, romantic texture that this adds. This bride wanted to have a woodsy event. Her husband is very outdoorsy, but she's very romantic and elegant. And so we're sort of marrying the two together in this arrangement.
Probably not going to find hydrangea on the forest floor. But it does like shade or just in a beautiful garden. And you could easily find this type of plant growing in a garden where the moss and ferns and everything are.
Umbrella ferns are one of my favorite things to have on hand if bright greens are being used in an event. Because, again, like the hydrangea, it can be used in so many different ways. You can pull it apart and use it in a boutonniere. You can leave it together and have it framed, you know, a big fleurette for something that you're doing in a large scale arrangement, maybe for a church or something like that.
Now, with the seeded eucalyptus, we're just going to use really mainly the berries from it. But the leaves do kind of nod to this fern over here. There's a little bit of similarities there. So I might move on just a few of those.
The goal with this is some texture. This is a very textural piece with all the different-- there's actually several different-- I don't know if you can see them, the detail, in the camera-- but there are several different types of moss within this. And that's one of the beautiful things about having something that's fresh and local is you get this variation between the browns, the yellows, the greens, something that I really love.
You can get moss in cases from wholesalers. Generally, that's not a real tough thing to find. Price wise, it will differ, depending on where you're getting it from and all that kind of thing. But I think it's about between $36 and $40, when I've checked on it. So that kind of gives you a little bit of perspective, in terms of material costs.
The little ferns that we're using today are from a local nursery. And I think they're about $8 each. Sometimes if you can get into Lowe's, where the piece of siding came from, sometimes you can get them in there for about maybe $4. It just depends what you're looking for and what you'd like to have for your design.
The candles that we're using today are a birch bark unscented candle from Jamali Garden. And I just purchased two sets of those for this project. I'm going to go ahead and just loop this around. And just like I would an ordinary centerpiece or I could switch sides of the tables, except you're there, and I need to stay out of-- I need to stay out of your way. I just want to make sure I'm not overworking one section of the arrangement.
The next ingredient we're going to add is called Pennsylvania Knotweed, something that as the name would suggest is a weed that you can find oftentimes. It looks very similar-- although I'm told it's not, you know, the same thing-- it looks very, very similar to me to Kiss Me Over the Garden Gate, which is something that you can get wholesale different times throughout the year. So very big, another one of those ingredients that can go very big or very small.
With this, I'm going to start playing a little bit with height then start jumping up and out and creating a skyline for my table. The next time that you're in a city, you should kind of take notice of all of the buildings and the outline that they make up against the sky. And when you arrange, you can kind of-- you can think in a similar way. You're putting all the different buildings together.
And just like when you're doing a compote arrangement, you want to create a little bit of depth. In this table runner, as well, just be thinking of having it come in, go out. Most of these that I have right now are sort of centered. So with my next little round, I'm going to focus on adding that dimension, that depth.
The next ingredient we're going to add in are just some slightly pink roses. I didn't want this part of the reception-- this is going on the head table-- I didn't want it to look so, wow, this isn't something we're probably going to find on the forest floor. I didn't want it to look so different from the rest of the reception.
She loved the lushful arrangements, so they're full of, you know, dahlias and roses and things like that. So I do want to incorporate a few things to tie those spaces together. These roses I'm using to create little lines that help the eye travel through the arrangement. Let's see if I can do this upside down here.
So I'm thinking about the size of the roses a little bit. I don't want to-- it's kind of nice to move from big medium to small if you can. It just creates just a little bit of a more gentle progression for your eye. And now, I'm going to set my biggest point. And I'm going to go-- roses are going to be smaller again.
So this would be a great place to pop in a dahlia and frame-- frame it with the roses. I took just a quick little intermission so I could put a bunch of flowers in so you didn't have to watch me place every single one. So we sped that up for you a little bit.
We put it in-- we finished up the roses and made, like, little lines throughout the arrangement. And then, I went and added this white gumfrina, sort of at a medium level in the arrangement. And then, over here, I started going for my highest moment in the arrangement, which is going to be this Queen Anne's lace.
So you just want to make sure that you're not going really above your knuckles. And I'm just going to keep going with some of this Queen Anne's. And then, we're going to add in some dahlias.
I think, if you wanted this to be a really light airy design, I would stop here and perhaps, even, maybe not use the roses. But, like I said, I want this to coordinate with the rest of what's happening in that room. And it's just full of really gorgeous big blooms.
So we are going to add some dahlias in here, not a ton. It's obviously more light and airy than heavy on blooms. But I do want to add in just a few.
I think I'm going to flip this around so you can see what's going on over here and also so that I don't overwork one side of the arrangement. Over here, everything looks pretty good to me, except there are some moss spots in the front that we'll fill in before we wrap up. OK, I'll finish with some dahlias.
I'm just going to take note of where my roses are. And I'm going to put one in the same neighborhood, just nice and low. This is great if you have some stems that break. I actually have kind of a funny story about these dahlias.
I don't like taking Buster whenever I pick up my flowers because he's a crazy dog. And he runs all through the car. But I just was-- I knew all the places I had to go. And I thought, oh, he'll be so sad if he was just hanging out with himself all day.
So I'll take him with me. He loves to ride in the car. So I took him with me. And my car was completely full, completely full.
And I thought, there's no way-- I just had to make one more quick stop and run in to a store. I thought there's no way he's going to crawl back in there on top of all those flowers. Well, you better believe he did. He was sitting right on top of my dahlia bucket.
But believe it or not, I only lost-- I only lost, like, two stems from the whole ordeal. And those were the first two stems that I popped in here that just had a little bit of a broken neck. But oh, man, I couldn't believe it when I came back and saw that.
Then, after that happened, I dropped an entire bucket of water went rolling underneath my seat. If that ever happens to you and lights start going off in your car-- my "check engine" light was on. The "take it to the dealership" light was on. I thought it was over.
Then, I got to the dealership. And he said, oh, ma'am-- and I'm about in tears-- he said, oh, that'll dry out. No worries.
So if that happens to you, just wipe it up real good. Take it and check. But don't panic right away like I did, because it might be all right. Ooh, it's a heavy one.
So a few more dahlias and we'll be done. People have a hard time with dahlias, how to keep them alive and looking pretty. You can do them wholesale. If you're part of the Team Flower Community, there's actually a discussion going on right now about this and some good tips and advice from some other members about how to condition them.
But I just have not-- I have not had a good experience with wholesale dahlias. So I don't-- I don't buy them to try out all of the different solutions that you can put them in. But just get them local, and they're beautiful, and they hold well.
You still do want to keep them out of the sun, of course. But it's a much easier time. All right. I think we're about done.
As always, I'll kind of take a step away and then come back and see if there's anything glaring. There might be something you see in the camera that you're like, oh, Kelly, you need to fix that. But right now, to me-- of course, I'm close up to it and I've been looking at it so much, looks good.
And these candles, I don't think are getting lit at the venue. So I'm going to leave them where they are for now. But you might want, if you're going to do this, you might want to get yourself some cylinders to pop them in so that you have them covered if you'd like to do that.
They do take one that is a little bit bigger than what you would normally get for a bouquet vase. So they don't slide down in those easy. You need to size up.
So anyway, all right, well, that's the six-- that's the six-foot forest floor table runner centerpiece. I hope you enjoyed watching it. I hope it inspires you to think outside of the container and do something fun and interesting for your next client. Thanks for watching.