How to Grow, Harvest, and Dry Flowers for Arranging
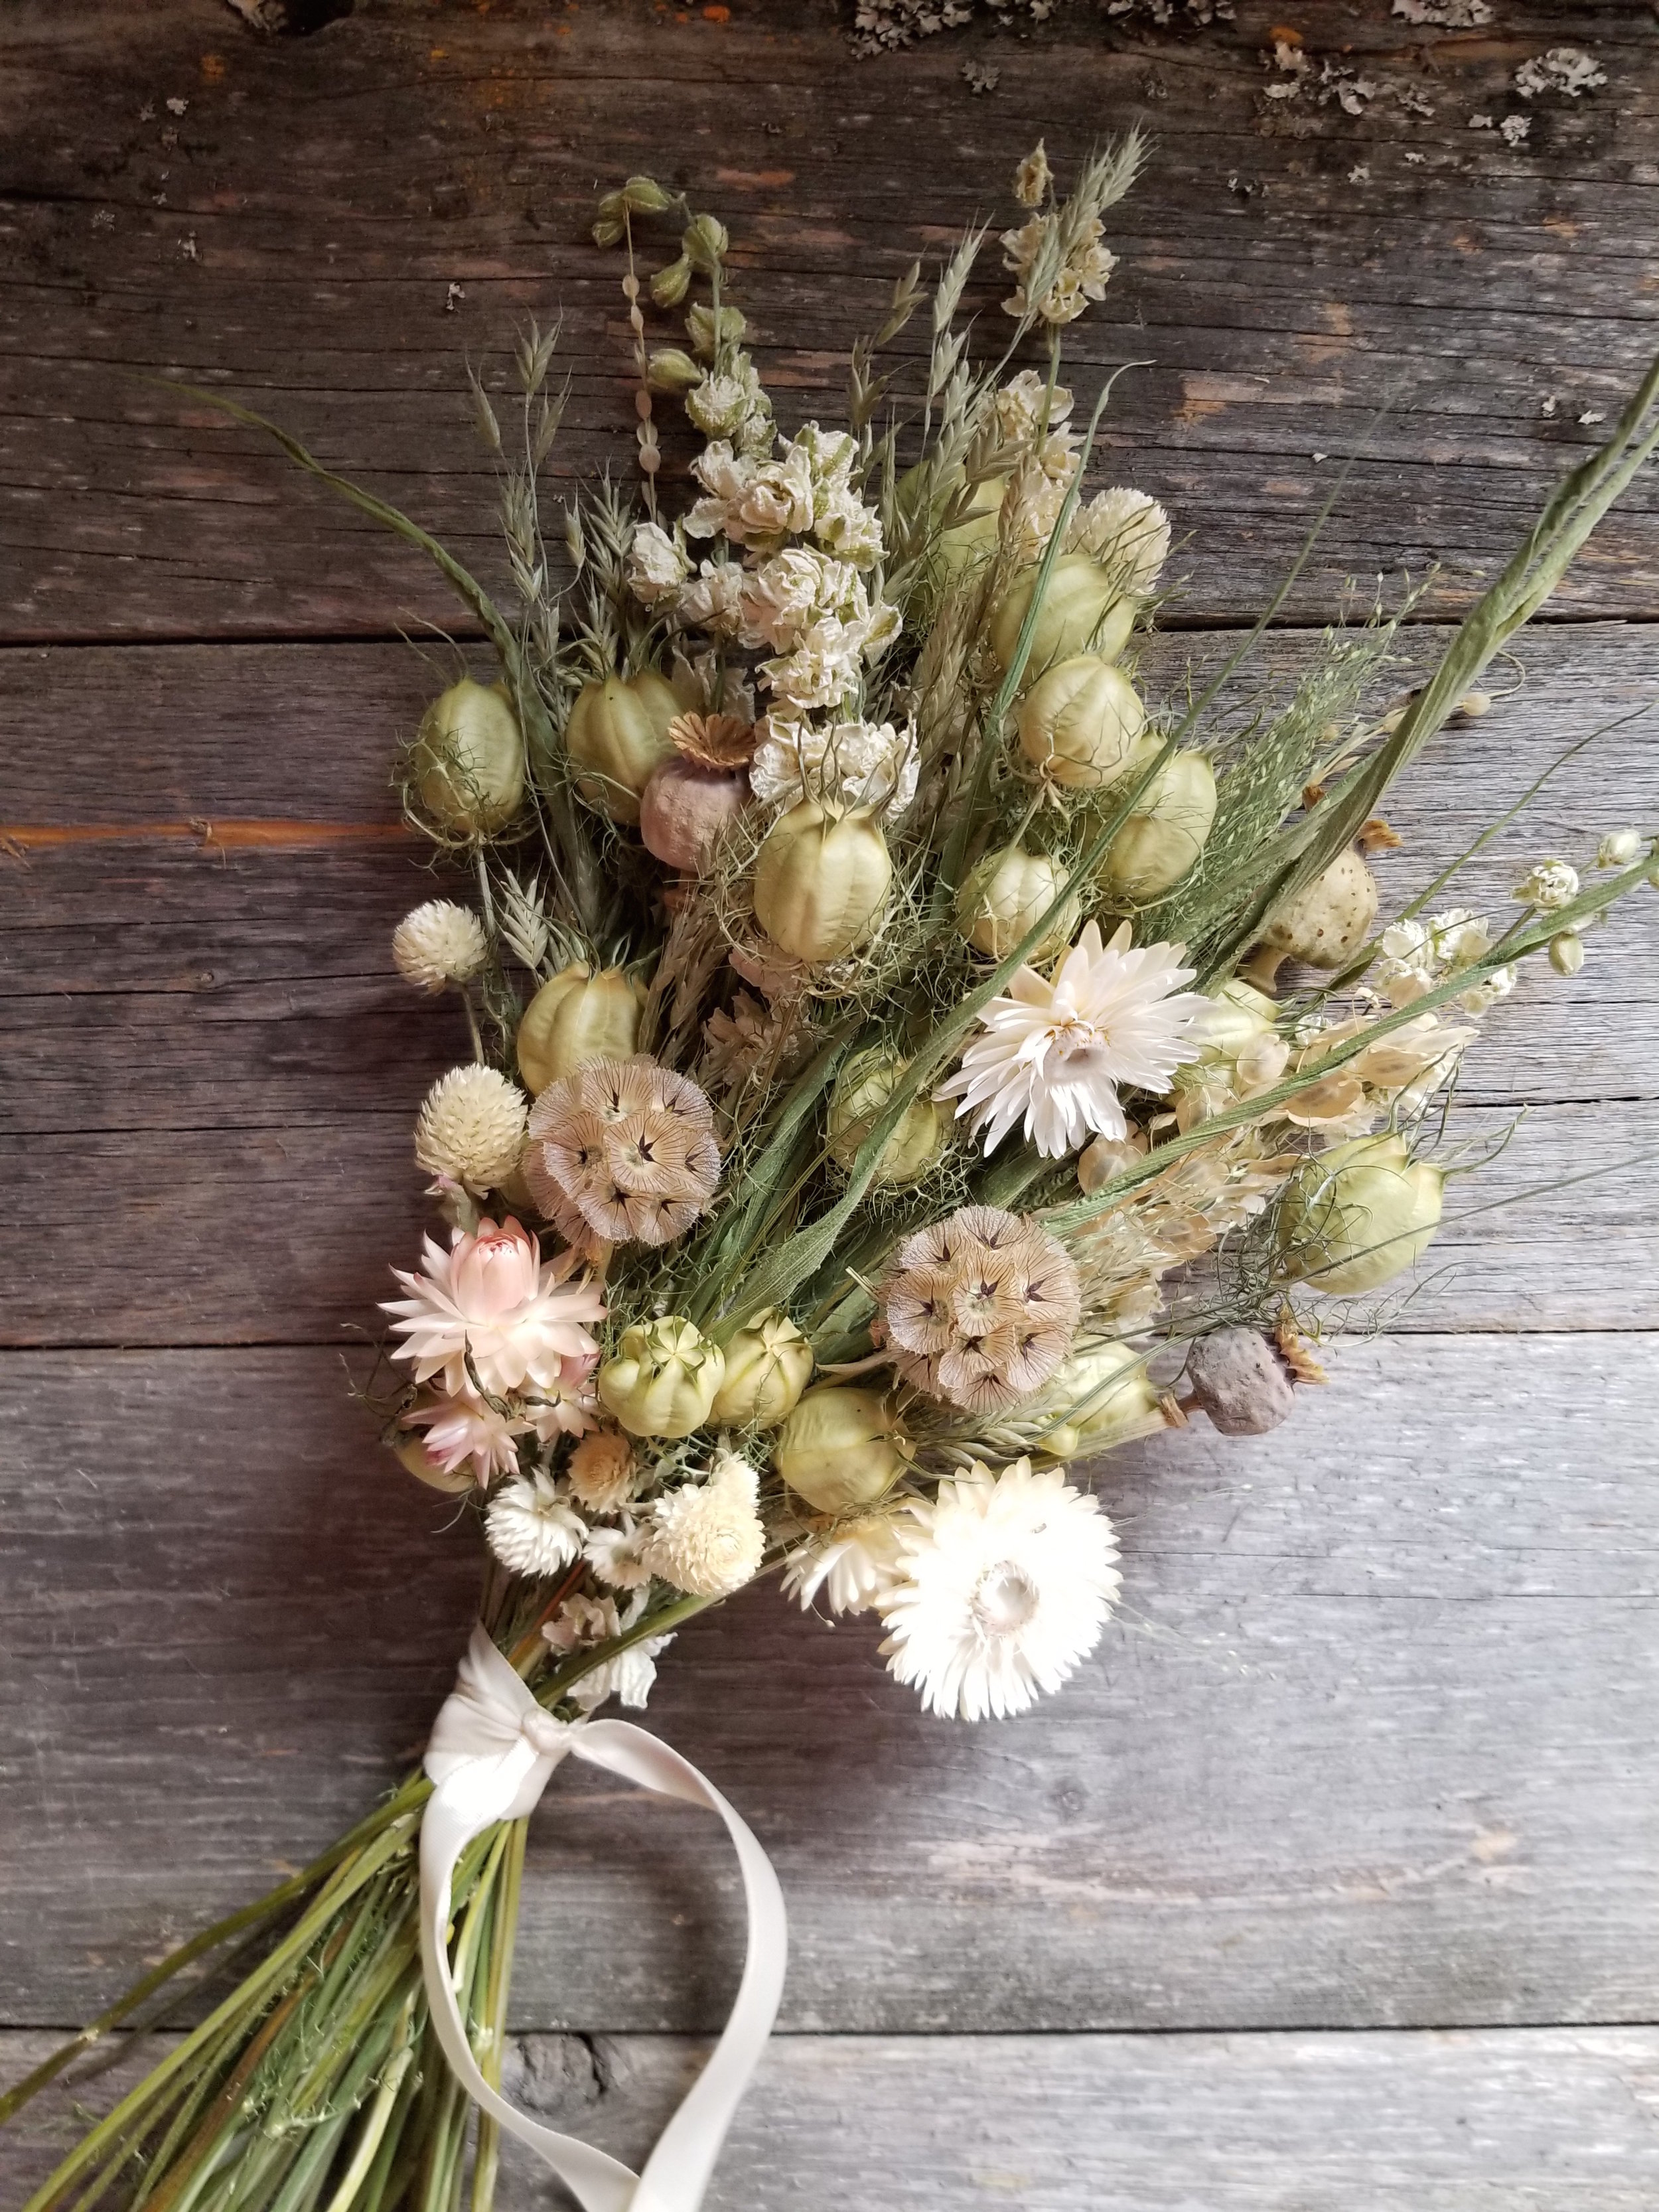
I made this posey for a pop-up market this winter. It has a background of green nigella pods and is accented with white larkspur, strawflowers and gomphrena. I added frosted explosion grass for an airy texture and some poppy and star flower pods for interest.
My husband, Carl, and I grow flowers on about two and a half acres here at Stone Meadow Gardens. Our farm is nestled in the heart of the mountainous region of Southeastern BC, known as the Kootenays. Our surroundings are gorgeous. However, the climate can be a bit challenging! Our frost-free days are limited, and I’m sure many of you can relate here: It feels like the pressure is on to make your entire annual income in just a few months. With that in mind, we are always looking for creative ways to spread out both our workload and our cash flow over a more extended period of time. We use lots of row covers and have a high tunnel for season extension of fresh flowers, but another way we are able to “extend” our season is with growing and selling dried flowers.
Having a good supply of dried flowers can be a great asset to your farm or design business. It’s not only a way to make sales when fresh local flowers are long gone, but it can also help keep your customers engaged with your farm. For folks who are conscious about the environment and their carbon footprint, your dried flowers can offer them a local option even in the depths of winter. Plus, dried flowers last for a long time, so customers will potentially have your flowers around their house for an entire season (or more!) instead of just a week.
There are two important factors you need to consider before deciding to add dried flowers to your production:
What your climate is like
What kind of space you have for a drying area
You’ll need a space that is dark and dry, and preferably warm (or hot!). In our region, summers are hot and dry with temperatures in July and August often hovering around the mid-30s C (or upper 90s F). We have an area in our barn that is out of the sun, has good air flow, and gets quite hot, so we’re able to dry a lot of flowers. Perhaps you have a warm, dry attic that you can use or can clear out a closet in your home or studio. You'll want to avoid spaces that are too damp or have any direct sun exposure. Sun can very quickly fade the beautiful fresh colors of your drying blooms, and moisture can slow drying and cause flowers to mold. If necessary, you can add heat or even use a dehumidifier if you can’t find a location that fits the criteria perfectly. Also, drying flowers can take up a lot of room, so you’ll want to keep that in mind when choosing the right space for your operation. However, once your flowers are dry, you can store them in clean, dry boxes to save space and make room to start drying more bunches!
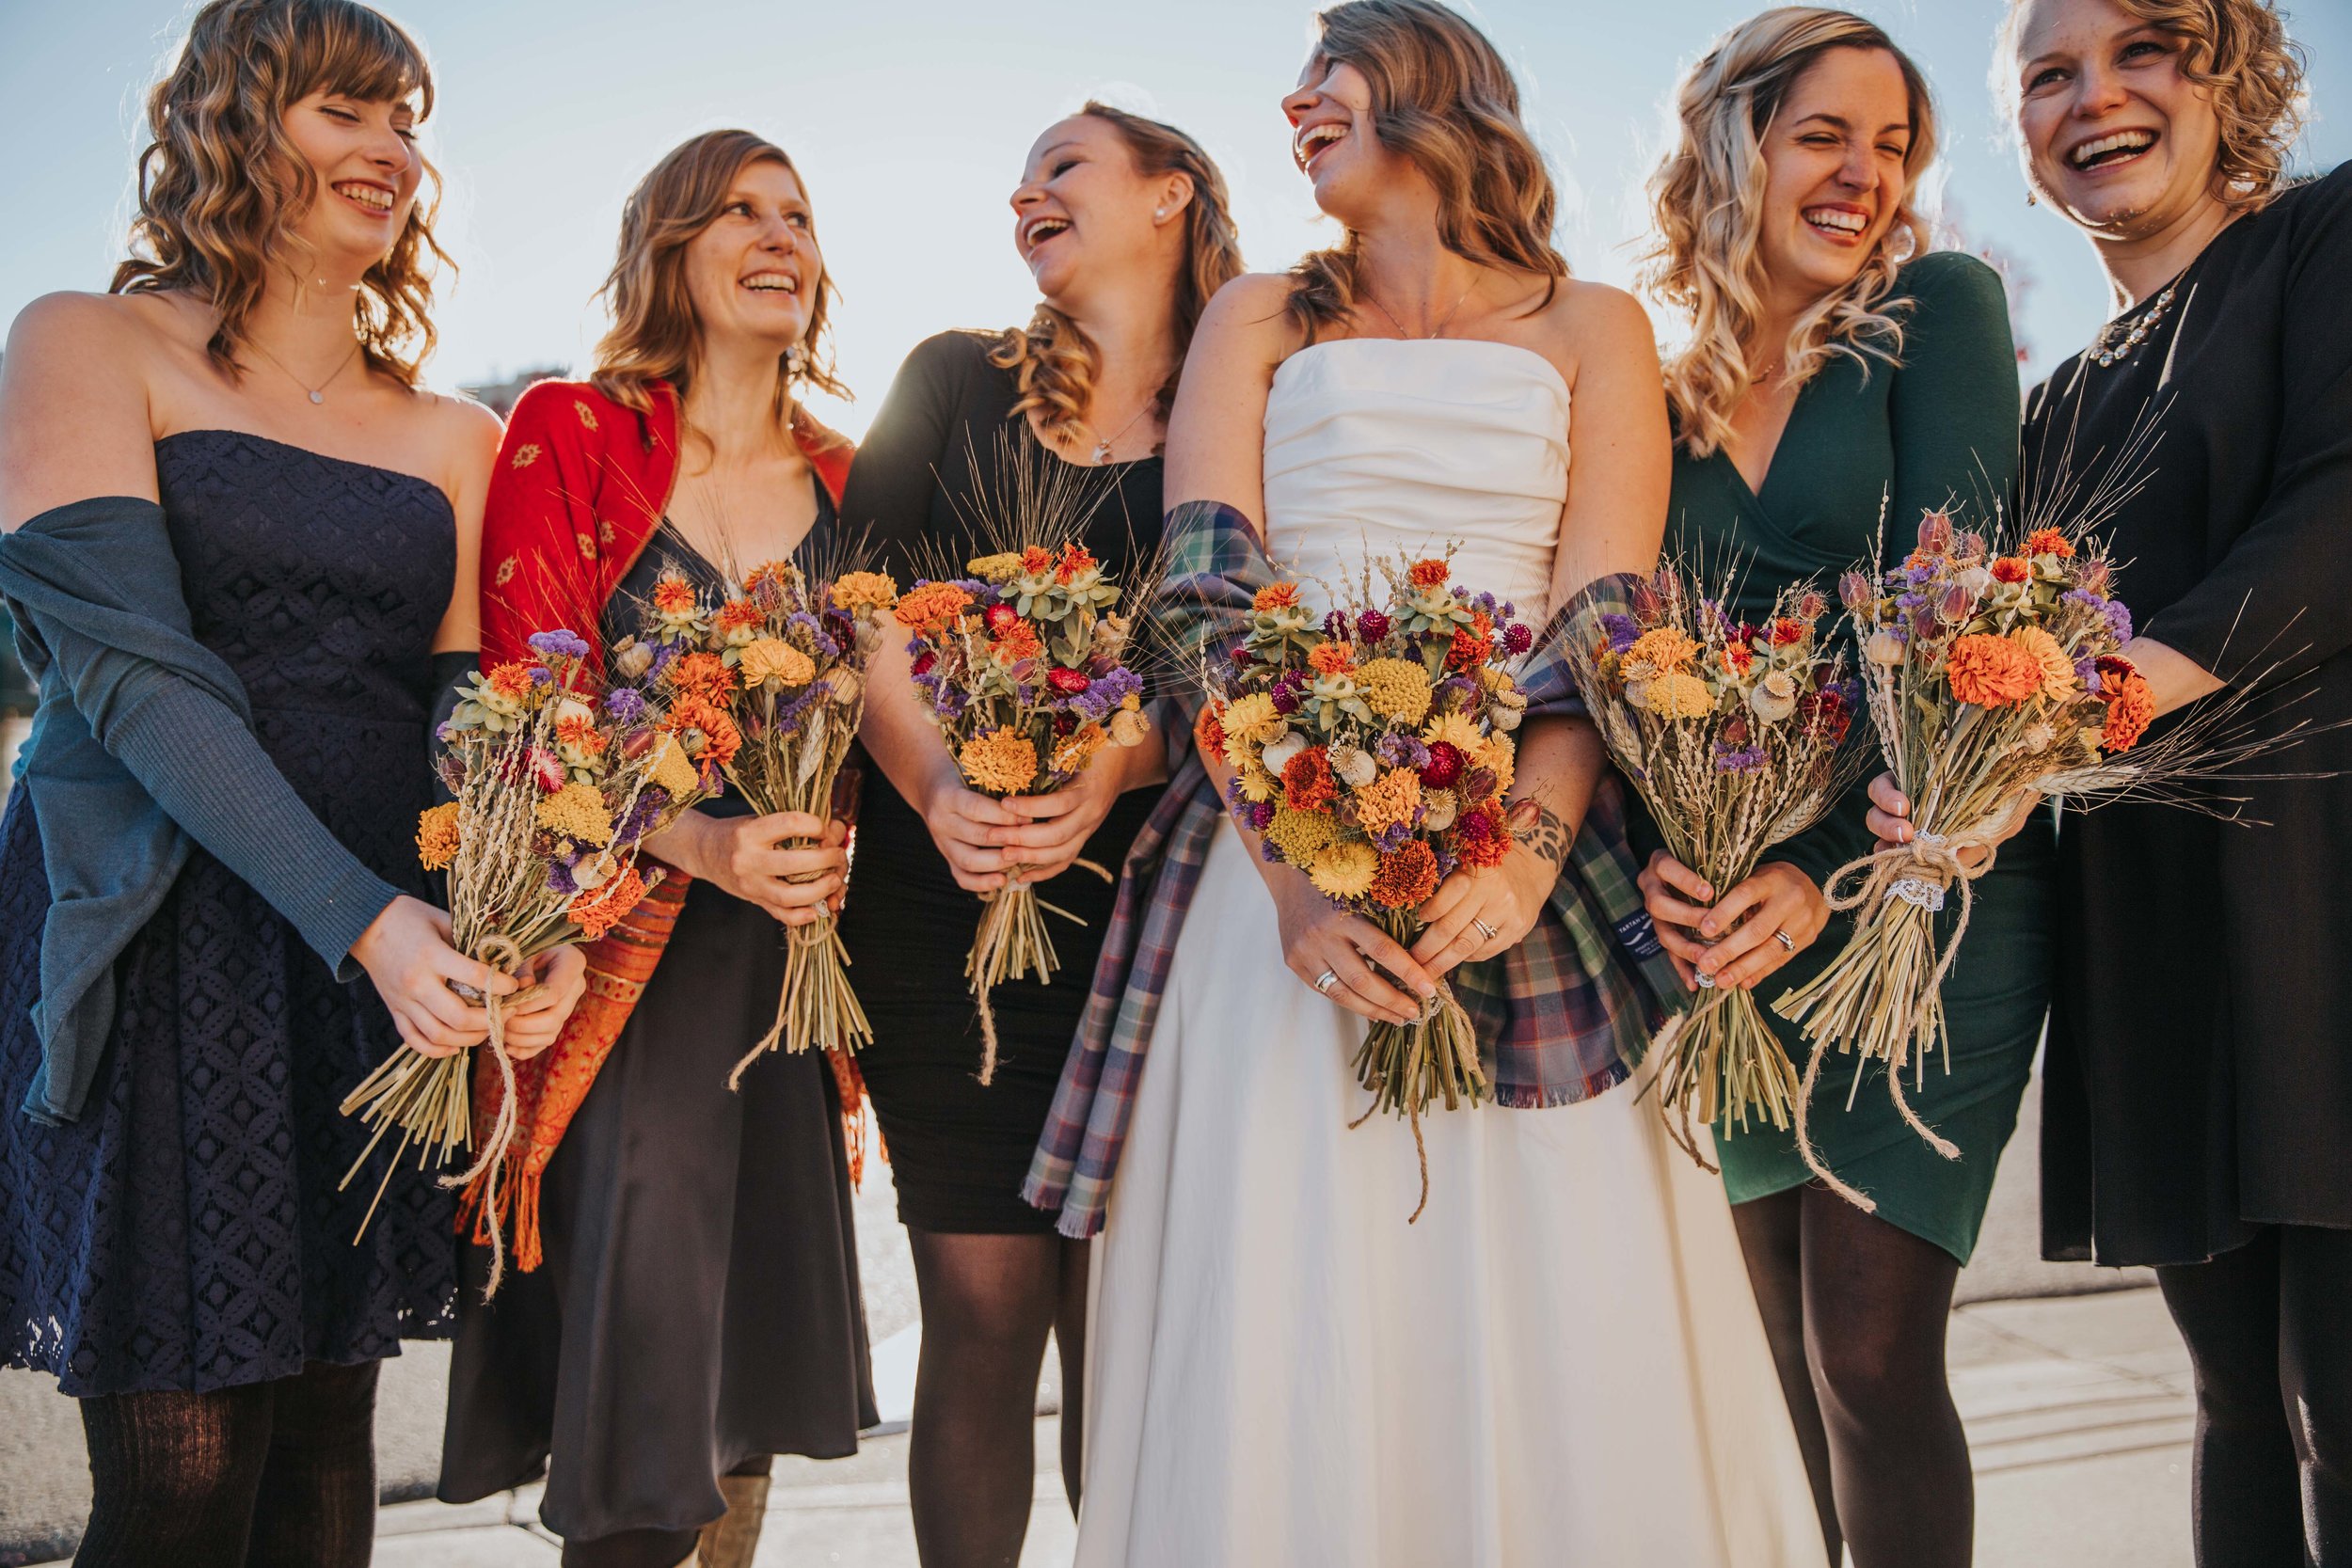
We’ve even had fall brides who wanted to keep things local, have us make their bouquets with dried flowers! Photo: Charlotte Truant Lota Love Photography
Once you’ve decided that you’ve found the right spot to dry, you’re ready to choose what flowers to grow. The list of flowers that are suitable for drying is a long one! To help you decide what to select, you may want to think about what your intention is - will you be making bouquets or posies? Do you want to mainly create wreaths or swags? Dried arrangements? Or maybe you have something entirely different in mind! Thinking this through may help you narrow down your choices. For instance, if you’re thinking about making fall-inspired wreaths, then you may want to grow more grasses or grains to use as a foundation for a harvest style wreath. If you're going to focus on dried bouquets, then you’ll want to think about growing some fillers along with some more colourful focal flowers to design around.
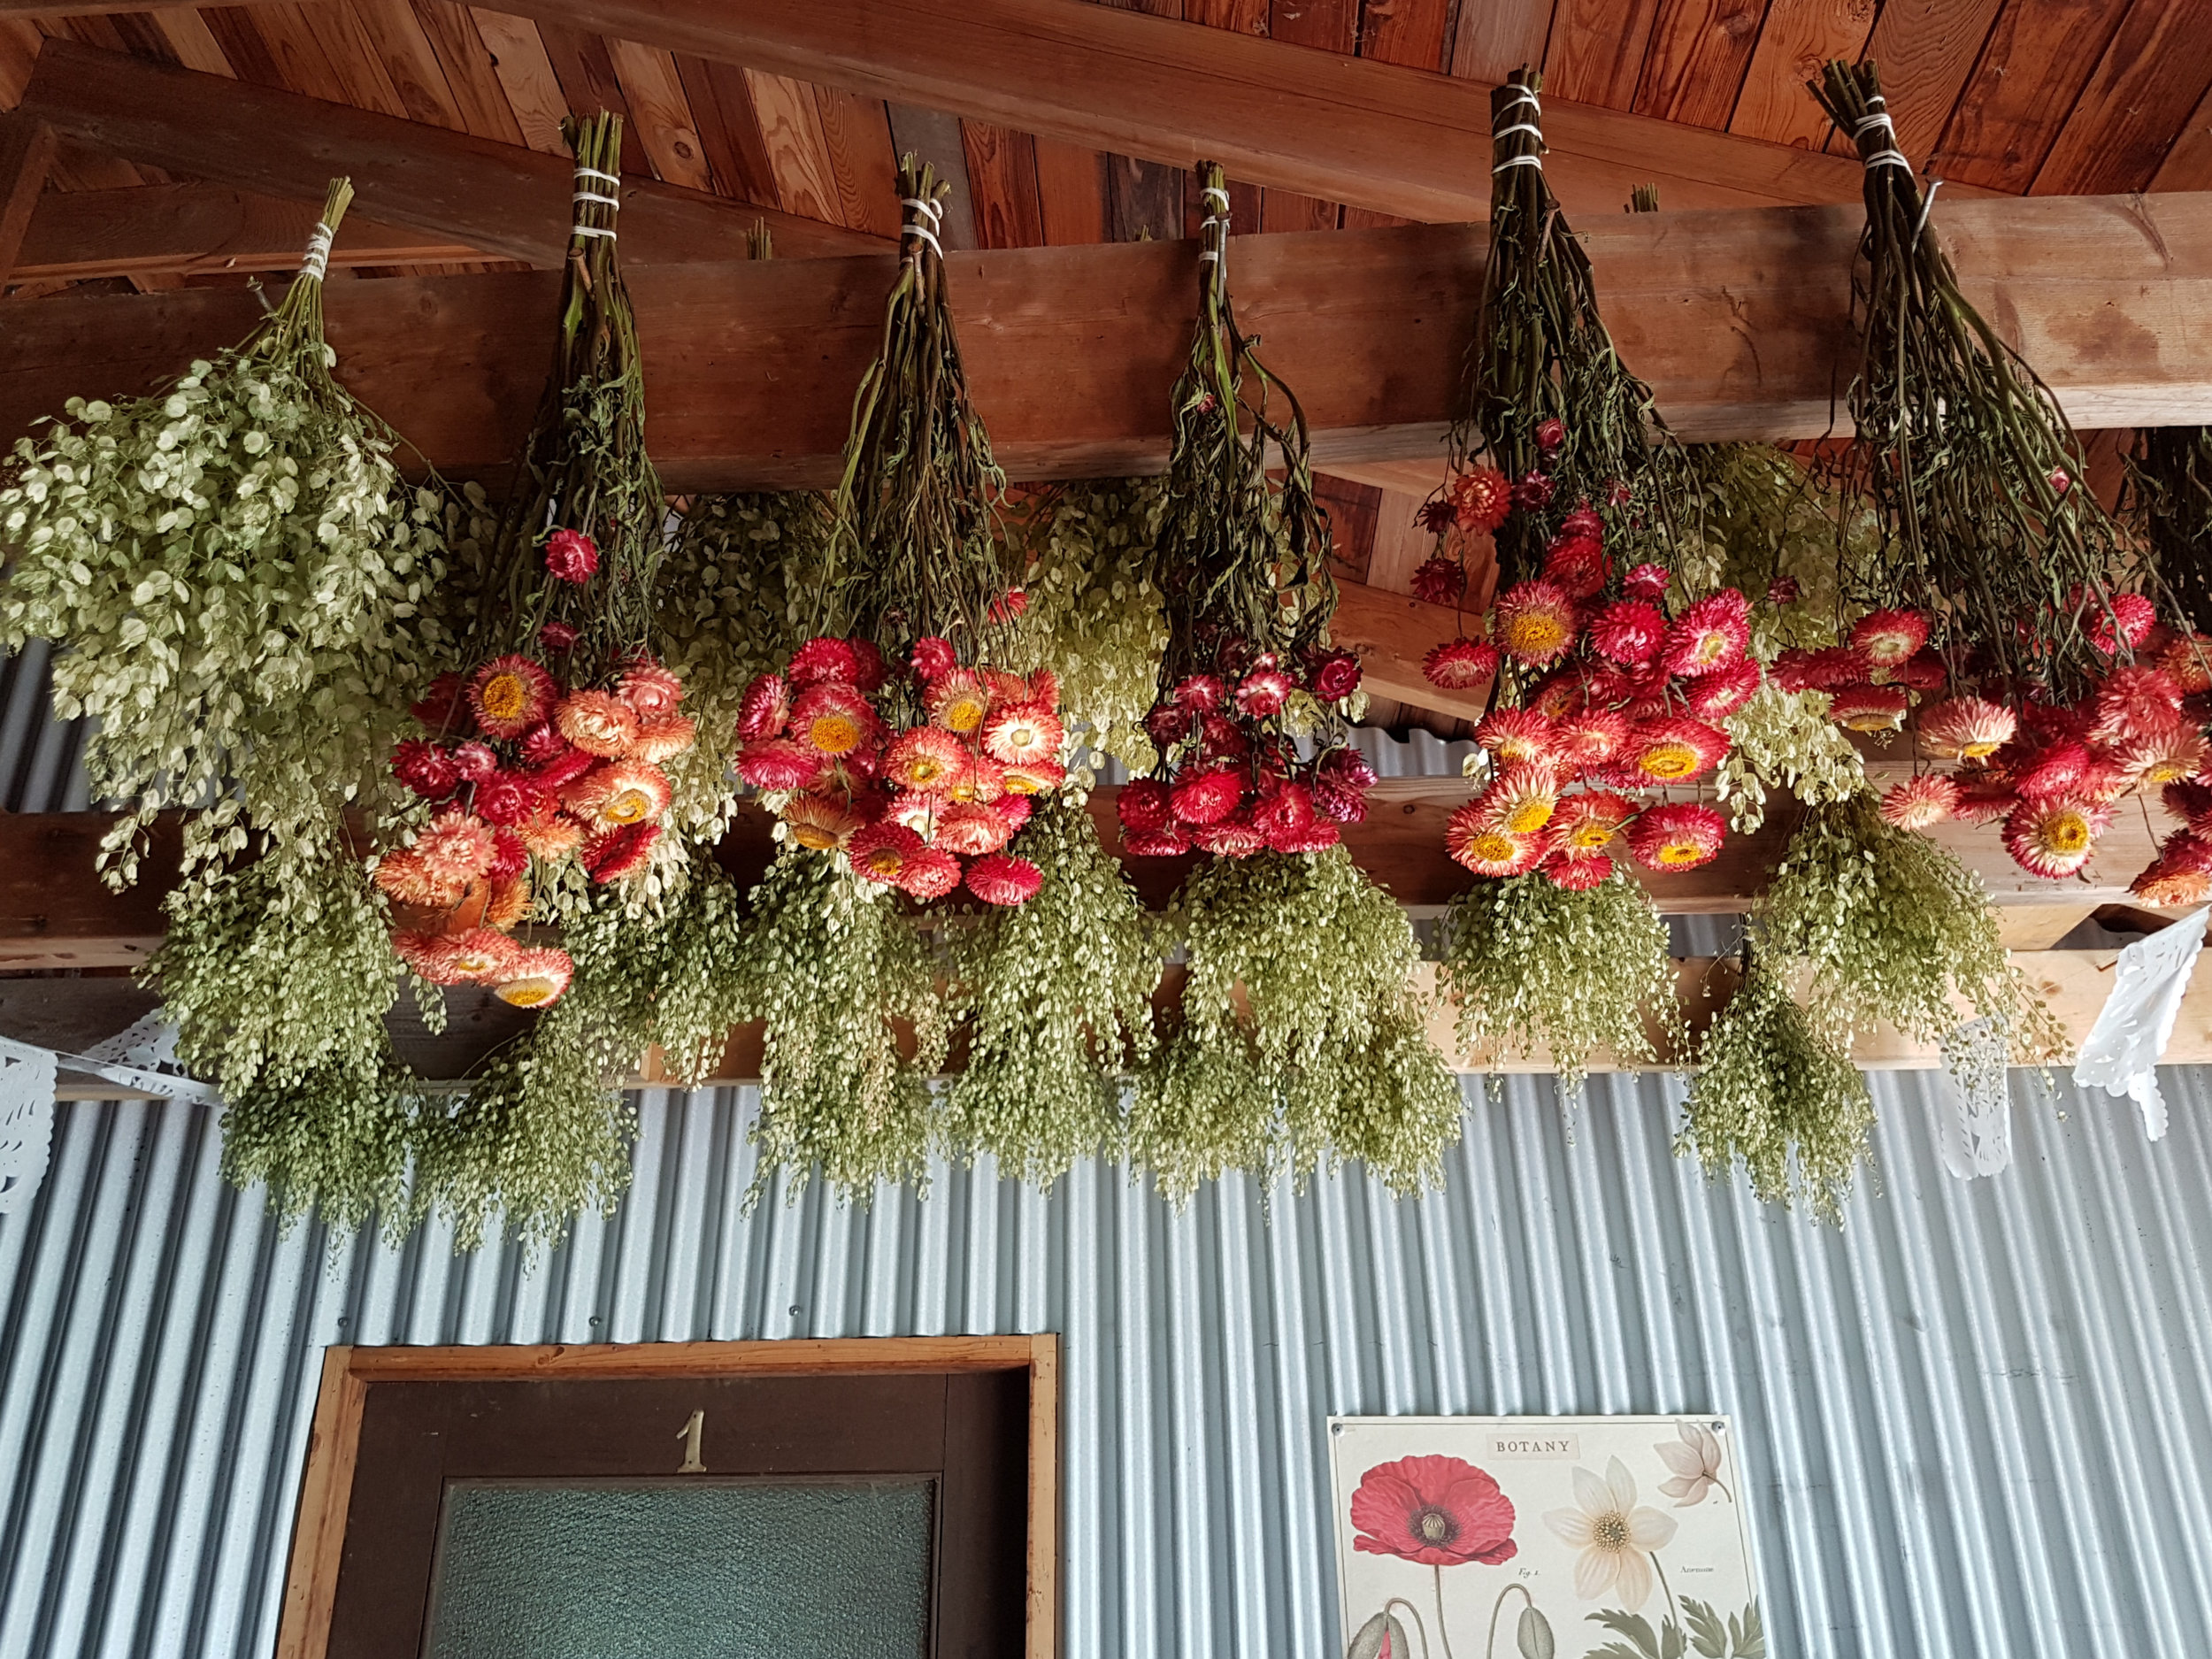
Drying flowers can be as simple as making small bunches and hanging them to dry in a warm, dark space.
Since there are so many great flowers that can be dried, I am including my top 10 list of annuals, along with my favourite varieties and specific harvest tips for each in the chart below. I chose these flowers for their ease of growing and drying and their usefulness in dried arrangements or wreaths. And because I really can’t pick just 10, you’ll also find a simple listing of our other favourite annuals and perennials that we grow below the chart. Check out our blog for more specific growing and harvesting information on many different varieties: Stone Meadow Gardens Blog.

We just love having long rows of poppies blooming in our fields- and so do the bees! This flower attracts honey bees like nothing else, then later makes beautiful, large globe shaped pods.

Statice is simple to grow and holds its color well. A must grow in any dried flower garden!
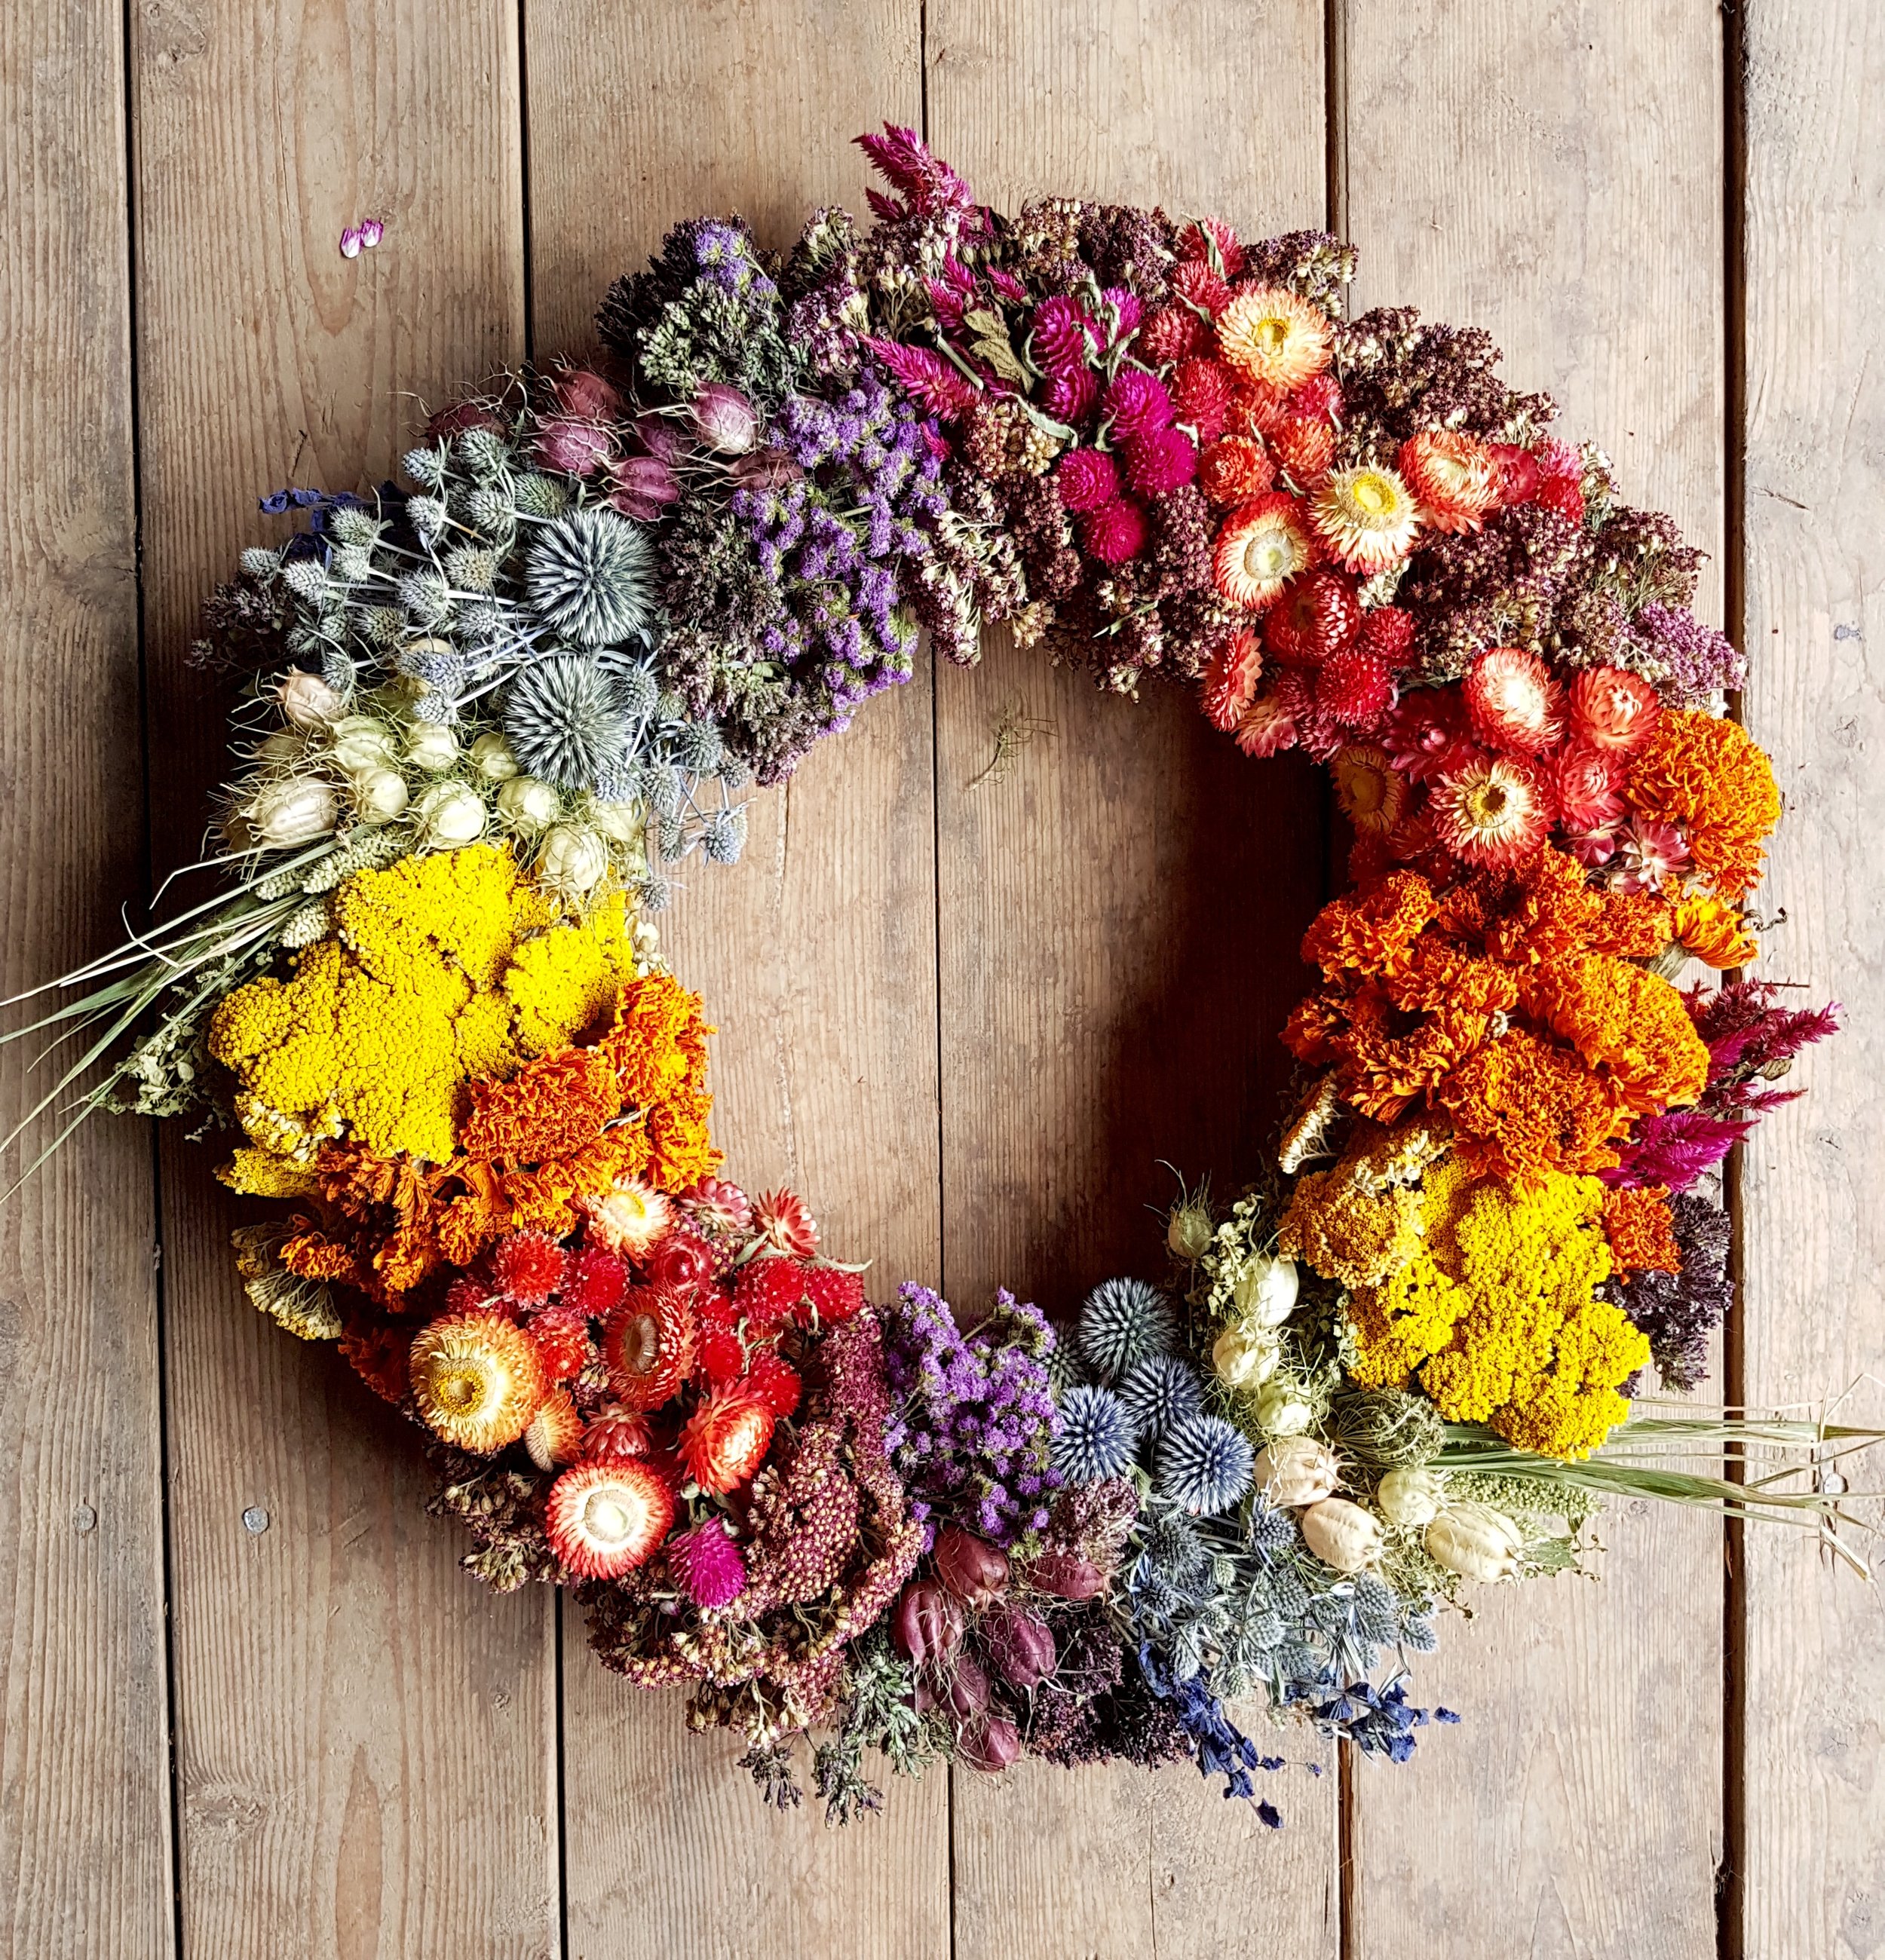
This rainbow wreath really shows off the color range that can be achieved with dried flowers!
Annual Ornamental Grasses and Grains:
Amaranth
Broom Corn
Cress, persian
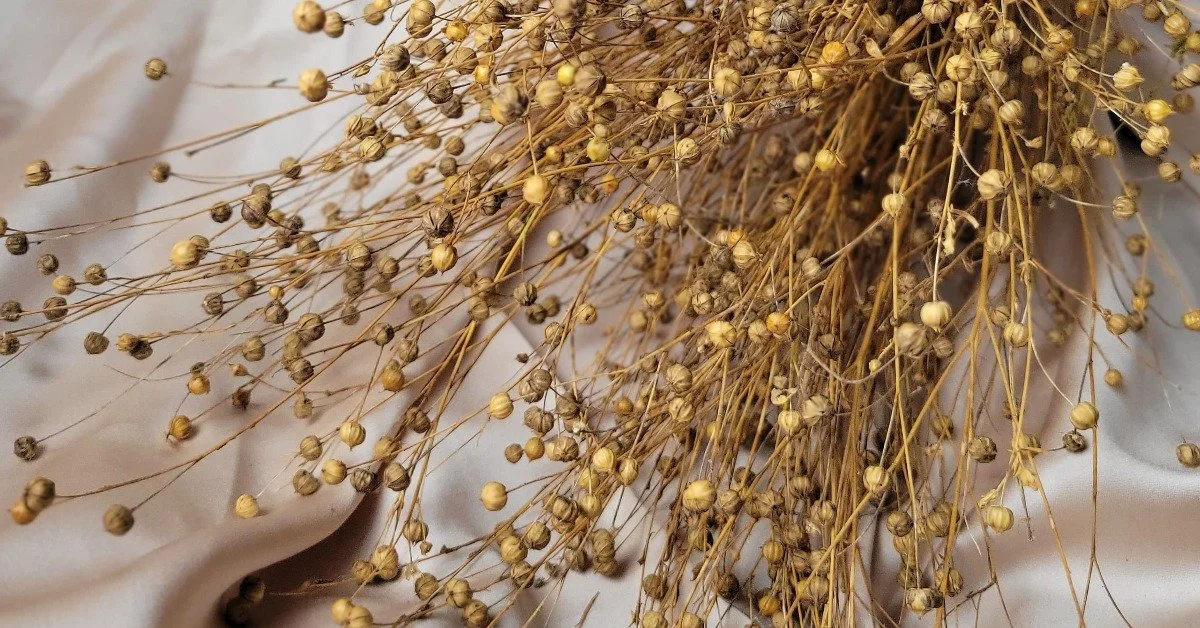
Flax
Frosted Explosion Grass
Feather-Top Grass
Oats, Wheat and Barley
Annual Flowers:
Ageratum
Celosia
Craspedia
Scabiosa, Star Flower
Statice Suworowii
Winged Everlasting
Perennial Flowers and Shrubs
Echinops, Globe Thistle
Eryngium, Sea Holly
Hydrangeas
Ornamental Oreganos
Roses
Yarrow

Safflower is another simple flower to grow. It has great color, interesting buds, and tolerates the heat of summer.
There are many sources for seeds, but here are some of my favourites:
In the US: Johnny’s Selected Seeds, Floret Seeds, Baker Creek, Botanical Interests, Renee’s Garden Seeds, and Swallowtail Seeds
Many of the above companies will also ship to Canada, but sometimes shipping and duties can add up. In Canada, you can try a new seed company called Stems, as well as West Coast Seeds, Stokes, and William Dam.
Commercial Growers in the US or Canada will find lots of options with Geo Seeds and Johnny’s, and Stems now has wholesale grower pricing as well.
Growing FLOWERS FOR DRYING
Most dried flowers I’ve listed here are quite simple to grow and require the same kind of care you would give to any other flowers in your garden. Here are seven things I always like to keep in mind when growing any flower garden:
1. Soil
Ultimately, to grow a healthy plant you first need healthy soil. We always prefer to start by amending our soil with high-quality compost. Compost can work wonders! While it adds a little fertility, there are also lots of other benefits including moisture and nutrient retention. We recommend getting a soil test done to really help you determine what type of fertilizers you should add beyond just straight compost. And please remember—compost is not interchangeable with manure! You will likely regret adding pure manure to any bed, particularly when you watch the plethora of weeds sprouting up in your beautiful garden.
2. Sun
Make sure your garden has plenty of sunshine! Most of these plants will benefit from being planted in a location with at least 6–8 hours of substantial sun exposure.

Here you can see the unique spike pods of Nigella papillosa just beginning to form. These flowers are a stunning addition to any garden and are unique flowers to use in fresh bouquets too!
3. Fertilize
We farm organically and usually add a small amount of a balanced granular organic fertilizer in addition to compost before planting. There are lots of options out there, so consult your local garden center or try Peaceful Valley Farm Supply for lots of resources and suggestions on organic fertilizers. Throughout the season we also like to use several applications (every three weeks) of Neptune’s Harvest, a liquid fish and seaweed blend. It’s simple to mix up and apply with a watering can for small gardens. For larger scale growers, it can be used through a fertilizer injector and sent through drip tape (that’s what we do) or overhead irrigation.
4. Weeds
Keeping the weed pressure down will help your plants immensely! They don’t want to have to compete for nutrients or water—or for your attention for that matter. Using mulches or landscape fabric can be very helpful to manage weeds right from the beginning, and we find wood chips are great to use to keep weeds out of our garden paths. If using straw or hay as mulch just be sure that the bales aren’t full of either unharvested grain heads or weed seeds as this can end up causing more work down the road when your mulch starts to sprout! In many of our beds, we use landscaping fabric that we burn (or cut) holes into where we want to place our plants. The material can be rolled up and stored for winter and reused for many seasons.

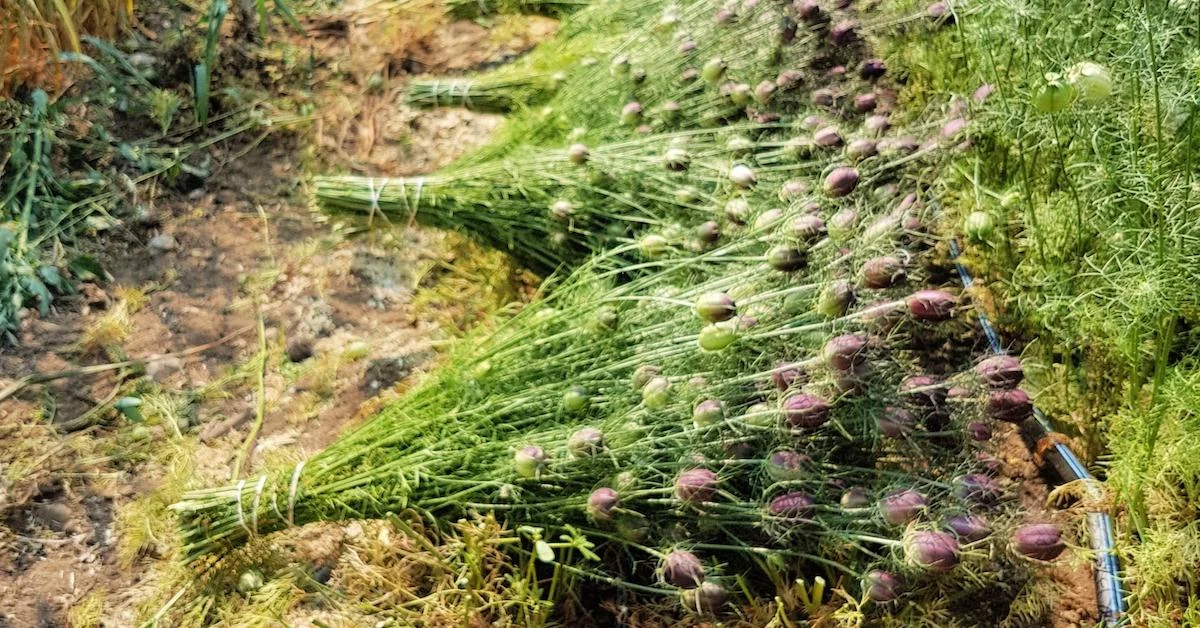
Nigella pods just harvested in nice bunches and ready to hang dry. Our dog, Paco, is just inspecting our work!
5. Spacing
We are always trying to maximize our growing space by packing in lots of plants. We use a bed system and depending on our spacing will plant either three or four rows per bed, and then the plants are spaced either 9 or 12 inches apart within those rows, depending on the type. Grains and grasses are the only exceptions—we plant those much more densely.
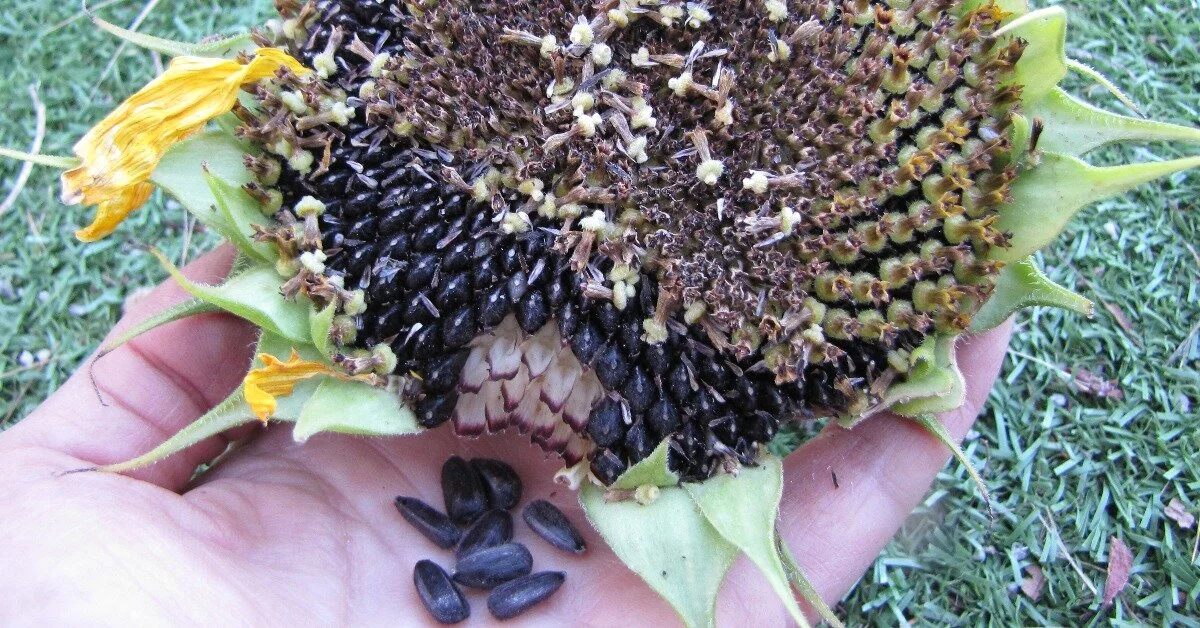
6. Harvesting
Always choose a dry day to harvest your flowers and be sure to wait until any morning dew has dried from the plants. Cut your flowers with sharp shears and remove the lower leaves. Secure your bunches tightly with rubber bands because the stems will shrink as they dry and if tied with twine bunches will often come loose and fall to the floor when they’re hanging. You’ll want to keep your bunches relatively small, although this can vary a bit depending on the space you have available, your climate (is it hot and dry?) and the air flow around your flowers. We like to clean up stems and bunch them right in the field, then gently pile them into crates and bring them to our drying barn.
To achieve good results, each type of flower needs to be cut at a particular stage in its maturity. If picked at the wrong time you may get flowers that just shed their petals or drop seeds everywhere. Some will even continue to open and not look their best. I’ve included harvest timing in the chart above for my top ten favourites.
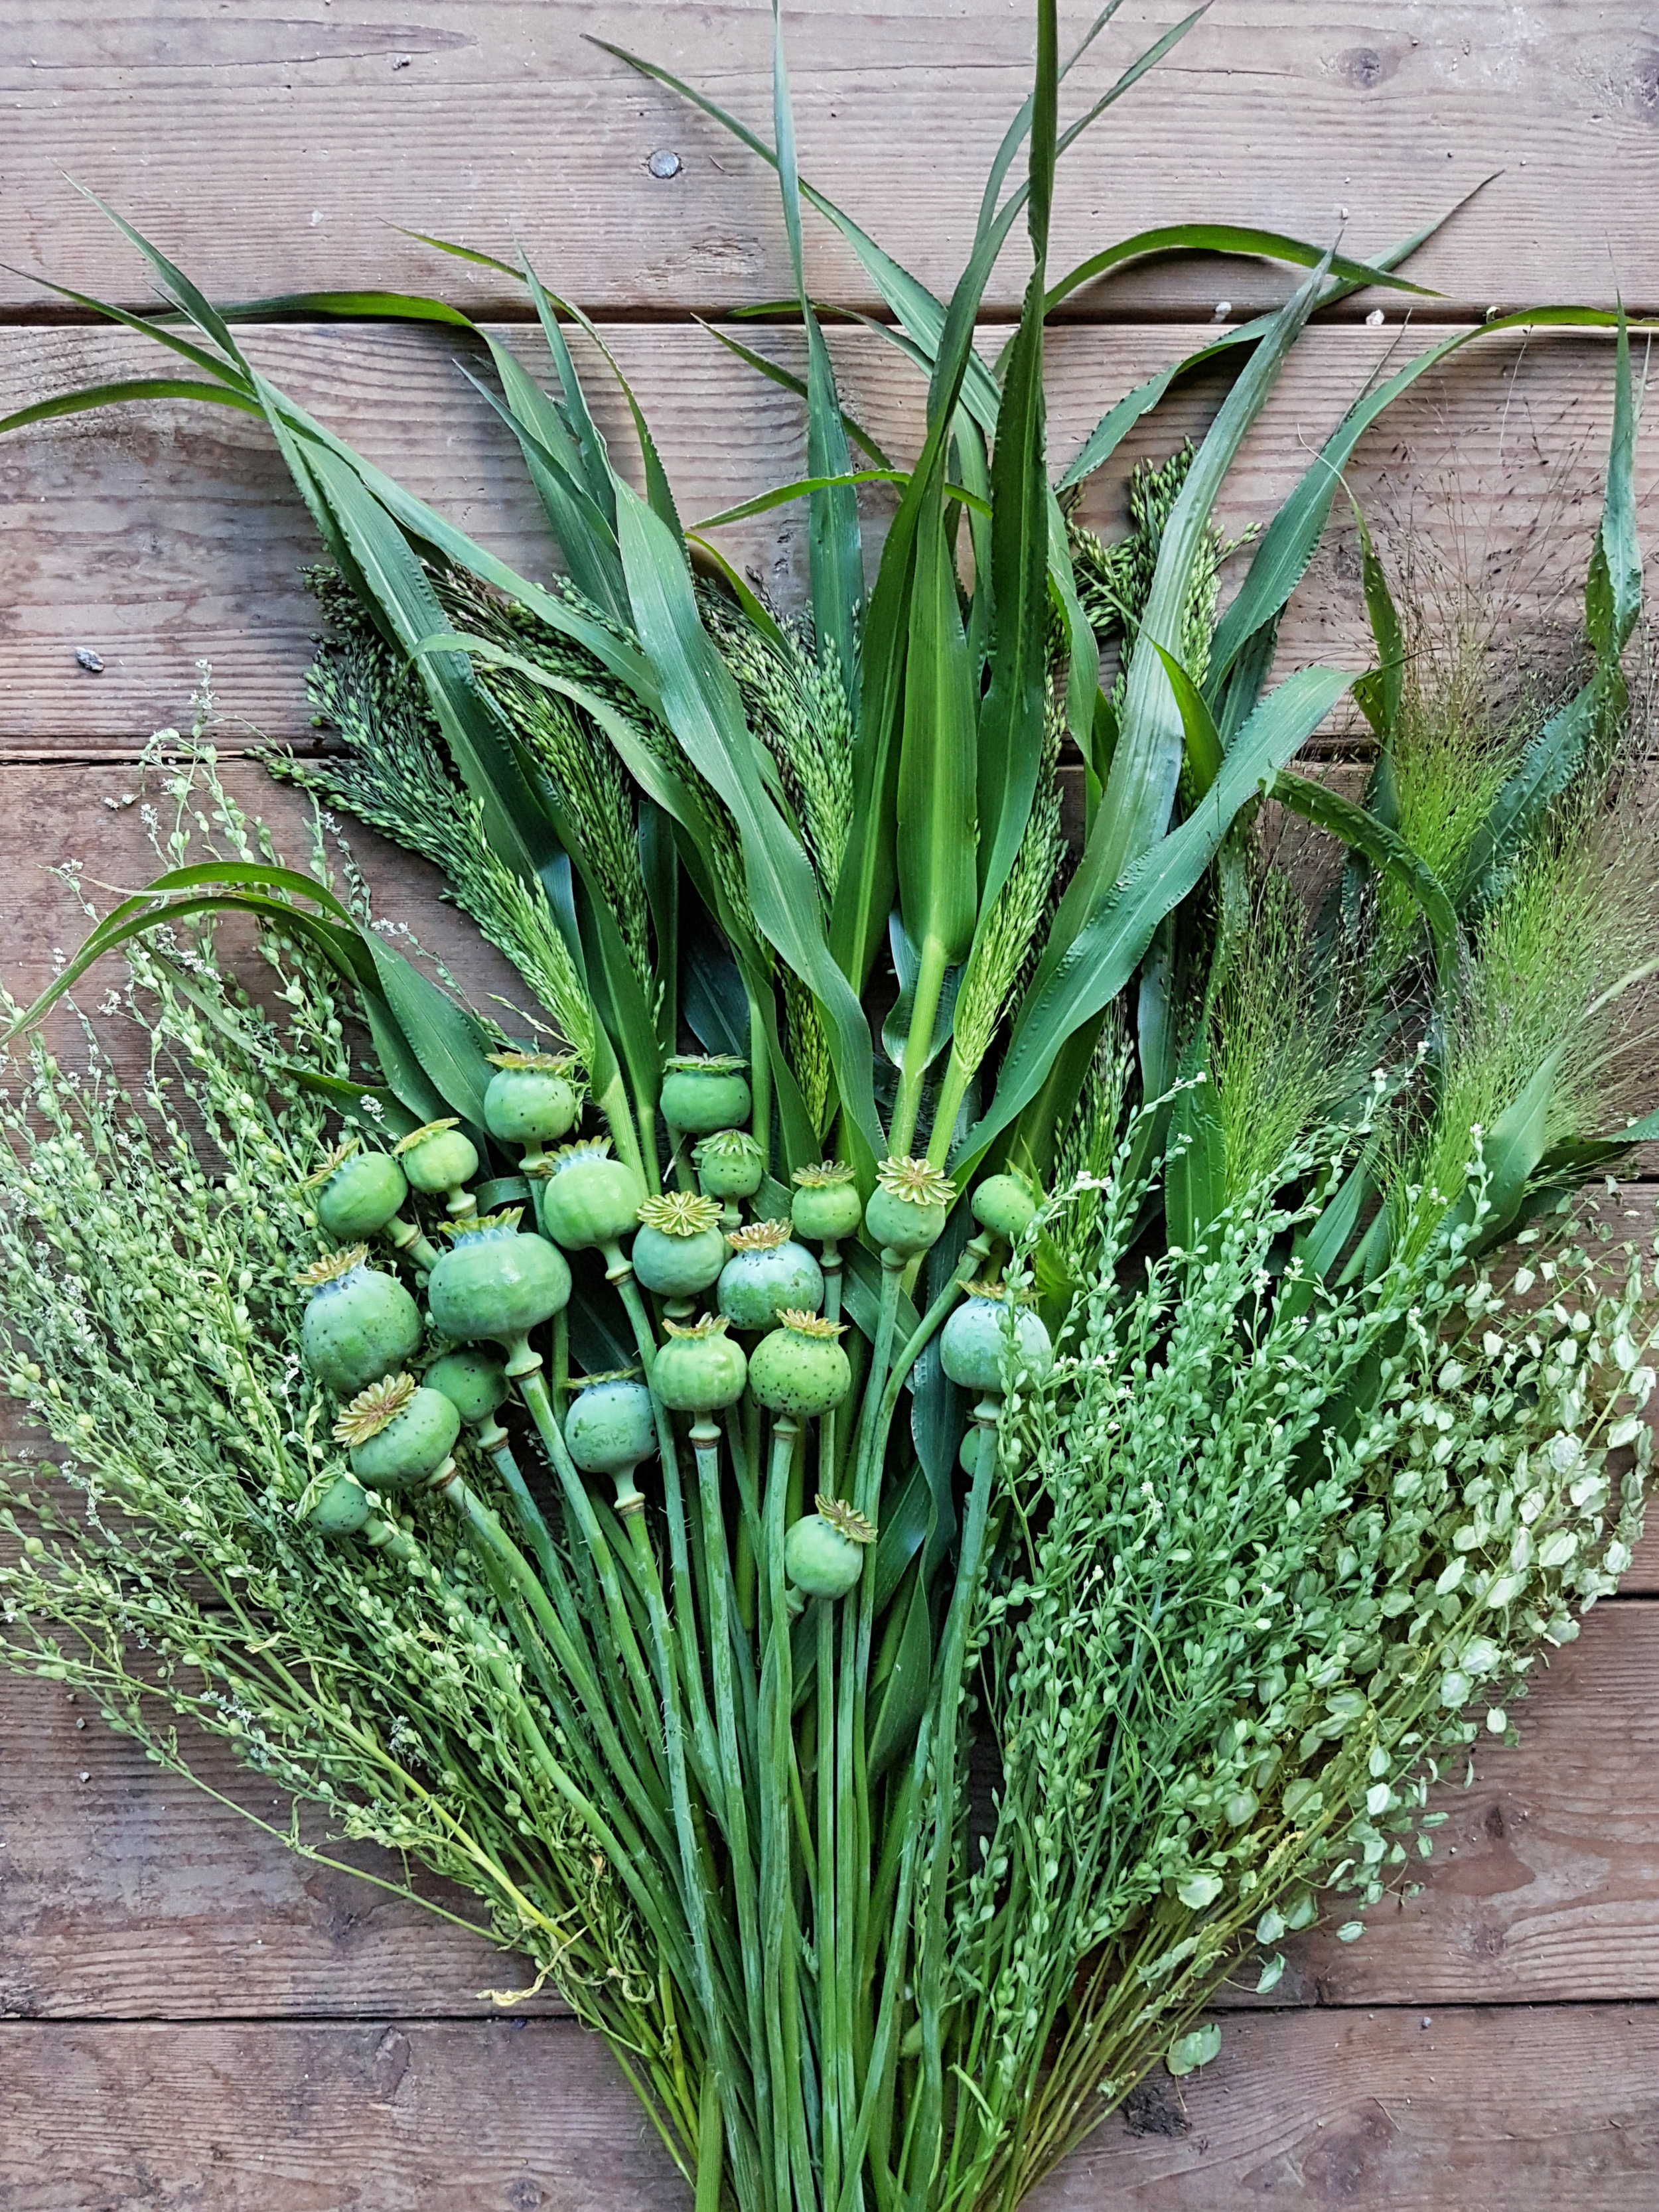
Grasses and seed pods add interest to your work, pictured here are poppy pods accompanied by cress and panicum grasses.
7. Drying
There are a few different techniques for drying flowers, but we mainly use the simplest of them: hanging bunches upside down to dry in our barn. Other methods include using glycerine or silica, but here we’ll focus on air drying because it’s simple, straight-forward and works very well for the majority of dried flower crops. We created a “rack” made out of fencing wire stretched over and attached to a wooden frame made of 2x4s. The frame is fastened to the rafters and hangs down to give us space for lots of bunches. We then made cuts in the horizontal strands of the wire and bent these pieces into hooks to hold our bunches. If you’re hanging flowers in an attic then often just hammering a series of nails into the rafters will work. You can also suspend a rod in a closet and simply split the bunch in half and hang it over the rod. Get creative with the tools you have and make sure to leave enough space around the bunches to allow for sufficient air flow.
Remember the key factors for success with drying: darkness, dry conditions, and (preferably) warmth. In the right place, your flowers should dry relatively quickly. It’s hard to give an exact time frame, so check them after about a week and see how they’re doing. You can tell if your flowers are dry by merely bending a stem- if it bends easily, feels supple and doesn’t break then it’s not dry enough yet. It should snap, not bend. When they’re dry, you can store them in boxes, separated by tissue paper. Flowers can re-absorb moisture even after they are totally dry, so storing any boxes or bunches in a dry place is of the utmost importance. The same goes for any finished products as well.
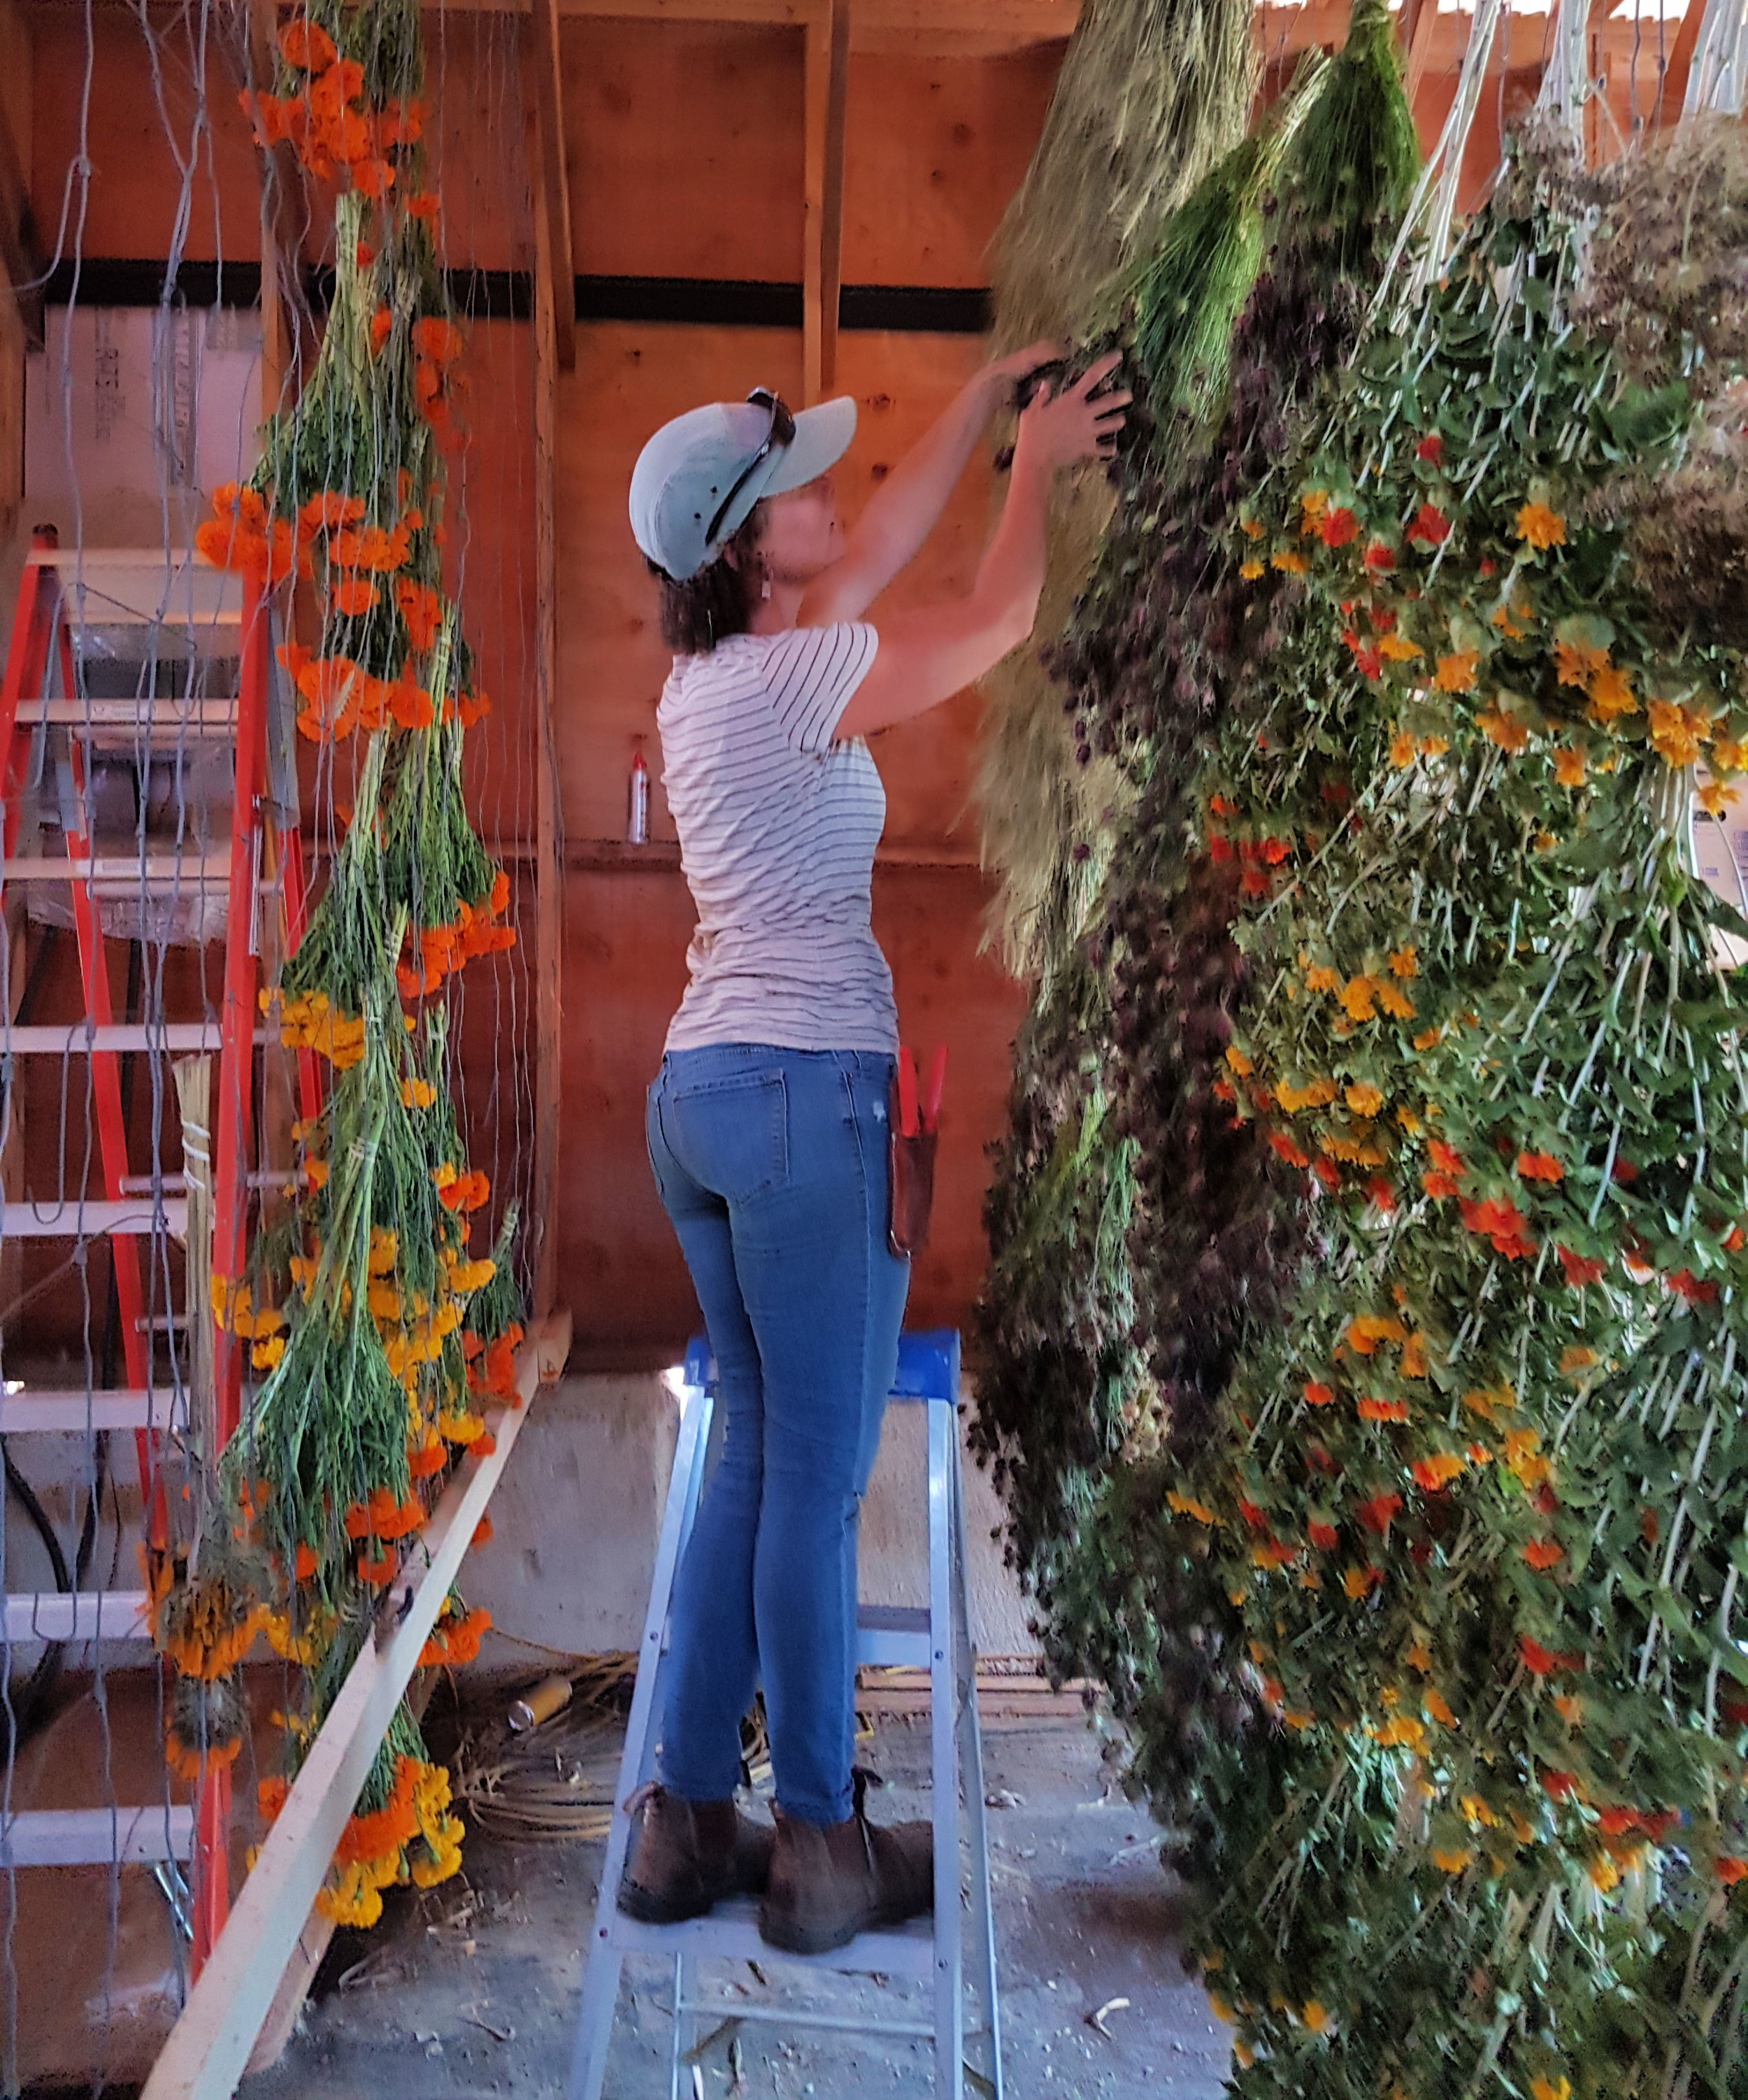
We created a large vertical rack in our barn so we can hang lots of bunches in the middle of our hot dry summer.
A note especially for designers: I’m sure many of you are already drying things in your studios such as hydrangeas or Proteas, but if you want to expand your offerings, think about reaching out to your local flower farmers and let them know you’re interested! They will likely jump at the chance to work with you and perhaps have more space available to dry flowers for you to use throughout the year. If you have space in your studio or shop, try experimenting with flowers you may have left over from weddings or designs—many flowers, if given the right conditions, will dry nicely!
I hope you found this article useful and feel confident enough to jump in and start growing and drying some flowers this coming season! We’ve discovered they are quite helpful in extending our sales into fall—and even winter too. The colors and textures can enhance any room and adapt to any decor or style. Just let your imagination guide you!