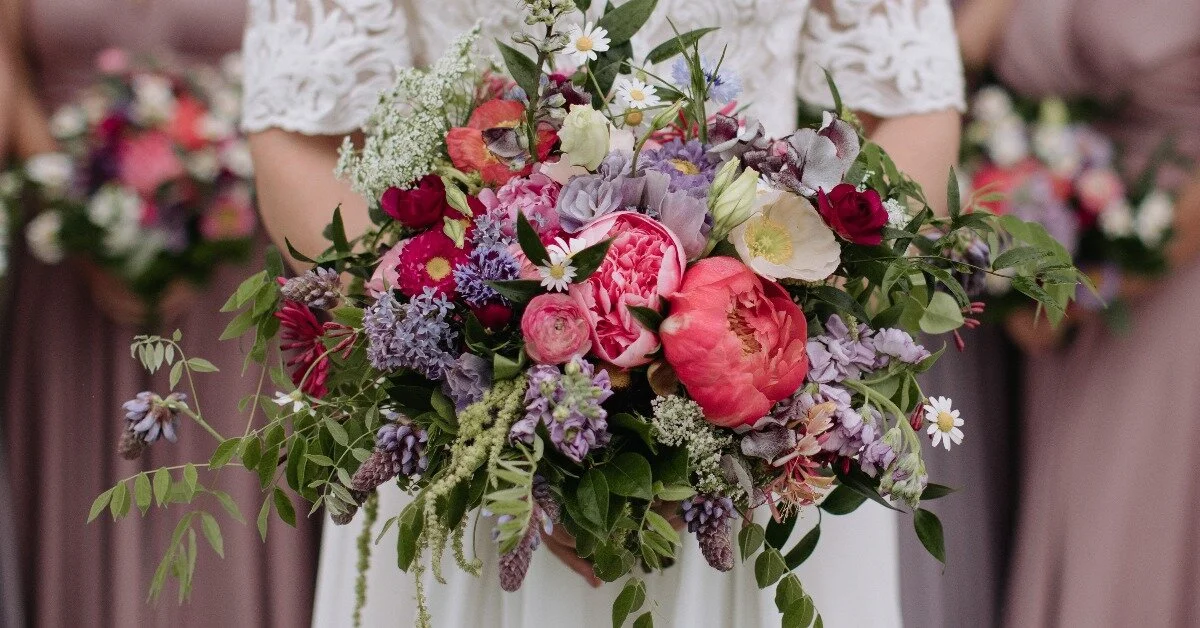
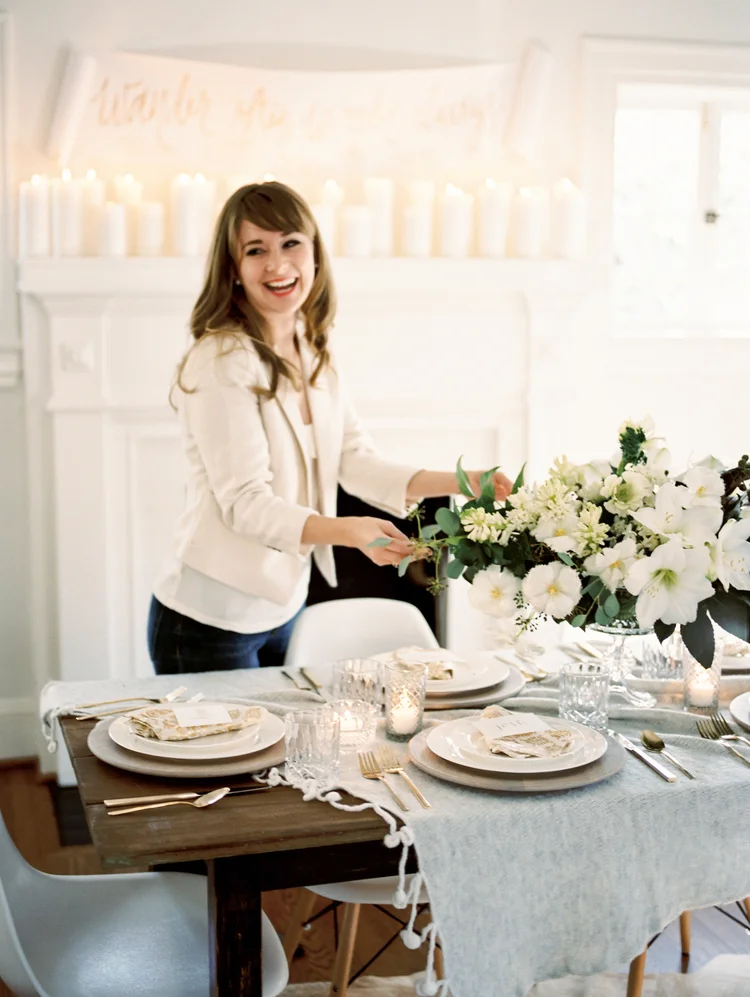
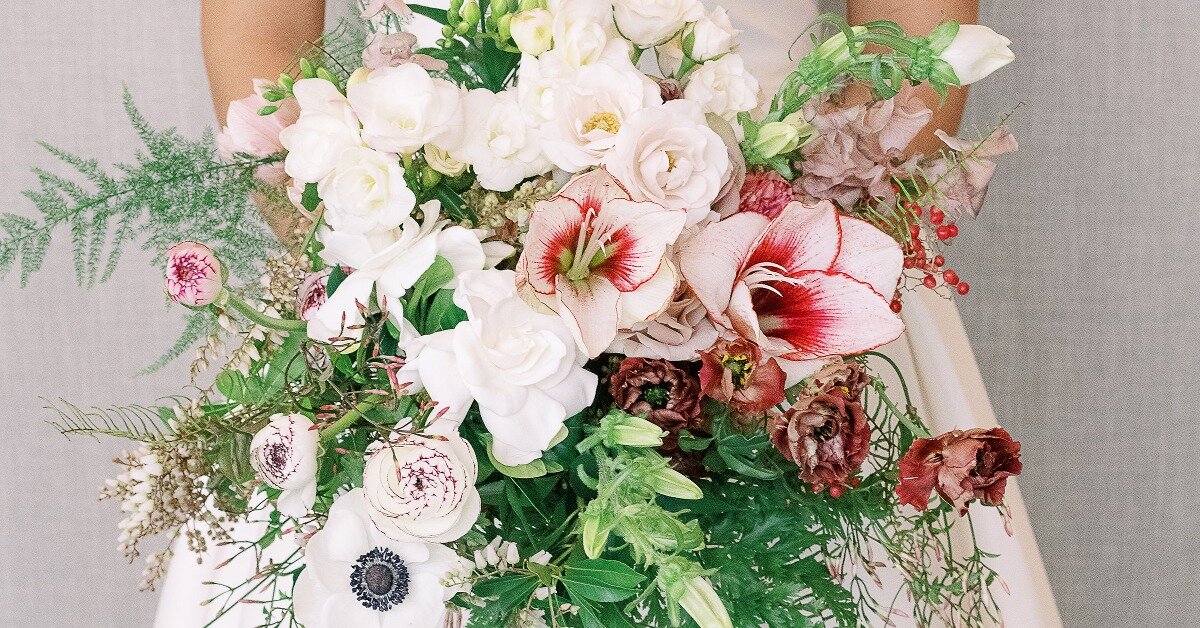
In this design highlight, floral designer Amy Balsters gives tips on how to liven up a bouquet in a white and green palette. In addition, she discusses how to use the spiral technique to create a variety of shapes.
All tagged Technique
In this design highlight, floral designer Amy Balsters gives tips on how to liven up a bouquet in a white and green palette. In addition, she discusses how to use the spiral technique to create a variety of shapes.
Jessica Hall of Floral Genius joins us on the podcast. Flower frogs are a timeless, incredible tool used in floral design, and Jessica is the co-owner of Floral Genius, the only maker of flower frogs in the U.S. She’s here to tell you all the things you need to know about flower frogs—from the different types to how to use them.
Have you used the classic floral tape grid mechanic in the past? It can be time-consuming, and it isn’t reusable. Enter the DIY Floral Grid—it serves as the reusable fix to the traditional tape grid used in flower arranging. In this article, learn how to use it (as well as how much time and money it can save!)
Fear not floral designers, timing poppies to open for your event is easy. In this video, Kelly demonstrates a simple method for opening poppies, and shares a few other related tips like when to cut poppies, how to judge the longevity and vase life of poppies, and a few of her favorite varieties for cutting.
———————
Transcript:
All right, in this video, I am going to help you take your poppies from here to here. It's a really common thing to be in a situation where, ooh, all my poppies look like this and my event is coming up very soon. I need them to be open and beautiful and ready to go. So I'm going to just teach you a simple little technique that I like to call poppy peeling. So poppies, whenever they are cut, wholesale or from the garden, you're going to want to have the kind that have just a little bit of a crack where you can see some color coming through. That lets you know that the petals inside your poppy have, you know, developed. If this crack hadn't happened yet, you can still peel the poppies. You might just have a petal that hasn't quite grown the whole way or you might have a poppy that's a bit misshapen or just not ready to, not ready to hatch yet. So you want to look for that little bit of a crack. Then down here at the base of the poppy, right where you have one of these cracks, just very gently with your fingernail, you're going to start peeling away at this base. Now what's tricky about this and what you have to be careful about is that if you're too, well, if you're too gentle, you won't get the pod off, and if you're too forceful about it, you could damage this delicate petal that lays right underneath the pod. So this takes just a little bit of practice. You might lose a few flowers in the process as you're practicing getting the hang of the amount of pressure to apply, things like that. So we are just, we're just pulling this pod off very gently until we have the whole pod off and the flower is set free. It's amazing to me how the petals are so delicate and this pod is so tough, yet somehow those delicate petals push that pod off of there when they're ready to come out. So is it a time-consuming process? Yes, it is. But it's definitely worth it. So now your, it's kind of like a butterfly that needs to dry off its wings. So it needs to just sit a little bit in this kind of a state before it will pop open. So these poppies I peeled two days ago, and this is what you're looking at, how they've gone from here to there. If you want to give 'em a little bit of a head start, you can gently put a little air so you can see that center that's exposed and that will help. So for an event, you're of course going to want them at their optimal peak openness. If you're doing something retail, you might want to just pop them shortly before you're going to put them in the piece. Maybe you have one open poppy like this that is a focal point, so whenever your client picks up, you can say, "This one here is going to open, "and this is going to give you a longer vase life." So that's something that you can explain to your retail clients if you decide you'd like to use poppies. These are Icelandic. They do very well as cuts. I know some people are little bit shy of poppies because of shattering and their vase life but these are pretty tough. They are a single-petaled flower though, so those flowers do tend to have a shorter vase life but they're so fun and people love them. You can see how this one was in a place where it was a little bit more ready to pop open. It came out very easily. When the pod starts feeling dry, you know that it's just, just about to let go. So this one does. It feels quite dry compared to the other. Feeling flowers and getting a sense, you know, not being afraid to touch them I feel like is very important for a floral professional and any kind of person who's interested in flowers because it tells you a lot about the flower and where they are in the course of their life, those types of things. So one last little, let's finish peeling this one so you can tell, you can see how thin this is. This means it's just about ready to pop on its own and how it comes and it has a little bit of spring to it. So by really getting a sense of the different, like this one was tough and this one is nice and thin, so that tells you a little bit about where the flower is. So this one that popped right open, this is going to open a little bit faster than this one that we had to give a little bit of force to. So that is it. And that is how you pop poppies. Wishing you the best on your next event where you are using them. There are so many great varieties of cut poppies out there. I love the peony poppies, the mother-of-pearls, they're so great for blush palettes, and then of course here we have the Icelandics, nice, bright, and super cheerful. Wishing you a wonderful day. Thanks so much for tuning in.
Unsure which technique is the best for your upcoming project? Wire, foam or frogs? Learn the pros and cons in this video. Learn how to become a florist and take floral design classes online with Team Flower. Here you can even learn tips on flower gardening for beginners. We'll show you how to do flower arrangements in flower arranging videos.
Transcript
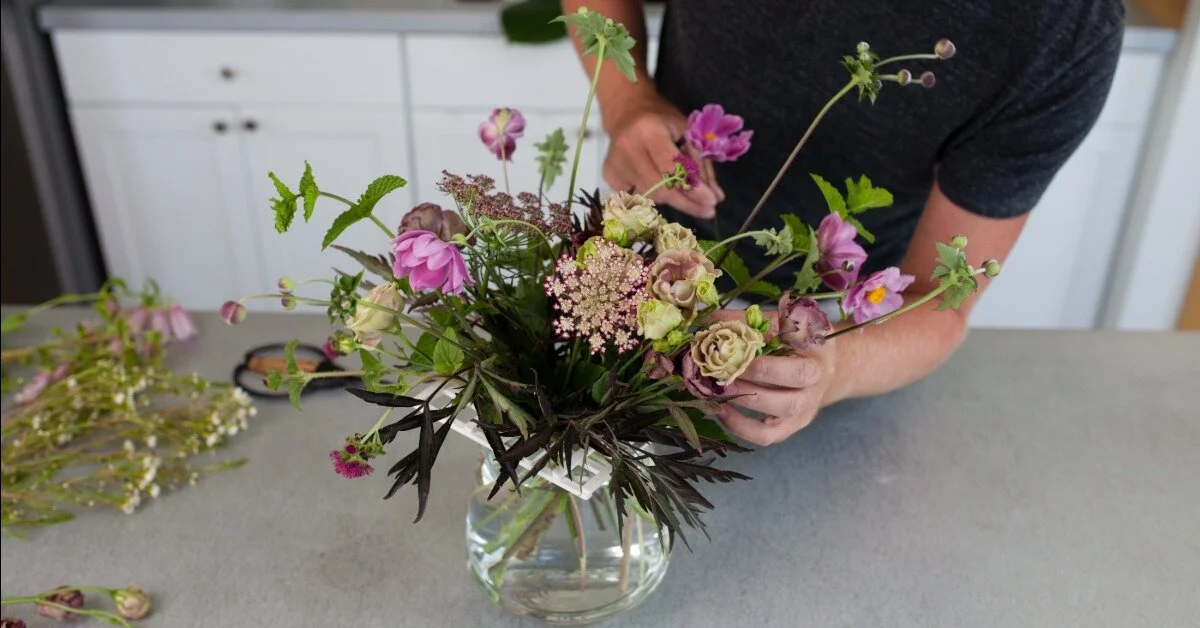
Hello, and welcome to the first Team Flower webinar. Today, I'm going to be sharing one of my core principles about arranging flowers. And that is that there is more than one way to do it.
Think a lot of times, it's easy to, as you go through making your arrangements and doing your business, to wonder if you're doing things the right way or if that's what everyone else is doing. And I think what's really important is to just shake all that off. And give yourself the freedom and the opportunity to experiment with a lot of different techniques because the more you experiment, the more you learn. And every time you fail, it's a lesson learned. And every time you succeed, it moves you forward. So I think it's really important just to forget about what everyone else is doing, and to experiment for yourself.
Today, I'm going to show you three different ways that you can prep your containers for your holiday center pieces or your next upcoming event. Each of them has pros and cons, and we're going to talk about those. There are certain situations where some are better-suited than others. And perhaps, you're just using one right now. And maybe having these other options in your pocket might be good and help propel you forward.
So the first one I'm going to show you is what I started out whenever I was doing flowers, and I used chicken wire. You might be familiar with this, and you might not be. And that's all right.
This is available at a craft store, like AC Moore. Or Michaels typically carries this. And then they also have it at flower wholesale. If you have a wholesale license, you can pick up a gigantic roll of this for about $50.
So chicken wire is fairly inexpensive. If you're trying to loosen your arrangements up a little bit, it's a great way to do it because it allows the flowers to fall naturally as you arrange. Sometimes when you arrange in something like a floral foam, the flowers, they go in and they stay exactly where you put them. And if you're trying to create a more loose or organic look, using the chicken wire is a great thing because when you put the flowers in, they're naturally going to fall the way that they want.
So let's go ahead. Jessie, send this over to this other computer. And we'll take a look at how to go about doing the chicken wire.
So the key with arranging and chicken wire is not to use too much. I found that if I have even just a little bit too much, it can be very bothersome as I'm arranging. So what I like to do when I am deciding how much to use is I will create a little cylinder like this. And I'll set it over the container that I'm going to use. And see how that just covers from side-to-side there?
Next, I fold it under. And this is a very technical florist term, but I just smush it. And what we're trying to do here is mold the chicken wire into the shape of the container that we're using. And our goal in doing this is to create something that is fairly secure and that is really molded so that we're not going to have this rocking back and forth.
The other thing, we want the flowers to have room, obviously, to go through the chicken wire. And ideally, they would pass through maybe two to three layers of the chicken wire. So I try to avoid things sticking straight up like that because that can [INAUDIBLE] the flowers from going in.
So I like something about that. But again, just because I do it this way doesn't mean it's the only way that you can do it. And you can experiment further, even within chicken wire, just to see what your preferences are.
So next, I'm going to secure it was some waterproof tape. Some people like to be extra secure, and they'll go back and forth three times on one side. And again, it's a matter of preference. It's a matter of what you find works best for you. So I secure it really well there. It's important that your container is very dry anytime that you're working with this tape so you get a nice, secure hold.
Now if you'd like to do a little bit of extra support, what you can do is flip your container over, and you can put a little tape here. And do that on all four sides. Some people just use tape as a base. And they would create a grid going back and forth only using tape.
I, personally, it's a little time-intense for me. And I don't prefer to it that way. But that's another thing you can do, especially if you're using a clear container.
So this is chicken wire. Then I would fill this with water. I would be very careful to just keep it away from the tape. Ta-da!
Let's move on to flower frogs. I started using flower frogs because there were a few things about chicken wire that I didn't like. And that was that the arrangements were not traveling very well. And I was having trouble whenever I would put things that were very heavy in my arrangements.
I like to use a lot of fruits, and apples, persimmons, grapes, things like that. And when I was trying to get those into the chicken wire, a lot of times it would maybe pull the chicken wire out on one side. I guess those were the two main things that made me think what's another option that I can have in my tool belt?
So the frogs, I really struggled with. And I hesitated using them for a long time because they just felt intimidating. And I realized that I was using frogs the wrong way, and that was the problem.
So once I figured out how to get everything situated properly, I've been using them ever since and absolutely love it. It has the benefits of both the chicken wire-- where the flowers have room to breathe and they're laying more naturally-- and also the benefit that foam gives you-- is that once you put it in there, it really doesn't move a whole lot. So it gives you a little extra security there.
What I'm using here is called Cling. This is also available at a Hobby Lobby or an AC Moore craft store. It might be under a different name, but it's basically a really hardcore waterproof putty. Also available at flower wholesalers and probably even on Amazon.
So the trick with the flower frogs is that you don't want it to release once you start arranging your flowers. And trick with that is to get a really great seal. So Jessie, right don't we switch over to this camera so they can really see what I'm doing here. Maybe even zoom in a little bit, if you can.
I'm going around the outside of the flower frog. And now I'm going to move towards the underside. I do not want any water passing through this putty and going underneath my flower frog. Because that is what is going to cause that to release, and give you a big headache.
The flower frogs are tough with glass and porcelains. If something is very slick to touch, you're just going to need to be extra careful if you're working with a brass or something that-- it's not quite as slick. It's going to be a little bit easier, and they're not going to release as quick. But just takes a lot of putty to put this together.
Once I get in here, I might start doing a little bit of ribbon, so that I don't have a gap. And some people-- like I said, everybody does this different-- so some people don't go the whole way into the center. Some people do. Really just experiment, and see what you like.
So now I'm going to go ahead and set that in the center of my bowl. And you'll see, I have this little bit of extra, and that was on purpose. I'll show you what that's for in a second.
So I take a towel, and I just put all of my weight on that frog. And sometimes-- if it's a brand new piece that I'm doing-- I might step on it and really, just with all might, get that in there really secure. So I test it with my hands, make sure it's not going anywhere.
And then what I do, is with that little extra piece that I have, I roll it. And feel down around here, and see where your gaps are. So I take this, and I do an extra layer. I used to be a cake baker. So this, in a way, reminds me of frosting my cakes, and making sure every little nook and cranny was covered. So push all that down there really, really good.
Sometimes, some people like to use a hairdryer just to warm the putty up a little bit, get it extra sticky. I think that's great. If your container is at all damp, this will not work. So it's very important everything is very dry. And a little bit more here.
I leave my frogs in my containers. When I buy a container, I buy a frog. And that makes it very efficient. Because when you're in the middle of doing weddings back-to-back-to-back, it's nice to be able just to come home, pull the flowers out, rinse the containers out, put a little bleach in them, and then just to jump right in and start over again.
So those are some perks of using the frog. Now some people combine using a frog, and they'll put a layer of chicken wire over it. I prefer not to. It's a little bit bothersome to me. Just it's tough to get the flowers in there with all of those things in my way, I feel like.
So what I like to do instead is I work from the outside of the frog in. So as I'm putting my heavier things-- my branches and my structural pieces in first-- I'm going around the outside of the frog first. And in doing that, I'm allowing space in the middle for things. So if you just haphazardly put your flowers into a flower frog and you aren't thinking about it, a lot of times with your stems, you're taking up all of this valuable support system that you have. So it's important to work from the outside in, to be very mindful of that.
Let's see, what else is important about frogs? Think those are the two main things. Get it in there really tight and then work from the outside in. Like I said, if you feel like you need a little bit of a safety blanket or your transitioning from chicken wire to just using a frog, go ahead and put a layer of chicken wire, put a grid of tape here. Just jump in and try it without it.
These travel really well. I've had great success. I live in the mountains, and every time I'm delivering a wedding, it's up one mountain and down the other side. And sometimes on dirt roads.
And so, like I said with the chicken wire, I just had a lot of trouble with things settling as I drove. But with the flower frogs, they seem to do better, with things looking pretty close to how they looked wherever I left the house. So I really appreciate that about the frog.
So one other thing. Another situation that I ran into and I was like, ah, neither one of these things are working very well for me and I need some other way to go about this was whenever I had a bride who was maybe doing a smaller wedding. And she was picking her flowers up here at the house. And she was using a less expensive disposable container that I was just sending out the door with her, and then I was never seen again. I didn't want to give her my frogs, but then I knew that when she got to her venue, her flowers would settle a little bit. I didn't like that either for her.
So that's when I decided that I was going to go ahead and use the flower foam in those situations. It's not something that I love because it's not really earth-friendly and it's not great for the environment. Also, just don't like the way that it smells. There's a lot of different reasons.
But there are some situations where it's the best thing to use for your client. And you should know how to do this as well, I decided. So with the flower foam, it is possible to do a really lovely loose arrangement in foam. I've done it many, many times.
And the trick with it is just to give yourself some space. So this is a really-- probably I need my-- I don't have a knife that I cut that I cut Oasis with. I usually cut it with a wire, but I forgot to grab my little wire holder whenever I came in here earlier. So you improvise.
Now, one of the problems and one of the hesitations I had when using foam was that I didn't feel like the flowers lasted as long or held as well as they did with the frogs and the chicken wire. And I still think that to be true. But through experimentation, I have come up with what I believe is another way to help the flowers last longer.
First thing, I soak my foam much longer than the package says. The Instant Oasis should be good to go in 10 minutes, and I believe it. But I've tried it, and I really didn't love my flower arrangements came out. So I've decided that I like to soak overnight.
And then I also, once I get the foam situated in here, I will fill the container still to the brim with water. And I've had a lot of successful with that. The flowers still look good for quite a while after the event takes place.
And I'm pretty pleased with how it goes. It's a bummer, some things that are more fragile or have a soft step just don't like to go into Oasis. And having that water in the container as well is something that I found that helps a little bit with that.
Oh man, [INAUDIBLE]. I need my wire. The whole studio is full of cameras and lights, top to bottom, so I can't just run out there real quick and grab it.
Oh man, guys. Look at this. Woo wee!
So that's about the height that I like. Now that I've made a complete mess, you'll be much more on top of things when you do this for your next event. So I put the foam in here. And now I'm going take a pass at it with the tape.
Now I didn't take a pass at it with the tape for one of the weddings, the first wedding that I tried this at. And the foam started floating and rocking back and forth. It was fine when I was moving them just one at a time. But when they were all in the box and rocking back and forth, my box just went crazy on me and flowers were flying everywhere. So that was a bummer.
But anyway, this is what foam looks like. And then, fill this, of course, up with water. And as you arrange, you just leave room.
You do want to start and do some foliage low and get this area covered. That's a perk about the flower frog, is you don't really have any area that you have to have covered. So you can do things that don't have as many flowers in them.
But this is what that looks like. And another benefit of doing this is that the client can simply pull the flowers out, put it into another container if they want if you've decide that you're in a hurry one day. Sometimes arranging in a frog or in chicken wire can take just a little bit longer. Foam is very quick. You can just put everything in and nothing really moves very much.
So if you were doing an event where you were going back to pick your containers up and you went this route, I'd be very easy just to pull the foam out and set those out on a table. Let them drip off a little bit. Then people can take the full arrangement. So that's three ways to set up your centerpiece.
I think I got everything. Let me just double check. I think we covered most of the pros and cons. I don't know that I mentioned this, but if you need to get a frog out of a container that you've used, it's a little bit challenging, but it can be done. And if you get a hair dryer and warm up that putty, get it malleable. And then, take a screwdriver, and pull that thing right out.
So those are the three different ways. So I hope that encourages you to try new things. Before we go today, I'm going to go ahead and answer three of the questions that you had written in. I'm sorry that I can't get to all of them today. But let me just answer a few here.
So the first one. Ashley from Minnesota writes, what has been your biggest success marketing-wise attracting local brides? I don't do fairs and I don't pay for magazine advertising because I know that those things don't work. I've tried them.
Yes, very smart. And I agree. From the very beginning, I talked to a photographer friend who told me I don't pay for any advertising. And I think that everyone's markets are a little bit different.
I think that some of the people that are watching have probably had success with doing ads or doing bridal shows. I personally haven't. So I think that the important thing is to know your market, and know what works in your market. Again, using this principle of experimenting with a lot of different ways.
So personally, Ashely, what works for me is networking with like-minded people who have a similar client that they're looking for. So I make friends with not just people here in my immediate area, but inside my region that have a similar aesthetic, and have similar goals and are going the same place. And so I network with a lot of people. And some of my favorite weddings and my strongest leads have come from those relationships. And it's a lot of fun to do it that way.
So that is what I would recommend, Ashley from Minnesota. Do some research in your area and find some people. Wedding planners are great. Photographers. Just network with a lot of people.
And then I have Kersty from England. And she writes, what is your favorite variety of rose? My is currently a majolica spray rose or the quicksand rose. But I am enjoying learning new varieties all the time.
Well, Kersty, I think what I would like to recommend to you is the champagne rose. And that rose looks very beautiful. It's like the tone right in-between the white majolica rose and the quicksand rose. And it's a slightly different size.
So if you're working on a blushing white wedding-- which is very popular and oh so classic these days-- the champagne rose is a really great option. It opens beautifully. It's one of the standard roses that I think looks the closest to a garden rose. It's something that just popped right out of the garden. So I love champagne.
And then, the last one, Rachel. She asks, what should I name my business? That's a really tough and personal question. But let me tell you my two thoughts on it.
Whenever you are choosing your business name, you can go in two different directions. You can choose a name that isn't your name, and you can do a doing business as Philosophy Flowers, or Buds and Blooms or whatever you might like to call your business. And when you choose a name like that, that has flowers in the name, it's a perk because it tells you what the business does right off the bat.
But then it also limits you. So if you think that you might want to someday add planning to your business or someday add coaching or some other aspect of you-- maybe interior design or something like that-- sometimes it's nice to be able to use your name because then, people still recognize your name. And you can be constantly adding new products and services under that name, and it's still pretty clear what you do.
So those are my two thoughts about it. Consider who's around you. Consider what other people in your area what they're doing their businesses. Not that you should follow suit because of that.
With me, whenever I chose Philosophy Flowers, one day I was on a walk. And it just came to me, and everything about it felt right. Why I do what I do is very important to me, so having philosophy in the name was a great pick for me.
So those are the two views that I have. So just consider long-term what you might like to do. If your name might be more effective then using something specifically flower-related.
I think that's all the questions that I had. Before I sign off, I wanted to wish you a very Merry Christmas. And I wanted to share a little something from my walk this afternoon that I picked up here in the woods. And this is called-- oh, very messy-- this is called ground conifer. And this is an evergreen vine that grows on the ground that you might like to go outs on a woods walk, and just happened to notice and add it to some of your Christmas centerpieces.
My grandpa used to go out and pick this up out of the wood every Christmas. And he would make these beautiful garlands over my grandparents' door. And since I hadn't seen it in the wild-- at that time, I was very young when that was taking place and going on-- when I discovered it here in boon in my backyard on a little walk, I was really pleased and excited.
So ground conifer or ground pine. It's called ground pine as well. And it has a sweet little pine cone bloom that peaks out.
Well, I think that's all for now. Thanks again so much for joining me. I hope that you learned something. And I hope that what you saw here today will encourage you to take the next step.
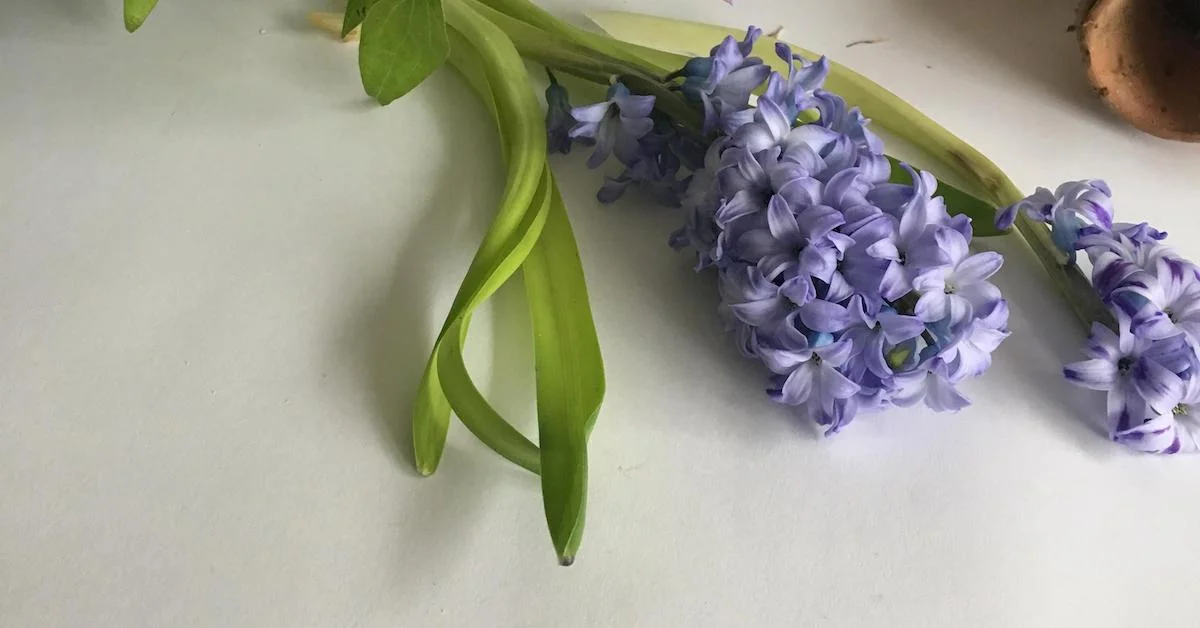
In this video, Kelly Perry of Team Flower demonstrates how to wire flowers for a floral comb. Wiring is a very important part of a florist’s toolkit as it allows you to do so many different things with various types of flowers. For this floral comb, Kelly is using white hyacinth and pieris.