All in Videos

Video: Centerpiece Design Quick Tips

Join Kelly as she goes through a free 4-part quick tip video series on designing a centerpiece. She discusses designing for a table, using the lines principle of design, and shows the ingredient use and purpose. Watch these completely free video lessons.


------------------------

Video transcripts

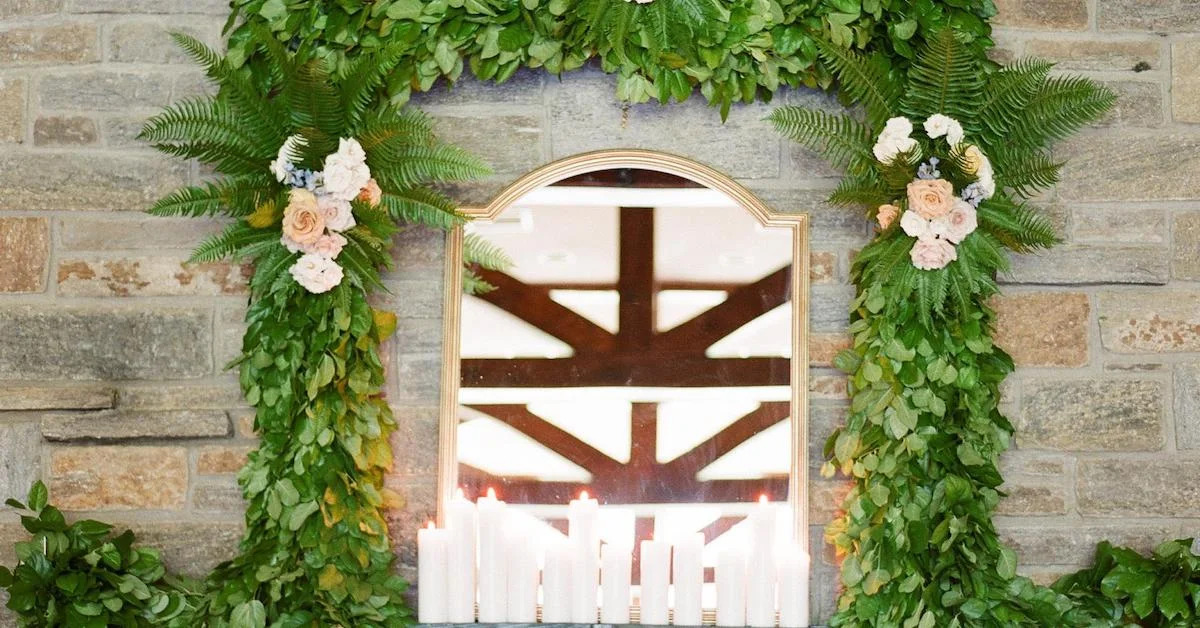
Hi, I'm Kelly Perry with Team Flower, and I'm here to show you a few quick tips for designing on a narrow rectangular table. If you have a client that wants a long, full, lush, centerpiece, or you're doing a styled shoot and they want something larger, it can be a little bit tricky to fit all of the things on your table that you need to, cups, glasses, flatware, plates, and you, of course, want it to be beautiful, but you also want it to be practical for your guests. I think that's really, really important. 

So, I have just a few tips for you if you're wanting to go in this long and lush direction. The first one is to use a centerpiece container that has a little bit of height to it. So, maybe you're doing a bowl, but it has a little pedestal and then the bowl is on top. What you're looking at right now is pretty low. There's no pedestal on this bowl. It's just a bowl with a small little lip at the bottom. And what we're running into problem wise with this, is that the flowers are kind of just invading this space. There's not enough distance between the plates and the flowers. 

So, we want to create a little bit more space. And I'll show you the difference that it makes just to add a little lift underneath your arrangement. So, now you can see there's a considerably larger amount of room between the plate and the flowers, and so the guests can easily access their dinner, and cups and things like that fit in a little bit better. The next tip that I have for you, is to do a little mock setup before your event and before you start designing. So, if this is for a wedding, just set up a table similar. If you're working with an event planner, or cater, or whatever, just ask the dimensions of the plates that will be used. 

You want to be mindful of chargers. Sometimes, you know, you'll get there and oops, surprise! There's chargers, and on a narrow 30-inch table, you cannot fit chargers end to end, and then also, you know, really large centerpiece. So, that's something to consider during the design process when you're working with your client. If they mention charger, you have to kind of ding, ding, ding, remember. It's going to be difficult to fit all that on the table. So, you can set up in your studio, just a quick little-- maybe with a little pop-up eight foot or six foot table, whatever they're using, or round six foot table, just to get an idea of what you're looking at. 

If you don't have those tables, you could do a little visit to the venue if that's practical for you, and you could kind of chart out and set it up, and see what dimensions your flower arrangement should be. So, that way you know if you control your greenery out a little bit more, if you need to tuck it in more. But the most important part with these narrow, long tables, is this section right here. You want this to be pretty narrow. So, tip one, you know, popping it up a little bit higher, tip two, having a little mock setup table. Now, what's great about this, is you're making your first arrangement, you can sort of, examine how the cup-- the cups are kind of the thing that, a lot of times, will get in your way. 

So, if you have the height and width of the cups and you can set that up, you can sort of trim out of your arrangement, little pieces that are interfering with the guest access to those elements of the table. So, this particular pokeweed berry is touching the glass, and I just want to get that out of there, so that it's comfortable for my guests. So, just a small adjustment-- maybe we get rid of this leaf as well-- it makes a big difference, and that'll save you a little bit of time whenever you go to set everything up. It helps the event planner or the caterer be able to access those things easily. 

You don't want to be the florist that always has flowers in the way of other people's jobs, and just practicality is important. So, those are my two quick tips for you. Get the level up, and then set up your little mock table, and that'll help you get an idea of the general size that you need to go for. And then you can also clip things out before your arrangements head out the door, just a little bit of quality control to help you make things a little faster on event set up day. I hope you enjoyed this little video, and if you'd like to see more, you can visit teamflower.org/free. I'm Kelly Perry, thanks for watching. 

------------------------

Hi, I'm Kelly Perry with Team Flower. And I am back with a little flower recipe for you. This might be a great option for a bride who would like something that has just a little hint of fall in the air but is still nice and summery. 

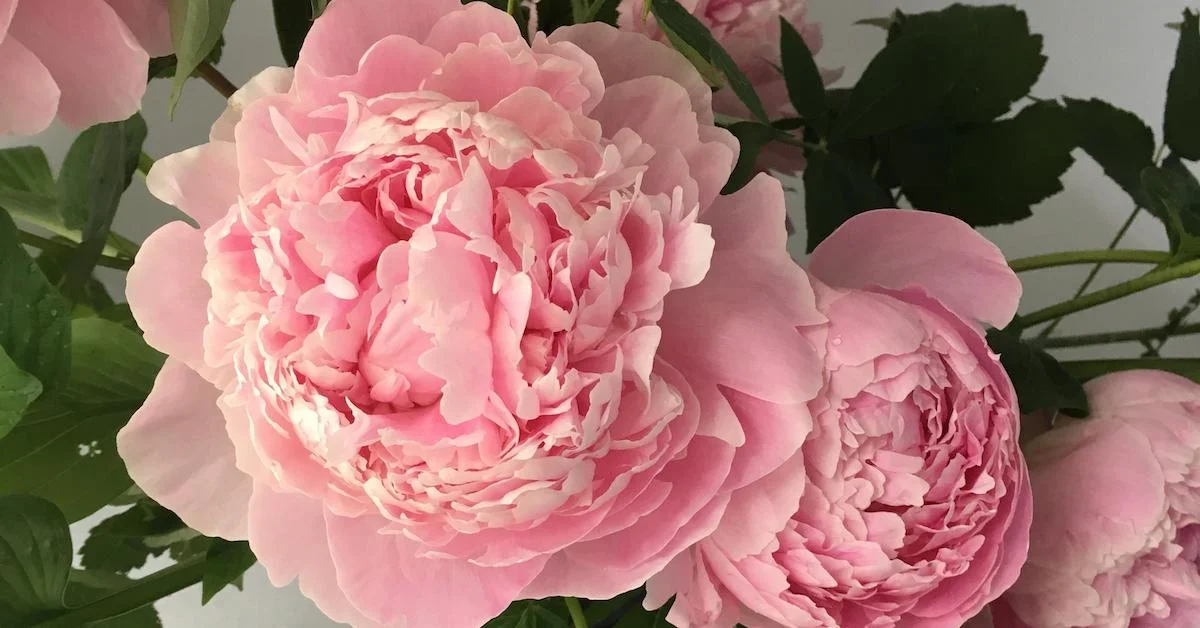
It's late August here in the mountains. And I think that these colors are really just telling of the season and the time of year that it is. We have some of these pinks, and we've paired them with some-- just a real rich orange that just has that little bit of a knod to fall, which is fun. 

So the leaves have started changing colors. And this color palette just reminds us where we are in the season. So I just wanted to go through and tell you a little bit about each of these ingredients. You might find a way to work them into your garden, or into an arrangement that you have coming up soon. 

So the first arrangement that we're going to start out with is pokeweed. It's this right here. And it has little pink and green berries. 

Later in the year, they turn into a very dark purple. Once they hit that stage, I don't use them in arrangements anymore because they stain pretty bad. So I just like to avoid that liability. 

But whenever they're at this stage, they're really, really great to use. This is something that just grows wild. And it's weedy here in Boone, so it's easy to come across and a great way to fill an arrangement. And next, we have some snapdragons here-- these little pink guys. And I love how they pull the color out wide into the arrangement. 

These little orange guys here called gomphrena. And they come in a carmine pink and white lavender. So there's a lot of fun color options with these. They have just really nice texture and just that little knod that you can use as a finishing piece. 

I'm quite a bit of lisianthus in this arrangement. This variety has a nice dark burgundy center, which I love how it just captures what's going on with these queen redline zinnias-- one of my favorite zinnias. and then I have the burnt orange dahlias deep in the arrangement here. 

And if we flip over, I just have one other variety of dahlias that we pulled from Darlanna Besecker's farm, Hope Valley Gardens. So here is another variety, that dahlia. And then I missed our little base in here. 

If you look in real deep, there's some limelight hydrangea and then, also, some sedum. So that is my little quick flower recipe for you. Hope you enjoyed it. And if you'd like to see more videos like this, you can visit teamflower.org/free. See you soon. 

------------------------

Hi, I'm Kelly Perry. And I wanted to take a few minutes to talk about one of my favorite design principles, and it is, lines. It's never fun to stand in lines and wait. But it is so fun to see lines in your arrangements. 

There's two different kinds of lines we're going to talk about today. One is actual and one is implied. As you can imagine from the definition, an actual line is what the stem creates. It is a line that you follow with your eyes. So you can see it right here in this little piece of gomphrena. 

Implied lines are like connect the dots lines. Maybe if you think about a starry night, all the different constellations and how we use those stars to connect the dots and to create a picture in our mind, that is what an implied line would be like. So I just wanted to show you how I used flowers in this arrangement to create some lines. 

So of course, we just talked about the gomphrena and how we have this little bit of line here. I love to use maybe ranunculus, or things that have a little bit of a curvy stem or some interesting stems that can add some interest to the arrangement. This one's pretty straightforward. But we have some nice curve lines going on with the implied line. 

So let's talk about the first one that's probably most obvious in this arrangement, and it is the zinnias. These are queen red limes. We start our line right down in here. And you can see they're at different levels and the direction that their faces are pointing are a little bit different to add some interest. 

So we have one here, here, here, here, and here. So this is one of our implied lines. Now, the next one we're going to talk about is the line that is formed with these burnt orange dahlias. So it starts down in here, and it pops its way up. 

So here is another implied line. Another one would be here with this lisianthus. We're going this way. 

And this one's more horizontal as opposed to curved like these ones were. And I'll flip the arrangement around. You can use different flowers to create the lines on different sides of your arrangements if you want to add some interest and variety in the flowers to your arrangements. 

So in this one we have dahlia's going in a little line like this. And then, lisianthus, again, we're using to go here. And then over here. 

The great thing about lines is they guide your eye through the arrangement, and they invite you to keep looking deeper. So that is what I'd encourage you to do today. Consider how to add some lines to your arrangement, and always be thinking about how you can think deeper. 

Hope you enjoyed this lesson. If you'd like to see more, you can visit teamflower.org/free. Thanks for watching. 

------------------------

Hi, I'm Kelly Perry with Team Flower. And I wanted to do a little bit of a different take on a tutorial. A lot of times, we see the arrangements come together step by step, but when we actually look at them in real life, in a photo, they're already completed. And it's like, wow. How did they get there? 

So I wanted to have a completed arrangement for you today. And I would like to pull it apart piece by piece. I'm going to go backwards, I'm going to show you the last thing that I put in. We're going to just slowly work our way out until all we have remaining is our container. So this will be a really fun one. I hope you enjoy it. 

The ingredient that we're going to start with is this gomphrina, up here. So, I'm just going to start pulling it out in the order that I put it in. I like to use this as the final little bit of movement in the arrangement. So, you can take a little snapshot in your mind and see how removing this ingredient changes it. You could still do something like this if you had a bride who wanted something maybe just a little bit more tailored, less sculptural. Just deleting this one ingredient gives you a more tailored look. 

Next, I'm going to pull out some of the focal flowers that I was working with. And, back here, they were the dahlias So the dahlias are going to come out and I'll show you what it looks like without those dahlias in there. And then on the other side of the arrangement, we were working with zinnias as the focal. And you can see them right here. So I'm just going to tug those out. And then I'm going to go in and pull out the lisianthus So you can take just a quick little peek of what that looks like without those dahlias and without the zinnias. And I'll start pulling out the lisianthus Everything comes together one step at a time, no matter what it is. Flowers, cakes, books-- just a series of steps. Homes. All of those things. 

So, it might seem like a daunting task at first, but as you just start deconstructing it and thinking about it a little bit differently, it becomes, in a way, a little bit more attainable. Which is fun. So if I get overwhelmed, I kind of like to step back and think about all the steps it took to get there. 

OK. Next, I'm going to pull out the burnt orange dahlias, here. And now I'm really getting down to the base material of the arrangement. These ones that I've been pulling out-- the dahlias and the lisianthus-- I would consider the accent flower. So, those are gone. Next I'm going to pull out the snapdragons. These were used to carry color to the sides of the arrangements. Missed a zinnia. 

And now, we're left with the pokeweed, which creates the shape. And, then, the hydrangea and the sedum, which creates the grid that we can layer all the other flowers into. If you find that flowers move around on you a lot, especially with bouquets, this might be the ingredient that you're missing. Something like this, the flowers can really latch into. Because just the overlapping stems, I think, isn't quite enough sometimes. So I think it's helpful to have a flower, a structural flower, in there, as well. 

So out comes the hydrangea. Now you're starting to be able to see the flower foam that it was arranged in. And, of course, with these, the purpose is to cover up that base or that structure, whatever you're using. Whether it's a frog or chicken wire or the foam. Each of those things has pros and cons to them. And you can learn more about those on the free page at Team Flower, where we go through the three different ways that you can set up an arrangement. So if you're curious about the different kinds, and pros and cons, and when to use what, you might consider watching that and chiming in with a few comments. 

So, out comes the serum. And, then, all we have remaining is the pokeweed, which is what created our shape and our general-- how big we were going to get and how wide and deep. So I'll pull that out, too. And a lot of times, with this-- I'll leave this one in here, I guess-- some of these shorter pieces go in second. And I will use the longer pieces too. Those ones will go in first, to get the general shape established. And, then, these act both as a shape and then also as cover. And one little piece of spirea that I put in here. 

So, there you have it. The deconstructed table arrangement. This isn't a very pretty way to end a tutorial, but it was pretty when started. So, anyway, I hope you enjoyed that. And hope that that helps you and inspires you to take the next step with your business. If you'd like to see more free videos like this, you can hop on TeamFlower.org/free. And hop on our mailing list, you'll be notified as soon as new videos are released. Thanks for watching. Have a great day. 

Video: Amending Soil and Growing Snapdragons

Lee of Goldenrod Gardens has been working with me for several years, providing amazing plants for my wedding work. In this video she shares in-depth about amending soil, nutrients and how she plants snapdragons!

-------------------

Transcription:

We're back and we're talking about what this field used to be and the goal for soil amendments and texture of the soil that we're working with and all those kinds of things. So tell us a little bit about your field. 

We're south facing here, which is an important thing, if you're growing at a high altitude. 

OK. Now, why is that? 

Season extension. 

OK. 

You need to be where the sun is going to hit you and it's going to be consistently warm temperature. And if it's frigid-- for example, we're going to try and overwinter these snapdragons. 

OK. 

You want to be south facing, because that's where the light is. Throughout the winter it drops. And this whole area, this whole field was-- they were Christmas trees. So they were Fraser firs. They were farmed here and they have a short crop season, fir tree. So I would say maybe max for this area was 10 years. 

The soil's wonderful. It is a loamy, sandy mix. It's very well-drained in most part. 

Yeah, there's no-- like, it's not that tight compact clay that you can get sometimes. 

And low on the rocks too, which is a dream up here. A lot of times you're in rocks, which I use to my advantage. I say they're good for drainage and they have a lot of minerals in them. You just have to release them. 

Yeah. 

But this area has also not been overfarmed. So it doesn't have a lot of weeds, see. The weeds that are here-- 

So overfarm, that term means there's just been-- every year, there's been a lot of different-- 

Crop after crop. 

OK. 

And in some places people do a crop after crop. And they'll start and then they'll let it go to seed. And so the soil ends up being, sometimes-- 

Full of all of these other seeds. 

Weed seeds, yes. And it's also been leached of its nutrients. You know, if you're gardening in a certain area or if you're farm in a new field that's never been farmed, you will have the most amazing stuff the first year. 

Yeah. 

But after that year, that's when you really have to deal with what's going on in the soil. So what's going on here is we're on the bottom slope of my field. There is a natural-- and I think I've noticed this with a lot of areas, when you get to a lower area, is acidity. 

OK. 

Acidity is pretty much how the whole like eastern coast is, acidic soil. 

OK. 

You know, if there's been a woodland or a swamp, there's acidity. It is what happens when plants break down and decompose. So that's, you know, peat, peat bogs. And they are what they are, because they're so acidic. 

OK. 

There is a little bit of an issue here of acidity in this low area. And it's like it seeps down. And you can amend that with lime. And that's what's already been doing to this soil. 

OK. 

Before we add the good stuff, the other extras, I've already limed this area, because I noticed the acidity. 

Yeah. And you didn't really need to do any amendments to the texture of the soil, because it was that nice kind of ideal condition. 

Well-drained. 

Perfect. So we dealt with texture. And then, we know that we're a little bit acid. So we're dealing with the pH. And now, we're going to look at the actual nutrients that are in the soil. 

Yes, which you have N, P, and K, are our main nutrients. Nitrogen, potassium, and phosphorus. When you're growing flowers you need them all. But you don't need as much nitrogen as you would need as if you're growing a bunch of lettuce. 

OK. 

You absolutely need a good bit of phosphorus. 

OK. So how does the nitrogen hinder the flower production and how does the phosphorus aid? 

Nitrogen causes leafy growth. 

OK, but no blooms. 

No blooms. 

OK. 

They all work together. You need the nitrogen, but if you have an overabundance of nitrogen, you're going to have leggy, weaker stems. 

Well, that's what's happening with my cosmos right now. Like, I have lots of leaf, leaf, leaf, but I'm not having the growth. 

Buds. 

Yeah, buds. Yeah. 

And it happens. 

Yeah. 

You overfeed them with that. 

Yes. 

This area is known for being low in phosphorus. 

OK. 

And so I'd like to touch on that. It can be noticeable, to the point where there is a purple tinge on leaves if they are deficient of it. They're not only like stunted and not as flowery, but their leaves are purple. It's not supposed to be that way. Another tricky thing about phosphorus is it is immobile in the soil. 

OK. 

So you can't just sprinkle it around and think that you're going to correct it. 

You really have to like work it in. 

And bring it in. Even my professor at school said, just, you got to dig a hole and stick it in. 

Yeah. Yeah. 

That's an important thing to remember. 

To remember. 

Calcium, magnesium, and potassium. They're all very important roles, but phosphorous seems to be one of the things that's a little bit harder. 

Sure. 

Another one I'll touch on while we're here and there's sunflowers, I can grow sunflowers here right now this season, but next year, if I grow sunflowers here, I'll have to boron. 

OK. 

Sunflowers don't form if there is a boron-- 

Deficiency. 

--deficiency. 

And they kind of like eat it all. Like this crop will eat it all up. And so will the kale, collards, all of that. And if you're in the desert, you're good on boron. It happens where you are getting a lot of water. It just runs through. And even if you over boron, it'll work itself out very quickly, with even a hose. 

It's kind of like vitamin B in your body. You get rid of what you don't need. 

It goes away. 

OK, perfect. 

So we're going to add the basics today. 

Great. 

We're going to start with pal-- and this is all organic. 

OK. 

So it makes it a little bit more difficult, but it makes it a lot easier to work with maybe a little bit stinky sometimes. 

Yeah. 

We're going to do pelletized chicken manure. 

OK. 

Which is a good balance N, P, K and calcium. 

OK. 

They don't list their micronutrients on there, except for the calcium. But I consider calcium very important. And I buy it in a pellet. 

OK. 

It's a lot easier to do than nonpelletized chicken manure 

Ugh. 

I've done both. I recommend this. And what we're going to do-- you're going to help me in your white shirt-- is one of these buckets-- this bucket full this will fill and amend a good 50-foot row. 

Oh, wow. OK. 50 feet by how deep? Four? 

Two. 

Two? 

Yep. It depends. You don't want to over beef, but since this, for me-- this did have Christmas trees in it, I do want to kind of enrich it, because there will always be flowers and vegetables here. And I think if you start-- this is the first year on this field for me. And you want the sweetest soil you can have. And this is a good way to start it. 

OK. 

So voila. We have our pelletized chicken manure. And then, we have our ever expensive, and I must tell you, bone meal. 

OK. 

This is the organic source, one of them, the main one, for phosphorous. 

OK. 

It's slow release, but it is organic. This little baby costs, you know, $16 to $20. 

Yeah. 

Whereas two and a half buckets of these, like, maybe total $11. 

Yeah. 

But it's worth it. You have to have it for flowers. 

Yeah. But the ratio of what you really need of bone meal to chicken manure, is the same? Different? 

I burn through this. 

You burn through it? 

Yeah. 

Yeah. 

If it's deficient, you kind of have to really add to it. 

Yeah. 

But it's not mobile, like boron, so it's not going to wash out. Once you get it in there, it's going to stabilize it. And there are actually cover crops that will help fix it. 

OK. 

Buckwheat fixes phosphorous. 

OK, so the bone mean functions as-- you said it stabilizes-- 

Well, it stabilizes in the soil, but what it does is it creates strong stems. 

OK. 

Strong stems, big flowers, and just a healthier plant. It also affects the root growth. 

OK. 

And I can get into potassium, but these are the picky ones for flower growing. If you have a burn pile and this is potash is what it's called, that's where you grow the best stuff. Grow it in the burn pile, because it's phosphorous, calcium, everything. 

Everything. 

Favorite other little amendments. And one Epsoma. It's a company called Epsoma. 

I think I just bought something from them. 

They grow the tones. So you get flower-tone, bold-tone, holly-tone, citrus-tone. 

Yeah. 

You can get phosphorous. But this is flower-tone. 

OK. 

It has the major nutrients in it. It's not just N, P, K. It's the list of all the elements. 

Little ones, uh huh. 

It also has beneficial mycorrhizae geared towards what you're growing which is the fungus that is good in the soil for flowers or citrus. 

So it's like probiotics for plants. 

Yes, exactly. 

OK. 

So I have flower-tone. And then, I have-- well, we're going to call this azomite. It's a rare earth mineral. 

OK. 

It is like the periodic table of elements, but just in just tiny, tiny doses. And so it's just a full amendment for the whole of the soil. 

OK. They've decided that there are certain things that the plants have to have to live. Doesn't mean that they're not going to benefit from other things in the periodic table. 

Sure. 

And this is one of the things that includes everything. 

Yeah. 

There's even gold in it. 

Yeah. She's a big fan of this, the azomite. 

And I've actually done tests, like just field test of like kale side by side, poblano peppers side by side, zinnias side by side, and it is so amazing. Oh, and dahlias. They're so much stronger and so much happier of they have a good dose of the azomite in them. 

OK. 

I recommend it. 

OK. Great. 

It's soil building. You donate a lot. 

Perfect. 

So that's what we're going to do. We're going to add stuff. 

Perfect. 

It's likes baking a cake. 

So if we're trying to figure out, like maybe I have a space that's not as big as this space, like maybe I can write it down, but like the ratios of like how many scoops of this we need per square foot and those kinds of things, what you would recommend? 

I would say, if you had a nice plot, a four by four plot, I would add-- if you really want to make it really happy, I would add about maybe five pounds of the chicken manure. 

OK. So you're like top dressing. And then, you're going to like and bake the cake. 

Till it in. Turn it in. So you'll do, if it's new soil and you have just a little test plot, I would do five pounds of the chicken manure, a good cup of the bone meal, a half a cup of azomite. And with the flower-tone, you can do, maybe a cup dressing, two cups dressing. It depends on your soil, if it needs more building. Or you can just put a little sprinkle in each hole and mix it as you plant. 

Sure. 

And that's where I like it too, is when I'm planting like plants that are a little bit bigger and I'm having to dig a bigger hole and not just like a finger. I can kind of throw a little handful in there too, mix it around, and then get my plant in there. You just don't want it to-- if you're using something like that, you just don't want to nuke it on top. You need to mix it in. 

Yeah. Yeah. 

Otherwise it could burn. It could get really happy and suck it all up at once and just go-- 

Yeah. That happened to me this year, whenever I transplanted everything. All my stuff, I think I just like overfed it and burned. 

Yeah. You have to be careful. 

Yeah. 

And temperature has definitely. But mixing it in. I know it's easy to kind of get over eager. I would go with like the amounts that they recommend first. 

Yeah. 

And then, if you need to add a little side dressing, you can go back later. 

Sure. Now, are there any of these things that if you overdid it, it would be like, bad news? 

Well, I think I killed a hydrangea this spring, because of the chicken manure. 

OK. 

It was thirsty and I gave it lime and it said. Yay, I needed lime. 

I really needed that and then it was like I'll take way too many things. 

And then, I put some chicken manure around it and it said uh. And it was one out of six. So maybe it just was on its way out. But nitrogen will burn faster than anything, because if it's a good source of nitrogen, or even a mediocre source, it will suck it up so quickly it will cook it. I think that nitrogen is probably going to be your biggest killer. 

Yeah and nitrogen plus lime, because lime helps you absorb all of your nutrients, little deadly combo. 

So you got to be careful. 

OK. Perfect. Let's do it. Yeah. 

Very good. 

Very good. OK. 

It's a good even coating. That's like my magic booster. It's like baking soda. 

Oh, yeah. It is. I could see that. 

Whereas this is like the eggs, because it's the chicken. 

We're going to go all in on the baking analogy. 

So this was the flower-tone. We just did one little cup of this. 

Light. 

Little light dusting about every, what, like eight feet per cup? 

Little zigzag. 

Is what we're doing. 

Yeah. And this is one of those things that you can always go back midseason, and a little bit more. 

And top dress. It's great for that. 

Because it'll rain and go down in. So top dressing works for this. 

And heavy feeders, I would say, like sunflowers, well, if they're fast sunflowers you don't need it. You just have to feed the stew out of them to begin with, because you're not going to have time. But dahlias, any type of perennial, and I would say zinnias as well. It's a good thing to go ahead and add some midseason, just to give it a little extra boost to get you through the first frost or until you're tired of cutting them. 

Yeah. 

Which who knows which comes first? 

Whichever comes first. 

And this is bone meal. And I'm going to go ahead and say that, just observing like this winter, this lower part of the field was-- I saw purple, weeds. So we don't have a ton of bone meal right now, but I'm going to focus my dosage down here, because this is where I think it needs it more. 

The part where we're going to plant. 

However, you know, the chicken manure did have phosphorus in it. But this is a good strong extra source. 

Energy boost. 

And it's really dusty so keep it close, close to the soil, so you don't lose any, because it's expensive too. 

Yeah. That's what I didn't do right with the plant-tone at first. I was holding it too high. 

Which just, I don't know which one of those nutrients tends to go through the air fastest, but it's probably the one that I really need. 

Yeah, right. 

If you're not having to certify organically, you can use triple phosphate. 

OK. 

But it is strong. And so you have to do it in really low doses. But if you're in a situation-- 

Instead of bone meal? 

Instead of bone meal. 

Because it's cheaper? 

It is cheaper. 

Or what are the pros? 

It is a lot cheaper and it happens a lot faster. 

OK. 

It's strong. Another organic source though is greensand. 

Oh, OK. 

It would take pallets of greensand for me to do what I needed to do here, because of the way our phosphorus is. All regions are different. 

OK. What is greensand? 

Greensand is a mined sand. It's a mined earth. 

As opposed to playbox sand. 

Yes. 

OK. Got it. 

It's literally has a green tinge. And like this comes from, basically, the same place that the chicken manure comes from. And it comes from processing. 

OK. 

They're bones. It's bone meal. They're ground down. Greensand is a mined element. And it just depends on where you are and what you have access too. If you need greensand and you're in the southeast, you're going to pay five times-- 

A lot of money, because it's tons-- 

--on the shipping. 

Heavy. 

So you have to think about your local sources of what you can do to amend your soil too. And I think that's an important thing to consider. 

Would the extension office, like the local extension office be a good resource for connecting you with those different places and sources to get them? 

Absolutely. Yes. And like our local extension agency has a alternative farming adviser. And he helps with people that are certifying organically, or like to use organic, even if they're not interested in certifying. 

Sure. 

And then, there's the regular office. They're both wonderful, ours are. But they both have wonderful resources and classes to help you learn about your region. And even they-- 

Yeah, I think they're such a great resource. 

And they usually know the people in your area who supply the things that you need. 

Sure. 

So go to them. 

Yeah. 

They even do the garden masters. 

Yeah. Master Gardeners. 

Master Gardeners, that's your local-- 

Great resource as well. Definitely. OK. We got it all? 

Yeah. Well, we're going to add a little azomite, just add it. And then, David's going to come through and till it. And we're going to-- 

What do we do if we don't have a David? 

You get a little tiller, or-- I did not bring my-- you do it by hand. 

By hand. I have one of those little like, it looks like a lawnmower-- well, I have the little Mantis. And then, I also have this little thing that looks like one of those push lawnmowers. There's just like all the little like tines, which works for my little boxes that I have. 

I'd recommend the Mantis. 

I probably would break my boxes with the Mantis. 

No. 

No? 

No. I use it in my little boxes. 

OK 

But the Mantis is awesome. 

Yeah, very, versatile. And they're not too hard to, like, manage. Once you get like the real big ones, like I can't manage those. But I can manage a Mantis. 

Yes. And it does a lot of work. I mean, I could go back and forth with my Mantis. It is, I think, more efficient than a rear tine tiller sometimes. The rear tine tillers somewhat leave gaps. They're slow. With the Mantis, I can actually like hoe with it-- 

Really get it in there. 

--and pull the bed together, I can do all work with it. It's a little thing. And it's easy. But then, there's a tiller on a tractor. 

This is a simple quick system to set your lines, if you are planting or laying horizontal netting. We're using hoops that have been-- they're conduit. They've been bent with a hoop bender. 

This is rebar. 

These, do you buy these bent? 

No. 

You have to buy this at Lowe's straight and then you bend it on a hoop bender. 

Which you can purchase through Johnny's Seeds. 

OK. 

They actually have several sizes. 

OK. 

You can do a smaller one, which will bend up to, I think, an inch thick. But they also have some that will bend conduit for caterpillar tunnels. 

Oh, wow. 

These are made for low tunnels, or bent for low tunnels. Caterpillar tunnels are for the kind that you can walk through. 

Sure. 

And I just don't do that type of large scale. If I were to set up a cover over this area, I like low profile, because there are winter winds. I think the caterpillars are great for, possibly, that if you have a good anchor. But I'm going for hard core winter protection. 

Sure. 

But what we're doing today with the snapdragon planting is using this as multifunction, adjustable, holding for our horizontal netting for our snapdragons. Because our snapdragons, if they fall over, they don't fall back up. 

No. 

And if they fall over, they do this. And you just get no fun. 

Yeah. I didn't stake mine. That's what happened, to all of them. So I just pulled them all out yesterday. 

But they went a long time. 

They did. Yeah, they did. 

And those were like the rejects that you got too, which is awesome. 

Yeah, they went. 

I had four cuttings, four major cuttings out of the crop I put in. 

Yeah. 

So with Chantilly snaps, it's my first time to have the patience to go through that. 

Yeah. Little seeds. 

I was excited. 

Yeah. OK. So we bent our rebar with our-- 

No. 

No, no, no. Our conduit. 

This is conduit. 

Right. 

It's roughly four feet wide now. This-- 

From Johnny's Seeds. 

Johnny's Seeds. This is rebar. This kind of stake with the arrow in it is generally used for electric fencing, like, just pop-up quick electric fencing. But I use this in the field. Lowe's, yes. You get these at Lowe's. We've already preset 18-inch shorter pieces of rebar that were going to slide the conduit onto. 

As your anchor. 

These longer pieces of rebar in this string, I've used in this field repetitively since April. This is how I mark my lines and keep my bed widths-- 

Consistent and neat and tidy. 

Consistent and straight. 

Which is great, because whenever you're organized and everything's straight going in, like you can really pack the plants and make the most of the ground that you do have to work with. 

Exactly. 

OK. So we're laying this on. We're going to make it tight. You're going to hook-- just lay your ends on the corners of the rebar. And David's going to help you and make them tight. Can you get that corner? Of course, it's the broken one. The tighter the better with this stuff I've learned. It's plastic. So if it's not tight, it tends to get a little squirrely very quickly. 

Nice and tight. 

All right. 

And what'd you tell me this was? This is the-- 

This is horizontal netting. 

Horizontal netting, as opposed to the-- or no. Is this vertical? 

This has been amended. This was vertical netting. It was 10 feet high and I cut it and I cut it. 

Yeah. 

I think with the horizontal netting that you can purchase from Johnny's, it's more of a square grid. But I had, a good 100 feet of this. So I cut it. 

Using what we have. 

And we're going to just lower-- it's good and tight. Yay. We're going to use this as our planting grid. 

OK. 

So this kind of does double duty. We're going to take our snapdragons-- 

So we just want to put it right down on the ground. 

On the ground. We're going to put our snaps in. And then, once our snaps are in, we're going to put our hoops on, and then raise this netting up. And as they grow, we can raise them up a little bit more to hold their height. 

OK. Perfect. So you just raise it as the plants are growing? 

With the hoops too, I use the hoops. I've noticed-- this is the first time I've really put this out. If you have a big wind in the spring, if you had just this, it would be goodbye netting. Now this, actually, it kind of like moved. 

OK. 

But it didn't fly away. What I did later in the season is I took the hoops out, just so I could get in and out. And I had this up. And for security, I zip tied to make sure it was tight and didn't get knocked out of place. And that helped it stay. But I hit a point with the hoops being here-- 

We're going to overwinter these snapdragons. So this not only provides horizontal support, it's also going to provide a cage for either greenhouse plastic or [INAUDIBLE] or growing fabric, which just gives it frost protection. So that's what we do. And then, that's when you use all your extra rocks to weigh down the edges. Save the big ones for the end. 

Random bricks left over from something. Yeah, OK. Perfect. We're going to put these in there, tuck them in? 

Tuck the little plants in. 

OK. 

Specialty Cut Flowers book is a heavy handed book for me. And I highly recommend it for anybody that's seriously trying to grow-- 

And he wrote that book? Is that what you're saying? 

Yes. He and another lady, and I can't remember her name right now, and she's wonderful to, but his books are-- I can't do without them. 

Yeah. 

His perennial book and his professional cut flower, specialty professional cut flower. 

Yeah. 

But the recommended spacing-- and it's a group effort, by the way. They used input from flower growers across the country and their experiences and they have them in notes. And they definitely rely on having it as a group-- 

Group effort. Great. 

Because we can't all-- I mean, you can't-- 

Can't all know everything. That is for sure. 

You can't test certain things in Athens, Georgia and expect them to grow in Spokane, Washington. 

So I do plant in rainbows. It helps me organize mentally and it also helps me when I'm cutting large groups of things. So we're starting with purple then go in to velvet and then red and bronze, salmon, et cetera. 

These are going to be roughly eight inches apart. And we're just going to use the grids. So we're going to do this y'all. And they're kind of eight inches apart, but kind of not. There might be some losses, but we're going to lay them out that way. I kind of do this a little ahead of time. And then, you can kind of throw your little babies in there. I try to get all of one color done first. And these look terrible right now. But oh my gosh, I can't wait til we come back in a week or two. 

Yeah. They'll take off. 

And so we're just going to lay them down. 

Oh, I meant to ask you, like temperature and weather. Like when is the ideal time? Like if we had to cancel earlier because it was too wet to do this, like what would be the best way so that the plans aren't shocked? Like if you're looking at your calendar for the week and you're trying to pick the best case scenario, what's ideal? 

So with this field, since we don't have the direct, like, water hose water source, it all has to be brought up from the spring down below, you plant it right before a few days of rain. 

Got it. 

And it's going to be naturally-- 

Taken care of. 

Yes. That's important, getting things watered in. 

So would you say like the first week is like really, really crucial for like the water? 

Yes. 

For them being set in? 

Yes, I would say the first week, even if it's really dry-- I can't speak for a desert region. But if you're an area like this where we've had very dry periods, but when we do get rain we'll get a good inch or too, you have to give it a week, 10 days. And those are the times if I don't have access with a hose-- 

I'm just going to keep making circles. 

If I can't do a hose, I fill up my backpack sprayer with water. And I go along and I just take off the spray nozzle. And if I can give it just a localized squirt of water-- 

That helps a lot? 

Every other day, if I can get it through that first 10 days, it's usually golden. 

Yeah. 

After that, I'm just about trying to compete with the weeds, because the weeds don't seem to mind the fact that there's no rain. 

I know. That's always funny how that happens, isn't it? 

But if you're really doing a lot of planting and don't have that kind of access to water and you don't have the time to go in and do the hand watering, time it before a big rain. And they'll get watered in and your likelihood of survival is going to be good. 

Much better. 

Yeah. 

I was going to say, is there like a survival rate that you typically see whenever you're planting? Like out of everything that we do today, like will you lose a few of these little babies along the way? 

Yes. 

What's normal to lose? 

I have one of those, in my head, from landscaping for many years, which I usually beat it on landscaping. My percentage is really low on landscaping. But I think an average that you should consider is 15%. 

OK. 

Yeah. I think he should go for 85% survival rate. That's a good number. You know, if you're doing sunflowers, these pro cuts, they're geared towards stick it in the ground, they'll be done in less than two months. That should be like a 95% survival rate. But I think with smaller, less vigorous plants, 85 is good, because sometimes, as we talked about with like the marigolds being bad seeds, sometimes you'll just get little genetic glitches. 

Yeah. 

And you want to pull them out and you don't want to keep them around. And so I would say that factors into that percentage as well. 

Fast Flower Video: Bouquet of my wedding flowers

Seven years ago this week Jesse and I were getting ready for our wedding! I thought it would be fun to celebrate by recreating the bouquet my sisters-in-law made for me. It has eucalyptus, spray roses, sweet peas, lisianthus, garden roses, anemones and lamb's ear. Watch this fast bouquet time-lapse come together!

Video: Creating a Unique Holiday Centerpiece with Amaryllis

Amaryllis are one of my favorite flowers to use in design work, but the thick stems can get in the way for some types of design work. In this video I’ll be demonstrating how to overcome this challenge and create an arrangement perfect for a holiday gathering!

-------------

Video transcript

  - Hi, I'm Kelly Perry with Team Flower and today  we're gonna make a centerpiece using amaryllis. 

 This can be a tough one to use in arrangements sometimes  because the stems are so long and they can be very fragile  but I wanted to take some time to show you a few tips  that you can use to do some  great arrangements with amaryllis. 

 With the holidays coming up, they're a beautiful flower  to use in holiday arrangements,  so I thought it would be fun to show you. 

 So we're gonna get started. 

 The container that I'm using today has a few little  brass screws, so I've sealed those off with silicone. 

 And then I have a block of soaked Oasis in here. 

 And the Oasis is important for the amaryllis  and the technique that I'm gonna show you for that,  so I really prefer to use that as opposed to wire  or flower frogs, just specifically for this  and I'll explain a little bit later. 

 So I have the Oasis in here and then I have it taped in  and I also have the container filled with water. 

 And that I have found really helps keep the flowers  fresher longer, because whenever you're using flower frog,  they get the maximum water absorption. 

 And I just have found that sometimes with Oasis  the flowers don't last quite as long as they do  in clean, fresh water, so I like to fill the container  still even so with water, just to make sure that that is  completely soaked all of the time,  and that helps with longevity a little bit. 

 So we're gonna get started with,  this is called rose sumac and this is what I'm gonna use  to establish the general shape of the arrangement,  and kinda where I'm headed with things. 

 And then we are gonna, after we add some of this,  then we're going to add some pittosporum. 

 And I love what you'll see here, the importance of  having these specific ingredients,  it's not important that you have them. 

 You just need things that have a similar quality about them. 

 So the rose sumac is branchy and has a nice shape to it  and the pittosporum has some branchier,  or not branchy, just full full flower. 

 So that helps with coverage quite a lot. 

 So that's why I've chosen those two things. 

 So you're just looking for similar shapes. 

 I'm gonna use about five pieces of this,  and these three you can see are out further,  and then I wanna move these ones in. 

 Well, I wanna round out the back first  but use these in a little bit more  as opposed to very outside of the container. 

 So you can see how we have a nice dimension going there  on the front and the back. 

 And this piece is just a little bit too much for where  I'd like to put it, so I'm just gonna do a little trimming. 

 Okay, I like to, I always like save a little piece  just in case if I see later that there's a place  where I'd like to use that. 

 So now with the pittosporum, I'm going to  just add some more fullness into these areas. 

 So I'm just kind of following the sumac,  and then what I like about pittosporum is it has  several opportunities here to use the same stem  multiple times, so I'm just clipping right above  each of these groups of leaves, and then these are so  great to go nice and low in the arrangement. 

 And you cover up that exposed cut that you made  since it's nice and low. 

 Whoops. 

 That one clipped itself for me. 

 Okay, we'll leave a few of those,  and next I'm gonna add some pepper berry. 

 You can see some of it that came in the bundle  is bright red and some is just a green. 

 So if it's important to you to have one or the other  you might wanna just check with your wholesaler and see  what stage it's in, or if it's in the stage where  you could get either one (laughs). 

 Actually, I think I'm gonna wait to add this  until I get a few more things in here. 

 Same thing with this willow eucalyptus. 

 Next I have some carnations. 

 I think these are great to use low in the arrangement. 

 And a dark color, it draws your eye in and gives the  arrangement some depth. 

 And if your carnation comes and it's all tight  and wound up like this, you can just kinda massage  this section of it and fluff out the flower. 

 And as I put these in here, I'm just thinking about  putting them in at different heights. 

 I want everything to be pretty low,  but I don't want it to be one dimensional. 

 I don't want it to be so tight in there either that I  can't get my other stems into the arrangement. 

 Next I'm gonna follow that with some roses. 

 And these are also gonna go nice and low in the arrangement. 

 This just adds another shape and another size to this layer. 

 And I'm gonna start working these roses up,  out of this base line, just a little bit. 

 Just one step up. 

 And I'm gonna check in here on the side of my arrangement  as well, 'cause I want there to be a little bit  of that color popping through over there. 

 And this Lazy Susan is so helpful to keep you working around  the arrangement rather than really focusing in on one side  and then it becoming unbalanced  which is something that you wanna avoid. 

 Just clipped out a little piece of that rose sumac  that I felt like was in my way and obstructing the line  a little bit, so feel free as you go along just to  clip things out that you feel like aren't working for you. 

 Next I have some of this beautiful striped foliage. 

 Gosh this is my new favorite thing,  and I wish I knew what it was called. 

 I'll have to look that up and put it in the email for you. 

 But I went to go look for the little tag  and it seems that I tossed it out. 

 This is a house plant from just Lowe's hardware. 

 Sometimes I like to pop in there and see what kind of  interesting house plants they have, just so I have  some kind of interesting foliage on hand  if I'm in a pinch or on the fly or  just putting something together. 

 It's a way that you can really take things from  ordinary to extraordinary by just having one of those  really special ingredients. 

 So what do we have in here? 

 We have three wholesale ingredients that most people  frown up, we have roses, carnations, this pittosporum. 

 But with the addition of the rose sumac, which is  interesting and textural, and then this leaf,  it really elevates it to another place and I think that  you don't need to get too hung up on, you know,  my wholesaler doesn't have all that much to choose from  or that's interesting, but really all you need is that one  thing and you can find one thing. 

 You never get real far when you're always wishing  that you were somewhere else or that you had something else. 

 You really have to be content with what's in your space  and make it work. 

 Okay, so I'm layering these in. 

 These are what I would call a framing flower. 

 And I love to use those to set off some of the  larger focal flowers in the arrangement. 

 So I've layered those in there with that in mind,  just areas that I'd like to have those focal flowers. 

 Next I'm gonna take, these are, believe it or not,  these are Quicksand roses. 

 They look like Saharas. 

 I think they were maybe just, I don't know,  cut a little bit earlier or just from a different grower. 

 I'm not sure, but they are definitely not the blushy pink  that were anticipated but they look really lovely  with amaryllis, so no worries there. 

 I have a few there. 

 I'm gonna balance it out with a few over here. 

 We've gotta lot of contrast between this cream and the red  but we are gonna bridge the gap using the amaryllis  here that we have, 'cause you can see how these are,  this is what I would call a transition flower. 

 And you can see how this has both the red and the cream  and it blends those two pieces together so beautifully. 

 Transition flowers are very important. 

 Wake up, little guy. 

 (blows)  Okay. 

 Okay, so the moment you've been waiting for, the amaryllis. 

 Got some cotton balls that I soaked with water. 

 And I'm going to take the cotton ball and  put it in the stem of the amaryllis. 

 This makes a funny noise, wait for it. 

 (squishes)  Uh, kinda gross (laughs). 

 And then I'm gonna clip the amaryllis stem  to the place where it would hit the base of the floral foam. 

 So it's hydrated by the cotton, but it  has the stem that can just easily pop right into that foam  and be a very stable and secure hold,  which is what we're after. 

 Amaryllis I would recommend purchasing. 

 The stems always come in better if you purchase them by the  box, and boxes have about 15 to 18 stems in them normally. 

 But it's tough whenever the wholesaler, you know,  if you just need a few and those are shipped to you,  they just sometimes the stems get cracked and you  have a hard time with those. 

 Now these are huge, so what I'm gonna do  is clip out a few flowers here. 

 I actually think that I like  how this little group here looks. 

 Just these two little ones. 

 I think we need to get it even shorter. 

 There we go. 

 And then some of these small ones that we tugged off  we can set low in the arrangement. 

 Pop those right into the foam. 

 Let's leave these guys out for now. 

 Okay, next I'm gonna go in with some of these  white Majolica spray roses. 

 Just kinda catch everything up to speed. 

 Let's just build this out one more layer. 

 And don't be shy to clip off some of the pieces of the  spray roses if it's too full or getting in your way. 

 If that's not the look that you're going for,  you can just clip those out. 

 Kinda like we did with the amaryllis so that it was  the puzzle pieces is what we needed  to fit into that particular spot. 

 And I have a few peachy spray roses. 

 I'm just gonna add those in. 

 Look how those connect with the amaryllis. 

 See like this right here, like this is  too much for me personally. 

 So I'm just gonna tug those out for now. 

 I just wanna open that up and leave some more room  for some of these other beautiful flowers to go. 

 I have these romantique antique garden roses. 

 These are gonna start low in the arrangement,  and then I'm gonna bring that pink color out. 

 Not real pleased with this bunch that I got. 

 They aren't opening as nice as they have sometimes. 

 With roses sometimes they open really beautifully  and then sometimes they don't, and a lot of people think  that it's something that they did, that it's their fault  that it's not opening, or whatever, but actually  a lot of times it's when the flower was cut. 

 Maybe it was cut just a little bit too early,  or just stressed in shipping, I mean there's so many  things that happen in the lives of these flowers  before they ever get near you, and so you could  do the same thing over and over again in terms of  how you treat them whenever they arrive to you  but if you're getting different results,  there's something else at play. 

 So just keep that in mind and don't get too  ruffled up that you're doing something wrong. 

 They just like clean water and fresh cuts,  little bit of food. 

 Okay. 

 And then let's leave these guys out for now. 

 Let's just see, these are Prince Jardinier,  really really pretty garden roses, and they smell amazing. 

 Those last ones were O'Hara's. 

 They're pretty Barbie pink. 

 I don't love love them for what I'm doing right now  but they're okay, they'll work okay. 

 But I like how these look with the romantique antiques. 

 I got them as a transition flower to go between the two  and they do, I mean, there are these really outside petals  that have, if we can get a close-up of this,  the really dark romantique antique pink and they have  that little touch of burgundy on the ends of them  and they have some of these lighter pink petals  and then a medium pink. 

 But the tone is just slightly off for me. 

 But sometimes you have to work with slightly off and  that's okay. 

 Nobody but you probably notices. 

 These just open so beautifully. 

 I just love, love, love. 

 And you have to give 'em time to open. 

 Really do. 

 They need about four days to get looking really pretty. 

 Sometimes even a week. 

 Okay, so we just have that focal point anchored,  pretty centered there. 

 And I think we need one more in here  but I'm not sure if I wanna put it... 

 Just wanna see how that affects the other side. 

 Okay, I like that. 

 It carries this line throughout the center  of the arrangement, which I like. 

 You know, what I don't like what's happening now  can be solved with a little bit of greenery,  and it's just that there's not softness between these layers  so I wanna add some of that in with this willow. 

 Actually, let's use some berries for that. 

 I'm gonna do a little bit of willow here on the sides  to soften this area. 

 And this is willow eucalyptus, just not like a willow tree. 

 Okay, and then let's see. 

 I think the answer might be some of these berries. 

 So you can snip that off and have a different size. 

 The nice thing too about this Oasis water mix that I like  is that if you do have something that doesn't do  well in Oasis and really needs to be in the water  you have both options right there at your fingertips,  which is great. 

 Oh, and I forgot to put my pomegranates in. 

 We can go back in and do that easy enough. 

 Another ingredient I love to soften up the flowers  once they're in, is ivy. 

 You can use jasmine or other kinds of vines as well. 

 And I just like to wrap this kind of  around the different flowers. 

 Okay. 

 And pomegranates. 

 I really like the silhouette of how the front of this is  looking with this low. 

 I like how that looks quite a lot. 

 So I think I'm gonna put these actually on the side over  here with these burgundy roses. 

 And I just like, when I'm doing fruits,  I like pairs of them. 

 And one that's a little bit smaller than the other. 

 I think that that helps. 

 (hums)  A few little ranunculus here that  could be sweet up this area. 

 And then some scabiosa which are fun for  a little bit of movement up higher. 

 We need to put something low in here. 

 I don't like how that just is open,  so I'm gonna tuck one of these down in there pretty deep. 

 Same with this guy here. 

 He's gonna, if we can get a close up of this,  I had just like an exposed branch cutting here  so I'm just kind of tidy that up. 

 Okay. 

 I think we are done. 

 Let me clear this off so you can get a good look at the  finished piece and I wish you all the best as you're  working on your flower arrangements and putting some  beautiful things together for your clients. 

 So it was great to have you with us today  and I hope you enjoyed this lesson. 

Video: How to Reflex Roses and Tulips

Reflexing flowers like roses and tulips is one of my favorite ways to enhance their natural beauty. It’s an old-school idea making a lovely comeback. In my floral design work, I seek to emulate the natural ebb and flow of nature. I find it comforting. As flowers reach their peak of beauty in nature the outer petals of many flowers unfurl, bending back towards the stem before surrendering their petals. That fully open point, right before surrender is so beautiful.


------------------------

Video transcript:

- Hi, I just wanted to pop in and demonstrate reflexing flowers. It's one of my favorite things to do with tulips, and since we're chatting about tulips on the blog today I thought it'd be fun to do just a quick little demo with some flowers I have in the studio. It's amazing how you can take a tulip from looking like this to looking like this. This would be something that would be fantastic to drape off the edge of an arrangement, but here we have all of a sudden a focal point flower. So, in springtime sometimes it can be difficult to find that, like, nice little spring focal flower, and so here is a way that you can transform a tulip into that capacity. The important thing about reflexing flowers is that you use ones that have aged just a bit. You don't wanna reflex flower petals that are real crispy, or brand new, because often they will crack here at the base and then you really shorten the life of your flower. The important thing with reflexing also is to make sure that the petals are nice and moist, so I'm gonna use a little bit of Crowning Glory on this. And I'm going to take my thumb, right here, and you're gonna hear it. Very quietly, it pops. This takes a little bit of practice, it takes a little bit of feeling it and being able to sense it, but once you get the hang of it it's very quick, it's very easy. If you're concerned about vase life on your flowers, things like this, or you're just thinking about, ooh, I don't know if I wanna try that for something, I wouldn't recommend, I don't reflex every tulip that comes in. It's just if in arrangement there's the perfect place that it's like oh, I could really use a little bit of an extra punch, I'll pop it in up there. What I would not recommend doing is getting in flowers for the first time, reflexing every single one, you know, putting them out there, and it being the first time that you've ever experimented or practiced with it. This is something you need to get comfortable with and you need to practice just a bit. So I've sprayed it again with some Crowning Glory on the top of the petals because what I've done, if you look here the petals are only losing moisture right here on this outside part. This is pretty protected in here, so now I've just flipped them open and I wanna make sure that the moisture that was inside those petals stays there, so that's what I'm doing with the Crowning Glory, I'm sealing it inside. Let's do one more tulip and then I also thought I would show you a couple of roses, that's another one of my favorite flowers to reflex. So we'll just give it a little spritz. And final spritz. So those are all ready to go, let's take a peek at these roses. This variety is called Sandy Femma, it has a lower petal count which makes it easy to reflex. And these have been aged for about six days. It's Tuesday, they came in last Wednesday. So I'm just going around the base and very gently tugging them back. You can do this with roses that are maybe at that three, four day stage but much earlier than that and they just look very obviously reflexed, they don't look like a natural reflex. You can still do it, it's pretty, just depends what you're going for, I think they're a little bit easier at this point. What I love about reflexing flowers, this is a standard rose, so, I think these were about 90 cents a stem. But I can get a garden rose feel by reflexing the petals and exposing this beautiful center. So I've taken them from this, which is pretty, to this, which really is fantastic, look at how much bigger, how much more room and real estate that's gonna take up in arrangement. Really ups the perceived value of the flower. Just like I did with the tulips it's important to keep the insides of these petals moist as well, because they were protected previously. These have a nice, it's faint but it has a nice little scent to it. Again, just be very careful of not cracking low in the petals, that's the most common thing that can happen. It can cause browning and petal wilting, things like that. Mostly it's because it's done too early. Once you get the hang of this you'll be able to just touch your rose and know, well, is it ready or not? So see how this one doesn't look quite as natural in terms of the openness of it? So these petals right here, this is where I'm seeing the defined difference, so I'm just gonna loosen these up a little bit, I'm gonna bring this back, fluff them out just a little bit. So I still get that look, but it doesn't look like that I really peeled them back too hard or in a way that would be different than they would naturally do it as they age. And just gentle movements like this if you're working with ranunculus or some other flowers like that, just gently opening them is an important part of helping the flowers become their best, that's our job is to take the flower and to just make subtle adjustments. It's been through a lot, maybe it's been shipped or traveled across the world, needs a little bit of a pick-me-up. So there we go. I'm just reflexing them back a bit, it's more open than it was before, but it doesn't look unnatural. So there you have it, the reflexed roses and the reflexed tulips.

Video: How to Price and Order Rose Petals

Learn how to be prepared the next time a client asks you for a rose-covered pathway for their ceremony. In this video we'll show you our favorite type of rose for pathways, how to calculate how many you will need and how to price for these types of projects.

----------

Video transcript

Do you have an aisle filled with petals in a proposal that you're working for in the future? If so, todays' quick tip is for you. Hi. My name is Kelly Perry with Team Flower. And today we're going to talk about how many roses you need to order for your aisle, so you know how much you need to charge for the aisle on your proposal. 

Today I'm working with white Mondial roses, and I've chosen this variety because it has a high petal count. You can use any type of rose that has a high petal count. It comes in a color that you need. I would definitely recommend sticking with a standard rose, and if you need to have a lot of petals, check out the box slots to see if you can get a good deal on petals for your event. 

Let's talk a little bit about how to shuck the rose petal. You'll hear it here, Crunch. Whenever I'm doing this I do it in a little bit of a round motion like this. All in the wrist. Because sometimes it's important to keep the rose petals together. So what I love about this is if you are in a situation where the petals, instead of them being down the aisle, are they're going to be tossed on the bride and groom. 

You could set one of these little rose buds on the end of each seat. They can pick it up and when it's time to toss, they're ready to go. So that is just a quick way that you can pull the petals off. And then, whenever I'm thinking about scattering the petals down the aisle, really what you need to know is how many square feet you're aisle going to be. 

So you can find that out after your final guest count has come in. And on your proposal that you're quoting for before the event, just put the exact amount of square feet that that quoted a will cover. A lot of times our present the options to my clients who are doing petal aisles, a light, medium, and heavy dusting of petals. 

Because when it comes to charging for the petals, I charge the same amount that I would if that flower is actually going into an arrangement. So if we pretend, just to keep it easy, that this rose cost $1, that would cost $3 in an aisle, just like it would cost $3 if it's in an arrangement. I still process it, transport it, and place it. 

In some cases, this whole process of taking the petals off and then actually scattering them can sometimes take a little bit longer. So that's just something to keep in mind. You don't have to charge less for petals, although ultimately, that's up to you. 

So these are the three options. But for today's demonstration, I've actually done two heavier dustings of petals. So what you're looking at here is one rose, so that's $3 a square foot. Two roses, $6 a square foot. Three roses, is $9 a square foot. Four roses, $12 a square foot. And then, five roses, $15 a square foot. 

This is a great way if you're in a consultation and you're trying to decide, if the bride is deciding between one or two, you can just bring a few roses that you have maybe left over in the studio or even that you would grab at the grocery store, so that you can help them actually see visually what you're looking at in terms of thickness if that's something that they need to see. Sometimes they don't and that's fine too. You can just show it in a little photo. 

So that's what I have for you today. Thanks so much for tuning in and and being a part of Team Flower. 

Video: How to Grow, Hydrate, and Hold Hellebores as Cut Flowers

Susan from Shady Grove Gardens is joining us to share some information on growing, hydrating and holding cut hellebores! Susan has been working with flowers for 31 years and has been so gracious to come and share. If you've ever been captivated by the charm of the hellebore you are in for a real treat!

------------

Transcription:

I'm Kelly, and I'm here with my friend Susan from Shady Grove Gardens. She's a grower here in Boone, North Carolina! Susan, why don't you tell us a little bit about what you do up at Shady Grove Gardens? 

All right. Well, we're growers and florist. And we've been doing-- this is year 31. 

31, wow. 

We grow our flowers and use them for all our wedding designs. 

OK. 

So, we grow well over 300 different varieties, and we sell them to people like Kelly. 

Like me! Actually, to me! Yes. 

[LAUGHTER] 

And florist. 

So, I'm, like, nodding, like, oh, this is new information. But I of course know this, because Susan is one of the growers here in Boone. So, a lot of flowers that you saw whenever we were doing bunches of weddings and things like that, some of those things came from Susan's farm. 

Mhm! And we sell directly to brides, as well. 

OK, fantastic. So, before you started doing weddings and doing flowers just cut, you had a little bit of experience in landscape design. And then also tell us a little bit about your education. 

Well, I have a master's in Biology, and I have a Naturals degree and a Botany degree. And then I did landscape gardening, for about 20 years. And then we slowly transitioned into having a flower farm. 

So that's all we do, now. We have a flower farm and a nursery. We grow all our own seedlings. And I'm the grower, seedling, office mouse, designer. And Brent, my husband, is the main grower and farm manager. 

Yeah! Because they've got some flowers at their main place, where all of the seedlings and office work takes place. And they have a beautiful, you call it "The Peak," that's out-- just beautiful mountain views. I mean, one of the prettiest farms that I've ever been to. Fantastic views, great location. So, again, all of that then happens out at the Peak. 

Tell me a little bit about that Naturalist degree. What's included in that? 

Well, it's from Appalachian State. And, back then, we just did a lot of fieldwork. So it was all ornithology, mycology-- which is mushrooms-- 

You're going to have to tell me what-- so, mushrooms-- got it. 

Mushrooms and fungus, you know. So it was all fieldwork, as opposed to, like, learning how to do lab sorts of things. 

OK, sure. 

But I also took Plant Physiology and things like that, as well. 

Yeah, fantastic. Well, when it comes to hellebores, there are a few things that are really great that we want to share about keeping them hydrated. And one of them actually goes back to some of this plant physiology and some of those things that Susan's been talking about. 

And one of them is keeping the water that you're using-- having quite a full vase of water. Because having all of this water in here creates pressure that then pushes the water up through the stems! So that's one of the first things about hellebore hydration. And that would apply to a wide variety of plants, actually. 

So, it's great to have some deep water, whenever you're working with hellebores. We have several different types of hellebores here. And Susan really loves the ones that have their necks up, because they are a lot easier to use in arrangements. So, do you want to tell us a little bit about the ones that you brought today? 

All right. This one is actually a seedling, from my other hellebores around the yard. I will point out that it takes four years for them, at least, to bloom. And they don't move terribly well. 

So I love this one, and it's in a pot, so it's going probably back in my yard somewhere. 

OK, it's ready to go out. Uh-huh. 

This one is one that you can buy on the market. It's called Winter Thriller. There is a mix, and this one is Pink Ballerina. And it's a really nice ruffled double. 

But it does hang down a little bit. So, Kelly might be able to tell you how to solve that problem. 

[LAUGH] Yeah. Well, whenever they have kind of that natural facing, like, that their heads are moving down, sometimes what I'll do is take a branch-- like, for example, spiraea and quince are blooming at a similar time as the hellebore. And they both have, like, nice, branchy stems. 

So what I'll do is put this one-- you know, since this is a short stem, I put this kind of lower in the arrangement. But I would just, like, hook its little neck, here, onto one of those branches, or prop it over one of the branches, so that you could get that effect. And sometimes, too, seeing the backs of the stems, and the silhouettes that you get-- 

It just all depends what the point is, and what the purpose of that flower that you're using is, in your arrangement. Because this, even pointing down like this, I think, would be really lovely, depending on the lines and the shapes that you're using in your arrangement. But if you have some that are a little bit droopier, you can prop them up using those branches and things. 

So, love this. Pink Ballerina. Another one that's on the market right now, this one's called Pink Frost. And this is one-- I got a couple of these at Lowe's-- had them. 

I like the stiff stem on that one. 

Yeah. Very hardy. And that's what Susan-- as soon as Susan picked it, she's like, yeah, this is a really hardy one. And several years ago I visited Pine Knot Farms, which is where some of the research in this book took place. And I cut several different types from their garden. They were so gracious, to let me do that. 

And this was the variety that really held up well, comparatively. I mean, this went on for almost a month, I think, whenever I had it that first time. So I think this is a really great one, if you're looking to add some cuts to your garden. 

But really, most hellebores, I think, do hold up quite well. All of the progress that they've made in breeding and all those kinds of things, they're a great, strong plant. 

So, anyway, this one, I just cut from the garden, right before we came in to record today. So I'm going to give it a quick snip, exposing as much of this area as I can. And then I'm going to have some Quick Dip, here, from Floralife. And I'm just going to do a 1, 2, 3. [LAUGH] 

And then I'm going to put in that deep water. And then, same thing with this. And this one, I'm not 100% sure on what exactly this is called, but I got it here at Pine Knot Farms, if you really love it and you're looking for one that's similar. It's a very unique-- 

It doesn't have the picotee, like this Ballerina. I love the little spots. But this is more of a gradation in color, from white to this just really rich burgundy. And the back sides of the petals are so lovely, too. And a double, like the Ballerina that we have, here. 

And most of the hellebores on the market now are hybrids, so you just have to go by variety name and which ones you like. 

Yeah. There we go. OK. So those ones are in there, and they're ready to go. 

So, Quick Dip is one way that you can process your hellebore. And another way that you can do it, kind of an old-fashioned technique-- we just wanted to show a couple of different techniques that you could try out-- is to take-- 

And, Jessie, why don't we just get a close-up of this, if we can, here. We want to get water up into the stem as quickly as possible. So we're just doing a very small, gentle, super-gentle scoring of the stem. 

And that is also done with tulips, occasionally. And that just helps them get water into that-- what's it called? The xylem? 

Mhm. 

In the-- 

Yeah, in the xylem. In case you have a stem that's sealed off at the base, somehow, that allows more water uptake. And if there's air bubbles in there, like an embolism comes out. 

Mhm. So there we go! So, tell us a little bit about how the Quick Dip works. Because it serves somewhat kind of a similar purpose, when it comes to-- 

It does. 

--the air bubbles and the embolism-- things like that. 

In theory, you shouldn't have to do this on your own cuts. But with the ones that are shipped in, especially if you have them wilted, the Quick Dip, what it does is it changes the surface tension of the liquid and the water that you're trying to get taken up. 

So, it's acidic, and it's just-- that's all you need, is that few seconds to change that surface pH. 

So, the acid breaks down kind of the surface. 

Mhm. 

Mhm. And then it pops those bubbles and lets everything flow through freely! 

And that's similar to what you're doing with the slits. You're allowing the air bubbles to be dissolved, in one way or another. And you get more uptake. 

OK. Yeah, because sometimes with hellebores, we get those little, droopy necks at the top, especially when you're shipping them in wholesale. And for a long time-- Susan and I were just talking about how, for a long time, it was considered that hellebores just weren't a "good" cut flower. And how unfortunate that we lost that. 

But we moved into a season where a lot of our sourcing was coming from other countries. And we were doing a lot of shipping in planes and all those types of things. And so, comparatively, in the world of flowers, it was a little bit more complicated to get hellebores going, and because of their bloom season being whenever it's cooler-- things like this-- maybe flowers weren't as much in demand. 

So there was sort of this little period of history, in the cut-flower world, where they disappeared. But whenever we were doing cut flowers using things that were in our own backyard, before, you know, airplanes and all those types of transportation methods were a piece of it, this is something that you'll see in floral history and in art and different things. You'll see these being used. 

Well, the hybrids certainly have made them more popular, because there's nicer colors, better stems. But yes, back in the '40s, when people grew their own flowers as a florist, they used them. 

And then, the tropics, they don't do well in the tropics. They have to have that cold period. They bloom in the snow. They're Lenten roses. So, now that there's more North American growers, we have more hellebores. 

More hellebores. Yeah, and how lucky we are, because just the variety that's available, now. And Pine Knot Farm has done so much work in pushing us forward, in terms of just the interesting types and colors and, you know, all the doubles and picotees and all those beautiful gradiations in the colors of the petals. I mean, it's just fantastic. They have such a great variety, there. 

Tell us, Susan, a little bit about these little rubber-band guys. 

[LAUGH] 

We were talking about when the best time is to cut them. In the summertime, we, of course, whenever it's warmer, we want to cut them early in the morning or late in the evening. But what's interesting about hellebores is, they are blooming whenever it is freezing, unlike most other flowers. So you actually have to pay attention to, is it frozen? [LAUGH] 

Well, these were cut last night, at 11 o'clock at night. And they were frozen solid. So, I had my doubts about bringing them over to Kelly. But, sure enough-- 

Yeah, pull them out! 

--every single one of them-- 

Wobble them around a little bit. 

--looks just fine. They're a little more wilty than the ones I cut the day before, before the freeze, but not much. 

So here's day before the freeze, what we're looking at, here. 

And this one's not too terribly much different. 

I don't see a huge, like, visible difference. What do you think? 

I don't! Now, what you're going to notice, especially if you're getting ones from your own yard, is the buds probably will never look good. They may turn brown. 

If they were frozen. 

Or the immature ones, that stem might decline much faster. But the bigger ones, they will be fine. 

Mhm! 

Now, it does depend on how long they stay cold, and whether it's windy and they have wind chill and dehydration. But a short spurt of snow or deep cold, they are OK! 

Mhm. Yeah, and that's something else that's important to consider, is, what-- and, a lot of times, with cuts, when you're having things, if you're someone who's having things shipped to you, there is a whole life that that flower lived before it even landed at your doorstep. And so, you might be doing all of the by-the-book right things to do but still be like, but these never opened, or these just kind of-- you know, whatever. 

They had a whole life. They could have not been hydrated properly, whenever they were a plant in the ground. They could have been malnourished. It's like, how strong was that plant before it was actually cut? 

And so, one of the great things about hellebores, I think that they are-- it's something that I think everybody should have in their-- I think everybody should have these in their garden. They're very easy, once you've got them in the ground. 

They're easy. 

A very easy plant. And tell us a little bit about when you think the best time is to cut them. Like, you would water them two days before or-- 

Yeah, about-- 

--what do you think? 

You know, just make sure it's either rained, or you watered, about 48 hours out. And then you should be able to cut them early in the morning, as long as they're not frozen, is probably your best time. And bring them in immediately, and put them straight into water. Where you could go wrong is leaving them lay around, like I did with the one. 

Yeah, yeah! 

[LAUGH] 

But, even so, look at how-- I don't remember exactly which one it was, but there's only three to choose from. 

It's the one I cut with the knife. 

Oh, yes, this one. 

It's this one. So this one accidentally got left out overnight in freezing-cold weather. And I didn't pick it up till that afternoon. The next day, and it is perfectly fine. 

Yeah, look at this. 

And I didn't put it in anything. This just went into water. So that's a tough plant. You know, it's almost an evergreen. Now, you'll also notice on these blooms, here-- I think it's on this one-- you can see where there is some freeze damage from the past freeze. 

OK. Here, let me hold that out, so Jessie can see it really well. But, if you can just kind of get rid of this-- you good, Jessie? You see that OK? I mean, you can just pinch this out-- 

Right. 

And it's still perfectly fine to use. 

And I use them like that, because people love green flowers. 

Mhm? 

And so, these will all turn green in a few months. And that's generally when I use them. Because my brides are getting married in May and not in February or March. So, even the burgundies turn towards a green color. 

Yeah. They all sort of fade, a little bit, as they're aging. And-- good grief-- OK, so, this starts coming out-- well, I know, we're up in the mountains. It's a little bit cooler longer. But the amount of time that this stays on the plant is really fantastic-- that it's usable as a cut. I mean, you really have, I would say three-- 

Into June. I use them into June. 

--solid three months! 

Mhm. 

Yeah. So, their color tones and things are going to be changing throughout that period. And the look of them, of course, will change. So-- let's see. Do we have any where the seed pods are maybe a little bit more developed? 

A few. And there is a reason why it's called "Lenten rose." It's at its peak during Lent, which is now. 

Which is now, mhm. 

There was-- I think one of the white ones has a pod on it. 

OK. 

Because they're a little earlier. So, some of these will come in at different times. So you have to kind of look at the ones that work for your yard. 

Mmm-- I feel like this one might be kind of as close as we're doing to get-- 

Oh, that's right. 

--in terms of time period, right now. But these will actually swell out. So, this is the female part of the plant. Right? Yeah? 

Mhm. That's your ovary forming, there. 

Mhm! And then these are the male part of the plant. You can see the pollen popping off of them. So the pollen's popping down in here and then going down in. And these are going to, then-- these little parts, right here, Jessie. They're very small right now. 

Mmm. It's right here. Can you see that? That's going to swell. 

Mhm. And make seeds. That's the ovary, and that's where the seeds will come on and live. So, there's lots of different stages, so you can have it where it's, you know-- actually, in this book, there's tons of pictures in there I could show. 

There's a green seed pod. And they're very usable with the green seed pod on them. 

Mhm. Yeah, absolutely. So, here's a picture of the life stages of the hellebore. And here is the part where-- you know, this is what it's going to look like late in the season, once the seed pods have developed and ripened on the plant. 

But tell us a little bit, Susan, about this life cycle that we're looking at, here. I know you mentioned four years to bloom, on this. 

So, if you're growing them in your yard, and you let the seed pods drop the seeds-- which you can barely see in the photo, there-- you should, in theory, have seedlings the next year. But they're going to be tiny. They're going to be like these little seedlings you see here. 

Now, you can move them. And probably the best time to move them is when they're that small. 

Oh, OK. 

They don't especially like being divided. They don't especially like being moved. 

OK. 

But the other important thing is, once they get really big and mature, they make a better cut flower. So maybe that first year or so, you might not really expect those flowers to be great and hold up well. 

Kind of like a peony, maybe. Like, you know, that kind of three-year mark. Well, for a lot of-- you grow a lot of perennials. And three years is when they kind of have established and they're doing well. 

So, as far as bloom goes, for those little guys that you might be wanting to do yourself, don't expect to see anything for about four years. 

Yeah? [LAUGH] Patience, big-time. 

And that's why hellebores are not that commercially available or that inexpensive, if you're buying. 

Right. They are a more expensive plant, and there's a lot of time that's involved in babying those things, unlike some of these annuals that you can pop up pretty inexpensively, at Lowe's or different things. Like this one, here, the Pink Frost, I think that that was maybe $16 or $18, compared to some of the other, kind of, quick annuals that they have or biannuals that they have that are coming and going. 

Yes I saw some at Lowe's, just yesterday, day before. $17 for just the standard Lowe's gallon pot. 

Yeah. Yeah, exactly. But they're great when you can get them going and established. There's nothing else really happening in the garden at that time. 

That's true. 

So it is that kind of like-- I guess I think I plant them more for myself, because it's like, oh, here's something! 

[LAUGH] 

You know, spring is here. Anything else that you wanted to share? 

I started growing them because all my brides were asking for green-- 

Oh, OK! 

--and green flowers. 

Right, right. 

So, I needed something green, and there's only so many green flowers. And in June, and in May, perfect green flowers. 

Yeah, yeah. 

I also use the leaves. 

Mhm! Yeah, I love these. Mhm. These are so great. I'm not sure how you use them, exactly, but I like to use them low in arrangements, over the rim of the container, to frame some of the larger flowers. 

And the leaves you can use all season long. I might be-- am I destroying my plant by clipping from the leaves after they've bloomed? Maybe a little bit. [LAUGH] 

If it's a big plant, I think they can handle it. 

They can handle it? Mhm? OK, great! Well, I just wanted to share, again, this book. It's called Hellebores, a Comprehensive Guide. Burrell and Tyler are the authors on this. And it is one of the American Horticultural Society award-winning books. 

And you hop over-- this was at the Royal Horticultural Society gardens, in England. Whenever I was there, they have-- this is one of the ones that they have in their library. 

But it's a comprehensive guide. And there's all kinds of great resources in here and a lifetime of several people that are kind of summarized in here. And also, what we've got is, there's a plant trial, back here, that John Dole from NC State headed up, in the appendix-- which I guess I don't-- there's a little nutrient study, here, in C. 

Back here, in Appendix D of this book, there was a study that Fanelli and John Dole from NC State, the Department of Horticulture Science, put together-- a little experiment using hellebores as a cut flower. And their results-- and you can see all of, you know, what their control was and their temperature and all those kinds of things. 

But 17 and 1/2 days is where they landed. They were experimenting with cut-flower preservatives. So, like, not the Quick Dip specifically, but those kinds of hydrating solutions and holding solutions, versus when you're cutting the plant. Because, for almost-- a lot of people-- and Susan, you know, I would consider one of them-- that cutting them later, you know, finds that there's really not a whole lot of problem, once they've got those seed pods on them. 

So, that's what he was testing. You know, was there a notable difference between if the seed pods were developed versus if they weren't? And he didn't seem to find a major-- in this study, he didn't see a major difference. But it doesn't mean that there might not be for someone else. 

Like, this one's starting to form a seed pod. So I would prefer to use one like that, because it's a little more leathery. 

Sure, mhm. 

And I would assume that it would last longer than one that still has all its anthers. 

Very delicate and soft. Mhm. Exactly. 

John was using a hydrating solution and a holding solution. A holding solution is a professional solution you can get from Floralife, is the one he uses. 

Oh, and I think he did-- actually, in this experiment, I think he used-- 

And Chrysal. 

Yeah, I think he used both-- like, the kind of equivalents of both brands-- and didn't see a big difference. 

Basically, they have less sugar in them than the standard Floralife that you would get in the little packets. So that's really the main difference. The hydrator is just a solution you leave them in for several hours. And it's similar to Quick Dip-- 

Mhm, but the plant just sits in it for a while. 

--just a different brand. 

OK. Why do you think people-- why do you think that, like, higher sugar content that you would get in a packet, if you were buying flowers from a florist or something, why wouldn't it be the lower sugar count, if that actually makes them last longer? 

Yes. Because, when you give somebody regular Floralife, with a lot of sugar, that's carbohydrates. So that feeds the flower, and it also makes it continue to mature. 

OK. 

So, if you're a flower grower or a florist, you just want to hold that in stasis. So you just barely want to feed it. You don't want it to continue to mature, and you don't want to feed the bacteria. Of course, there's things in there to keep the bacteria from growing. But that's why they give it very little sugar. 

OK. 

And then the home person gets the product with the sugar. 

Right. So then they're really seeing kind of the best parts of the plant, and the rest of the life cycle of it, I guess. 

And most flowers are cut in bud, so you want them to stay in bud till they get to where they're going. 

Right And then that extra sugar lets them open. 

Mhm. 

Perfect! Well, thank you so much, Susan, for popping on to join us, today, and to talk about hellebores a little bit. This has been really fun. And we're excited to share these beautiful things with you. 

So, best of luck on your hellebore planting that you have coming up. And you let us know if you have any questions. 

Video: How to Divide Dahlias

In this video we share how to divide dahlia tubers. Susan has been doing it for over 20 years, has tried all kinds of methods and is sharing her favorites. Jump in to learn about tubers, eyes, and dividing dahlias!

-------------

Transcription:

Hi. My name's Kelly. And I'm here with my friend Susan from Shady Grove Gardens. Susan and her husband Brent grow wonderful dahlias up at their mountain farm. And so I asked Susan to come over today and tell us a little bit how to divide dahlias. And I also wanted to tell you a little bit about the dahlia workshop that she has coming up this July. Tell us a little bit about it. 

It's July 31st. And we're going to have one day of very intensive everything you need to know about dahlias. So it'll be planting, staking, dividing, design. We're going to spend a little bit of time with little tricks and tips on how to design. How to cut them, how to do disease control. 

They also get a lot of insects, so we're going to go over insect control, and the hard parts, planting and harvesting and digging them up in the fall, and then how do you store them. And today, we're going to do the division. But we're going to cover everything else at the workshop. 

Perfect. That sounds super fun. I bet you'll have like all the different varieties and kinds that you would recommend. So you're thinking you might want to start growing dahlias, there are all kinds of varieties out there. But Susan's been doing this for a long time and she knows the ones that really work well for her. So she'll be sharing all of that at the workshop, which is really exciting. 

So tell us what we're looking for and how we need to do this. These are Cafe au Laits from my little backyard garden. And I've never divided them before. I know that there's eyes and that that's important. 

Well, there are several different ways to do it. And I'm actually very conservative, because they're mine and I'm not shipping them off usually and I'm not trying to make hundreds out of it. So I might leave something like this for myself. But I start by clipping off all the little, what lot of people call as hairy bits. 

Get rid of all those hairy bits. 

And that makes it just a little bit easier to see. Now, you can divide the dahlias, either in the fall, right after you dig them up, which makes it a little easier to see the eye. 

Show us what the eye looks like over here. 

So the eye is these little tiny bumps here. 

Right around the kind of top. So this kind of looks like a little magnolia pod, doesn't it? And then, it's tiny. And then, you get this little bit of a bump right there. 

And it's always attached to the stem. So when you divide them, you always want a little bit of the stem to remain. So on this particular one, if you think there's two or three eyes in there, and you can also see, possibly, two or three eyes back here. So what you want to do is leave some piece of the stem, because that's where you think the eyes are going to be. 

So here, I'm cutting up through the middle of the stem. And this part isn't necessary. 

Goodbye stem piece. 

So then, if you really wanted to make three out of this, you could cut it again. But if you want to be conservative, you just cut it like so. So this has sort of this little neck here. And that's where I would expect the buds to come out. 

So the buds, or the new growth, is actually going to be coming out of that eye. 

All the growth will come out of there. And of course, it will form roots. 

So if we cut the eye off, then we just cut off anything that would be viable. 

Right. You can, if you have these here that are-- see how this is broken, what I would call broken, the neck's broken. 

Cracked. 

So these, most likely, will not do anything. So often, we will clip those off. But we'll keep this and that should come out. Now, this one's a little on the shriveled side, but it should be OK, if it doesn't continue to shrivel. We store ours-- we've gone through a lot of different trial and error, sometimes they'll rot, sometimes they don't. But this year we've decided that pine bark or the bedding that you use for pets-- 

Like hamsters? 

Like hamsters, like those little chips you buy at the store, those big bags, that seems to be our best bet for storing. So it doesn't keep them wet, it doesn't keep them any drier. We do have the whole bins all the sets of bins with the chips shavings in there, are all also surrounded with plastic so they don't lose-- you also want to store them about 40 degrees. Now, our garage is not 40 degrees. 

Yeah. This isn't either. 

So we try. 

Do they need a cold period? Or it's more or less for preserving them? 

Yeah. They're from the Andes. But they do not need a cold period. So think of them like a tomato. It's a tropical plant. It just needs a little rest, because in North America, it's too cold for them. 

That's interesting that it was a tropical plant. 

Yeah. So whenever people say like that it's too hot or that it needs that-- I guess, and you know this, because you're a Costa Rica girl-- the swing of the temperatures, like day to night, but people in Florida it just doesn't get cold enough for them, or if they're like they're on the coast. 

They're from the Andes. 

Educate me. 

The mountains, the cool summer nights, cool days, that's where they're the happiest. That's their origin. 

When you said tropics I immediately thought I'm going to the Bahamas now and I was like, wait a second. 

But that's where the wild ones are. So they probably originated somewhere near where potatoes originated and they act a lot like potatoes. 

Interesting. So this one here, would you say, if you do you have that broken neck, would you just leave it on and plant it? It's not going to do any harm, but-- 

Yeah. I probably would, just hoping that it might be OK. , Now, one that's really badly damaged, like this one, I'd probably clip it off. And I didn't used to do that. But just for storage space. And then, you don't want the rot. If it rots, you don't want it to spread to the rest of the plant. So ideally, you don't want them to shrivel quite that much. 

Show the bad example. 

But this will still have a good potential to sprout. I don't think I would divide it more, although some people might. You can clip the stem off, just don't clip down too far, because every once in a while, the buds will come out right here. 

Now, this one is more challenging. So you would need, probably, a sturdier knife and really cut into that. You could use clippers or even loppers. 

Yeah. This is hard. 

So that's another reason to maybe do them in the fall, when they're a little softer. 

Right. So basically, I dug these. I left them in soil and I kept them in a pot in a cool room of the house. 

Cool's good. Cool's good. And then, you want fairly high humidity so they don't dry out. And like I said, 40 degrees, 60 degrees. We start opening our garage windows if it gets above that and hope for the best in this warm weather. 

So recap. We're getting rid of the hairy bits. Step one. Step two-- 

Makes it a little easier to see what's going on. 

Yeah, it's easier to see what's happening. 

And you knock off the dirt. In my case, I'm knocking off rocks, because we have lots of rocks. And we're trying to get those out between the tubers. But the next step is what most people are afraid to do, is to really just go right on in there. And you are going to lose-- 

Look at this one. What's happening here? 

That is probably the mother. Actually this one's the mother. So that's the one you had last year. 

Oh, OK. 

So it's usually a little rougher, it could even be hollow. 

Will it produce again? 

No. So you could remove that and not miss it. 

Let's get a close up of what the mother looks like. 

So this one is the mother. So that's last year's tuber. And then, all of these formed over the summer last year. 

So then, usually, I'll go in with something like clippers and cut into the stem. But these won't do that. So we're just going to show you. 

Is there something else I can give you? 

Nah. I think maybe I could just switch to another. 

Yeah. We'll just switch to another one. And there's all kinds of different tools that you can use to get these going, even the little-- I'm not sure what it's called. 

It's like a Dremel tool. 

It's like a Dremel tool. 

Or those tiny Sawzall. And you can get small and large blades. We use a little narrow one, about the width of my finger. And it's heavy and it's not cheap, if you have a lot of dahlias, you're going to want to do it. So then, we go in and it just goes-- 

[BUZZING] 

--and it just cuts, like that. And then, it's a little easier. 

So here's one of your eyes. 

And you can see, it looks like it's like sprouting now, this little bit of green. 

Yes. It's starting to sprout, because we've had a little bit of a warm spell. So if you wanted to get them started early, you could put it in a pot. 

Put it in a pot and starting babying it a little bit. 

Yeah, but then you have to care for it everyday. 

Do you get an earlier bloom, or what's the benefit of-- 

Yeah. You get an earlier bloom. And then, those people that really want more dahlias can do cuttings. But that's a whole other project. 

So on this one, it's a little easier to see where you might cut it. And so you just cut in there. And you still have multiple buds. And on this one, hopefully, we still have multiple buds there. 

Yeah. Can you see this? You can see, up around this eye, how there's already even these little buds that are starting to pop out. So cool. So there's a plant. And here's one. And here's one. And here's one, maybe two? 

Yeah. Maybe two, if you're feeling brave. 

I don't have enough room, so I won't feel brave. I'll just-- 

Since these are Kelly's, I'm not going to cut it up more. 

And since I don't have a lot of room, I don't need-- look at all these. It's amazing how, this was three plants. So here and now we already have three more plants coming up this year. 

Especially if you're doing this in the fall, you want to let this sort of seal over before you were to put it in some-- 

To store it. 

Don't do what I did. Don't put them in Ziploc bags and store them. You will kill them. All mine rotted one year when I did that. So you do want to use some sort of loose bedding, newspapers, shavings, or something like that. But you also, just give it a day or two, like a potato that you've cut up and let it seal over and you should be good to go there. 

Well, Susan, thank you so much for coming to tell us and share what you know about the dahlias and dividing them. This has been really helpful. And now, all my dahlias are ready to get potted up and I guess to get an early bloom, get started out there. 

So thanks so much for coming. We look forward to seeing you. And for those of you who come to Susan's workshop, we can't wait to see you soon. 

Video: Peach Summer Roses for Flower Arrangements

In this video, I’m introducing you to a handful of summertime roses (though much of the information applies in every season!). Not only am I discussing the varieties, how they last, and what their attributes are, but I’m also covering where to source these blooms from. The more you know about various varieties of flowers, the better informed you’ll be when/if you need to make substitutions. As you make decisions about ordering roses, remember they need time to open and develop (some more than others), so be sure to take that into consideration!

Video: Creating a Blush Floral Centerpiece

Learn how to make a cascading garden-style summertime centerpiece in one of the trending color palettes of the year. I’m using one of my favorite vessels from Accent Decor (that is perfect for 60” (or larger!) round tables) with a flower frog attached in the center with clay.

Video: Summer Flowers that Last Out of Water

If you’re in the floral industry, chances are you’ve asked the question, “Which flowers last out of water?” There are incredible designs that can be created without a water source: corsages, boutonnieres, aisle markers, bouquets, installations, and so many more! The best way to find an answer to this question is to do some tests yourself. I’m here to tell you about what to consider when you’re testing a flower’s durability as well as share the results of my own testing!

Video: Flower Feature—Salvia

In this video, Kelly’s here to give you some fun facts about salvia! Salvia is a great flower to take color to the edges of your arrangement. It is a perfect substitution for veronica as it serves a similar purpose in an arrangement. It’s also a rose companion plant, so if you’re growing garden roses, salvia will be your friend! Want to grow some yourself? You can find the seeds at Park Seed.