How to Create Elevated Floral Arrangements

Lovely Light Imagery
During the first few years in my floral business, I would get so incredibly nervous when an inquiry came in requesting elevated arrangements. I had no formal training on how to create elevated arrangements and felt completely unconfident with the pricing, design, and installation process. Back then, there were no YouTube videos available or resources of any type available to consult on how to approach this type of design. I had to learn from trial and error, and this has allowed me to come up with a simple way to create grand arrangements effortlessly and feel confident doing so.
To create an elevated centerpiece, there are a few first steps you need to take to ensure your foundation is stable and reliable. Once this is set up, you can navigate through the mechanics to create sustainability and design principles to make your design come to life.
Step 1: Foundation
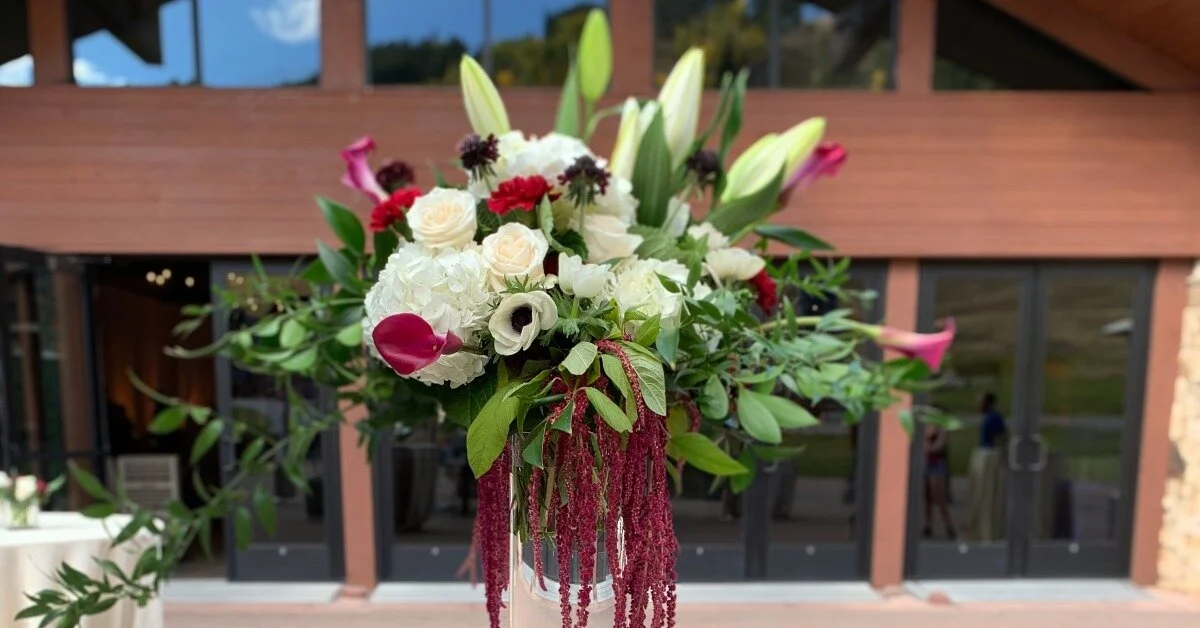
Your vase/container should balance the size of the floral arrangement you plan to make. I typically start with vases that are no less than 24” tall to ensure that the design does not block guest eye level when placed on a table. With a vase of this size, the floral arrangement on average is around 24–30” in diameter. Another thing to remember: Try to make sure your vase is sturdy—whether you’re using a metal or thick glass container—to sustain the weight from the flowers.
Step 2: Mechanics
Use block oasis as opposed to standard bricks to get the best hydration possible. I let these thoroughly soak (for tips on how to soak oasis, visit this blog). Although using 2–4 bricks together can work, it is best to use block oasis to ensure that all stems reach the water source and not an air pocket in case bricks are not lined up properly. Next, use chicken wire to secure the oasis into a deep plastic lomey dish. The chicken wire prevents the oasis from breaking up and falling apart after being poked many, many times! Use waterproof tape to secure the oasis and chicken wire together onto your tray. You are now ready to design!

Lovely Light Imagery
Step 3: Design
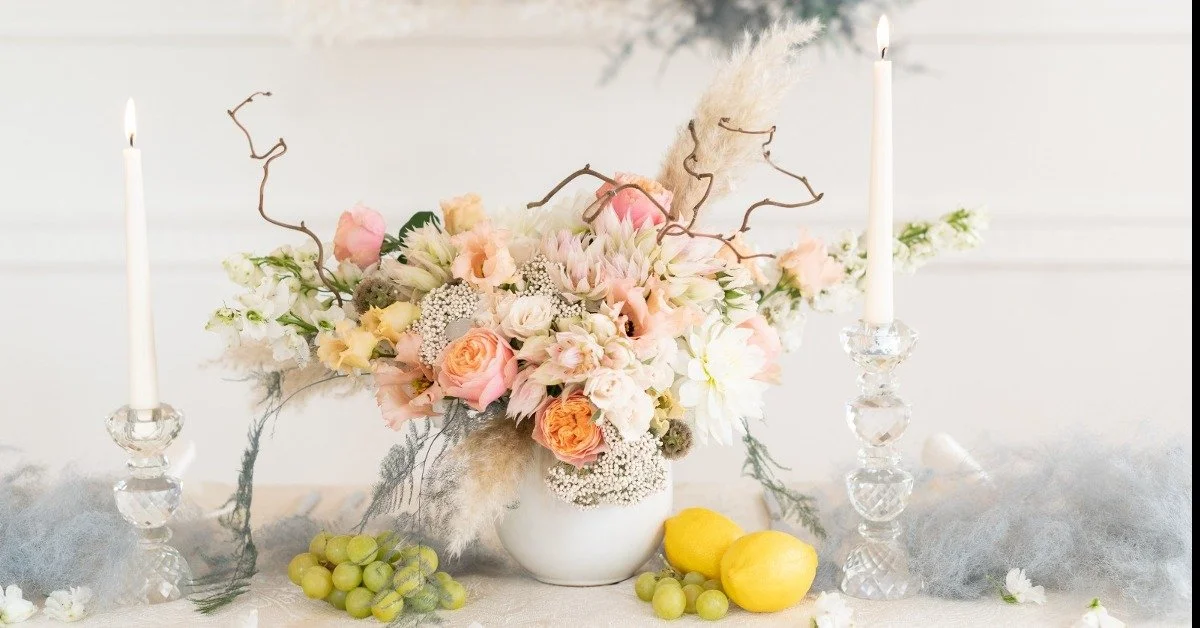
Depending on the recipe, I like to design in layers starting with either hydrangea or greenery as my base. If the design is modern, hydrangea will be the foundation. If it is more free-flowing, greenery will determine the shape first. Once you complete the first layer, move on to your line stems like stock or snapdragons. I like to spread these out evenly for modern designs and more sparingly if I am trying to achieve a natural look. Next, add the larger focal flowers like roses, and make sure to use the “weave” methods where no two stems are ever at the same level. This helps give the design dimension and look much more natural than when things are fully symmetrical. Finally, add accent florals like spray roses or lisianthus to add texture and fill in any holes.
Step 4: Care and Management
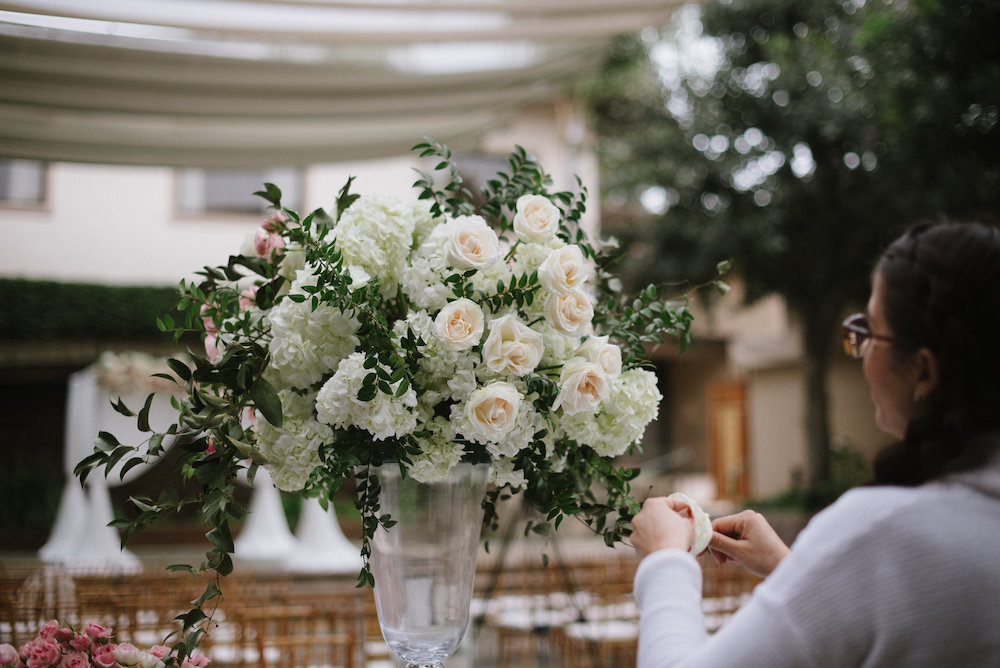
It is ideal to have a cooler to store these large florals away until needed. A cooler also provides the advantage of designing days in advance vs. trying to get this all done the day before an event (like I used to do in my earlier days). The best way I have found to maintain the lushness of these arrangements and keep them damage-free before event day is to prop them up on an elevated platform (even an upside-down bucket will do!) and store them on large rolling racks in your cooler or designated space. The tall platform prevents stems at the base from breaking and makes shifting florals quick and easy. Also, make sure to space them out enough to avoid overcrowding. Every day, hydrate as needed by pouring water into the lomey dish since a cooler can dry up your arrangement at times.
Lovely Light Imagery
Step 5: Transportation + Installation
On event day, roll the racks out of the cooler. Pro tip: you can use plastic wrap to enclose florals to prevent shifting in transit. We have a truck that we can roll the racks onto. All we have to do is secure the brakes and ties them to prevent rolling or tipping over on the drive. (If you don't have a large truck for transport, you can use an upside-down bucket secured to the floorboard to transport your elevated centerpieces.) Once we arrive on site, we roll the rack out and roll them in effortlessly. This has been so helpful in loading and unloading the truck in half the time it used to take us to unload one by one. On top of that, no florals get damaged in transit! Once vases are placed at each table, place the floral designs on top, securing the lomey dishes to the vase if needed.
These five steps will help you create elevated florals that are sure to impress your clients and give you peace of mind, each and every time!