How to Design Jewelry Using Fresh Flowers

Jessica Williams Photography
We’ve all seen the trend of flower crowns, flower jewelry, and flower accessories bloom into the market. And for good reason, too. How cool is it to accessorize your look with fresh floral creations? Floral accessories are great for bridesmaids to accessorize or perhaps for that untraditional bride looking for a little wow-factor. Mothers love a bracelet cuff adorned with floral rather than a traditional wrist corsage! But how do we design jewelry using fresh flowers?
As floral designers, we all instantly wonder, “How did they do that?” when we see interesting designs. Sometimes I wish I could physically pick them apart, flip them over, and look at the mechanics. I love it when fellow floral designers share their tips, so I thought I would share some of mine for creating floral jewelry.
Step 1: Choose Your Jewelry
First, you will need to start with an existing piece of jewelry—a wristlet cuff, necklace, or earrings for example. The style should depend on whether you want the base to be a part of the look, more of an accent, or completely hidden by the flowers. In the most recent pieces I created, we were going for an edgy/boho look, so the type of jewelry was important. I perused Amazon and some local shops and eventually found what I needed at Claire’s (my former twelve-year-old self was pretty excited).
Step 2: Create the Base
Next, you will need to create the base. This is where you will attach the flowers. I chose felt because it’s a bit thicker than regular fabric but still soft. I cut it to the desired size and then hot glued it directly to the piece of jewelry. (Important note: it's much easier to do this first rather than after you attach the flowers).
Jessica Williams Photography
Step 3: Design Your Floral Piece
Now onto the fun part: I used Oasis floral adhesive to attach the floral components directly to the felt. If you’re not familiar with how to use this adhesive, that's okay! All you do is apply a small amount to your felt or flower and then wait about 10–15 seconds for it to firm up before attaching. (If it's your first time using floral adhesive, you may want to practice on a few flowers before starting your floral jewelry.)
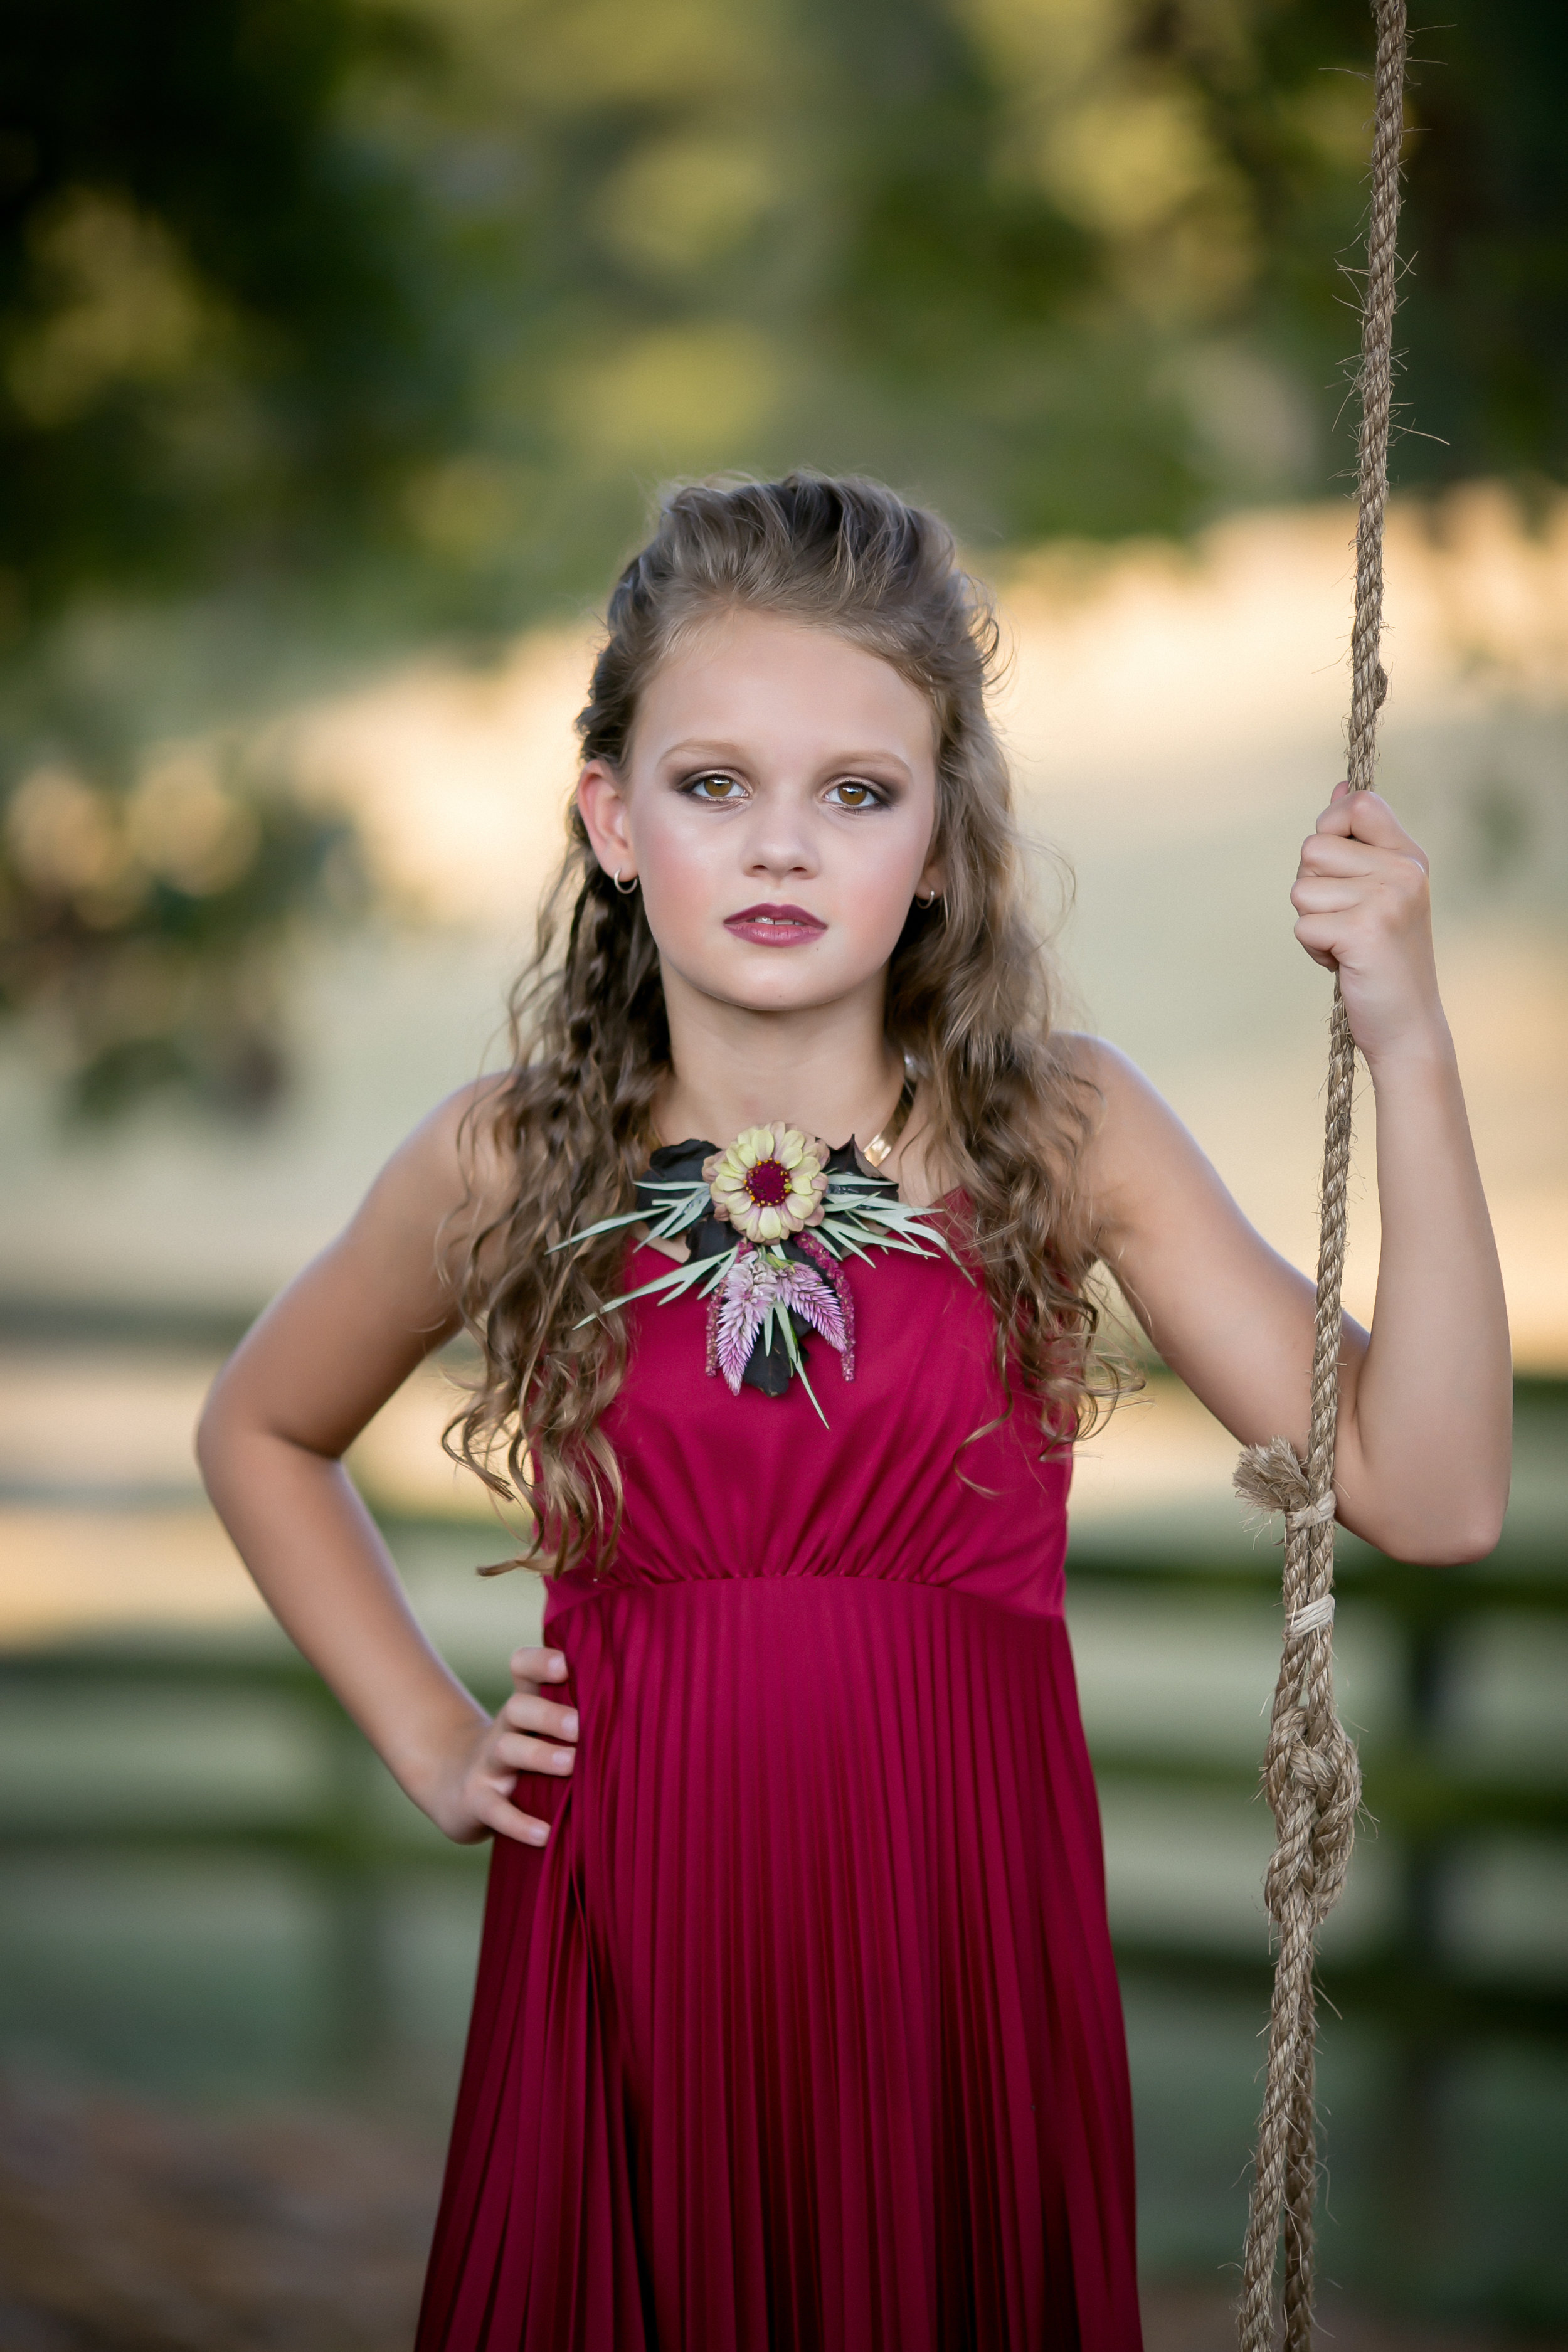
When it comes to choosing the flowers and greenery, you want to make sure that what you are using will hold up to being out of water, using adhesive glue, and being worn. In other words, they need to be sturdy! Most greenery and berries will work in this situation. Depending on the look you are going for, you might want to avoid using something that protrudes out further than the other items, such as large roses. Although I love the idea of using rose petals! Some hardy floral suggestions would include zinnias, orchids, ranunculuses, spray roses, mums and lisianthus.
Once you know the mechanics of creating floral jewelry, the possibilities are endless! Think about how cool it would be to show off a floral necklace or wrist cuff at your next industry event. Watch out for me—I might even make a floral necklace for my next Target run.