How to Build a Caterpillar Tunnel to Withstand Winter

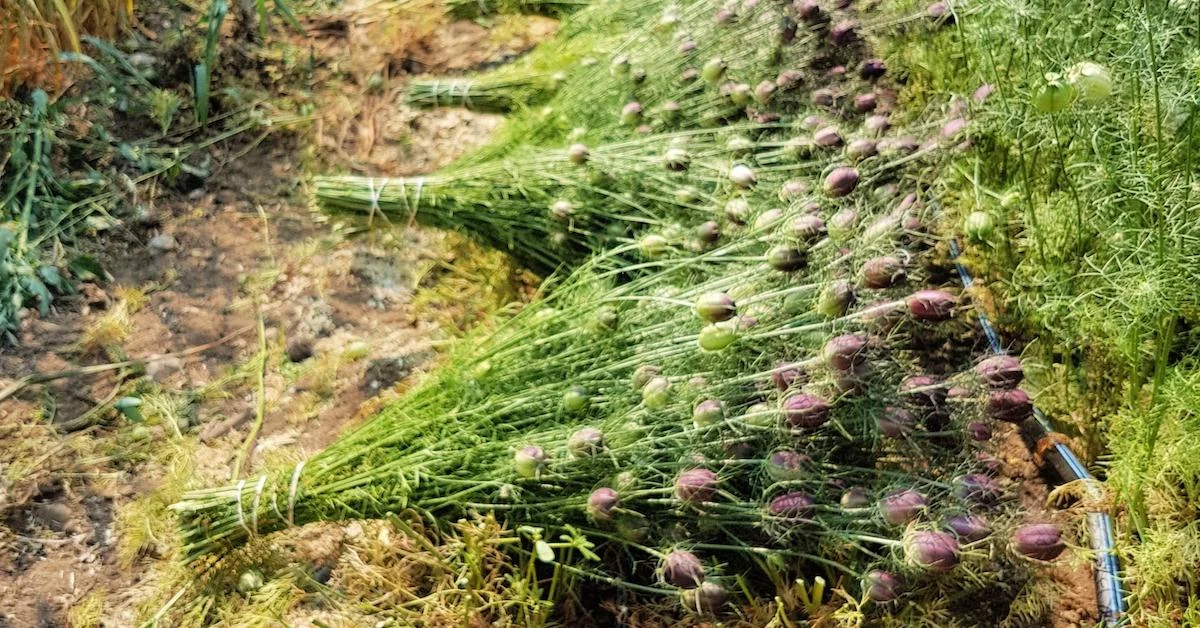
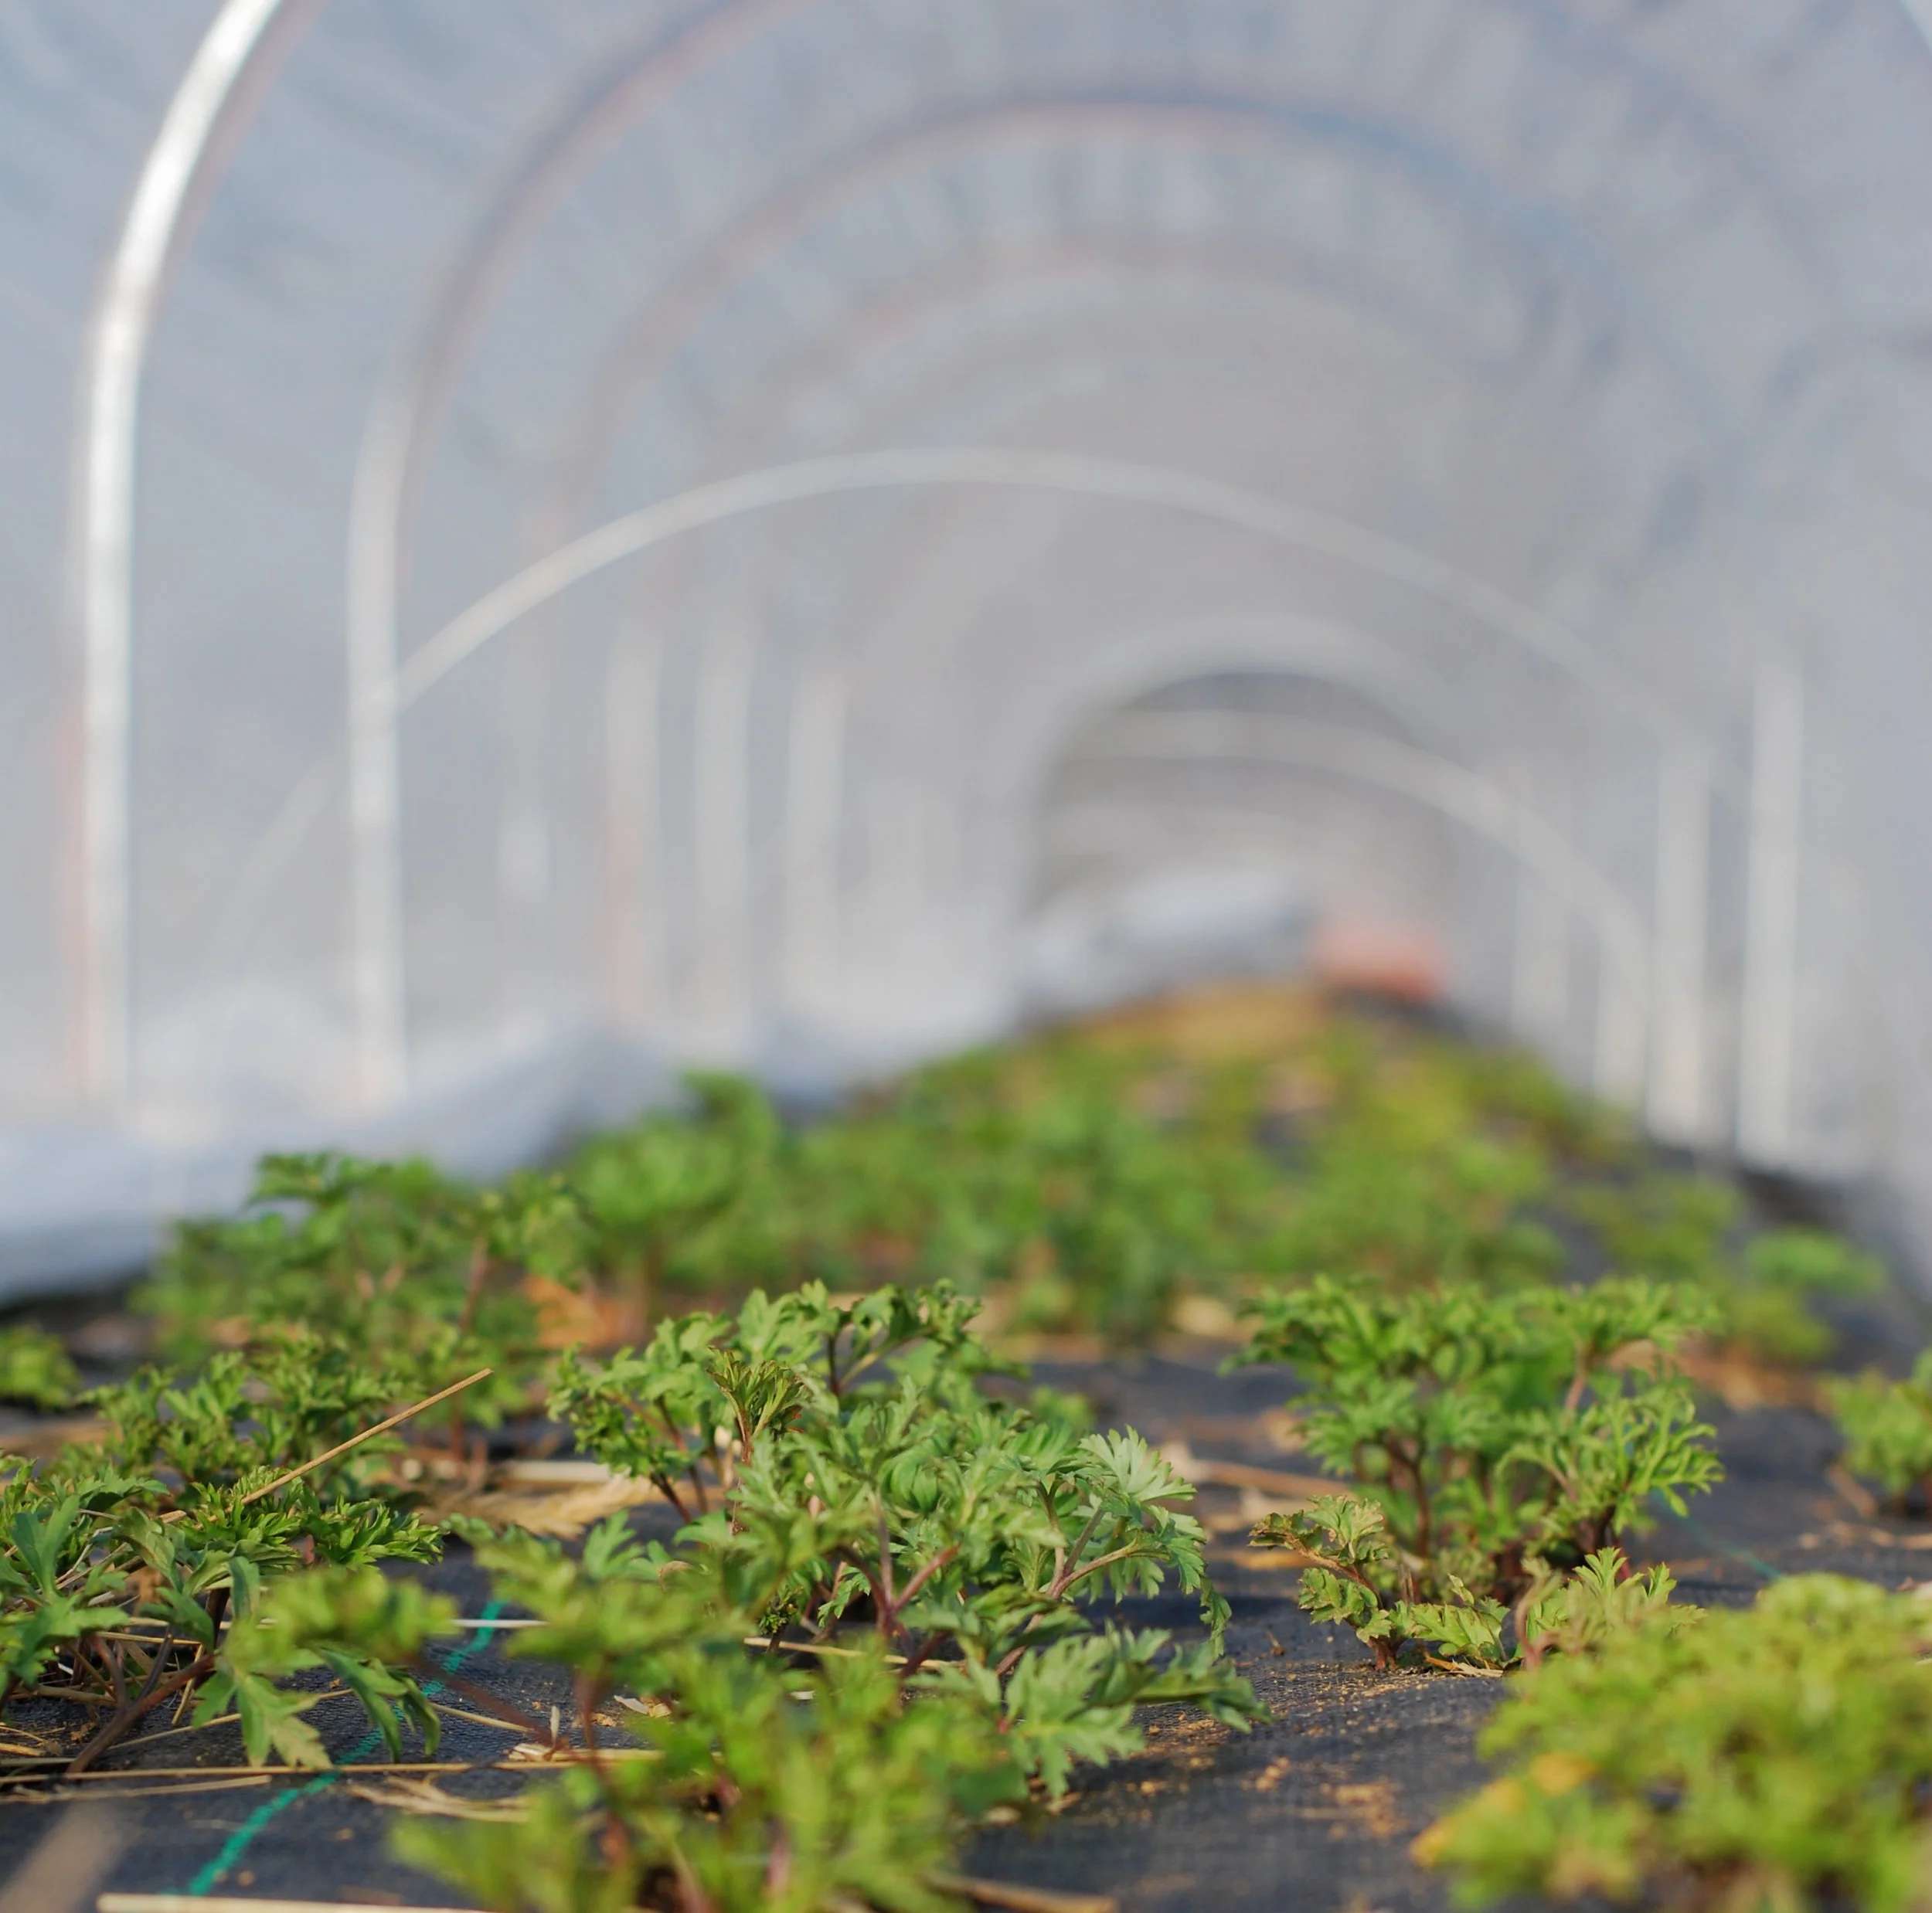
Purple anemones protected by low caterpillar tunnels
Ranunculuses and anemones are among the most beautiful flowers of early spring. But unless you are lucky enough to live in a truly Mediterranean climate where winter temperatures rarely go below freezing and the winds are gentle, you’ll need to provide these blooms with winter protection. Enter a crucial farmer favorite: caterpillar tunnels.
In this article, I’ll be discussing how to build a caterpillar tunnel—or what’s also called a low tunnel greenhouse or grow tunnel—with a focus on creating tunnels that can endure winter weather.
I’m a cut flower farmer, so I’ll provide flower-specific examples in this particular article. But whether you’re a home gardener or a farmer of veggies, ornamental plants, or cut flowers (like myself), you’ll find actionable information in this guide.
In this article, we’ll cover:
Benefits of using caterpillar tunnels
The challenges of using caterpillar tunnels in winter
Supplies and tools needed to build a caterpillar tunnel
Step-by-step instructions to better winter-proof your low greenhouse tunnels
Additional caterpillar tunnel considerations, including placement and snow
Caterpillar Tunnel (AKA Low Tunnel Greenhouse) Benefits
Growing tunnels provide crucial weather protection to get your growing season started earlier and also allow you to grow plants that may have some difficulty in your region during colder months.
“Growing tunnels provide crucial weather protection to get your growing season started earlier.”
Large-scale cut flower growers often devote an entire high tunnel (or multiple tunnels) to highly desired plants, growing high-value cut flowers in fall for spring harvest.
Because I’m not able to have a high tunnel on our property and our winter weather is often frigid—and always windy—I use low caterpillar tunnels to grow these valuable crops.
In addition to ranunculus and anemones, other flower crops benefit from being in tunnels, such as lisianthus and dahlias. My March-planted dahlias bloom earlier and are far more prolific than the dahlias I plant in the field in May (which is also when I remove the plastic from my tunnels).
Starting or running a flower farm? Learn the tips and tricks you need for the long haul—no matter the size of your growing space. Join the newsletter for access to step-by-step videos, educational podcasts, and more.
Why use low tunnels?
Low tunnels (often called caterpillar tunnels due to their segmented appearance) are great for small-scale growers or home gardeners, as they don’t require the space or financial commitment that large tunnels do.
My first caterpillar tunnels were small enough to fit in the backyard of a typical suburban house. Compared to a high tunnel, caterpillar tunnels are also extremely cost-effective. A 100-foot long caterpillar tunnel can be made with less than $200 in supplies and by a single person, though it’s a lot easier with two people.
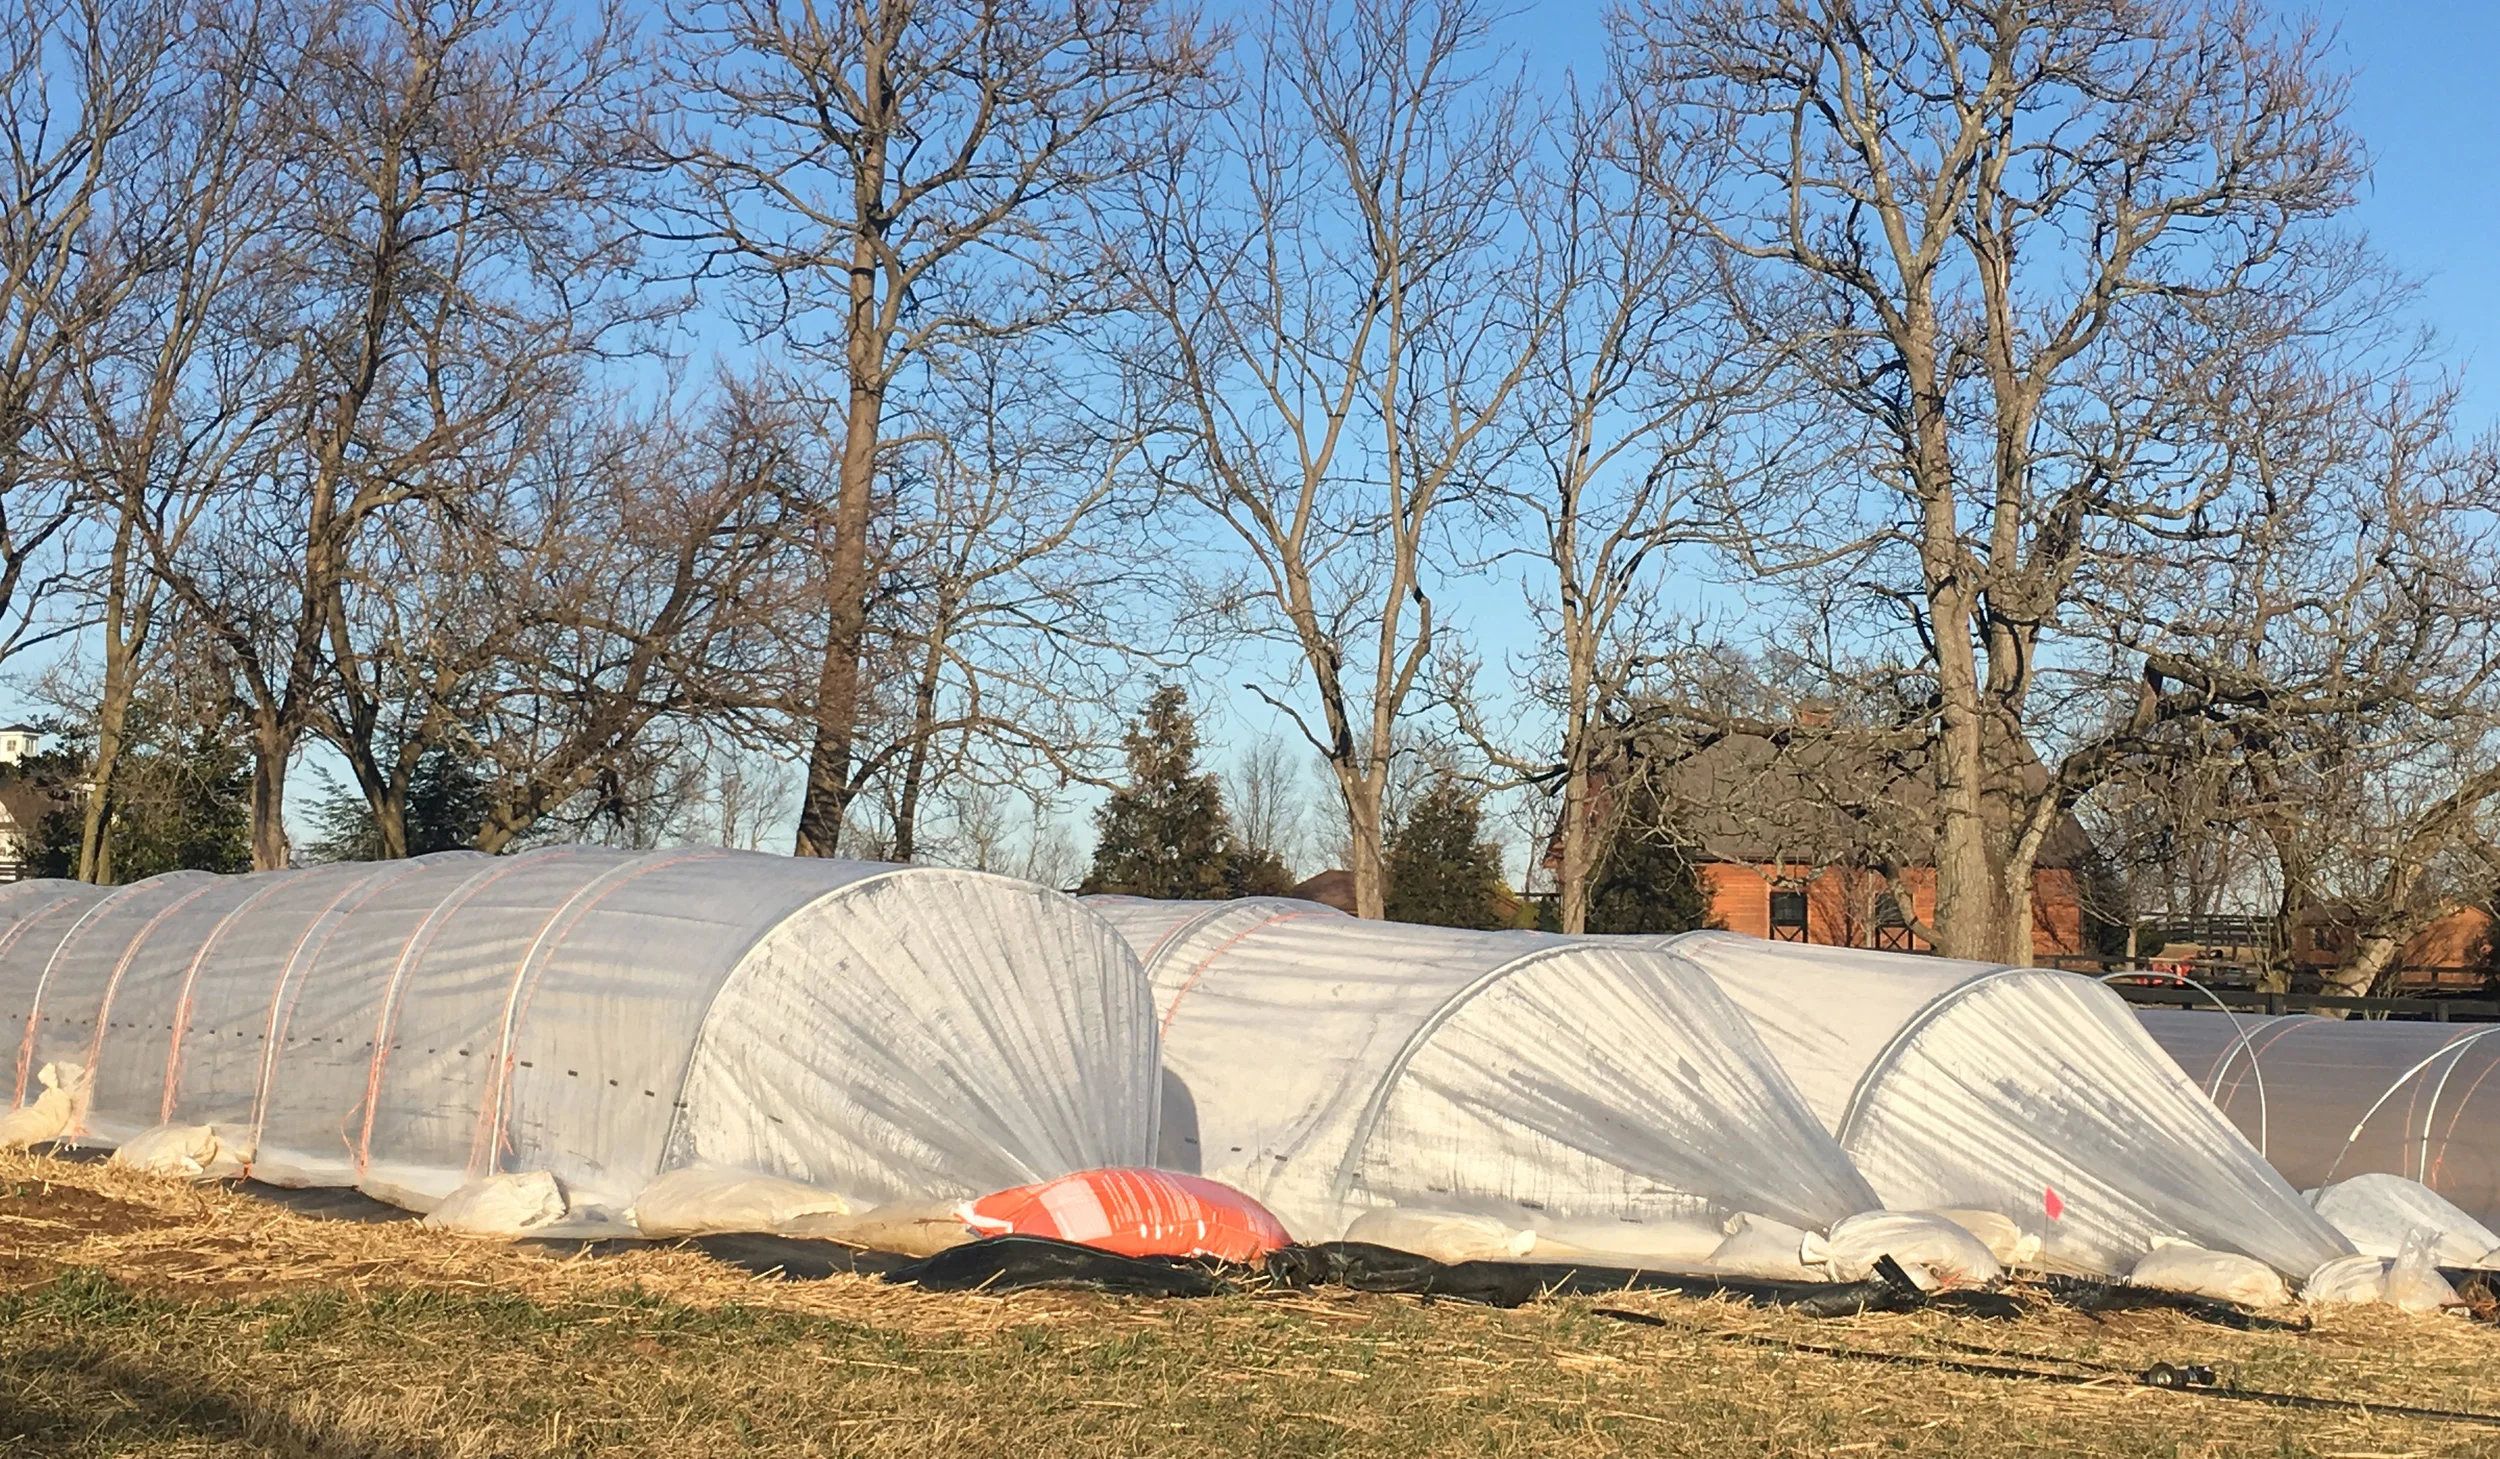
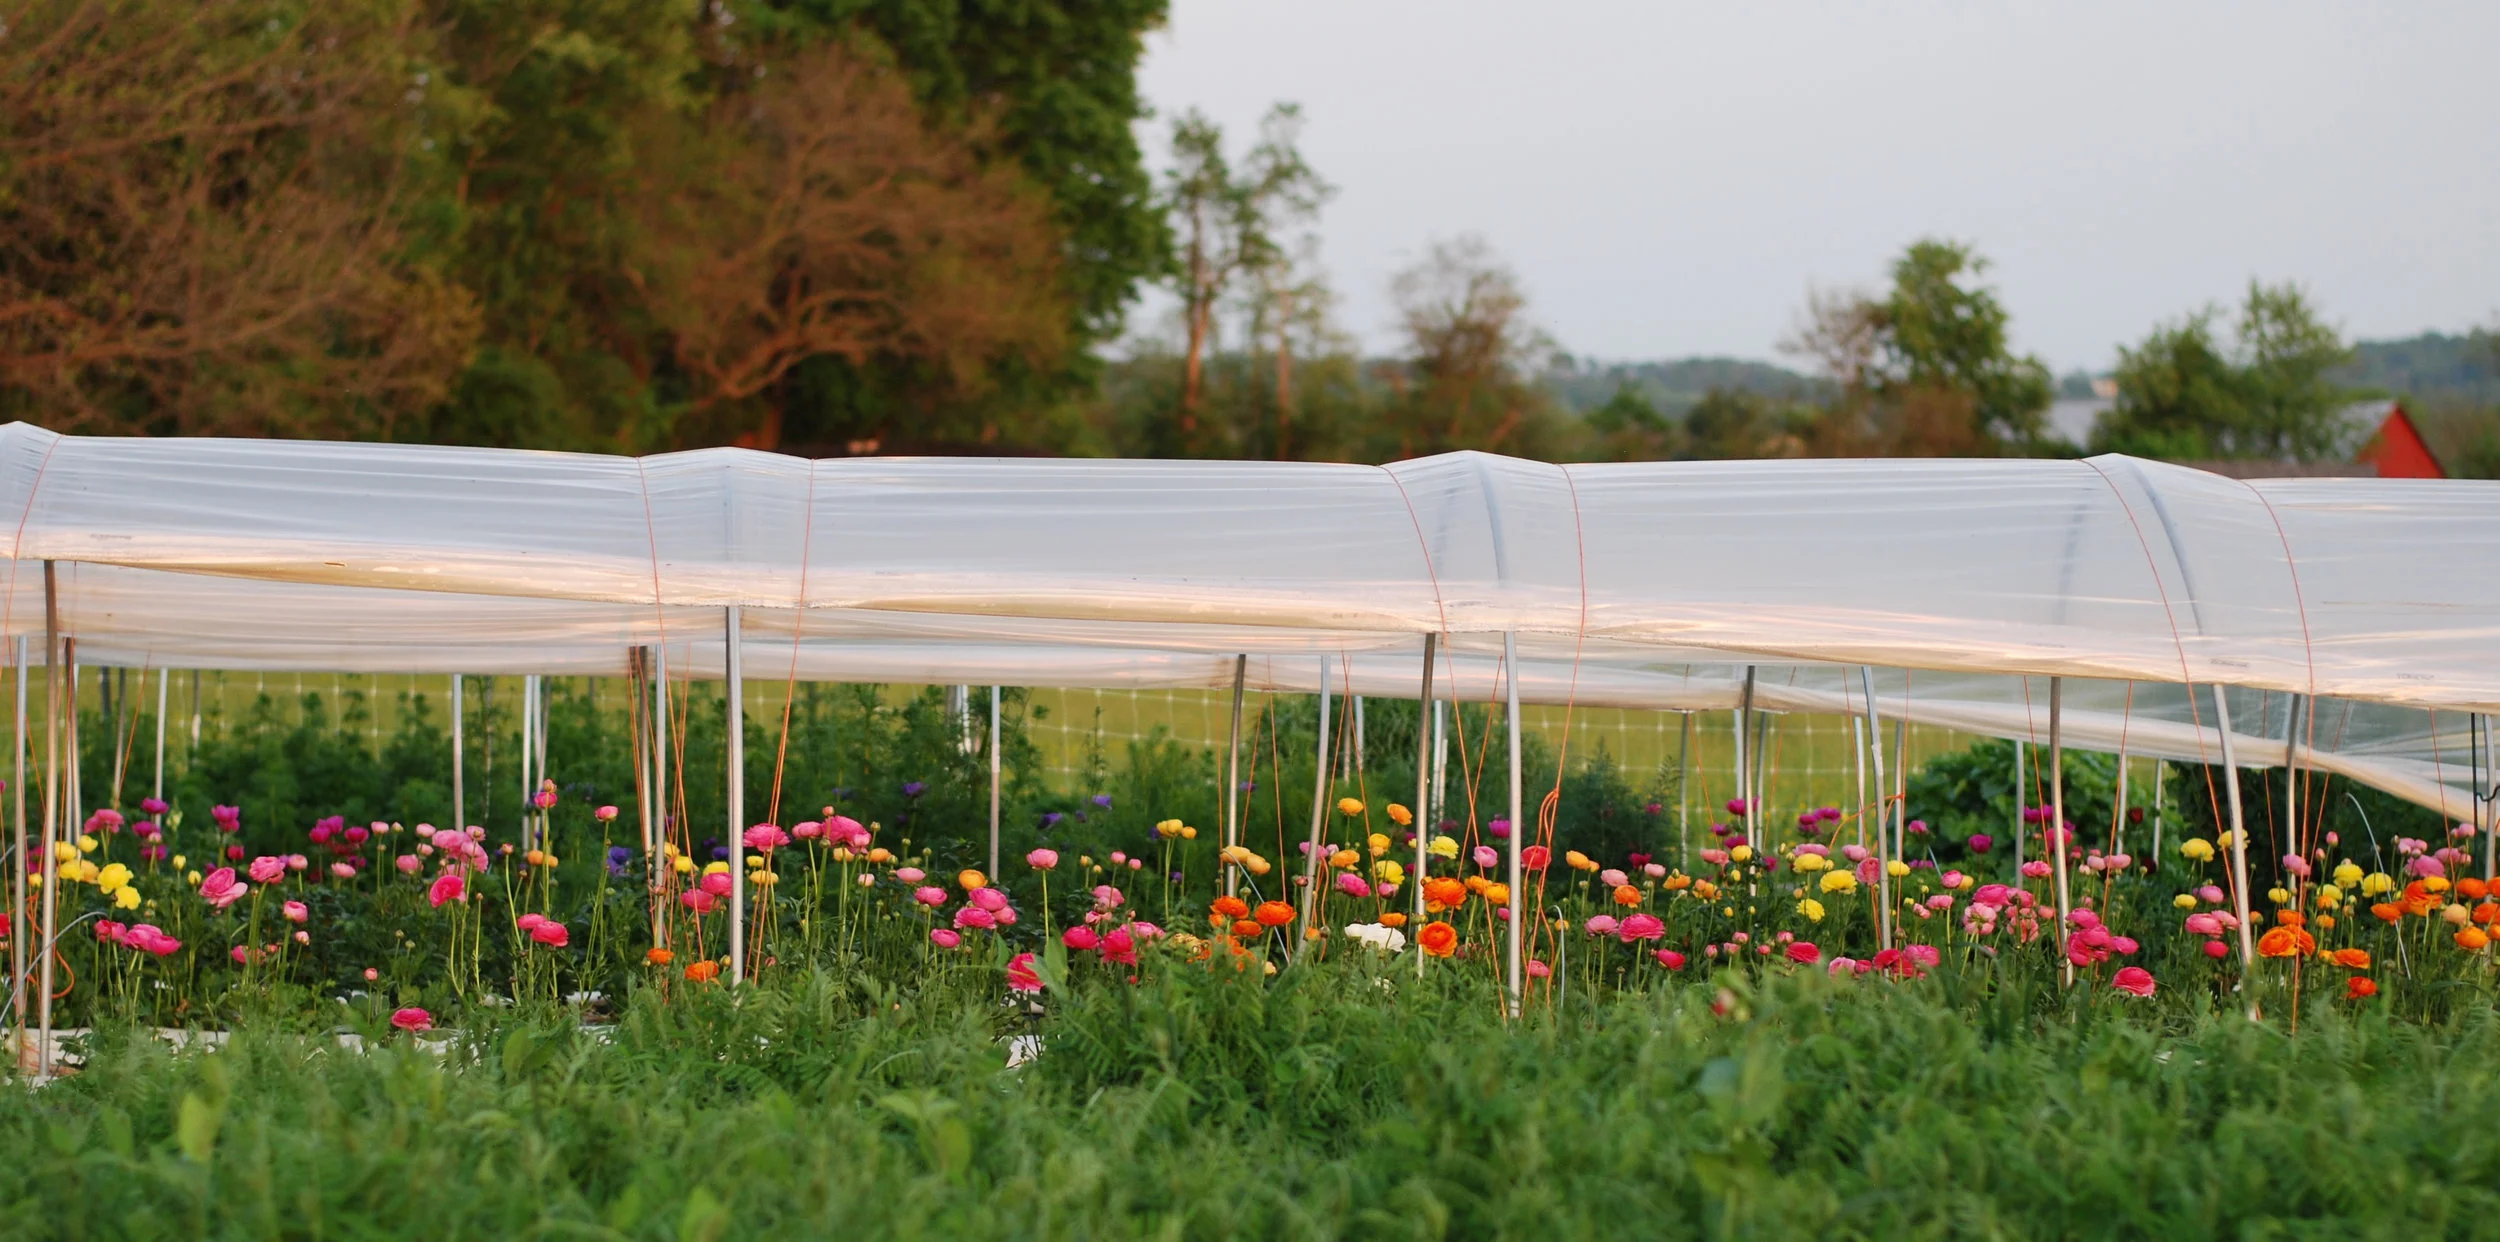
Caterpillar tunnels in use
This blog post is not intended to describe the basics of building a caterpillar tunnel, as others articles—including Bare Mountain Farm and Johnny’s Selected Seeds—provide detailed instructions.
If you’re lucky enough to be growing in a sheltered area with little risk of significant snowfall, then those instructions are all you’ll need.
However, in the remainder of this guide, I’ll specifically be cover how to build an affordable low tunnel greenhouse, or caterpillar tunnel, that will withstand winter weather and snowfall.
Challenges of Using Caterpillar Tunnels
Caterpillar tunnels certainly come with downsides, and one downside includes the amount of work involved in maintaining the temperature inside of them.
Because they’re too small for automatic openers or fans—and yet heat up quickly—they must be opened and closed manually. But until I employed the strategies described here to strengthen my tunnels against the vicious winds they must endure on our farm, for me the worst part of growing in low tunnels was the stress involved in worrying that they wouldn’t hold up.
My worst fear was realized during a windstorm one bitterly cold winter morning when all of my tunnels failed.
low caterpillar tunnels ruined by winter winds
I’ve written about that ghastly experience on my blog; it was almost enough to make me give up growing ranunculuses and anemones.
I ultimately decided to give the tunnels another try—but only after educating myself on the likely reasons my tunnels failed and adopting some of the mechanisms used to stabilize much larger tunnels. Hopefully, these techniques can help you, too.
Learn how to grow flowers for market—and successfully sell them–in our online flower growing classes.
Why Caterpillar Tunnels Fail
No one reading this likely wants or needs a physics lesson—and I’m not the one to provide that, anyway—but understanding why and how low tunnel greenhouses fail is helpful in understanding why the techniques below work.
First, unless you’re using cheap plastic (like the stuff you can find at the big box stores—don’t use it!) or a wind-borne object punctures your tunnel, it’s highly unlikely the wind will rip holes in your plastic.
Instead, the wind’s strategy is to sneak in under the tunnel. Once the wind gets under—and it will—the plastic of the tunnel serves almost like a parachute, capturing that wind. With every gust, the tunnel balloons out, putting tremendous stress on the components working to keep the structure anchored to the ground.
To provide extra stability to your caterpillar tunnels and enable them to withstand stronger winter winds (and several feet of snow), you will need to do two things:
Minimize the ability of the wind to get underneath the tunnel and start the “parachute phenomena.”
Ensure the tunnel plastic is stretched very tight, so that snow slides off instead of “pooling” in areas of slackened plastic.
I’ll show you how to build caterpillar tunnels this way in the steps below.
Here’s How to Build a Caterpillar Tunnel for Winds and Snow
Once you’ve got your tunnel hoops in place (see Bare Mountain Farm for detailed instructions), your goal is to ensure the ends of the caterpillar tunnel are super secure.
Some guidelines for low tunnels advise pounding a wooden stake or piece of rebar at the ends of the tunnel, then gathering the plastic at each end and using twine to tie the gathered plastic to the stake. The problem with this approach is that—as each gust of wind causes the tunnel to balloon up and out—it will tug at the stake.
This force of wind can be powerful enough to cause the stake to move significantly. And if the soil is wet with winter rains and snow, the stake can come all the way out—at which point the tunnel will fail catastrophically.
The following caterpillar tunnel set-up is more complicated than a simple stake, but will help ensure the ends of your tunnel are firmly anchored.
First, let’s dive into the materials and tools you’ll need for your caterpillar tunnels. After these lists, you’ll find detailed, step-by-step instructions on how to assemble.
Hey there, we’re Team Flower. And if you made it this far, you might want to learn more. We help flower pros and fans from every part of the floral world learn, grow, and connect through industry-leading online education and events. Discover how we can help on your flower journey.
Materials for Caterpillar Tunnel End Assembly
Here are the materials you’ll need for the ends of your caterpillar tunnel.
2 2-foot long 3/8” threaded rods
2 3/8” rod coupling nuts
2 3/8” x 2-1/2” eye bolts (comes with a nut that you won’t need)
2 ¼” anchor shackles
2 in-line ratchet-style tensioners (found in the fencing supply section of stores like Tractor Supply)
2 2-foot long pieces of rebar
2 4” x 5/16” U-bolts
2 1-foot pieces of rebar
Baling twine (do not use garden twine or anything else that stretches and/or breaks down)
Sandbags (and dirt or gravel to fill them)
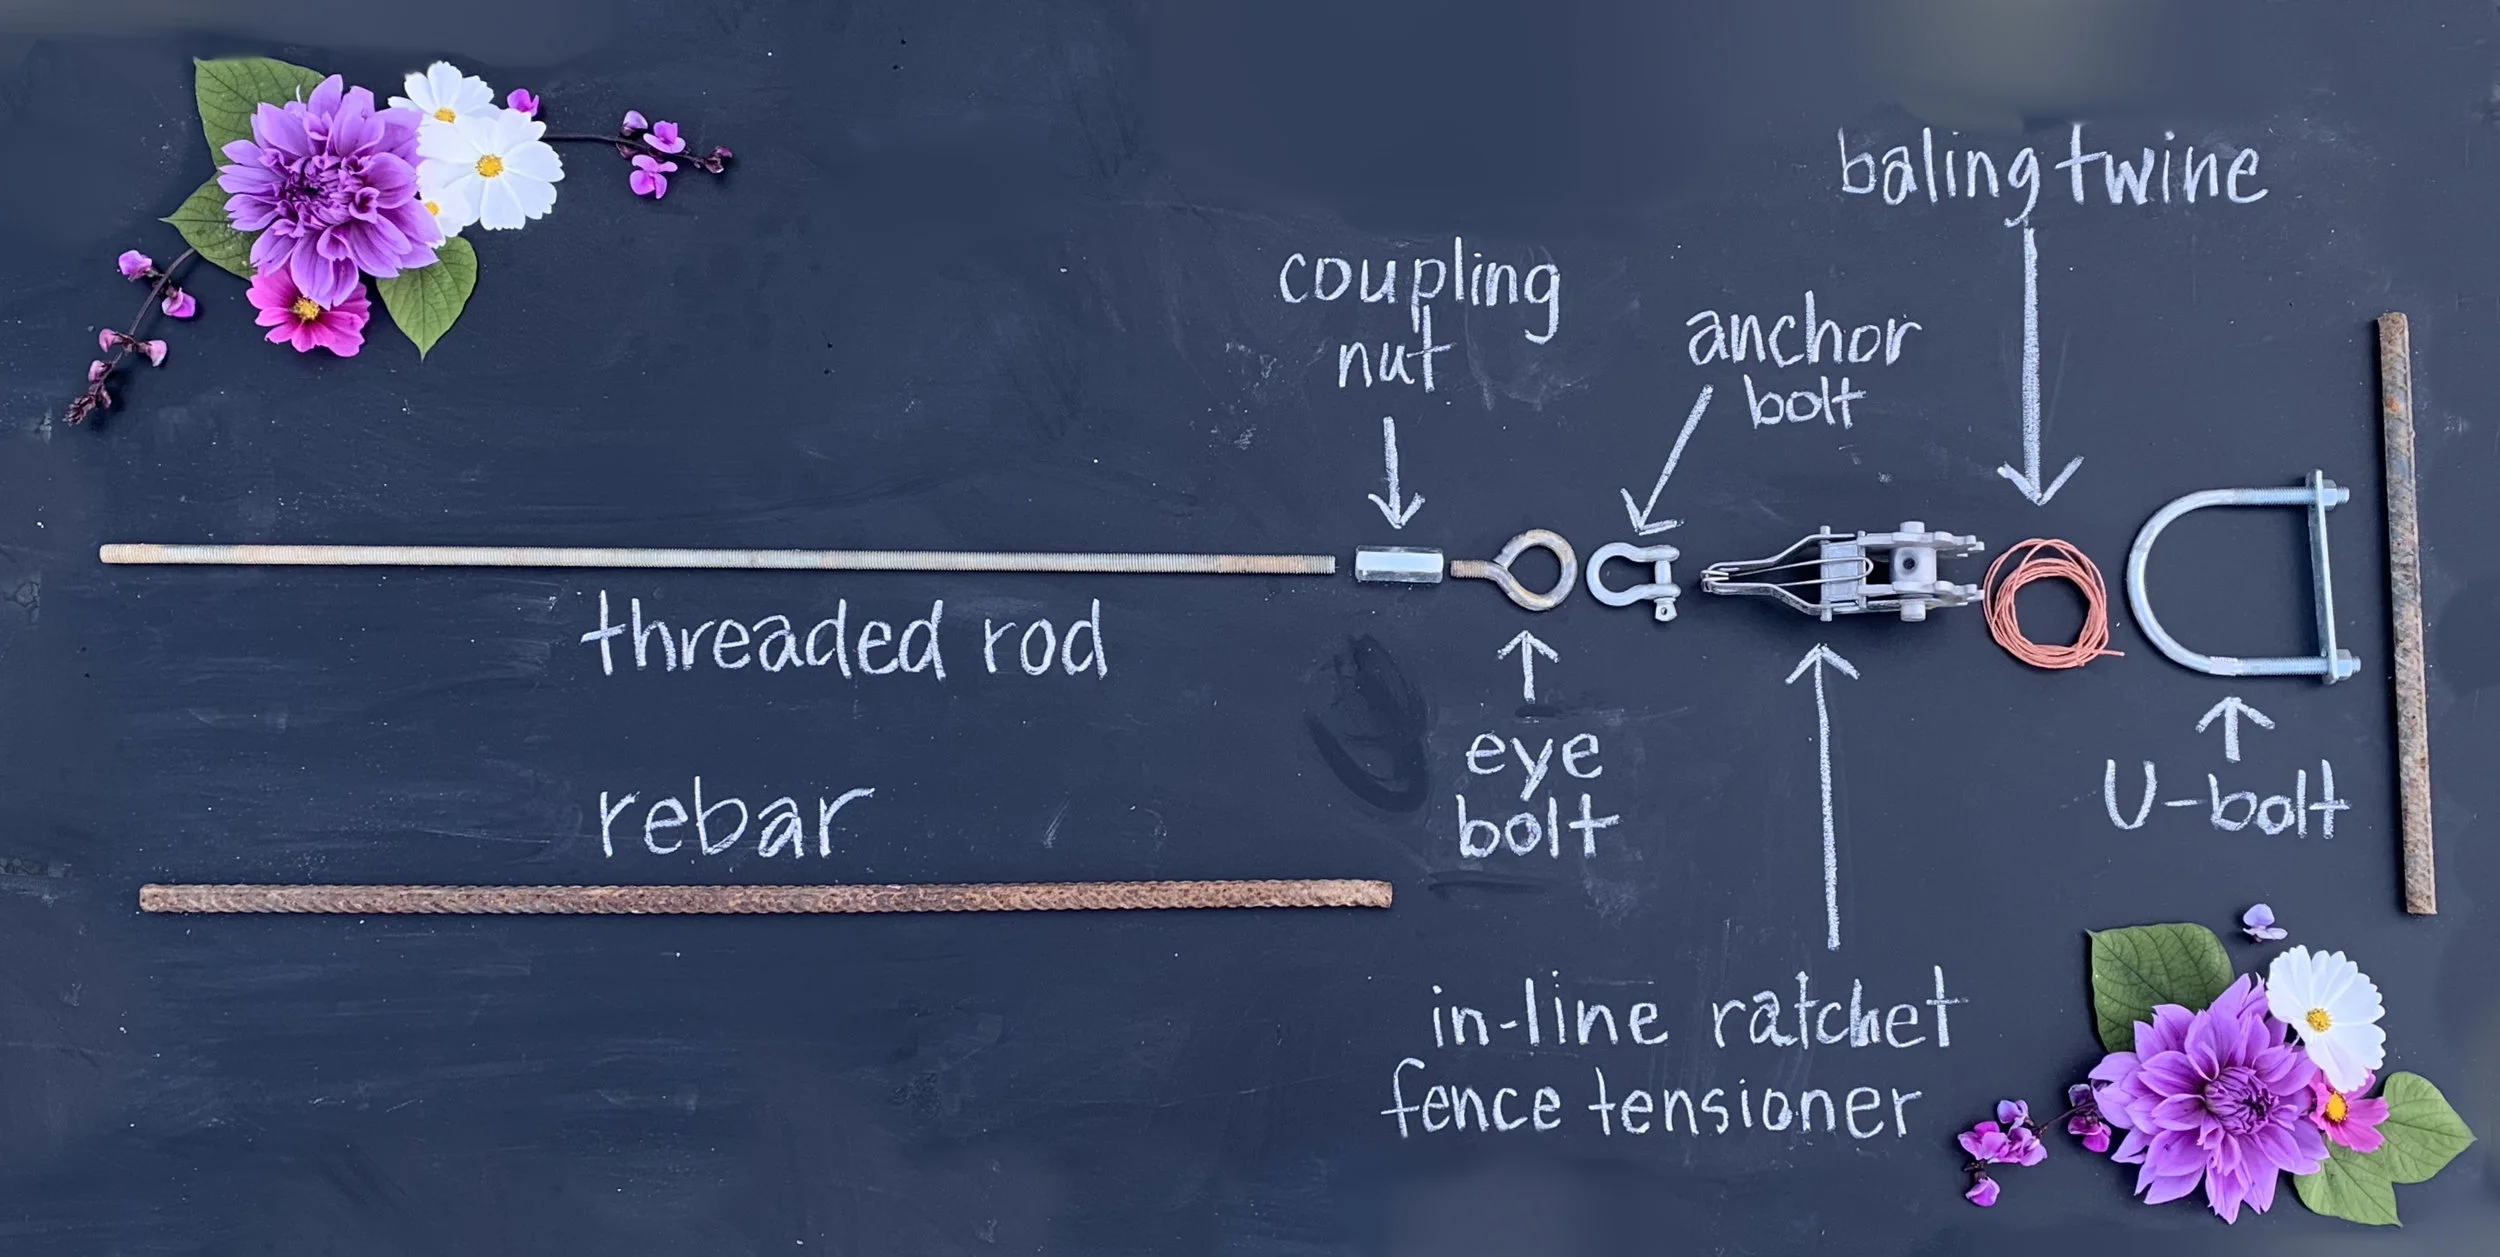
Caterpillar tunnel materials needed
Materials for each set of Side Ground Anchors
To anchor each side of your caterpillar tunnel, you’ll need the following:
2 2-foot long 3/8” threaded rods
2 3/8” rod coupling nuts
2 3/8” x 2-1/2” eye bolts (comes with a nut that you won’t need)
Tools Needed to Build a Low Tunnel Greenhouse
Here are the tools you’ll need to build your low tunnels:
Sledgehammer
Plastic cap to protect threaded rods when pounding them with a sledgehammer. You can use the caps that come with the fiberglass fence rods you will need to build the tunnel itself.
Scissors for cutting twine
Shovel for filling sandbags
Tunnel materials
Here are the materials needed to construct your caterpillar tunnels:
Fiberglass fence rods
8- or 10-foot metal conduit (depending on how big you want your tunnels to be)
Greenhouse plastic
Baling twine
How to Secure Your Low Tunnels: Full Steps Below
As a reminder, for full and complete details on how to construct your caterpillar tunnel, see the guide from Bare Mountain Farms.
The guide from Bare Mountain Farms will get you started if you need it. The steps below will guide you the rest of the way to creating an anchoring system that helps your low tunnels better withstand wind, snow, and winter weather.
1) Using a sledgehammer, pound a two foot long, 3/8” threaded rod into the ground at a 45-degree angle so that the end you’re pounding ends up further away from the tunnel than the end of the rod that’s now deep in the ground.
Leave approximately one inch of the rod out of the ground. Make sure to use a protective plastic cap—which comes with fiberglass fence posts like those you will likely use to secure the tunnel’s hoops (see this site) to ensure you do not mash up the end of the threaded rod. If you do, you won’t be able to complete the next step.
2) Screw a 3/8” rod coupling nut (also called a “hex nut”) onto the end of the threaded rod. Screw it on so that the threaded rod goes about halfway through the hex nut.
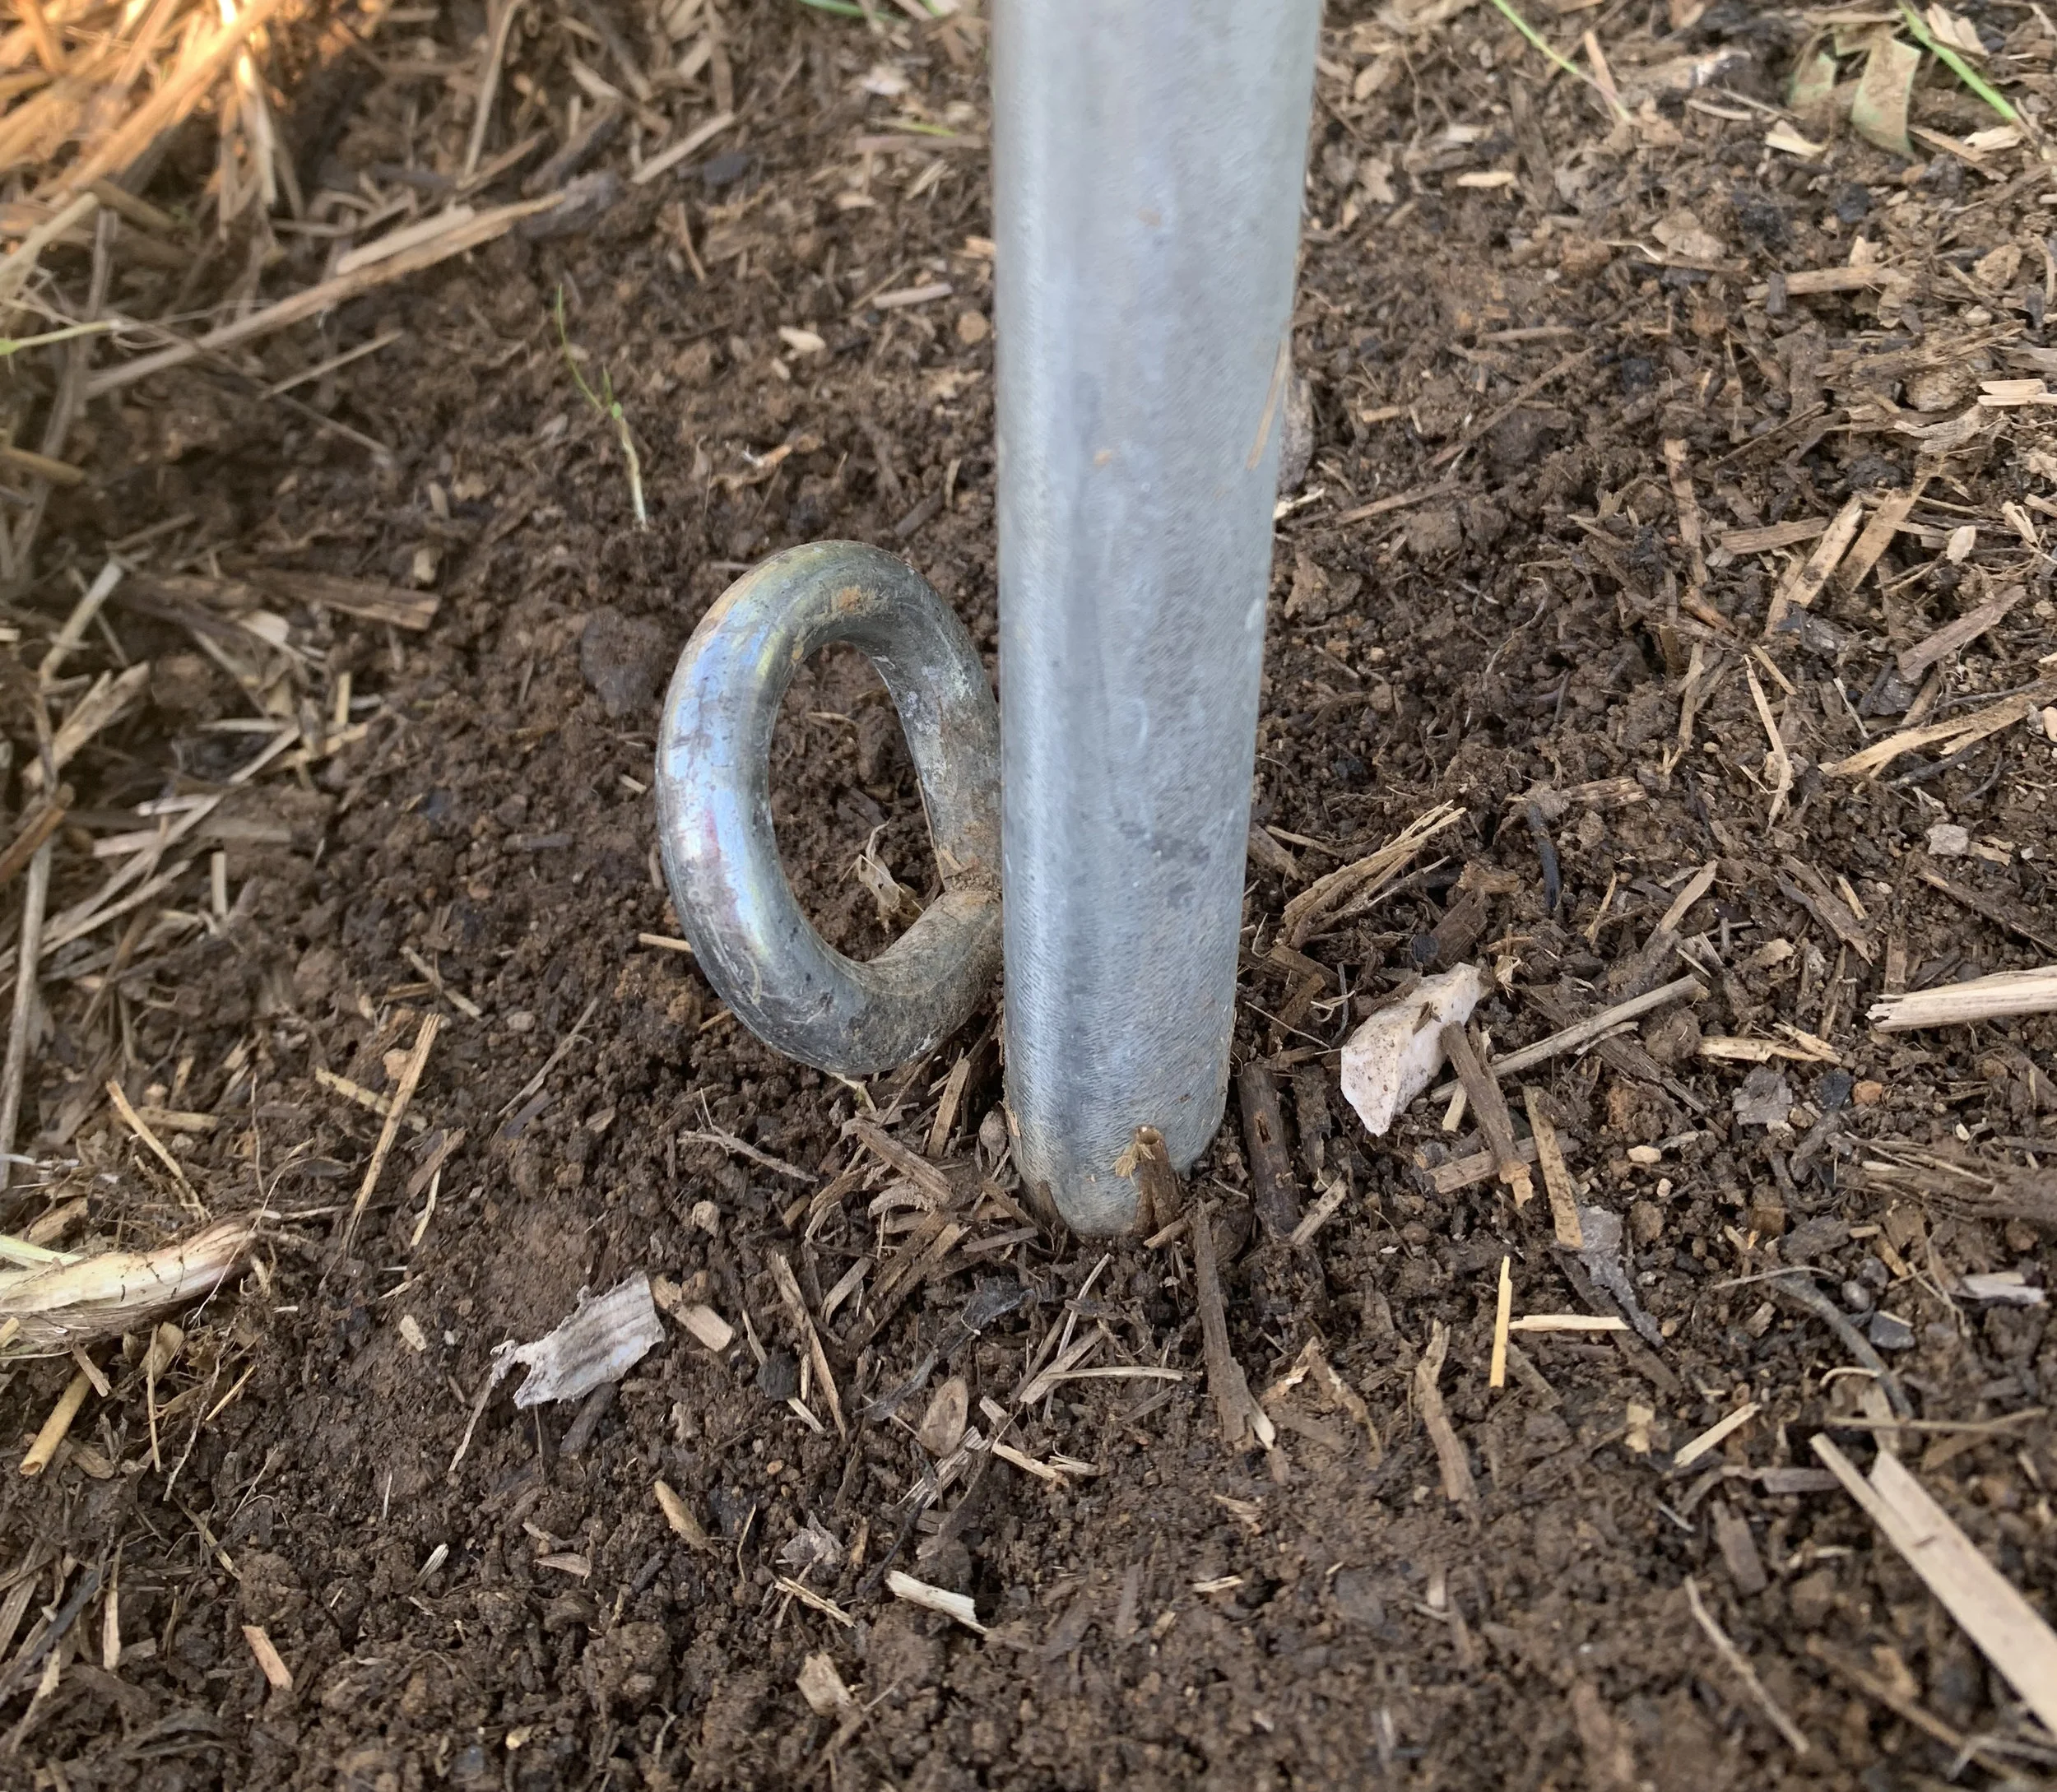
3) Screw the 3/8” x 2-1/2” eye bolt into the other end of the hex nut. Now you can pound this entire assembly further into the ground. I usually hammer it far enough so that just the circle of the eye bolt is still above ground.
4) With the anchor shackle, unscrew and remove the pin so that you can loop the part that is shaped like a horseshoe through the eye bolt.
5) Before you screw the pin back on, place the end of the in-line fence tensioner between the tips of the horseshoe. Thread the pin through both the horseshoe itself as well as the holes at the end of the in-line fence tensioner. At this point, you should have the circle of the eye bolt sticking out of the ground with the fence tensioner attached to it via the anchor shackle.
6) Take a two-foot long piece of rebar and insert one end into the eye of the eye bolt. Using the sledgehammer, drive the rebar into the ground at an angle and in a direction that is 90 degrees away from the path you drove the threaded rod in Step 1. This will help prevent the threaded rod from moving through the soil when the wind puts force on it.
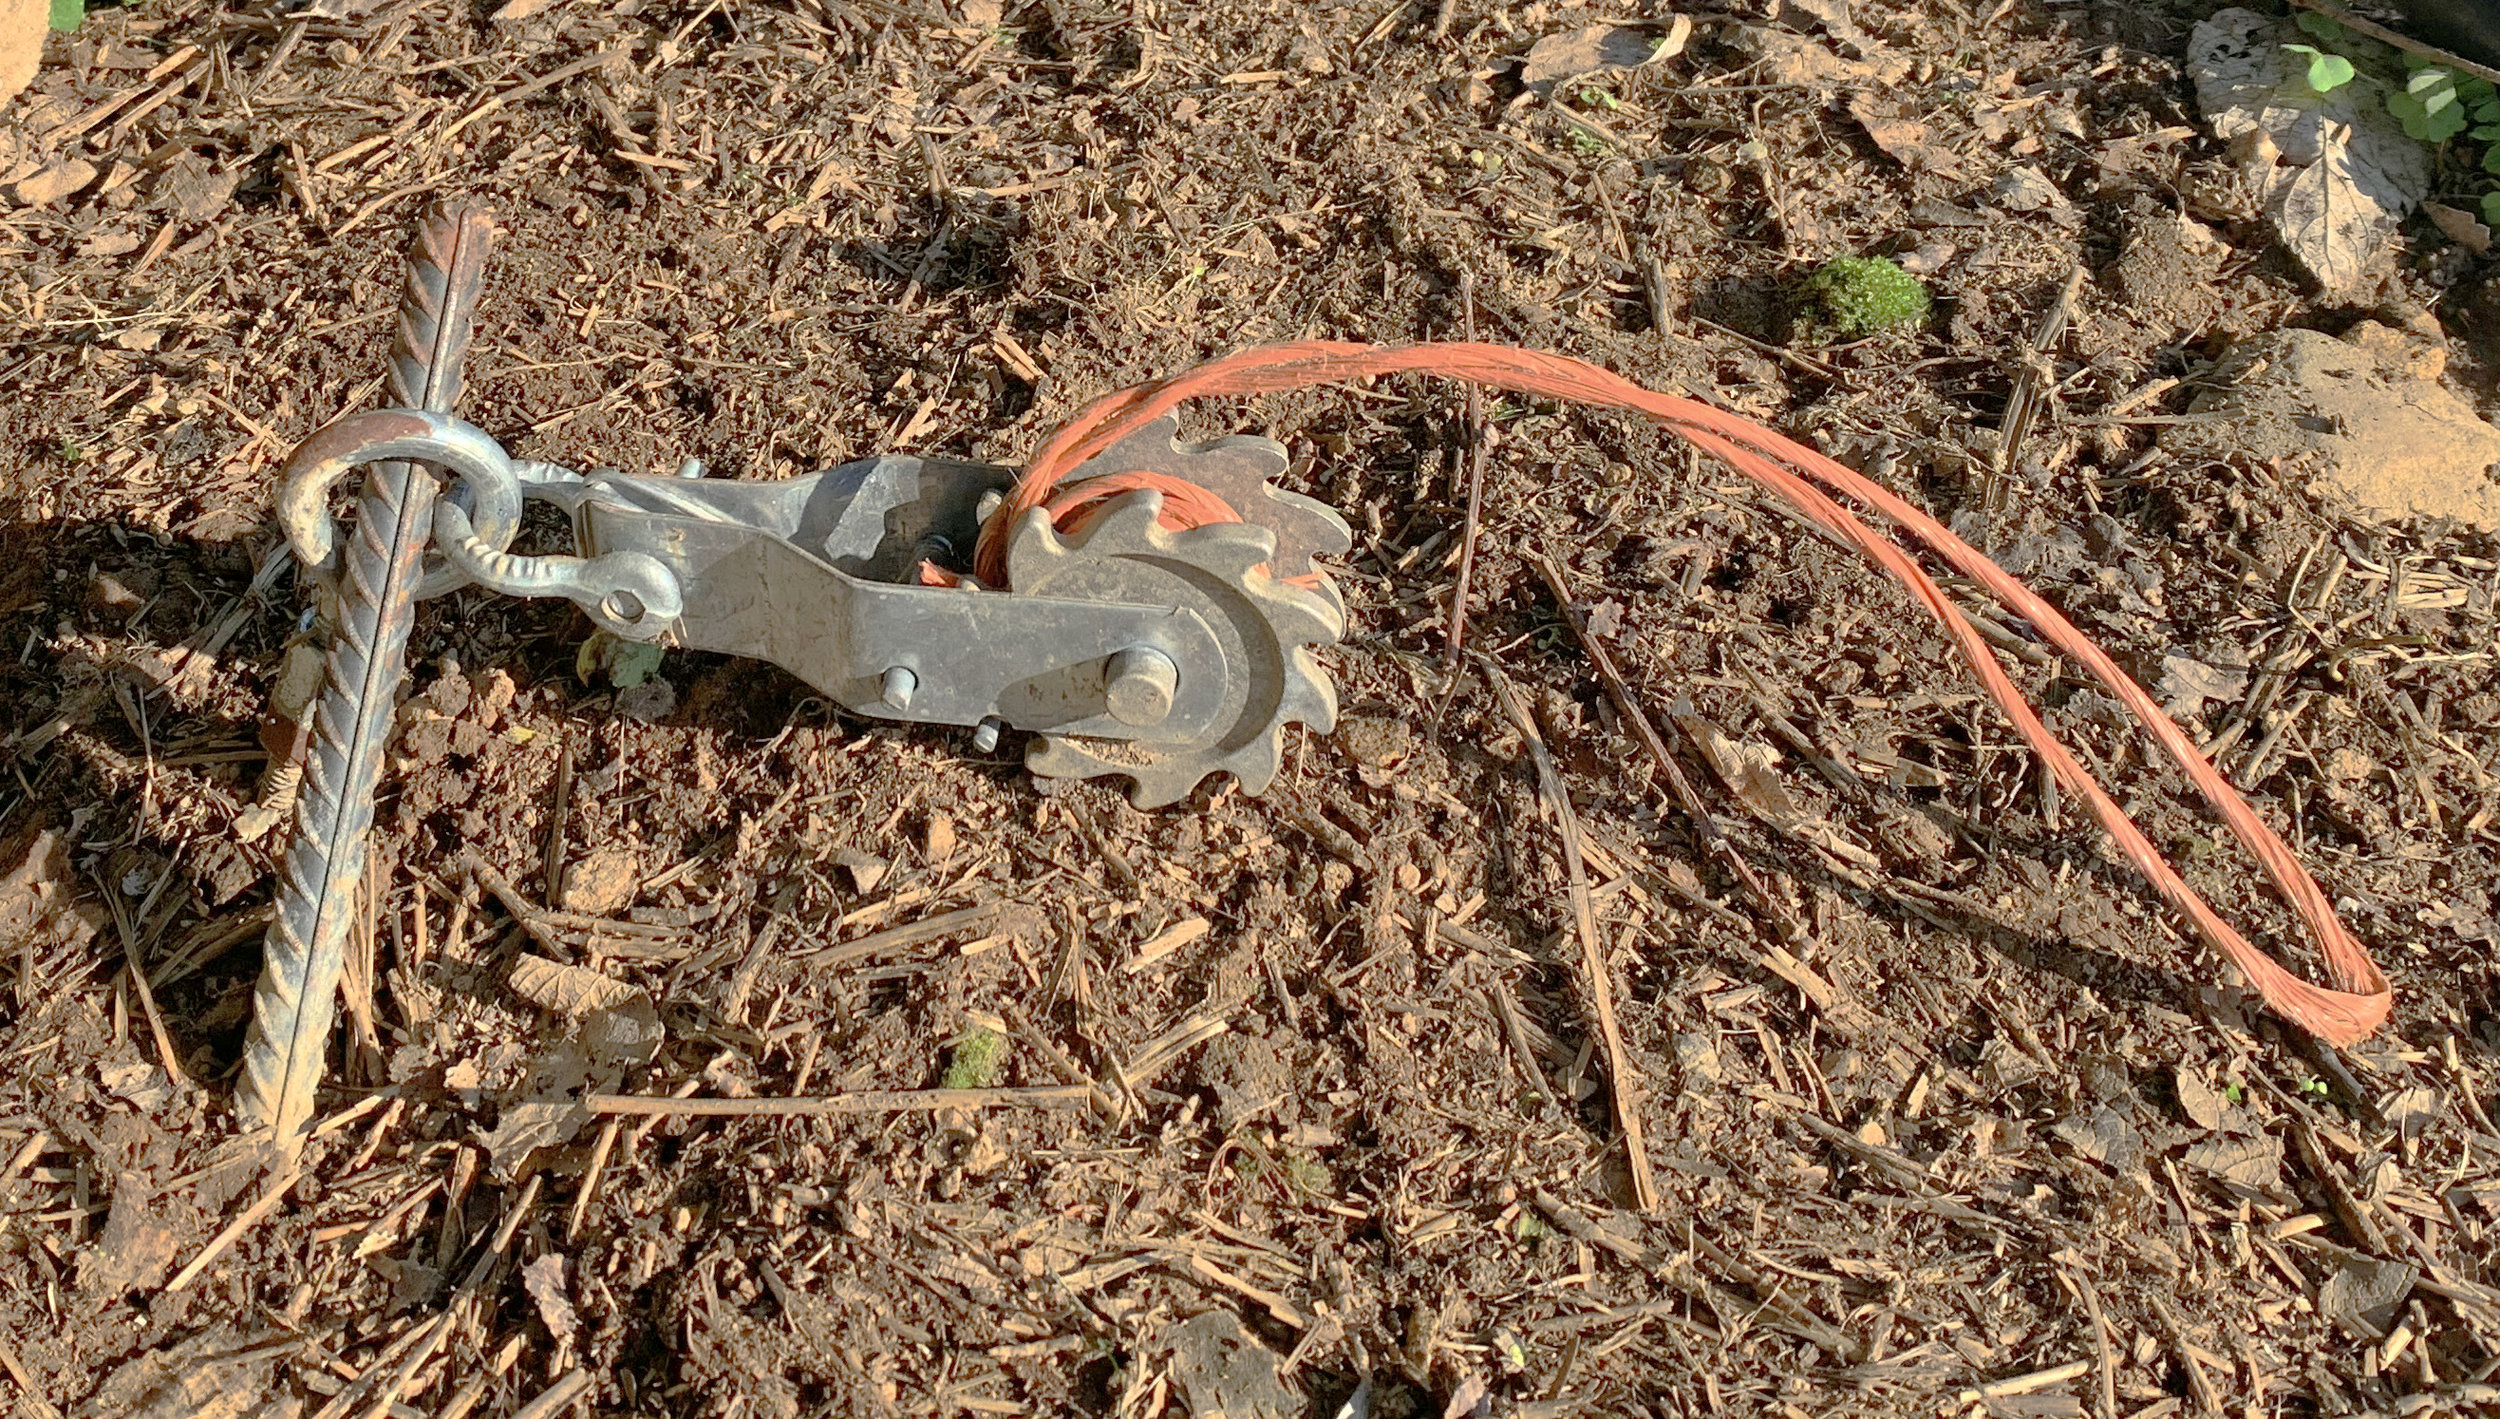
STep 6: This is what Your Caterpillar Anchor Will Look LIke
7) Cut a piece of baling twine approximately six feet long, and use a Zeppelin Bend knot (instructions here) to tie one end of the string to the other. If you’ve used the Bare Mountain Farm method to construct your tunnel, then you’ve already learned how to tie this simple (but incredibly strong!) type of knot. You should now have a circular piece of baling twine.
8) The next step is to attach this circle of twine to the rolling bar of the fence tensioner. This will allow you, when the tunnel plastic is connected, to pull that plastic super tight.
Make a crimp or bend in a section of the circle of twine and push the end of the crimp through the hole in the rolling bar of the tensioner. While this can require some patience, it is helpful to use a small piece of wire to help push it through.
Once it’s all the way through, tie a knot so that it can’t slip back out. Now when you turn the jagged “wheels” of the tensioner, you are winding the twine onto it. Wind it once or twice around to ensure the twine is firmly attached to the tensioner.
9) You now have a piece of doubled-up twine attached to your ground system. Grab the U-bolt, and remove the plate at the end. Keep the plate and the screws that hold it in place handy—you’ll need them in Step 13 when your hands are full of plastic.
Slip the “U” through the loop of twine and pull it away from the tensioner. For even greater strength of the twine, you can twist the two strands multiple times, creating a single, solid rope of twine that connects the U-bolt to the ground assembly.
10) Create the same set-up at the other end of the tunnel.
11) You are now ready to pull the plastic onto your tunnel (do not even attempt this on a windy day—trust me!). See instructions from Bare Mountain Farm for hints on this step.
12) At one end of the tunnel, gather the plastic together at a point about four feet from the end of the plastic and lay the gathered plastic in the base of the U-bolt.
13) Take the one-foot piece of rebar and lay it on top of the plastic, adjacent to the edge of the “U” that is closest to your ground system. Now fold the end of the gathered plastic over the rebar and back through the U-bolt. You will REALLY have to work at it to squish all of that plastic together tight enough so that you can get the plate of the U-bolt screwed back on with the plate and screws that you set aside in Step 9.
At this point, you have one end of the tunnel plastic attached to your ground system. The rebar is acting as a “dead man’s stop” so that the force of the wind pushing on your tunnel won’t allow the plastic to work its way out of the U-bolt.
14) Repeat the last two steps at the other end of the tunnel.
15) Wind the fence tensioners at each end to pull the plastic tighter.
16) Place three filled sandbags on each end of the tunnel, right on top of the U-bolt, to keep the entire U-bolt/plastic assemblage firmly to the ground. It’s possible you’ll have to loosen the tension on the ratchets to do this slightly; the end goal is taut tunnel plastic with ends that are firmly on the ground.
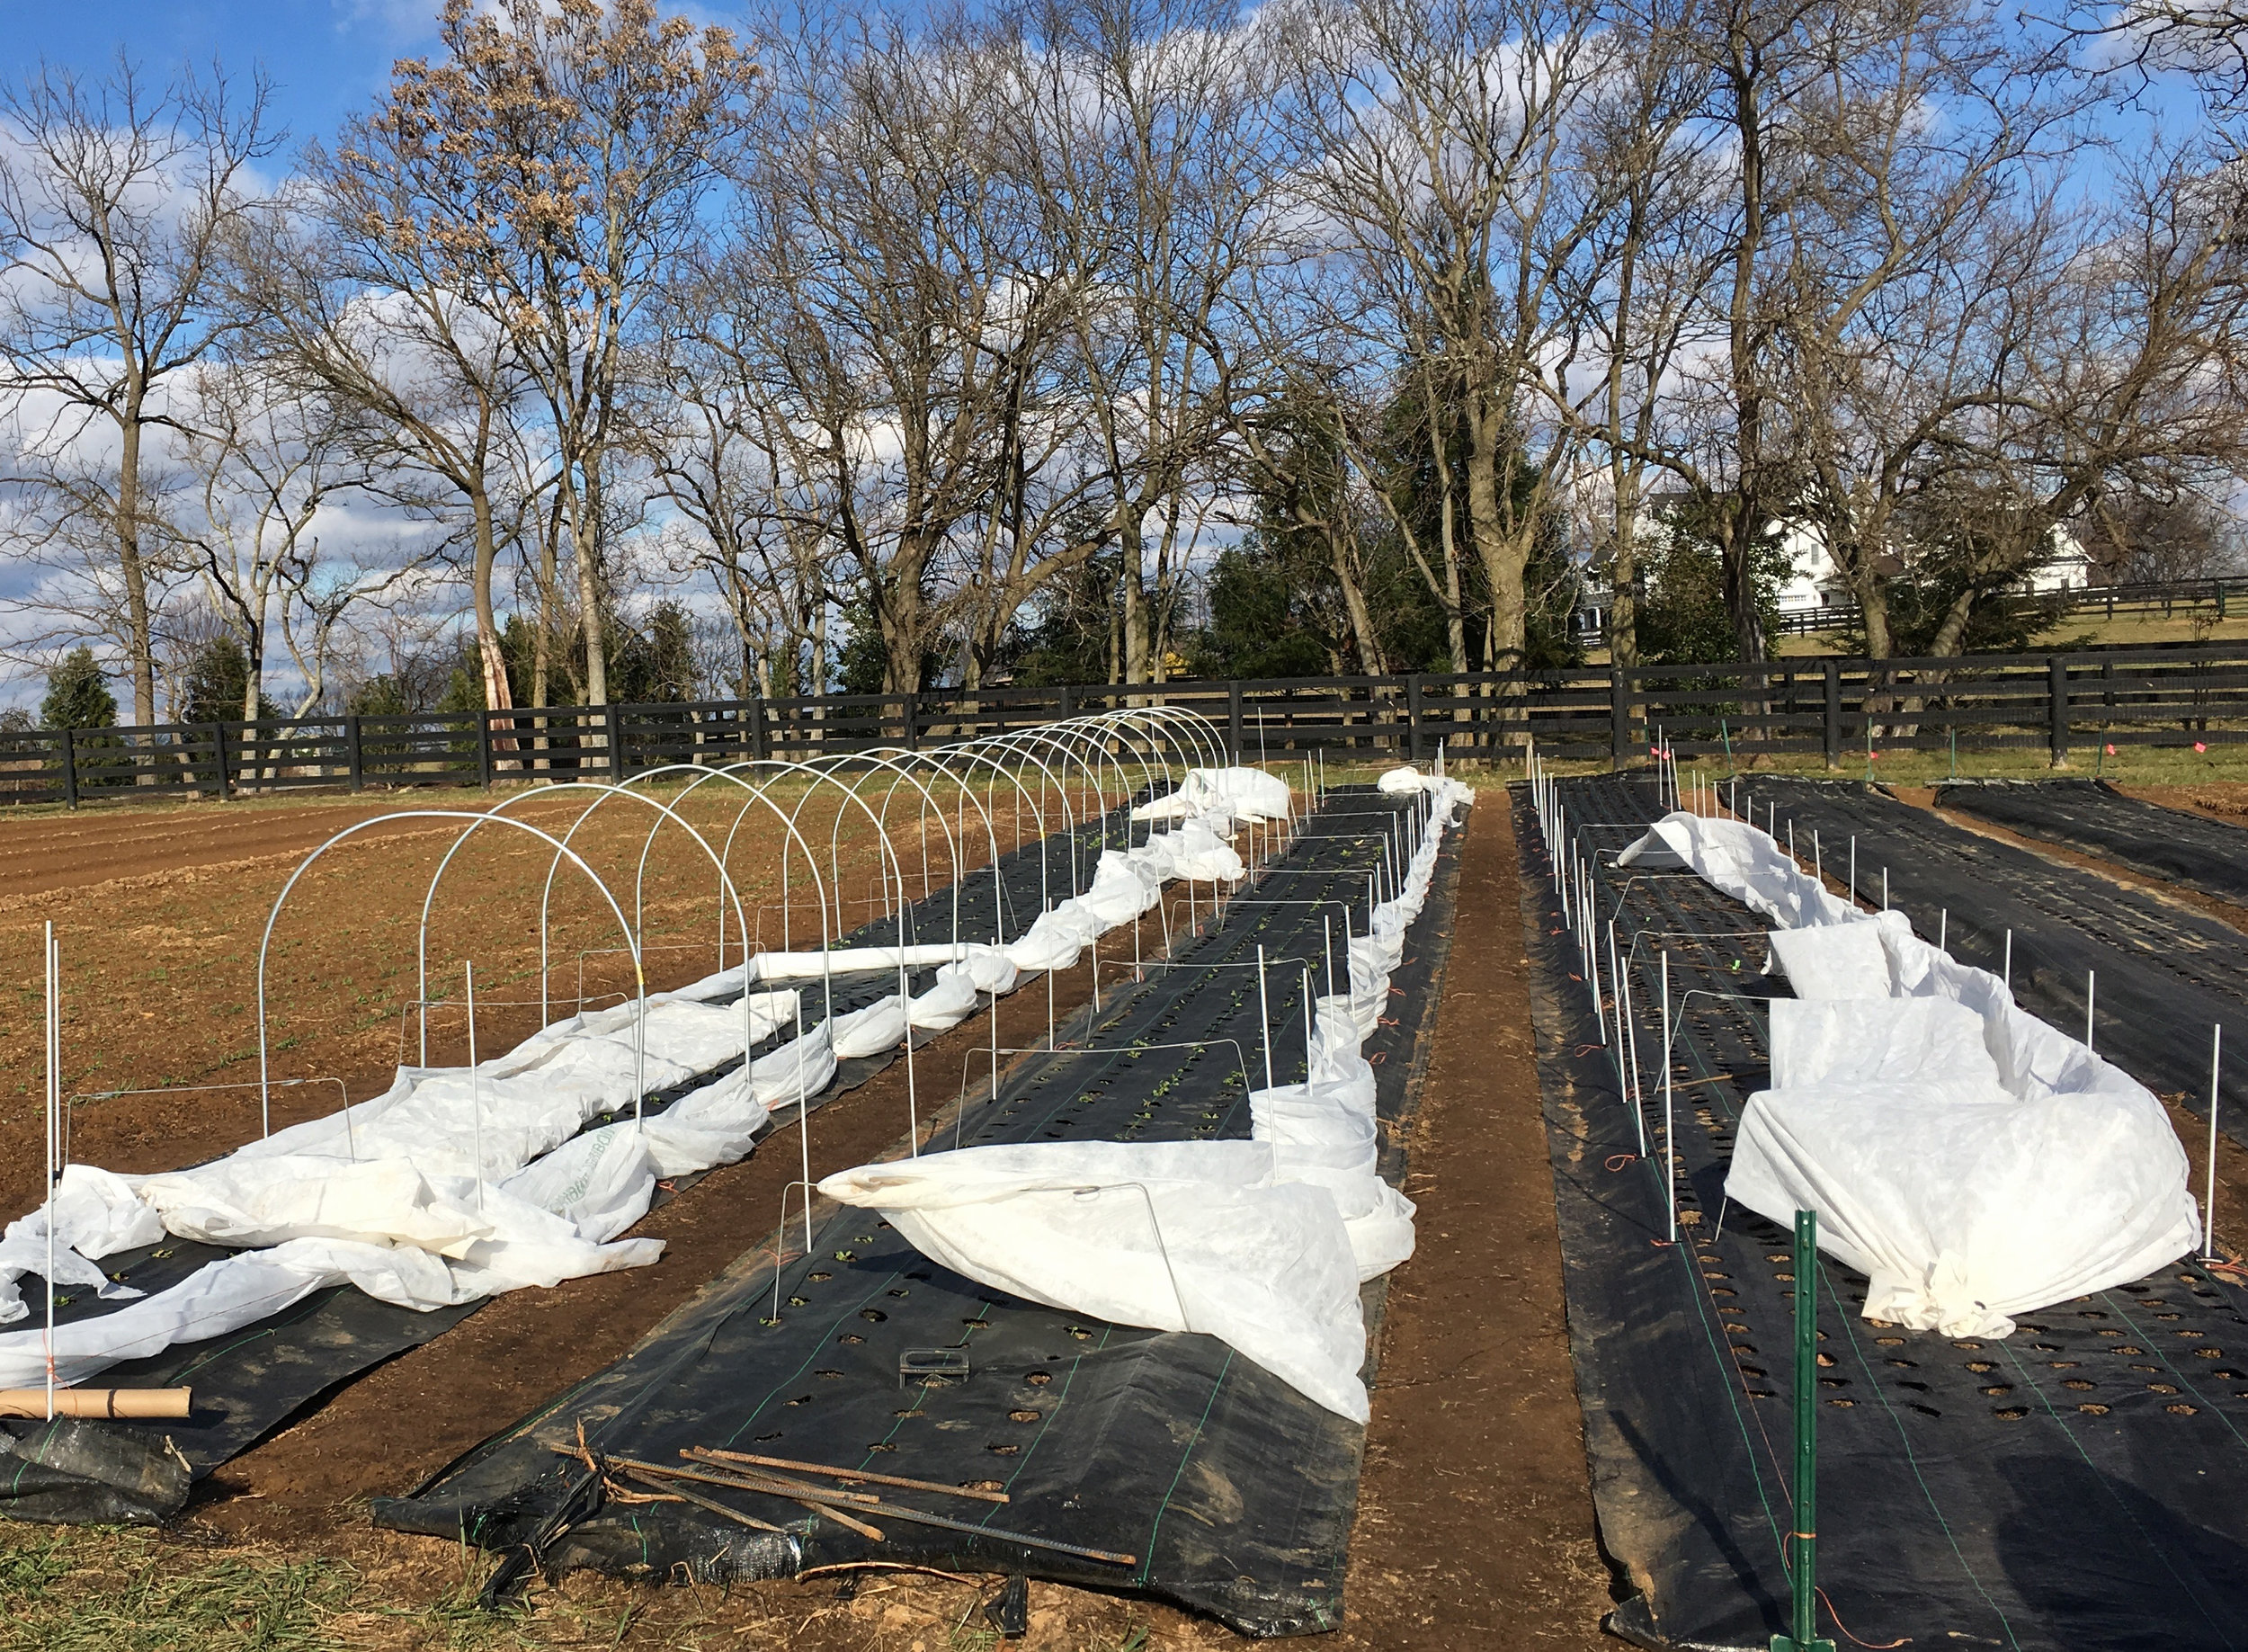
Stabilizing the center of the Low tunnel using ground anchors
Next, you’ll need to stabilize the center of your low tunnels.
Find the center hoop of the tunnel. At the base of each side of that hoop, pound a two foot long threaded rod into the ground at a slight outward angle. Follow Steps 2 and 3 from above to attach an eye bolt. You will use these ground anchors to secure the plastic to the tunnel using baling twine, as per the Bare Mountain Farm instructions (Step 6 slide 22).
The ground anchors serve to anchor the twine that molds the tunnel plastic to the underlying hoops (and which gives the caterpillar tunnels their name, since it creates the segmented appearance) directly into the ground, giving the tunnel even more stability.For longer tunnels (greater than 50 feet) you may want to add two additional sets of ground anchors at opposite ends of the tunnel. Otherwise, use the Bare Mountain Farm method, which uses twine loops, to secure the plastic to all of the other hoops with baling twine.
During periods of high winds, use additional sandbags along the length of the tunnel to keep the edges of the tunnel pinned to the ground as much as possible.
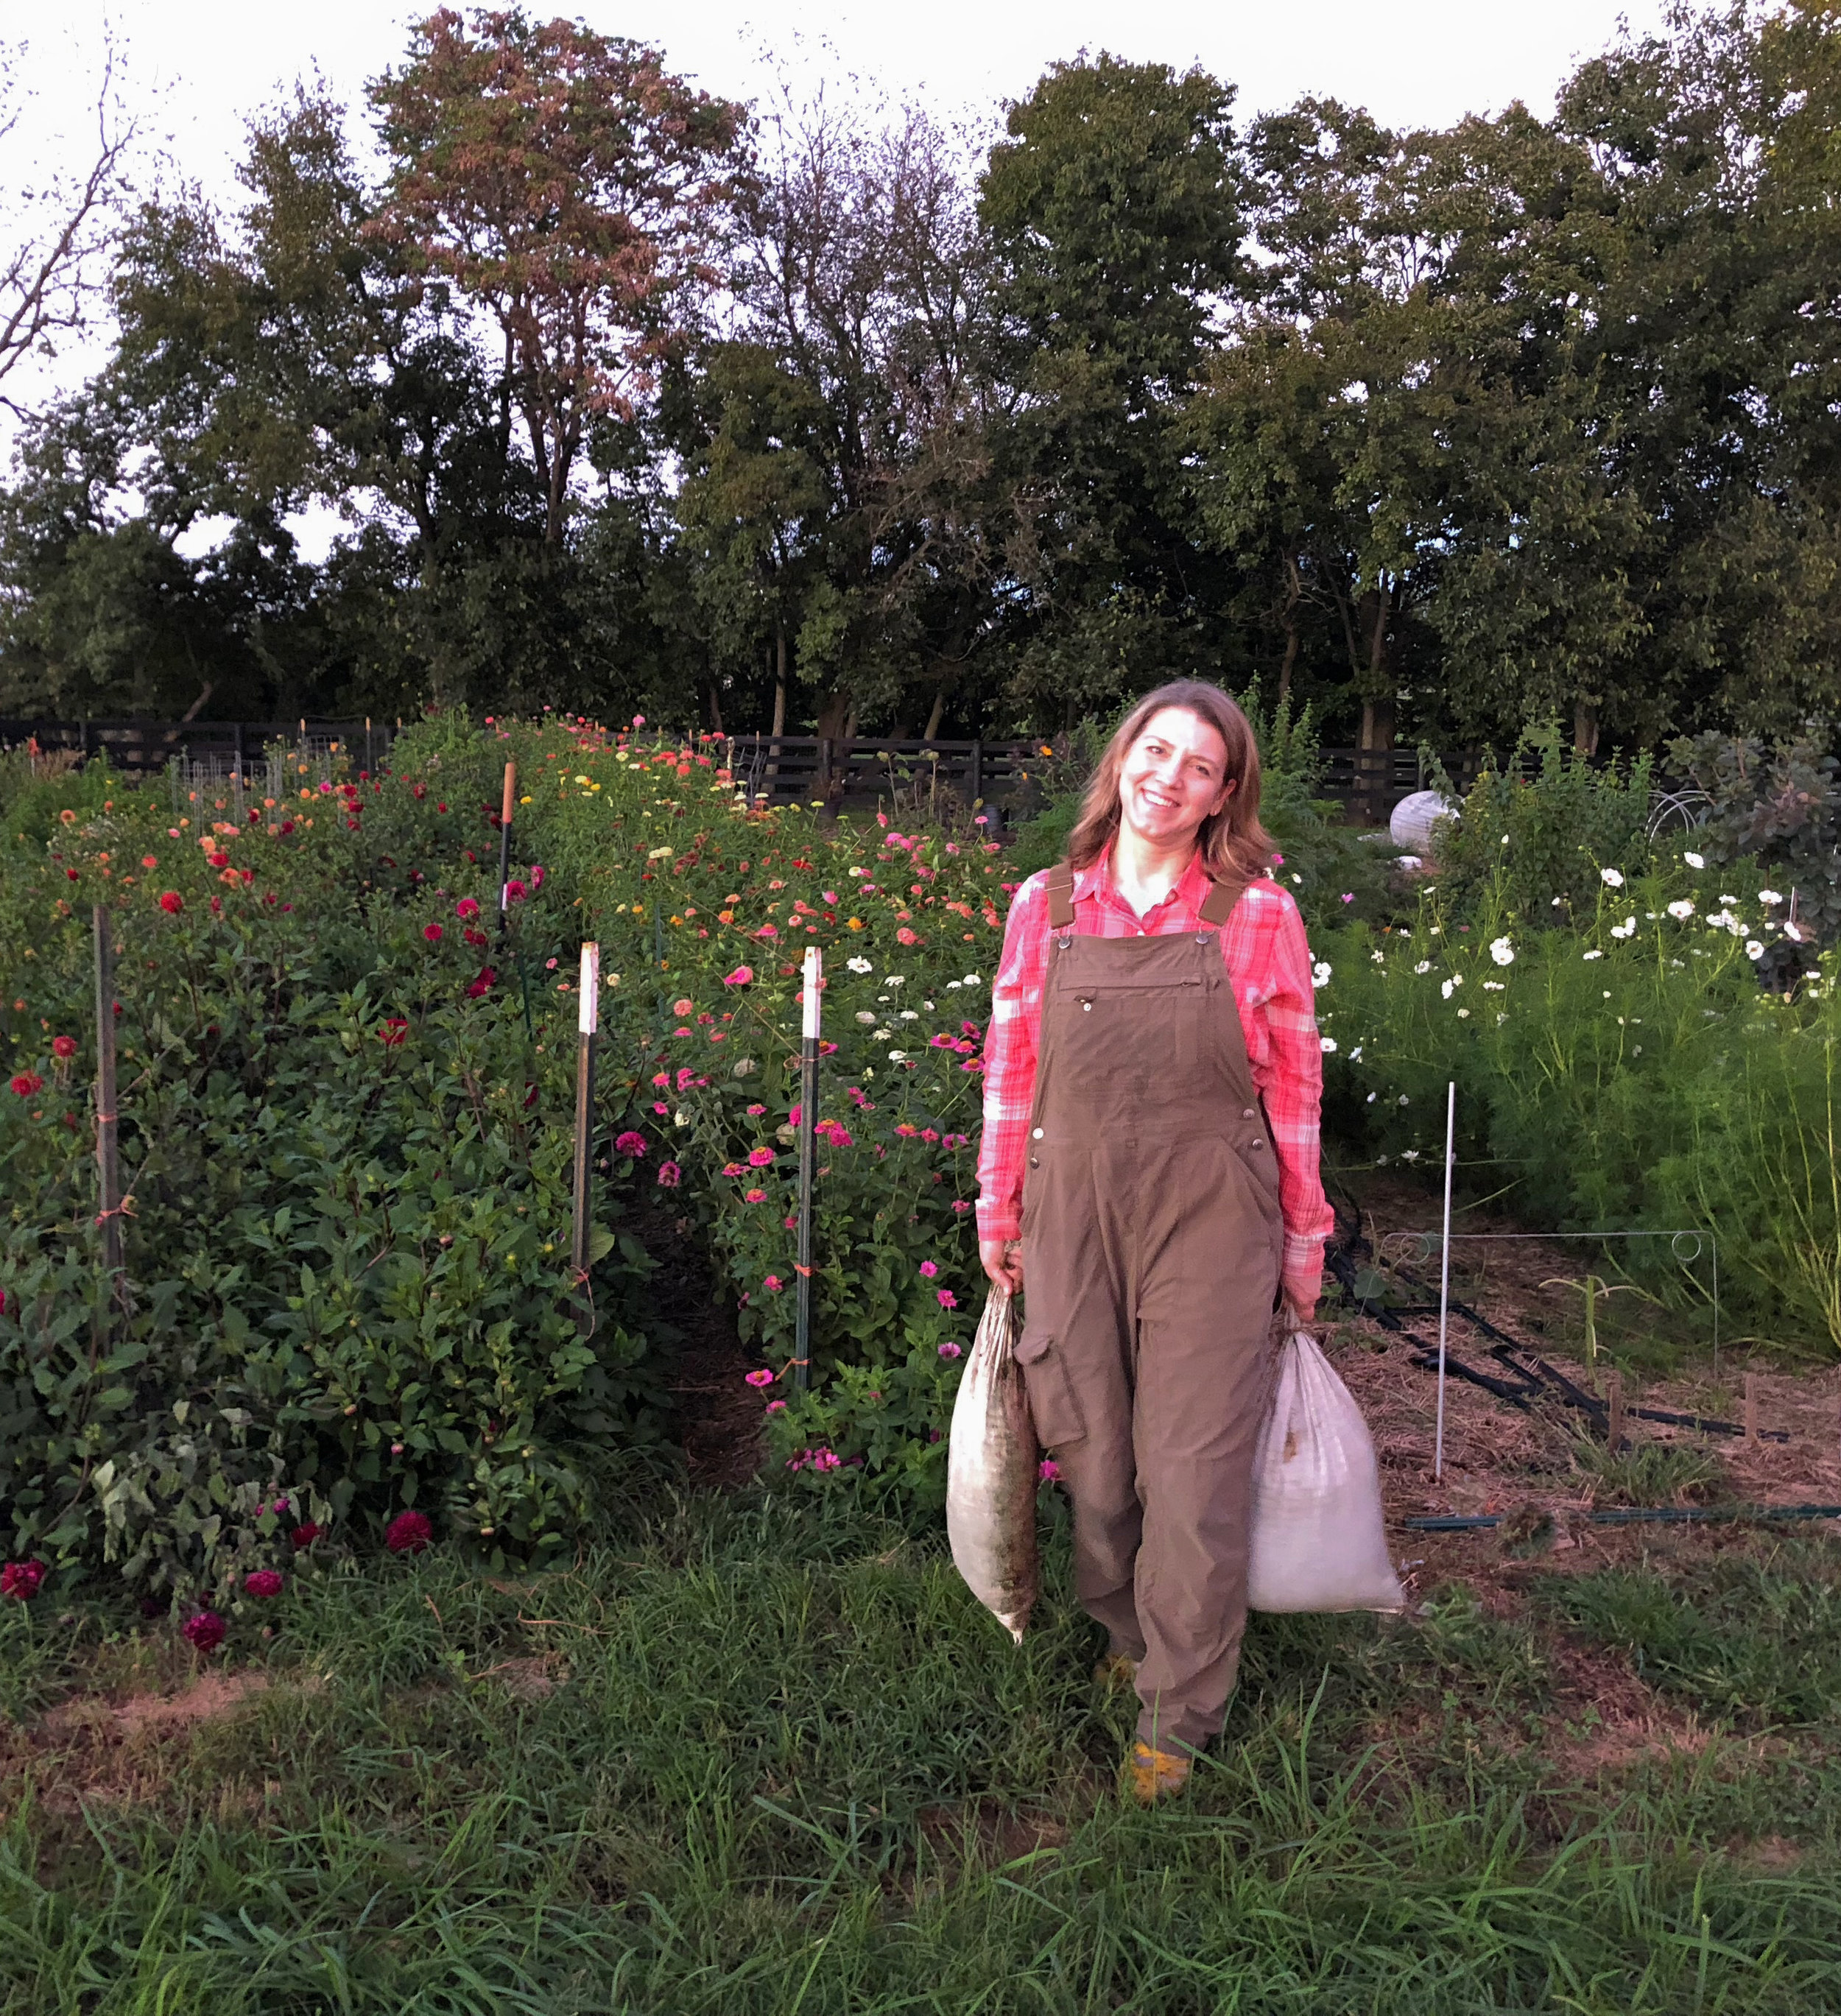
Farmer Sharon Hays Using Sandbags
Sandbags: low-tech but indispensable for Caterpillar Tunnels
For my 90-foot tunnels, I typically use five sandbags on each end of the tunnel, and four sandbags on each side, for a total of 18 sandbags for each tunnel. (Yes, that’s a lot!)
You may not need that many sandbags—it just depends on the wind your tunnels experience—but the weight they add to the ends and sides of the tunnel is critical. Without them, the strain placed on the other elements of the system (the baling twine, the buried rods, etc.) is significantly greater, increasing the odds of structural failure. Sandbags are a significant element of the strategy for enabling the tunnels to withstand strong winds.
Low Tunnel placement: a sheltered site is ideal
Part of your strategy for keeping your tunnels secure under harsh conditions should include consideration of where you put them (ideally in a more protected area than mine are!).
“If you’re stuck with tunnels in a highly exposed area, consider planting a windbreak.”
If, like me, you’re stuck with tunnels in a highly exposed area, consider planting a windbreak. I planted a row of perennial shrubs on the windward side of my tunnels.
As they grow, they’ll provide more and more of a windscreen. Whatever you do, don’t erect a solid barrier! It just creates turbulence on the other side of the barrier, which can be even more destructive than the winds that the wall blocks.
Caterpillar Tunnels that can stand up to snow
Making your tunnels secure from heavy snowfall is a three-fold process.
First, the tunnel hoops need to be constructed with metal conduit, not PVC.
Second, the hoops need to be spaced close enough together (I use four-foot spacing).
And third, the tunnel plastic needs to be pulled tight. The end assemblies and sandbags described above will help ensure your tunnel’s plastic is quite taut.
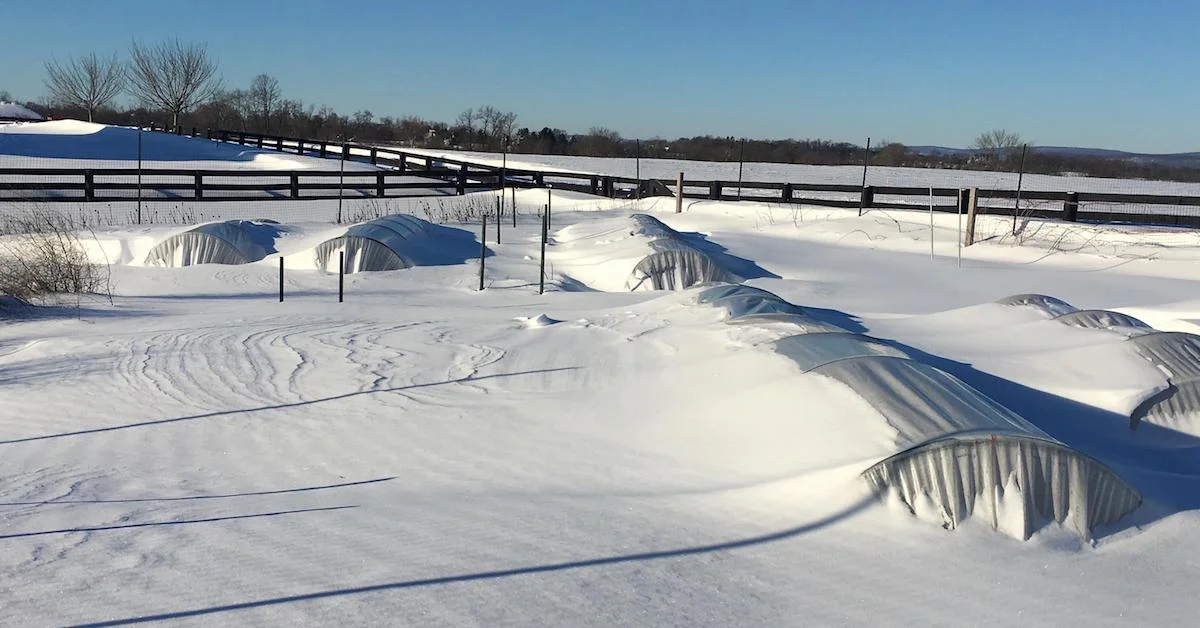
Even so, I try to brush the snow from atop my tunnels when it gets more than a couple inches thick—especially if the snow is particularly wet and heavy. My tunnels have held up to snow that drifted high enough almost completely to bury them.
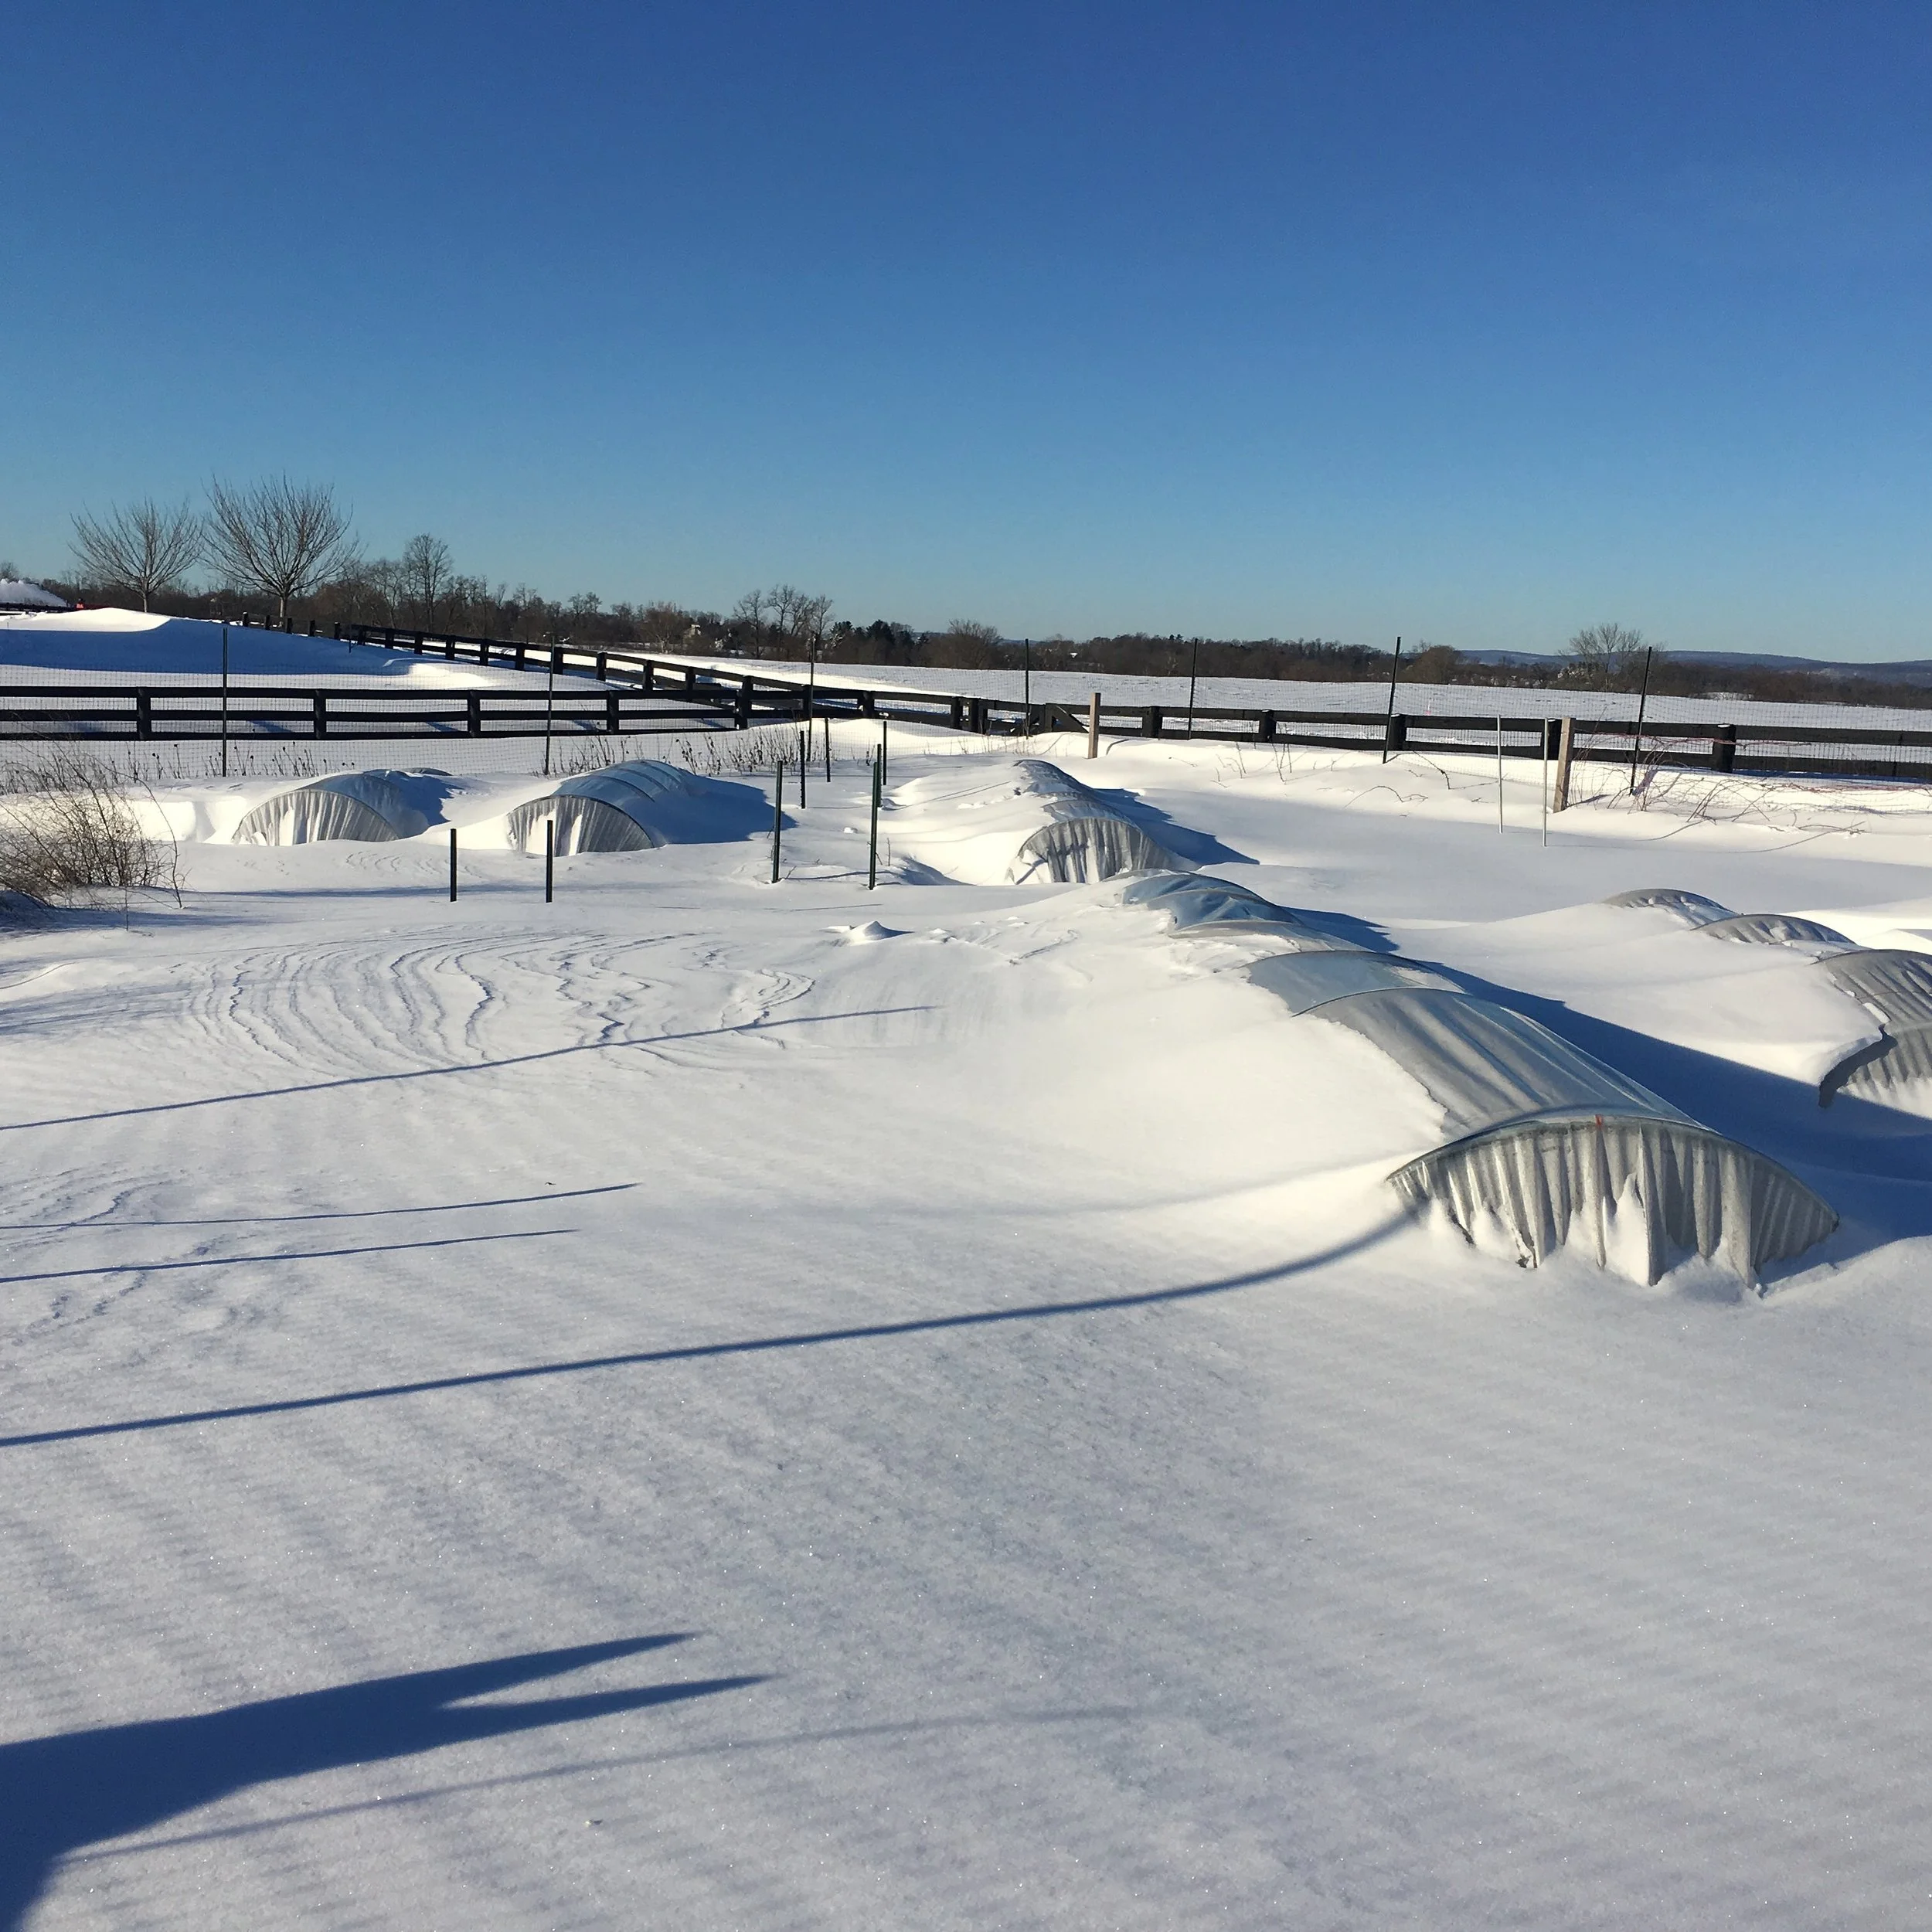
Caterpillar tunnels covered in snow
With these caterpillar tunnel modifications, you should be able to keep your tunnels intact even during powerful winter storms. The benefits include beautiful, high-value flowers in early spring (or even in winter!) and a lot less time spent worrying about your tunnels.