All in Videos

Video: Create Cocktail Table Centerpieces with One Ingredient

Can you really make a beautiful cocktail accent arrangement using only ONE ingredient? Kelly shows you how in this short tutorial! She demonstrates how to maximize both budget and style by purposefully placing every stem, leaf, and bloom, bringing the principles of design to life in this sweet piece. Knowing how to make an impact with a small amount of blooms is a great way to add value to your client's wedding designs.

Video: How to Win at Revenue Streams

In this excerpt from the Team Flower Sustainable Business Growth class, Kelly shares tips on how to be successful when choosing revenue streams. Using a simple and easy-to-use chart, Kelly breaks down how to determine when to say, “yes” and when to say, “no” in order to prevent burnout and encourage profit.

Video: Design Foundations of a Wedding Centerpiece

What are the three levels of an arrangement, and why should we be thinking about them as we design? In this video, Kelly walks you through the design principles of balance, shape, and rest and how she used them to guide every piece she creates. These three principles are the building blocks that lead to efficiency, balance, and freedom in design!

Video: Floral Design Mechanics for a Long Table Centerpiece

I took some supplies you would find at your local hardware store and made a beautiful 8 foot long centerpiece. In this arrangement you'll find bunny grass, yarrow, love in a puff vine, tiny hands (Japanese foliage), standard peonies, and much, much more! You can create a long table centerpiece following these simple step-by-step floral design mechanics. Watch this video for a quick how-to.

Transcript

Hi, it's Kelly with Team Flower. I wanted to pop in and show you the mechanics behind this table runner that we've created for a styled shoot recently. It's driven with me all the way back from Atlanta. It's still in one piece. It's looking a little tired. But I still wanted to bring it on and talk about it for just a minute, because I thought it might help you with a future project that you're working on.

So what we have here-- I'm always trying out new mechanics for how I can-- different materials that I can use and ways that I can put things like this together. So you may have seen another video where I did something similar to this, where we used garland and oasis. And we had a little system for working like a floral garland that way.

Well, this is actually, underneath-- I'm going to flip it up so you can take a quick peek. This is a piece of molding for a house. And Jessie, if you can get a little close up right here, you'll see underneath I have oasis bricks lined with a little bit of chicken wire under here. So that is there. And then I have just connected it with tape the whole way down.

So I'm going to pull one little section of this apart so you can see underneath. Is this a good section, Jessie? OK. So I'm going to pull these little guys out of here. And then I'll just tell you what's in here, too, in case if you see an ingredient that you like for a project you've got coming up.

These flowers came from Cut Flower in Atlanta. Really loved shopping their cooler. Alex helped me with my order that day and was super friendly.

So if you're looking for a source in that area, you have a project coming out, I highly recommend them. Beautiful cooler, one of the best coolers I've ever walked through. So Cut Flower Atlanta for these materials.

But you can see here-- can you see that, Jessie? What I've done is I've taken one piece of oasis and I've cut it into four pieces, but lengthwise. So it's nice little skinny pieces. They fit into this piece of molding from Lowe's hardware perfectly.

And then the little cup shape of the molding, you can see it just has a little dip here. That catches all the little bits of water under the oasis. So whenever we put this together, I could just tip the water off the edge.

And that kept it easy for traveling in the car. I didn't have water in my car. And whenever we set it onto the eight foot table with the linens and everything, it stayed nice and clean and dry. So I was really happy with how this piece performed. I liked it a lot.

I put just this little bit of chicken wire over here. I like to do that with oasis. Just in case, if you're repositioning stems quite a bit, sometimes it can break on you or just pop off. And so I just have just a little piece over the top of it to keep it all together.

This does take two people to move. It's eight feet in length. If you just have one person that was moving things, I'd recommend just snipping in half and doing four foot sections and working those together. But I loved the convenience.

If you just have a buddy going with you, you can just grab here and here. And they can grab there and there. Fits perfectly into the back of one of the U-Haul cargo vans. Or I have a Sienna minivan that it fits straight up to the front whenever you take all of the seats out or fold them down, however your car works.

In terms of ingredients in this piece, this is for like the blushy fall bride. I really love this palette a lot. I have some yarrow in here that I used low for coverage of the oasis. And I also brought a little bit of it out higher for some texture in the arrangement.

I have a little bit of bunny grass in here. It's what it was labeled as. It's a little bit different than the bunny grass I typically get, so I'm not sure if that's actually-- I'm not sure.

I'm not completely convinced that's exactly what it is. But it might be just maybe a different variety of that. But some type of grass. I've also seen grass that looks similar to this called foxtail grass. So it might be that.

I have some like love in a puff foliage down here. This foliage here is called tiny hands. It's from Japan. I have, of course, these big pretty peonies, spray roses.

A couple of these little-- I think this is-- I want to say this is cappuccino. They were unlabeled. But I have seen something very similar to this labeled and cappuccino is what it was called. So that's what I'm thinking for that.

These are beautiful tree peonies. These are from Japan as well. So peonies are now becoming available more year around. The tree peonies less frequent than your standard ones here.

But it's so interesting. They're coming just from different parts of the world throughout all of the growing seasons. And with shipping and just the logistics that they have available to them now, we're able to see and have these different things that are happening in different parts of the world, which is fun.

So we've got that. I have some of these pretty ranunculus scabiosa. Have a couple little acorns here. And I think I got almost-- I think got it all-- oh, bay leaves. That's what we used for our base coverage there.

So I'm back with my list. I forgot a couple of things, so I wanted Jessie to add this in at the end. But I missed this ingredient here, just pretty, blushy, real deep, and again nice texture and coverage low. And I'm going to spell it for you H-E-P-T-A-C-O-D-I-U-M, $9.50.

I also missed the amaranthe that I had pulled out. So this is the rose amaranthe. It's pretty. A lot of local growers have this now. So it's something that you can check around with if you're in an area where you have a couple local growers.

And then this leptopods-- they're very small, hard. They almost don't look real in a way. And I'm sure they would dry really well. But, yeah, little leptopods.

And these are porcelina. These and these came from Mayesh in Charlotte on the way down. So I picked those up along the way. And I think that handles all of it. Ranunculus are from Chile, in case you're interested. Yeah, that's all.

OK, just wanted to make sure you have this. Thanks, so much, for popping in. I hope that this inspires you for one of the projects, and maybe just makes your burden a little bit lighter. Thanks, so much, for watching. Have a great day.

Video: How to Prune a Limelight Hydrangea

In this video you'll learn how to quickly prune limelight hydrangeas for optimal health, get quick pruning tips, and discover what supplies are needed. Learn the pruning method to get the best bloom yield!

------------------------

Video transcript:

Today, I'm going to show you how to prune a limelight hydrangea bush. It's springtime here in Boone and limelight hydrangeas bloom on new growth. So that means that I can leave the flower heads on them all winter long and have that nice winter interest in my garden, and then I can go ahead and prune in the springtime because it's not going to affect the buds. There aren't any buds on this bush yet. So what I'm going to do is three steps, I'm going to trim the bush down, and that is going to help me have uniform sizing. It's also going to create a nice, sturdy base for all of these big blooms to come out and away from. The next thing I'm going to do is thin out some of the stragglers, the ones that aren't quite as strong, that won't support the blooms quite as well as some of the sturdier branches. Now, as I'm doing that, it means that I'm going to get less blooms but I'm going to get a higher quality bloom, I'm going to get a bigger bloom. So that's why I'm going in and clipping out some of those side shoots. Then, I'm going to clip anything that's crossing over one another. So that, kind of, crowding that happens, I want all of my branches to have some elbow room, I want them to have space for water to drip down and through, I don't want them growing all in and around each other. So I'm going to thin and trim in that area as well. To get started here today, I have a pair of pruners. And the important thing with pruning is to make sure that your clippers are very clean before you get started because you're basically doing plant surgery, right? So I have a Chlorox solution that I'm dipping my clippers in and just sanitizing and cleaning them off. The first step is measuring to 18 inches, that's what I've chosen for where I'm going to do my cuts on this particular bush due to its size. So I'm going to go ahead and measure to 18 and then I'm going to clip on an angle. Just like this, so this keeps the water from sitting in there and the water just can run off the sides. And I'm going to continue doing this using that as a general guide. And as I clip, I'm looking for these little areas of three. These two types of hydrangea, the limelights and the pink diamond, bloom on new growth. It's very important to know the distinction between the different types of hydrangeas because some bloom on woody growth. So this type of pruning would affect the bloom for you if it was another variety of hydrangea. So I'm going to continue doing this the whole way around. Now, what we've just done is created a strong base for the new growth to come up and out on. Now, we're at a point here where you have to make a decision. Do you want bigger blooms? Or do you want smaller blooms and more of them? If you want bigger blooms, it's important to go back down into the plant and to clip out some of these smaller, weaker stems. So that's what I'm going to do, I'm going to clip out some of these because these aren't really, these ones that are curved and wonky aren't really supporting... New growth that will come up. And I want to use strong stems like this that have a really great base, so I'm just going to cut some of these... out... Of the plant. But I'm not going to prune quite as hard as some people may who are searching for bigger flowers because in design work for me, unless I'm doing a really large scale piece, really giant limelight hydrangea blooms, they're kind of giant, even the small ones are a little bit giant. So I would prefer to have more blooms and less of them. But right now I'm just going to get rid of these smaller stems that aren't going to be a big support for the plant. The other thing I'm paying close attention to is some of these stems that are inner-locking. I want them to have a little bit of room, so I'm going to trim out any that are crossing over each other. Thanks so much for tuning in. I'm looking forward to seeing your nice, healthy, strong hydrangea bushes.

Video: Encouragement for Starting Flower Seeds

In this video, Kathleen Murphy of Primrose Hill Flower Company joins Kelly to share a few tips for new flower growers. Whether you are starting a small cut garden or a large flower farm, her advice is practical, useful, and encouraging.

————————

Video transcript:

- - Kathleen if you could tell somebody who's brand new to gardening something, what would it be? - Well first of all, you're so fortunate because you're starting out on a journey that is just, I just love flowers and I know you're going to as well and it's just such a great journey. But what I would tell you, my best advice would be, again to start small, to stick to the methods we talked about, to build upon successes, don't jump in to a huge amount of work and things that are going to overwhelm you. Choose that core group of flowers that are easy to grow and really get to know them and know the process. If you can become successful at that the possibilities are endless, the different garden styles that you can do and just everything builds from that core and you'll be a huge success and you'll really enjoy it. - I love that. Keep it simple. - Keep it simple. - Everybody. Keep it simple when you're starting. And what would you tell someone who has maybe tried sewing seeds before or has tried gardening and has just really felt like that they weren't successful at it, that it's not something that they can do or that they're good at. How would you-- - I would say, don't despair, try it again, try it this way. I feel in a way that this part of this industry maybe sets you up for failure. We see these beautiful photos and we get the seed packet, and there really isn't a lot of direction as to how to successfully get from this seed to this beautiful photo that you're seeing. So people have really become discouraged and they don't have the process. They don't know how, the correct watering method, the lighting situation, what we have talked about or what we do talk about in this class, will just, it will enable you to successfully learn how to grow a healthy strong plant and again it all comes back to strong plants equals success, and you can definitely do this. You really can. It's totally possible. So don't despair, and try it again, and try it this way. And you will be successful. And don't give up. I've been doing this 30 years and there are still varieties that I just can't, my Lady's Mantle, I'll have years that a ton of them pop up that can germinate and I had a year, this year I had two, and I think, what did I do wrong? But it makes it challenging. I'm going to try that again next year so don't give up. - Right. - Don't give up.

Fast Flower Video: Using the Iris Flower for Arranging

In this video, Kelly creates an arrangement step-by-step in this video. As you watch, pay close attention to how the colors compliment one another. Can you find the common color between each of flowers? Each one highlights the other as they work together to create a beautiful arrangement that draws the eye from one ingredient to another. Learning to understand the principles of color in an arrangement will take you one step further in your floral design.

Video: How to Stake Dahlias

In this video, Linda Doan, Specialty Cut Flower Grower from Aunt Willies Wildflowers in East Tennessee shows you how she cares for 700 dahlias, a backbone in her wedding-based growing business. Cutting and staking dahlias easily is a priority for Linda and her husband Roy and this is a quick peek inside how they do it. You can modify this double-row staking technique for other farm and garden flowers.

————————

Transcript:

Hello Team Flower, my name is Linda Doan. I own Aunt Lily's Wildflowers here in east Tennessee, and I'm about to tell you all you need to know about netting dahlias. Okay, this is our dahlia set up, and the supplies that you need are T posts, which are heavy duty posts. We drive in with a post hole driver, where we just pound it on the post hole, and down in the post, and we have these. These are actually tobacco stakes. We have this Hortanova or tenax netting that you can Google online or you can find it at Nolts, N O L T S. It has six inch squares and we separate it with this tobacco stake at the end to keep it wide. We have a lower row and a higher row, and these dahlias, these are just starting to bloom and you can see they're already up through the second row, so when wind comes and blows, we don't have to worry. They come up through the first row, through the second row of netting, and will not topple. We will deep cut them or they might even topple. We've had 'em get so big that they'll topple two rows of netting, so we try to keep 'em at a workable length, but a very good system when you have 700 dahlias in the ground, you don't want to have to be staking each one. This allows you to mass stake and does it very well and allows you to cut very easily.

Video: Harvesting Flowers from a Cut Flower Garden

Correctly harvesting flowers from your cut flower garden or farm is crucial to prolong their life, for both hobby floral design work at home and commercial cut flower sales. Kathleen Murphy of Primrose Hill Flower Company joins Kelly of Team Flower to discuss the best practices for Harvesting. Watch this helpful video lesson to learn more.

Video: Growing Flowers for Profit

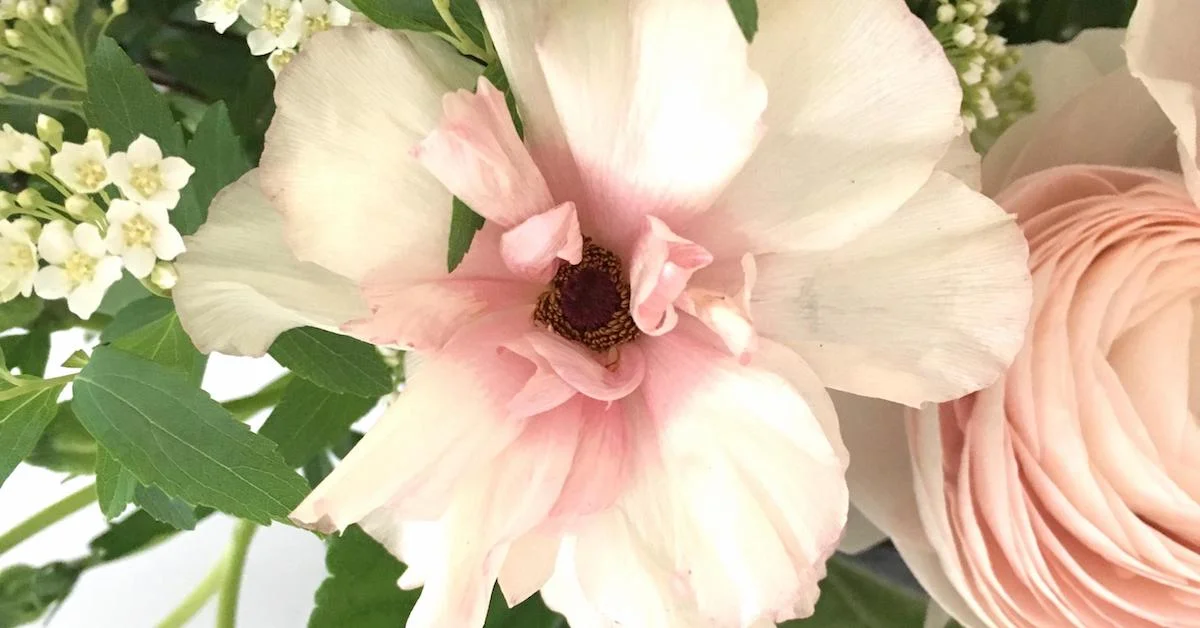
In this video, Kelly visits Pressly Williams at her flower farm in North Carolina, Renfrow Farms. Pressly gives a tour of her farm and shares advice to new growers. She's unearthing her secret ingredient in growing flowers, and talking about her experience with growing flowers from seed as well as growing flowers from plugs.

————————

Video transcript:

- - Hey, it's Kelly here with Team Flower. I'm here with my friend Pressly Williams of Renfrow Flower Farm. And we're here in Matthews, North Carolina. Pressly, tell us a little bit about the farm and what was here before and just a little bit about you and your story. - Okay, so this property that we're on is about nine acres and it used to be a farm back in the early 1900's when Matthews was kind of first growing as a little, teeny weeny town out in the outskirts of Charlotte. And the Renfrow family, which is what our farm is named after, lived here and every one of these houses along here had deep lots with big gardens, so this was a big garden, or a small farm, or whatever you want to call it. And then they owned a hardware store in the downtown strip of Matthews, which my family now owns, but come to the mid-1900's-- - So, not your family but, kind of caring on the name. - No, exactly. - And all that. Okay, great. - So, the Renfrow family died out. There was no one left of them in their direct line, so my dad bought the business from the last one in the 80's. And so come to the 1940's or so, this land had grown up, it was all in trees and when we got the land in 2010, we decided to turn it back into a farm. When the last member of the Renfrow's passed away, he left this property to the hardware store, which is what my dad owns and where I work. So, I work both here and there. - And that's just right down the road. - Yep, walking distance right down here. And so we do a whole lot of gardening, so I knew I wanted to be gardener, always, we had a big garden at my parent's house and I was not interested in flowers at all when I started this farm, but got into it when I designed my own flowers for my wedding. - Oh, okay, yeah. - Basically, we have just worked really hard to get this back to what it used to be, which was a farm, even with taking out the trees and doing the drainage and putting up a seven foot tall deer fence around the whole property 'cause there are a lot of deer here. - Yeah. - And yeah, so. - Yeah. - That's where we are now. It's year five. - Okay, that's awesome. So this did back in day used to be used for farming. Did you have to do a lot, once you got into it and you started liked digging in the soil, did you have to do a lot of amendments to it? Was the texture of the soil nice? What kind of nutrients did you need to put back into it? - Yeah, certain ones, we could tell had been farmed years and years ago, but it had been a long time. - How can you tell? - It was not just hard clay completely. - Okay. - So partly that and partly back in the back, we could still see the terracing that farms used to be naturally terraced around the property, so that-- - Now was that for water? - Drainage. - Drainage, okay. - So that it would not pool up and just, yeah for water stuff, so we could see that and the ground had just enough organic matter in it still, so what we do though is we use composted leaves, so a lot of this is composted leaves that we put on top of the soil and mix in and that is our secret weapon. - That's the secret ingredient. - Secret ingredient. - Yeah, it's so fun talking with all the different farmers that we've been interviewing. Everybody has their own special secret weapon. - And that's ours, free leaves from landscapers in the town that suck them up in different places and dump 'em in big piles at the back of the farm. And we let them rot down and mix them in. - Yeah. - And free compost. - Yeah, that's awesome. - So that would probably help keep down on some of the weeds like we were talking. - Weeds. - Mmhm. - Mmhm. - We were talking - It's a good - the other day about it - weed suppressant. Yeah, we do that, we mulch with it in the rows and in between the rows and then when we pull up the zinnias or something, then we'll till those leaves in - Those leaves in. - And so then they're as compost for the next year and then we just re-mulch the next year. - Yeah, that's awesome. And a lot of the things, now this, this area, we're just standing in one of four places. So, there's like another area over here and then across the road, there's like two more behind us, two big kind of larger fields. And most of them, they all look like they're in full sun. So, you've got a lot of plants in here that love to be in sun all the time. - Yes, yes. - Tell us a little bit though, we have had a very, hot year, lots of sun, very little rain. What are some things that you tried to grow this year that didn't go so well? - So, I did not know, just being my second year growing dahlias that they like a lot of water and not so much heat and we had almost no rain and we don't have a well here yet so we could not irrigate. It was just not something that I could do on city water very easily, or just the time it would take without having an irrigation system set up. It just was too much, so they have just now started blooming and here we are, early to mid-October, - It's like time for, yeah, frost is ready to hit. - they're almost finished. So that is one thing that needs a whole lot more water than I could supply. - Yeah, they love that swing between like warm and cool and kind of going back and forth and we just didn't have that, - We were - we didn't have that this year. - 95 plus every day for three months. - Was there anything like, vegetables included, that really thrived in that environment? - We had really good soil for tomatoes, so our tomatoes were wonderful this year and sunflowers have done really well, but there were even some vegetables that didn't like the heat. - Yeah. - Like green beans don't make when it's that hot. - Right. - So we just had plenty of losses, but plenty of successes as well to balance it out. - Yeah. - Yeah, that's good and tomatoes are your faves, so, - They're my favorite. - that was good, it would have been really sad if the tomatoes. - Yes, tomatoes are my favorite and my customer's favorite. - Yeah. - So, that's our biggest crop. - Yeah, tell everybody about your fun tomato day that you have here. - Yeah, once a year, in August, we will be hosting a tomato sandwich day where people come and we just provide the tomatoes and the white bread and both kinds of mayonnaise, so they don't have - Both kinds. - to choose between Duke's and Hellmann's. They get the choice, they don't have to just have one of them and we just let them make a sandwich and hang out on the farm. - Yeah. - We did the first one this year and people just loved it, so it's going to be our annual tradition from now on. - Yeah, that awesome and it's great way too that whenever there's people who want to come and visit the farm, but you have to, there's a lot of work to do on a farm. - Yes. - So, if you can kind of consolidate and make efficient the time that you get to spend with the customers and they get to actually come and experience what you do on a daily basis, it helps to keep your schedule clean so that you can keep moving through with all your things, - Exactly. - which is awesome. - Exactly. - I think that's such a super fun idea and who doesn't love a tomato and mayonnaise white bread sandwich? - Nobody doesn't. Yeah. - Yeah, that's fantastic. - We had some people who had never had one before. - Oh, really? - And it was their first experience. - Oh, wow. - It was great. - Yeah, I think they're great. Tomatoes are wonderful. You'll have to tell me a couple of varieties. I grew a couple this year, but mmm, I didn't like fall in love with the varieties that I had. - Oh, yeah. - So I need to pick some like, better varieties. - Okay, I can, I can help you with that. - You'll help me with that, cool. - Okay, what are some other things, What zone are we in? - This is kind of zone 7b, or 8a, I'm not totally sure which one it is, I think it has changed recently, but zone seven or eight. - Okay, seven or eight. - We typically have our last frost around tax day and then our first frost around Halloween, so that's a pretty long growing season. - Yeah, April through October, that's awesome. Are you, a lot of the things that you're growing, since you do have a longer growing season, you can probably start a lot more from seed than someone who's in like a more northern climate with a shorter growing season, so is most of what you have here things that you start from seed early in the spring or are you going to try to over winter anything this year? What are you, since you do have like a lighter winter, are you going to try to over winter anything? - Great question. So, so far everything I've done is pretty much been from seed, but excuse me, I am trying some plugs this fall and in the spring. I've realized some things from seed are just way too hard and may take, grow too slowly and are just not really worth the time. I'd rather pay to have all 200 of them come in a plug tray and all be ready - And they're all germinating - rather than having so few germinate. - Sure. - So, I'm definitely still learning the seed growing, but certain things like zinnias and stuff, I can direct seed those, I don't need a plug for them because they grow so fast, I can do four, five, or six plantings if I feel like it of zinnias. - Yeah. - So certain hot weather things are easy. - Tell me, tell me about that succession planting with the zinnias 'cause I've thought about that too. Would it be good to part way through, like pull some things out and redo - Yes. - 'cause I have just a very limited amount of space. - Yeah, so if you want to have more blooms. These were probably, I think these were my fourth or fifth planting right here. - Okay. - So my first three are already long gone. - Gone. - There's already broccoli heading up in the same spot where some of those were. - Oh, okay, okay. - So, I just, when they start, stop producing large enough quantity, I just mow 'em down and start over - Start over. - And then these are just here 'cause frost is coming and they look pretty and not really harvesting these specific ones any more much, - But don't want to get rid of those, just 'cause I'm about to not have flowers for the winter. - Yeah. They're there to, for the birds and-- - Yes. - The birds and the butterflies. - Yes. - Oh, that's awesome, so what's the latest date, if you want to do late planting of zinnias, like how close to that last frost date, can you do to actually have something that's worth? - I'd say probably 70 to 75 days. - Okay. - Typically, so these might have been early August, but yeah, I think you could do it all the way to mid-August, and last year we didn't really have a real frost until Thanksgiving so, totally depends on the year. - Yeah, got it. - That's awesome. - Well, it's obviously, it's fall here right now. What are some of the, what's your, are there anything, are there any like showstoppers for fall? Vegetables, fruits included, you can count them all. - Oh okay, so I've got them heirloom mums planted for the first time, so those are budding up. I've never grown them before, so those will be blooming soon. - Oh, fun. - There's a few back there and a whole lot in the next field, so those even if it frosts, I'll cover those and see, see how they do. - See how they do. - But, broccoli and collards are our two main vegetable crops. - Oh, okay. - People stand in line waiting for our brocolli and then there's several barbecue places in town that buy our collards in large quantities, so I can't grow enough of either of them. Not possible. - Yeah, that's awesome. What about in springtime? - So, I just got my anemones and ranunculus corms in, so I'm going to pre-sprout those and plant those within a month. And last year they started, some of them started blooming around Christmas, so that was a little early, 'cause it was so warm, but I'll be excited to grow them. - Yeah, well they come up super early, so whenever it's been like, it's kind of like exciting thing to go out there and see what you've got out there. Do you have any hellebores here? I know, that's more of like - Not yet. - a perennial kind of thing and it's a big investment to get started with those, but-- - I'm working towards those. My grandmother and my aunt have a bunch in their yard, so I do pick those and sell those, but I haven't made my shade garden here yet. - Okay. - I've got some spots laid out, but it's a matter of getting the time. - Yeah, of course. Mom and dad got some. It's been, it was right around the time, I want to say it's been about four years now, but mom and dad just got a couple of plants and it's been amazing to see how, once you get them in, they're very low maintenance and they really take off and you know, it takes a while for the seeds each year to germinate, but now they have lots and lots and lots and lots of babies. Yeah. - Yeah. - It's a big initial investment, but they do, they kind of do their thing. - It's worth it. - They don't take a whole lot of, they come up so early, like Christmas to January, depending on what zone you're in, - Yes, so fun. - so that's always fun. - I know. - And they last for so long throughout the spring, they still had them when I went up to visit in April. - Really? - Yeah. - Nice, yeah. - Yeah, so that's a fun plant. - They're on my, on my to-plant list, for sure. - On the wish list. - Yes. - Okay, what about summer? - Oh, sunflowers are probably-- - Your fave? - My fave. In a way, just because my customers get so excited about them. - That's one of those things that people just really, there's something nostalgic about it. I don't know if like grandma always had sunflowers or what, but it - I don't know what it is. - just makes people really happy. That's awesome. - So I like to grow a lot of different things, feverfew is one of my other favorites, but probably, the showstopper that gets people really excited are the sunflowers, even if mixed in with all sorts of other, other stuff. - Yeah. - That's awesome. Well, Pressly was telling me that she takes a lot of her, this building that you see just over here to our left, is a little farm stand that she has that's open just on Tuesday's, - Tuesday's. - So, she cuts, cuts, cuts, fills everything up and it runs, I mean just a really sweet space, runs like a store in there on Tuesday's. And then on the other days of the week, you said do you take some things up to the hardware store? - Up to the hardware store. Vegetables and flowers. - Yeah, that's awesome. And then she has some really awesome visitors coming to the farm here pretty soon, the big outdoor table, farm-to-table folks that travel all over. Do you know what it's called specifically? - Outstanding in the field. - Outstanding in the field. So they do farm-to-table dinners all over, so they one that's going to be happening here on Pressly's farm this fall, which is really fun, that we're excited about. - We're excited. - And she's going to supply them with all kinds of, probably, are collards on the menu? - Yes, they are. Collards and broccoli and tomatoes and a few other farm items. - Okay, fantastic, that's awesome. - I'm excited. - So, I had asked Pressly about maybe some things that she was over wintering, so we've popped over here to the black-eyed Susan patch and she's showing me some-- - Just various different black-eyed Susan Rudbeckia's, there's a whole row of 'em, they're really small still, but, you know, they'll make it through the winter without really much coverage and look pretty rough but in the spring, they will come back to life. - They'll kind of shed those leaves and come back. What is the earliest, you know, you over winter so you have an earlier bloom, right? - Mmhm. - So about when are you going to start seeing these bud up and produce? - That's a good question. I'm thinking early June. I'm not a hundred percent sure. - Yeah, 'cause usually this is kind of fall, late summer, fall, so now just - I'll be doing some more of these same ones in the spring, so that I have two different plantings to stagger the harvest. - So, then you've got it going all season long. That's awesome. Let's walk over and take a peak at the sweet peas as well. - Yeah. - So, yeah this is our cooler. We keep our flowers or things like our pomegranates in here. - Where are those coming from? - My parents have a few trees that made about 100 pounds of pomegranates. - Oh my goodness, that's awesome. - Oh these are so beautiful. What's the variety? - This is moulin rouge, which is one of my favorites. - Oh, guys, look at these. - This is really, like, this is really black. - Yeah, let's see. - And of course they're all a little bit different. Oh, okay, so branching - And that's one all. - Yeah, look at this one. How fun is that? Mmm, love it. Nice, thanks for saving those for us. Anyway, we're over here by the sweet peas. Both Pressly and I, was this your first year for trying sweet peas? - Yeah. - Yeah, it was my first year too, we both had a similar experience where we got a few awesome blooms that smelled so good that we were just like, yes more of this, but didn't quite have it, I didn't quite have it nailed down. - Oh no, me neither, that's okay. - So we're trying again, and so she's got these. - I have some teeny ones right here. - She's got the little babies in the ground and when I went to go see Linda the other day, she had hers in the ground too. And Pressly has them growing, this is called cattle fencing over from the hardware store, so she was telling me that they had them, the smaller holes are for goats, and you know all those kinds of things, so us girls that didn't grow up anywhere near a farm are like, we just need this metal stuff It has squares, so it's really helpful to know that it's called cattle fencing. That's what she has everything growing up, and then just attached to the zip ties here, I had an arbor that I had up this year that they were growing up, and I just took, I was trying to just use stuff that I had you know, so I had chicken wire from all of the weddings, so I just ran chickenwire the whole way up, and I was attaching them to that. But I think this would work so much better, because you just have a lot more spaces, with sweet peas you really have to keep on, they don't naturally really want to attach to this in the same way that other vines do, you kind of have to like. - Weave them in a little bit. - Coax them in, but they really do need a place to climb, but cup and saucer vine, have you ever seen that? - I haven't seen that. - Oh it's so pretty, it reminds me of this that you have going on over there, but it has real sticky fingers, but the sweet peas don't have that quite as much. Anyway that's our little tidbit about sweet peas, we're trying again. - Yeah try again, who knows. - Okay we are back, Pressly is going to show was her, the dismal dahlia patch she called it, the dismal dahlia patch. - Yes I don't know how to grow everything yet, as is obvious by my fairly short and very slow blooming dahlias. - Yeah it was a real hard year to try and figure it out for sure. - There's a lot of beautiful new weave growth on them now that we have gotten cooler temperatures and rain in the past three weeks, but before that they sat there without changing size for about three months, and I didn't have a way to water them, so I just had to let them-- - Had to let them go. - So next year, trying again. - So mine are coming, but I water them a lot, I water them a lot. - I can't, I don't have time or resources. - You don't have it up here yet, no, no. Well she has them all, like at the other form that we visited, she has the conduit types with the re-bar underneath, and so a precautionary measure, well not a precautionary measure, but a purposeful measure, whenever it frosts, to see if we can get something out of the dahlia patch, - Yeah I'll let them out a little longer and cover them with plastic. - See how the weather shapes up in a month or two. - And I'll end up putting early spring bloomers in this spot, I will dig the dahlia and put them in a new spot next year, and put my anemones and ranunculus here later this fall. - Yeah awesome, Let's see, I wanted to know, what advice would you give to somebody who is kind of starting out new to growing, like what's the most important thing? - Okay to start slow and small would probably be what I would recommend, if you're not a fulltime farmer, and able to just mix the flour crops into your regular job, it's hard to come home from a 40 hour work week and be able to attend a field this size, so I would say if you're looking to start into flour farming to just start small and grow a few rows of something, or a small patch of sunflowers, and a few zinnias and just start with the annuals because those are the cheaper seeds-- - Right to see if you like it. - Smaller investment, see if you like what they do, and just build on that, rather than getting in way over your head and buying all the expensive tulip bulbs and all sorts of stuff that you're not able to justify yet. - Yeah and I feel like plants take a while to get to know them, like when we started planting the garden at home, now that first year, I knew I wasn't in tune enough with them to know that they were maybe planted in a place that had too much sun and not enough water, and then once you know to get to know your plants a little bit more, they start to tell you things, like hey mom over here, I need to move, and plants can't move themselves, especially like I have a lot of perennials, so once they're in there there really in there, and it was so interesting to me how this year I could kind of start to know them a little bit more, so starting small with a low investment, that you can just really start to observe things, like we visited a place where the soil was more alkaline in a particular area, that's not something that I would notice my first year in, but after you kind of do it for a while, you start to notice things, so you can become smarter with your choices, and smarter with growing things that are very well suited for where you are, you might see some really beautiful flower that you're just like I really want to have that, but if it's not well suited for where you are, it's going to be a frustrating process, and their is really, they are truly, in all the different places, there are really special localized things. - You can grow something special everywhere, don't be afraid to mess up, because you will mess up and have failures, and just learn from them, don't be discouraged. - I love making mistakes, I don't like making them more than once. - No but I learn well when I make one. - Yes exactly, me too, I love that. Well is there anything, Pressly next year, she's expanding a little bit more on the flower front, and she's selling to designers more next year, which I'm really excited about, any plans for, I know you've got your sweet peas over here, which designers are going to love those to be able to have, because when we grow, or when we have the sweet peas that come in that are cut from wholesale in a box or whatever, you will get the long stems, particularly when they come from Japan, that's really high tide sweet pea season for somebody like me, but what's so beautiful, and what I love so much about whenever I had my little sweet pea patch, is that you had the whole vine with it, and the scent, and just the whole experience, it was just so nice. So that's something that I'm really excited about for you and for the designers who live nearby. So anything else that you have going on that you would like to share with the viewers? - Just growing a lot of new things, I'm always adding new varieties to the list, and at least doubling the quantity every year so far. - Just double, double, double, double until you get to your optimum size. - Yeah till I've decided I've had enough, max out at a certain point but I'm not there yet. - Yeah that's good, so your website is renfrow-- - R-E-N-F-R-O-W farms, with an S, .com. - .com, okay perfect, so we'll follow along, and do you have little Instagram handle or something? - Yeah it's @Renfrowfarms. - @Renfrowfarms, okay perfect so you can follow along with Pressly's growing adventures. So all right, thank you.

Video: Create a Real Flower Necklace Using Hyacinths

In this video Kelly shows how to make necklace of flowers with a needle and thread. Use this foundational floral design skill to create beyond the necklace — floral installations, flower chains for fashion, chair backs, and more are possible.

———————

Transcript:

- In this video, we're going to create a little hyacinth necklace that would be really fantastic to use as a little flower girls piece, or you could have chains that the girls are holding, backs of bride and groom chairs. There's so many different ways that you can use these sweet little chains. What I have is some silk bead cord, and a little needle that is used whenever you're creating jewelry. So, this is by the company, Beadalon. And I just picked it up at a local craft store. Now, whenever we're using needles and going through flowers, particularly with these fragile hyacinth, it's important that we have something that has a little bit of give to it, and so, that's why I really love using these needles and this nice silk, so that nothing's going to be torn or stretched. It's all a very smooth experience. So, to get started, I'm going to take the hyacinth, and I'm going to snip it off, leaving this little piece, that if you were wiring the hyacinth, you would want to leave that on. But for this application, we're going to snip it off. And each one of these little petals is a bead in our necklace. Now that all our little beads are ready to go, we're going to go ahead and start threading. So, I have the most of this blue color, so I'm going to go two blues, and then a purple, and a dark purple, and two blues, but you can do whatever kinds of color combinations you want, of course. Just going to get a general idea of like, how long I'd like it to be. And then, I'm just going to leave the rest of my thread. So, that'll be my little stopping point. So, whenever you're threading them, you are just going straight through the center of the flower, and coming out as close to that little part that we snipped from as possible. And when you get down here, you just want them to layer on top of each other, just like that. So, here we go. Speed it up. Okay, here we go! We've got our necklace all strung together. And to finish it off, we are just going to snip, and tie the ends, end to end. I'm going to get it as close as I can, so it looks like one continuous piece. I'm just going to tie it in a simple knot. Now, if you weren't quite sure who is wearing this, or the exact size that it needed to be, you can just leave the ends, and tie them in place, or you could even put a little jewelry style kind of hook on it if you wanted to. And there you have it.

Video: How to Open Poppy Flowers

Fear not floral designers, timing poppies to open for your event is easy. In this video, Kelly demonstrates a simple method for opening poppies, and shares a few other related tips like when to cut poppies, how to judge the longevity and vase life of poppies, and a few of her favorite varieties for cutting.

———————

Transcript:

All right, in this video, I am going to help you take your poppies from here to here. It's a really common thing to be in a situation where, ooh, all my poppies look like this and my event is coming up very soon. I need them to be open and beautiful and ready to go. So I'm going to just teach you a simple little technique that I like to call poppy peeling. So poppies, whenever they are cut, wholesale or from the garden, you're going to want to have the kind that have just a little bit of a crack where you can see some color coming through. That lets you know that the petals inside your poppy have, you know, developed. If this crack hadn't happened yet, you can still peel the poppies. You might just have a petal that hasn't quite grown the whole way or you might have a poppy that's a bit misshapen or just not ready to, not ready to hatch yet. So you want to look for that little bit of a crack. Then down here at the base of the poppy, right where you have one of these cracks, just very gently with your fingernail, you're going to start peeling away at this base. Now what's tricky about this and what you have to be careful about is that if you're too, well, if you're too gentle, you won't get the pod off, and if you're too forceful about it, you could damage this delicate petal that lays right underneath the pod. So this takes just a little bit of practice. You might lose a few flowers in the process as you're practicing getting the hang of the amount of pressure to apply, things like that. So we are just, we're just pulling this pod off very gently until we have the whole pod off and the flower is set free. It's amazing to me how the petals are so delicate and this pod is so tough, yet somehow those delicate petals push that pod off of there when they're ready to come out. So is it a time-consuming process? Yes, it is. But it's definitely worth it. So now your, it's kind of like a butterfly that needs to dry off its wings. So it needs to just sit a little bit in this kind of a state before it will pop open. So these poppies I peeled two days ago, and this is what you're looking at, how they've gone from here to there. If you want to give 'em a little bit of a head start, you can gently put a little air so you can see that center that's exposed and that will help. So for an event, you're of course going to want them at their optimal peak openness. If you're doing something retail, you might want to just pop them shortly before you're going to put them in the piece. Maybe you have one open poppy like this that is a focal point, so whenever your client picks up, you can say, "This one here is going to open, "and this is going to give you a longer vase life." So that's something that you can explain to your retail clients if you decide you'd like to use poppies. These are Icelandic. They do very well as cuts. I know some people are little bit shy of poppies because of shattering and their vase life but these are pretty tough. They are a single-petaled flower though, so those flowers do tend to have a shorter vase life but they're so fun and people love them. You can see how this one was in a place where it was a little bit more ready to pop open. It came out very easily. When the pod starts feeling dry, you know that it's just, just about to let go. So this one does. It feels quite dry compared to the other. Feeling flowers and getting a sense, you know, not being afraid to touch them I feel like is very important for a floral professional and any kind of person who's interested in flowers because it tells you a lot about the flower and where they are in the course of their life, those types of things. So one last little, let's finish peeling this one so you can tell, you can see how thin this is. This means it's just about ready to pop on its own and how it comes and it has a little bit of spring to it. So by really getting a sense of the different, like this one was tough and this one is nice and thin, so that tells you a little bit about where the flower is. So this one that popped right open, this is going to open a little bit faster than this one that we had to give a little bit of force to. So that is it. And that is how you pop poppies. Wishing you the best on your next event where you are using them. There are so many great varieties of cut poppies out there. I love the peony poppies, the mother-of-pearls, they're so great for blush palettes, and then of course here we have the Icelandics, nice, bright, and super cheerful. Wishing you a wonderful day. Thanks so much for tuning in.

Video: Designing a Wedding Arch

In this video, Kelly of Team Flower demonstrates how to create a new shape when designing an arbor. Pay attention to how she widens an arbor with various mechanics and design tips. Ingredients used are Honeysuckle, Burning Bush, Rhododendron, Lilac, Scillia, Foxglove, Wild Geranium, Ferns, Wisteria, and Moss.

Fast Flower Video: Moody Ranunculus Arrangement

In this video Kelly demonstrates how to create a flower arrangement step-by-step. As you watch, think about the shape and size of each ingredient and the role it plays in the overall arrangement. Like people, flowers work together like a team, each playing a part. Learning to observe and think through the roles of flowers is a core competency in successful career with flowers.  

Video: Here’s How to Arrange a Round Peony Bouquet

In this video Kelly uses blush peonies and sweet peas to create a classic round wedding bouquet with a full stem wrap and no foliage.

------------------------

Video transcript:

In this bouquet, I'm using a fragrant blend of springtime peonies and sweetpeas, both in blush. We're going to start by getting the shape of the bouquet using the peonies. First, I'm going to look and I'm going to take the peony that I feel is the most open and the most beautiful. That will be my flower that is at the top center of the bouquet. Toss off these tiny little pieces around and the next step is just surrounding this peony with lots more peonies and each time I add one, I am aligning these stems so that I am creating one big stem at the bottom. We're just going to go around in a circle around that first peony that we placed. Then, I'm going to start adding some of these smaller peonies in the centers. So, you can see I'm going to tuck that right in there to cover in some of that space. I want to make sure that I don't have any foliage showing at all so I'm going to pull these off as I'm going. Okay, so I have a round bouquet here. Now, I'm just going to adjust and tug stems to get it to be perfect round. Next, I'll add the sweetpeas. I'm just going to gently, in between peonies, slide these down in. I don't need this one here so that will get popped off. With each addition of the sweetpeas, I'm just seeking to keep this rounded out. These are so great for filling in just the little holes in these pieces underneath of the bouquet. The way that the flowers are shaped on the sweetpeas allow me to gently bend and fill in and ruffle the underside. Okay, a quick little assessment again. See if there's any that just need to be tugged out just a little bit to get it perfectly round. Even whenever we're doing tighter balls of flowers, it's good to give the flowers a little bit of a tug so that they don't get too compacted. We still want them to have room for their petals to fluff. Then, this one right in the center, I'm going to pop it out just a bit so that we get that little bit of fluff there and now we'll tape. So, I have a piece of the green oasis tape that we've been using throughout the rest of the class. I'm just going to do a simple wrap-around once and then back around the stems again. I have to put a ribbon on here. Wrap it around. You can go around as many times as you like. My ribbon is pretty long and I'm just going to let it as it lays. Then you would just pin and do your simple little tie to get something like that and you still want your stems to be exposed. Sometimes girls that really love this ultra-classic look like to have their full bouquet wrapped, ribbon and all, so I wanted to show you how to do that. We haven't talked about it yet. I'm going to snip the stems pretty short so that whenever they're holding, I have just about an inch, an inch and a half of space at the end of the hand. Then, with that tape that I have put up higher in the bouquet, I'm going to use that to just do a little U-shape around the stems. I'm going to do the same thing on the opposite side so this part with the tape and these yucky ends that I have will be completely covered by the final wrap that I'm doing. You might be wondering, how am I going to keep these flowers hydrated if the stems aren't exposed? You know, that whole piece of it and it is a great question. What, typically, this is done in France a lot and they'll just deliver the whole bouquet with the ribbon. They'll just pop this into the water and the ribbon would actually be wet and then you would towel-dry it before carrying it, carrying it down the aisle. When I have done this in the past, I just had one client that really preferred this look. What we did for her, hers was wrapped with pearls and I did it on site shortly before she was getting ready to carry it for her photos and things. We did put it back into the water before the ceremony took place. So, I've just taken this ribbon at the top, going around until I get to the bottom and then I will secure with a pin. Tucking in those edges. I used a little bit of glue whenever I did the pearls, putting those on the bouquet. You can do that as well, tacking in some of these little ends with that. If you're sensitive to that, you can also take a pin and go around and just secure the edge there with a pin. I'm just doing a simple fold and securing with that little pin. I think we'll go with the pearl pin on this one. A little bit more classic with the ribbons and the peonies. She's probably wearing some pearl earrings. All right. There you have it: the classic Peony and Sweetpea Wrapped Bouquet.

Video: Growing and Training Sweet Pea Flowers

Growing sweet peas is one of our favorite things to do each year and starting sweet peas indoors is a great way to get a jump on the season. Sweet peas grow quickly and can become tangled before weather permits safe transplanting. In this video, you’ll see a demonstration of how to safely train and trim your sweet pea seedlings without harming the plant. This sweet pea pruning process not only makes it easier to transfer the individual plants to your garden, but it also encourages side-shoot growth making each plant stockier than before.

------------------------

Video transcript:

Hey, I'm here to demonstrate snipping back the sweet peas. You'll see that we have, like Kathleen suggested, we have all of our little twigs in here and our sweet peas are trailing up them. Now, if it was time to go ahead and plant these out in the garden, I would just pull these out, plant them, take their little sticks and plant those towards the trellis that they will eventually live on. But I still have several weeks until it's time to plant these. I started them pretty early. Sweet peas aren't something that you need to start early. I was doing a little bit of an experiment and I wanted to have some available here to show you how to snip them back in case yours get ahead of you as well. So, what I am going to do is I'm looking for the first, true set of leaves. So, that is the leaf that looks like a sweet pea leaf. So, if we can get a closeup right here, you'll see that the plant is coming out of the ground and right here is its first set of true leaves. So here is where I can snip it back to tame the growth of it. So these will continue growing down here, more leaves will continue popping out. And by the time it's time to get these out into the garden, it'll be a little bit stockier... Because of what we're doing here. And I won't have a tangled mess. So, I'm going to snip back half of them. And then the other half I'm going to let get wild and crazy and see if I notice any noticeable differences in my garden. So that's just something that I'm choosing to do this year. I tried starting them several different ways. This is my little sweet pea experiment patch. Okay, so we're all set. You can see how this one that I had cut back a few weeks ago has now a second stem coming out down here from the bottom so I'm getting some branching going on. And that will eventually happen with these little guys as well. So there you have it, snipping back your sweet peas.

Video: Long-Lasting Spring Floral Arrangement

Watch a video tutorial on how to make a long-lasting, inexpensive, and cheerful springtime arrangement. I use fresh-cut daffodils (often available for $5 a bundle or less) and a handful of potted bulbs. Container aside, you’re looking at about $12 in supplies for this piece!

Transcript

Hey, I'm Kelly Perry. And I'm here to show just a quick little fun with flowers segment. I was out picking up some groceries and saw these hyacinth bulbs for a dollar. And I was like, well, let's do something fun with those this afternoon. So I'm here. 

And had some rocks left over from another project that I was working on and I thought we'll just do a little hybrid potted plant/fresh cut flower arrangment. So I'm going to put a couple rocks in the bottom of this to help with drainage since there aren't any drainage holes in this container. And then I'm going to add a little bit of potting soil. And then I'm going to go ahead and put in-- I had these left over from another project as well, so I'm going to pop these in-- little tulips. 

And we'll put in the hyacinth in here as well. I love hyacinth in the spring. It is the smell of spring to me. 

They're also really fun to make hairpieces out of. I was at a class recently in New York, and Shane Connelly was the teacher. And he does flowers for the Royal Family. 

And it was really fun to hear his perspective and take on things. And he loves using potted flowers. And so we have that in common. 

And then he taught us how to wire hyacinth flowers to use in bouquets and things like that. And that got me thinking about hair crowns and just all the versatility and things that we could do with those. So anyway, just a little tidbit there about the hyacinth. So once these bloom, I might pop them out and practice doing some more wiring with them. 

OK, got these potted in here how I like them. I pulled some moss out of the backyard. I'm going to put that in here just around. I'm going to not do the whole way around quite yet, because I want to add some of these fresh things with water tubes. But we can just kind of get this base started so we have a better idea of what it will all look like when it comes together. 

Perfect. OK, these are water tubes. I'm going to just pop them open and I'm actually going to just snip the ends off these. I'm using these little daffodils and their stems are hollow. So I don't want to upset them. 

I'm just going to pop these inside. 

In this arrangement, I'm just going to like a mass of spring flowers. No particular consideration to lines or anything like that. I just want it to look like it is just happening. 

So all the different stages of the flowers are in. Perfectly fine, because that's how they are outside. Some are high. Some are low. 

So do this with whatever you have in your garden. Maybe you have some of those really pretty magnolia branches blooming. Or a few little cherry blossoms. Whatever you have, go for it. 

I have this dogwood that I think I'd like to put in. And this will open up over time. It's not open at the moment, but it will be. Actually, let me give that just a quick little fresh snip so it can have an easier time hydrating. 

[HUMMING] 

I want to add just two more flower tubes. 

And I'm going to be adding the moss in so that will cover up-- oh, these are poking up through the soil right now. That'll take care of that. And these little tubes of water you'll want to keep an eye on if you're trying to keep your arrangement fresh for a particular day. Just keep an eye on those little tubes. They don't hold a lot of water. 

And I'm putting about two daffodils in each. So they'll drink that up pretty quick. Keep a little eye on that. OK, we'll fill in and cover up those tubes with the moss. And then we'll be all ready to go. 

The hyacinth already had quite a bit of moisture in the soil so I'm not worried about giving those a fresh drink just yet. But I'll keep an eye on that in the coming days. 

But once those start shooting up through the soil, and these tulip bulbs that are in here start blooming, it'll really fill this arrangement out. And it will be very, very sweet. Lots of longevity to this. 

If you do weekly arrangements for maybe a business or some type of office setting, this would be a great way to offer something with a lot of longevity to it. 

All right, there you have it. Just give this a little dust around the edges and we'll call that done. 

Thanks for watching. If you'd like to see more like this, you can visit Teamflower.org/free. I'm Kelly. Thanks for watching. 

Video: Using Floral Mechanics in Creative Ways

In this video I show how to use netting, foam and a tape grid together to support floral elements in a creative way! What happens when you want to use flowers who need different levels of support? What if you have an idea for a design that needs firm support in one area and loose support in another? That’s when using multiple floral mechanics is helpful!

Transcript

Hey, I'm Kelly. Welcome to "Team Flower." Today, I'm going to create a winter arrangement with you, and I have just five simple ingredients, golden raintree, and I have some of the pieris japonica, foxtail lilies. I have some grass. This is the grocery store grass just from the little field beside the grocery store, and a poinsettia from the grocery store. So all things that-- this is probably if you're going to go out there and practice an arrangement that's similar to this, this is probably going to be the thing that you might have a little bit of trouble finding, but you really don't need this specific type of thing. You just need something that's long and reaching and has a little bit of a bend to it.

So I'll talk about the purpose of the ingredients. The purpose is really the most important part. You can substitute with anything that fills a similar purpose and recreate a similar look.

Now, in terms of mechanics for this arrangement, I'm working in, I guess this is what I like to call the sailboat shape. But if you can come around here and just get a close up of how we have this set up. A lot of times I talk about wire, wire foam, and frogs and tape. There's lots of different ways to put together the mechanics for your arrangement.

And I like to choose those things based on the ingredients that I'm putting in the arrangement, not just what my preference is because I think sometimes people get locked into, well, I only use frogs or I only use foam or those kinds of things. But not all flowers perform really great in foam, but some flowers really need that really strong, stable thing. This container doesn't allow me to have a frog in here, at least not the shape. I just have the round ones in the studio right now. And just the way that it's shaped, it's difficult to really secure a frog in there really well.

So I thought through, well, how is the end of the design going to look? What are the components for mechanics that I can use to put together so that every flower's need is taken care of? So usually my technique for mechanics is a little bit simpler than this, but for this arrangement, in particular, I think it's important to have these different components.

So I'm going to fill this up too tall so I can tip and show, but you'll see I have a layer of chicken wire in here deep inside the bowl. And then I have a little piece of foam over here on my right-hand side, and then I have some tape grid over top of that. So this foam is important for the foxtail lily, which is really heavy and has a very thick stem.

The chicken wire, we can easily handle. The pieris can go in that. And this grass, I didn't put the foam to the edges on both sides because I need a little bit of room for the grass to go right into that chicken wire.

So I just wanted to share that with you as you're thinking through arrangements that you could be making. You can configure these in any type of way to meet the needs of the flowers, the ingredients, the end place that it's going to really serve your client best and meet their needs. And this one is just going in the house, so I'm not concerned about water sloshing in the car or anything like that. And if I was, I would just tip out water and refill whenever I got to my destination.

But without any further ado, let's go ahead and get started. I am going to begin with the pieris as the base in my creation here today. And right now, we're establishing the shape and the size of the arrangement. And this ingredient, while I am going to use the foxtail and the grasses are going to play an important role in shape and size as well.

This is really that low piece that the other flowers can be supported by, but it's also a pretty important shape component as well. So rather than just only using it to cover it down here in the rims, I see it being a pretty prominent piece.

So before I got started, I surveyed all the ingredients that I had, and I thought in my mind how would I like to go about arranging them, what are their strengths, how can I showcase them the best. And with the pieris, I really love the idea of it being dominant on one side, a little bit heavier on one side, but still having a little touch of it over here because I imagine these foxtail lilies shooting up in this area. So that's going to add some visual weight and balance it out over there.

So this is what we're looking at over here right now. And I'm designing this. I think if I have extra ingredients, I might go back in and finish up the back side, but I'm imagining this arrangement with what I have available to me just being one sided and being placed up against a wall and show cased in that light. So it's a silhouetted end use is what I have in mind. When we're really focusing on, the lines that are being created here, not as important that we have a finished back in this case.

So there's the main shape and silhouette that I have going with the pieris, and I'm going to add some of the grasses. The grocery store grass is next. I want those to shoot up and flow out over to the right side. And these are something that necessarily need lots of water right now. They're already pretty dry.

So what I'm going to do is do a little bit of a measure here, and then I'm going to bind them together so that they stay hanging out as a club whenever they get mixed in here with the rest of the flowers. And if the position isn't quite right and we need to pull the binding apart, that's no biggie. But that's what I think will perform the best, which you don't know until you get going. Every arrangement is different. Every flower group is different.

So now I've just got those together. Now, they're all one stem as opposed to being many, and that makes it easy to get it situated in here. Drama. Drama. Grass drama. Pretty fun.

So these foxtail lilies I saw as being really the backbone of this arrangement, so I'm going to add those next, nice and tall and reaching that uppermost point. And I thought it be a fun contrast with these really light grasses. The grasses really give us quite a drama moment too. But these add that touch of stability, and they have so much personality with their little curves.

And this tall one, if I just only use the tall one and I have a thing. I have naked stems very much. Sometimes they're fine, but for this, I like using the two pieces to work together to keep the flower beds going the whole way down into that base. And I think I'm going to stop with those for now. There could be another one. It depends what suits you, gives it a heavier look.

See whenever they're here at the same angle, they look like little-- I'm going adjust that a little bit. I don't know what littles they look like, but you just need to adjust the height of them so they don't look like, we'll call them ears. So that gives us a little stair step.

And the last ingredient, well, we have two more. We've got the raintree yet. And this I thought would be this pretty coming down and spilling out along with the pieris, little accent for that.

And since these don't need to be in water at all, you can use that pieris to tuck them in. Since some of them have shorter stems, you can touch them in and support them in and among the pieris. And you'll see I do have there is lots of open space in here. The mechanics are totally visible right now. That's something that we'll address.

But whenever you're doing something that is a little bit more sculptural, you need the negative space deep down inside here. So if you start filling that up too quick, too fast, then you really lose the interesting silhouette of the foxtail lily and things like that. So under here, this is an opportunity where just some light layering of moss can go in, trachelium, things like that that are very flat.

And in this case, I'm probably going to do a little bit with the poinsettia, just a leaf over top of the mechanics. Very, very subtle. So it's around Christmas time up here in the mountains, so the grocery stores, the poinsettias are out in the masses right now.

I love to get this poinsettia right in the water, directly in the water. Poinsettia does have the white sap. And so whenever that bleeds out, it will bleed out and will form little scab. The sap will eventually stop coming out of the plant, so it's important when you create an arrangement like this with a flower that has that, some people recommend clipping it, putting in water, letting it all run out and then switching it into a new bucket. So they say cut them at the length that you would want when you go in the arrangement. Well, sometimes when you're making the arrangement, you're not quite sure how long you need it to be.

So when you're planting, you can clip and let it sit in a little vase beside you and test it out, and then let it drain out and put it back in. What I'm going to do today is I'm going to put it in, I'm going to let it drain, and I'm going to flush the water. Just want to keep the water clean. But all of these plants are being clipped, and they're taking that first drink. So you if did do that, I'd recommend adding this one in a little bit later after they've already had a chance to get some of their water out.

But I could also just clip and pop them in my little vase here as well. So that is up to you. You can do some experiments and see what kind of difference it makes.

Now, we're just adding those poinsettias in there. I think I really could have stopped before, but these are that nice little focal point, and by little I mean big. Focal points are big, but I think with this, with the emphasis that we had on the shape and the way that the lilies came up and out, I think it could have easily been done before.

So we're at that matter of preference point. It's all a matter of preference, actually, but the principles are what help guide us. So we can interpret them a lot of different ways. So my dominant principle before I added the focal point could have just been the line of the foxtail lily. It works both ways.

All right. So that's what I've landed with and where I'm going to hang out and quit. But I am going to just go back over with some of the poinsettia and the raintree and just do some low coverage in here at the bottom to cover mechanics. But that's all, nothing really interesting to see there with that.

So here you have it with the poinsettia, and I will pop these out so you can see and get a visual again if the line was going to be the dominant principle, how that would change the overall composition. So there you have it. Thanks for watching.