
All tagged Principles of design

Incorporating Color Theory with Tinge Floral
On this episode of the Team Flower podcast, we’re talking with Ashley of Tinge Floral. We are diving into Ashley’s passion—color! She is sharing her knowledge and philosophy behind the role of color in floral design. Ashley walks us through her process of utilizing various tones when working with clients and how these design elements play out. We are discussing life as a flower mom, and Ashley is telling us all about her Color Theory Workshop!

Creating an Arbor with The Cottage Rose
Learn from floral designer Ferrell Richardson of The Cottage Rose in this episode. Dive right in as she describes her design process and moves to the topic of installations as well as how to create an arbor step by step.
Well-Loved Flower Substitutions for Popular Blooms
Finding quick flower substitutions for popular flowers is a crucial skill for any florist where both adaptability and flexibility come into play. In this guide, you’ll get flower substitution suggestions for popular focal, filler, line, dancer, and texture flowers.
Floral Design Tips for Beginners
When you’re just starting in floral design—whether you’ve discovered a new hobby or you’re hoping to start your own floral business—knowing how to approach an arrangement or a bouquet (or even a boutonnière!) can be overwhelming. Get essential floral design tips for beginners in this article!
Knot Gardens: What They Are and Why You Should Have One
Love creating flower beds that look visually appealing and smell beautifully? Intrigued by the idea of organizing your cutting gardens using basic principles of design? If so, then consider starting a knot garden!
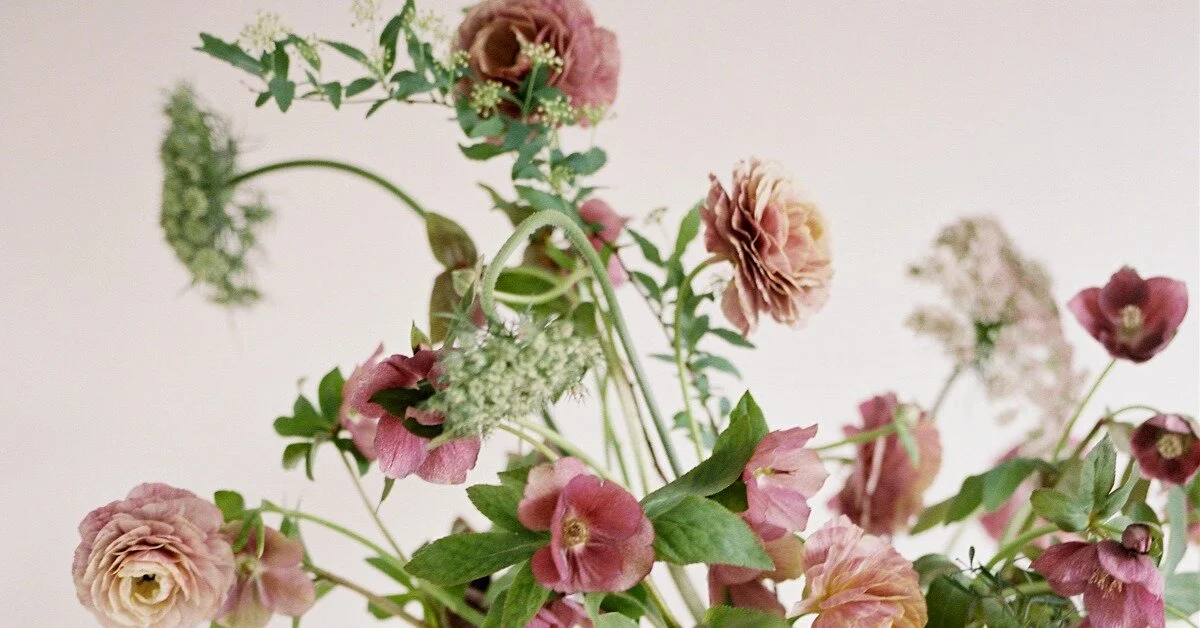
Impressionist Inspiration for Floral Arrangements of Color
What stands out to you most when you find or create a floral arrangement that you love? What’s that "wow factor” for you in a floral arrangement? In this article, be inspired in your floral work by Impressionistic art and the use of color.
Creating Purposeful Floral Designs Inspired by Fine Art
In the same way that different orientations and compositional effects greatly affect a painting, so do these same elements when used in floral design. In this article, you’ll learn to take in important considerations such as shape, lines, and balance when creating floral arrangements!

Fast Flower Video: Using the Iris Flower for Arranging
In this video, Kelly creates an arrangement step-by-step in this video. As you watch, pay close attention to how the colors compliment one another. Can you find the common color between each of flowers? Each one highlights the other as they work together to create a beautiful arrangement that draws the eye from one ingredient to another. Learning to understand the principles of color in an arrangement will take you one step further in your floral design.
How to Stalk Your Wedding Venue for Floral Design Inspiration
There are several reasons you may want to do a deep-dive into a wedding venue for floral design inspiration, even as an experienced professional event florist. Get fresh tips for researching floral design ideas for wedding venues in this helpful article.

Video: Using Floral Mechanics in Creative Ways
In this video I show how to use netting, foam and a tape grid together to support floral elements in a creative way! What happens when you want to use flowers who need different levels of support? What if you have an idea for a design that needs firm support in one area and loose support in another? That’s when using multiple floral mechanics is helpful!
Transcript
Hey, I'm Kelly. Welcome to "Team Flower." Today, I'm going to create a winter arrangement with you, and I have just five simple ingredients, golden raintree, and I have some of the pieris japonica, foxtail lilies. I have some grass. This is the grocery store grass just from the little field beside the grocery store, and a poinsettia from the grocery store. So all things that-- this is probably if you're going to go out there and practice an arrangement that's similar to this, this is probably going to be the thing that you might have a little bit of trouble finding, but you really don't need this specific type of thing. You just need something that's long and reaching and has a little bit of a bend to it.
So I'll talk about the purpose of the ingredients. The purpose is really the most important part. You can substitute with anything that fills a similar purpose and recreate a similar look.
Now, in terms of mechanics for this arrangement, I'm working in, I guess this is what I like to call the sailboat shape. But if you can come around here and just get a close up of how we have this set up. A lot of times I talk about wire, wire foam, and frogs and tape. There's lots of different ways to put together the mechanics for your arrangement.
And I like to choose those things based on the ingredients that I'm putting in the arrangement, not just what my preference is because I think sometimes people get locked into, well, I only use frogs or I only use foam or those kinds of things. But not all flowers perform really great in foam, but some flowers really need that really strong, stable thing. This container doesn't allow me to have a frog in here, at least not the shape. I just have the round ones in the studio right now. And just the way that it's shaped, it's difficult to really secure a frog in there really well.
So I thought through, well, how is the end of the design going to look? What are the components for mechanics that I can use to put together so that every flower's need is taken care of? So usually my technique for mechanics is a little bit simpler than this, but for this arrangement, in particular, I think it's important to have these different components.
So I'm going to fill this up too tall so I can tip and show, but you'll see I have a layer of chicken wire in here deep inside the bowl. And then I have a little piece of foam over here on my right-hand side, and then I have some tape grid over top of that. So this foam is important for the foxtail lily, which is really heavy and has a very thick stem.
The chicken wire, we can easily handle. The pieris can go in that. And this grass, I didn't put the foam to the edges on both sides because I need a little bit of room for the grass to go right into that chicken wire.
So I just wanted to share that with you as you're thinking through arrangements that you could be making. You can configure these in any type of way to meet the needs of the flowers, the ingredients, the end place that it's going to really serve your client best and meet their needs. And this one is just going in the house, so I'm not concerned about water sloshing in the car or anything like that. And if I was, I would just tip out water and refill whenever I got to my destination.
But without any further ado, let's go ahead and get started. I am going to begin with the pieris as the base in my creation here today. And right now, we're establishing the shape and the size of the arrangement. And this ingredient, while I am going to use the foxtail and the grasses are going to play an important role in shape and size as well.
This is really that low piece that the other flowers can be supported by, but it's also a pretty important shape component as well. So rather than just only using it to cover it down here in the rims, I see it being a pretty prominent piece.
So before I got started, I surveyed all the ingredients that I had, and I thought in my mind how would I like to go about arranging them, what are their strengths, how can I showcase them the best. And with the pieris, I really love the idea of it being dominant on one side, a little bit heavier on one side, but still having a little touch of it over here because I imagine these foxtail lilies shooting up in this area. So that's going to add some visual weight and balance it out over there.
So this is what we're looking at over here right now. And I'm designing this. I think if I have extra ingredients, I might go back in and finish up the back side, but I'm imagining this arrangement with what I have available to me just being one sided and being placed up against a wall and show cased in that light. So it's a silhouetted end use is what I have in mind. When we're really focusing on, the lines that are being created here, not as important that we have a finished back in this case.
So there's the main shape and silhouette that I have going with the pieris, and I'm going to add some of the grasses. The grocery store grass is next. I want those to shoot up and flow out over to the right side. And these are something that necessarily need lots of water right now. They're already pretty dry.
So what I'm going to do is do a little bit of a measure here, and then I'm going to bind them together so that they stay hanging out as a club whenever they get mixed in here with the rest of the flowers. And if the position isn't quite right and we need to pull the binding apart, that's no biggie. But that's what I think will perform the best, which you don't know until you get going. Every arrangement is different. Every flower group is different.
So now I've just got those together. Now, they're all one stem as opposed to being many, and that makes it easy to get it situated in here. Drama. Drama. Grass drama. Pretty fun.
So these foxtail lilies I saw as being really the backbone of this arrangement, so I'm going to add those next, nice and tall and reaching that uppermost point. And I thought it be a fun contrast with these really light grasses. The grasses really give us quite a drama moment too. But these add that touch of stability, and they have so much personality with their little curves.
And this tall one, if I just only use the tall one and I have a thing. I have naked stems very much. Sometimes they're fine, but for this, I like using the two pieces to work together to keep the flower beds going the whole way down into that base. And I think I'm going to stop with those for now. There could be another one. It depends what suits you, gives it a heavier look.
See whenever they're here at the same angle, they look like little-- I'm going adjust that a little bit. I don't know what littles they look like, but you just need to adjust the height of them so they don't look like, we'll call them ears. So that gives us a little stair step.
And the last ingredient, well, we have two more. We've got the raintree yet. And this I thought would be this pretty coming down and spilling out along with the pieris, little accent for that.
And since these don't need to be in water at all, you can use that pieris to tuck them in. Since some of them have shorter stems, you can touch them in and support them in and among the pieris. And you'll see I do have there is lots of open space in here. The mechanics are totally visible right now. That's something that we'll address.
But whenever you're doing something that is a little bit more sculptural, you need the negative space deep down inside here. So if you start filling that up too quick, too fast, then you really lose the interesting silhouette of the foxtail lily and things like that. So under here, this is an opportunity where just some light layering of moss can go in, trachelium, things like that that are very flat.
And in this case, I'm probably going to do a little bit with the poinsettia, just a leaf over top of the mechanics. Very, very subtle. So it's around Christmas time up here in the mountains, so the grocery stores, the poinsettias are out in the masses right now.
I love to get this poinsettia right in the water, directly in the water. Poinsettia does have the white sap. And so whenever that bleeds out, it will bleed out and will form little scab. The sap will eventually stop coming out of the plant, so it's important when you create an arrangement like this with a flower that has that, some people recommend clipping it, putting in water, letting it all run out and then switching it into a new bucket. So they say cut them at the length that you would want when you go in the arrangement. Well, sometimes when you're making the arrangement, you're not quite sure how long you need it to be.
So when you're planting, you can clip and let it sit in a little vase beside you and test it out, and then let it drain out and put it back in. What I'm going to do today is I'm going to put it in, I'm going to let it drain, and I'm going to flush the water. Just want to keep the water clean. But all of these plants are being clipped, and they're taking that first drink. So you if did do that, I'd recommend adding this one in a little bit later after they've already had a chance to get some of their water out.
But I could also just clip and pop them in my little vase here as well. So that is up to you. You can do some experiments and see what kind of difference it makes.
Now, we're just adding those poinsettias in there. I think I really could have stopped before, but these are that nice little focal point, and by little I mean big. Focal points are big, but I think with this, with the emphasis that we had on the shape and the way that the lilies came up and out, I think it could have easily been done before.
So we're at that matter of preference point. It's all a matter of preference, actually, but the principles are what help guide us. So we can interpret them a lot of different ways. So my dominant principle before I added the focal point could have just been the line of the foxtail lily. It works both ways.
All right. So that's what I've landed with and where I'm going to hang out and quit. But I am going to just go back over with some of the poinsettia and the raintree and just do some low coverage in here at the bottom to cover mechanics. But that's all, nothing really interesting to see there with that.
So here you have it with the poinsettia, and I will pop these out so you can see and get a visual again if the line was going to be the dominant principle, how that would change the overall composition. So there you have it. Thanks for watching.

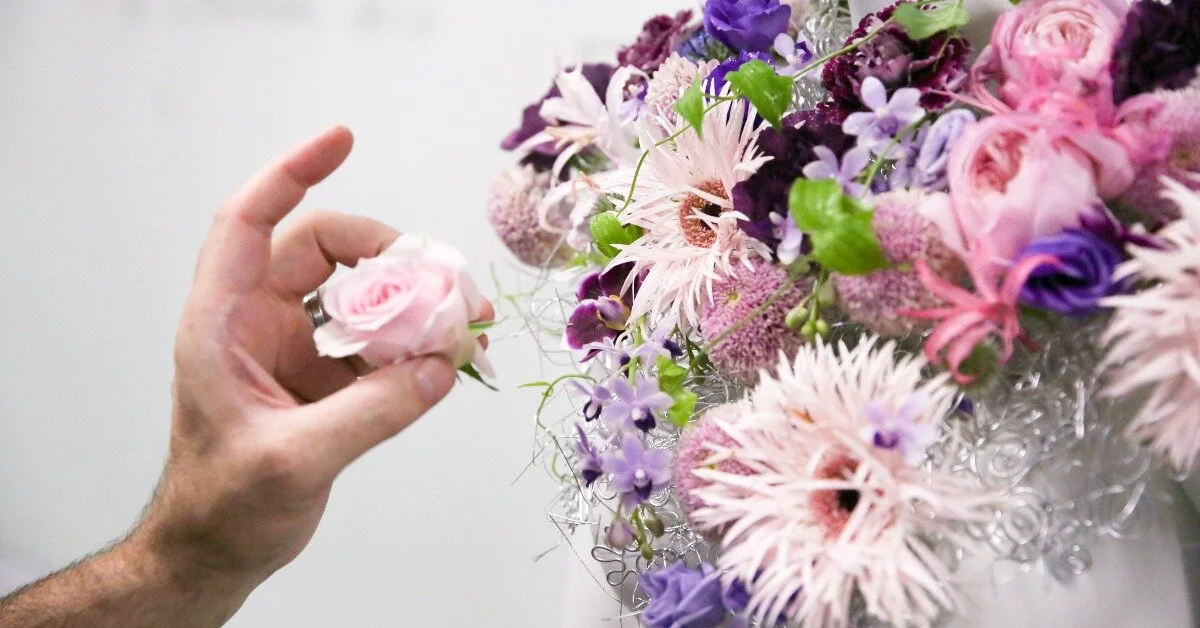
How to Use Tricky Colours in Floral Design (Even the Ones You Dislike!)
Do you have one colour you just won’t (or can’t bear to) use in your floral designs? Here’s how to overcome those tricky colours using tone, texture, shape, negative space, and the trusty old colour wheel, of course.

Busy Holidays in a Retail Flower Shop with Floralista
Alice de Crom of Floralista joins us on this episode as our special guest! She’s chatting about why she loves the floral industry and what makes it such a special place for her. She’s also sharing some awesome info about how to run a retail floral shop!

Video: Centerpiece Design Quick Tips
Join Kelly as she goes through a free 4-part quick tip video series on designing a centerpiece. She discusses designing for a table, using the lines principle of design, and shows the ingredient use and purpose. Watch these completely free video lessons.
------------------------
Video transcripts
Hi, I'm Kelly Perry with Team Flower, and I'm here to show you a few quick tips for designing on a narrow rectangular table. If you have a client that wants a long, full, lush, centerpiece, or you're doing a styled shoot and they want something larger, it can be a little bit tricky to fit all of the things on your table that you need to, cups, glasses, flatware, plates, and you, of course, want it to be beautiful, but you also want it to be practical for your guests. I think that's really, really important.
So, I have just a few tips for you if you're wanting to go in this long and lush direction. The first one is to use a centerpiece container that has a little bit of height to it. So, maybe you're doing a bowl, but it has a little pedestal and then the bowl is on top. What you're looking at right now is pretty low. There's no pedestal on this bowl. It's just a bowl with a small little lip at the bottom. And what we're running into problem wise with this, is that the flowers are kind of just invading this space. There's not enough distance between the plates and the flowers.
So, we want to create a little bit more space. And I'll show you the difference that it makes just to add a little lift underneath your arrangement. So, now you can see there's a considerably larger amount of room between the plate and the flowers, and so the guests can easily access their dinner, and cups and things like that fit in a little bit better. The next tip that I have for you, is to do a little mock setup before your event and before you start designing. So, if this is for a wedding, just set up a table similar. If you're working with an event planner, or cater, or whatever, just ask the dimensions of the plates that will be used.
You want to be mindful of chargers. Sometimes, you know, you'll get there and oops, surprise! There's chargers, and on a narrow 30-inch table, you cannot fit chargers end to end, and then also, you know, really large centerpiece. So, that's something to consider during the design process when you're working with your client. If they mention charger, you have to kind of ding, ding, ding, remember. It's going to be difficult to fit all that on the table. So, you can set up in your studio, just a quick little-- maybe with a little pop-up eight foot or six foot table, whatever they're using, or round six foot table, just to get an idea of what you're looking at.
If you don't have those tables, you could do a little visit to the venue if that's practical for you, and you could kind of chart out and set it up, and see what dimensions your flower arrangement should be. So, that way you know if you control your greenery out a little bit more, if you need to tuck it in more. But the most important part with these narrow, long tables, is this section right here. You want this to be pretty narrow. So, tip one, you know, popping it up a little bit higher, tip two, having a little mock setup table. Now, what's great about this, is you're making your first arrangement, you can sort of, examine how the cup-- the cups are kind of the thing that, a lot of times, will get in your way.
So, if you have the height and width of the cups and you can set that up, you can sort of trim out of your arrangement, little pieces that are interfering with the guest access to those elements of the table. So, this particular pokeweed berry is touching the glass, and I just want to get that out of there, so that it's comfortable for my guests. So, just a small adjustment-- maybe we get rid of this leaf as well-- it makes a big difference, and that'll save you a little bit of time whenever you go to set everything up. It helps the event planner or the caterer be able to access those things easily.
You don't want to be the florist that always has flowers in the way of other people's jobs, and just practicality is important. So, those are my two quick tips for you. Get the level up, and then set up your little mock table, and that'll help you get an idea of the general size that you need to go for. And then you can also clip things out before your arrangements head out the door, just a little bit of quality control to help you make things a little faster on event set up day. I hope you enjoyed this little video, and if you'd like to see more, you can visit teamflower.org/free. I'm Kelly Perry, thanks for watching.
------------------------
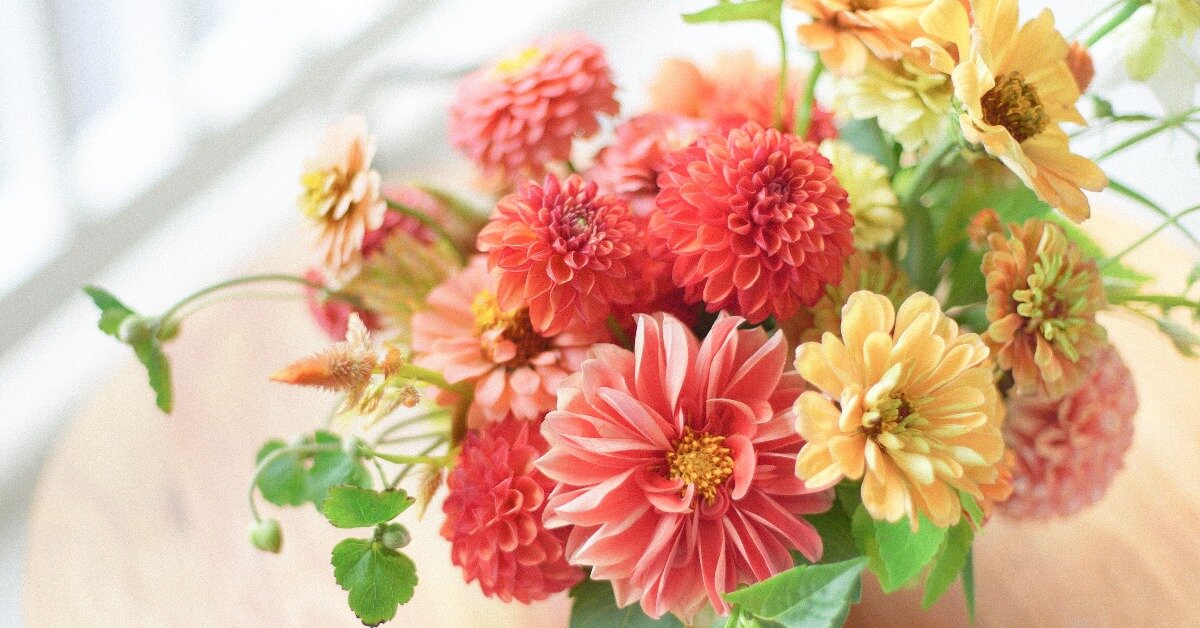
Hi, I'm Kelly Perry with Team Flower. And I am back with a little flower recipe for you. This might be a great option for a bride who would like something that has just a little hint of fall in the air but is still nice and summery.
It's late August here in the mountains. And I think that these colors are really just telling of the season and the time of year that it is. We have some of these pinks, and we've paired them with some-- just a real rich orange that just has that little bit of a knod to fall, which is fun.
So the leaves have started changing colors. And this color palette just reminds us where we are in the season. So I just wanted to go through and tell you a little bit about each of these ingredients. You might find a way to work them into your garden, or into an arrangement that you have coming up soon.
So the first arrangement that we're going to start out with is pokeweed. It's this right here. And it has little pink and green berries.
Later in the year, they turn into a very dark purple. Once they hit that stage, I don't use them in arrangements anymore because they stain pretty bad. So I just like to avoid that liability.
But whenever they're at this stage, they're really, really great to use. This is something that just grows wild. And it's weedy here in Boone, so it's easy to come across and a great way to fill an arrangement. And next, we have some snapdragons here-- these little pink guys. And I love how they pull the color out wide into the arrangement.
These little orange guys here called gomphrena. And they come in a carmine pink and white lavender. So there's a lot of fun color options with these. They have just really nice texture and just that little knod that you can use as a finishing piece.
I'm quite a bit of lisianthus in this arrangement. This variety has a nice dark burgundy center, which I love how it just captures what's going on with these queen redline zinnias-- one of my favorite zinnias. and then I have the burnt orange dahlias deep in the arrangement here.
And if we flip over, I just have one other variety of dahlias that we pulled from Darlanna Besecker's farm, Hope Valley Gardens. So here is another variety, that dahlia. And then I missed our little base in here.
If you look in real deep, there's some limelight hydrangea and then, also, some sedum. So that is my little quick flower recipe for you. Hope you enjoyed it. And if you'd like to see more videos like this, you can visit teamflower.org/free. See you soon.
------------------------
Hi, I'm Kelly Perry. And I wanted to take a few minutes to talk about one of my favorite design principles, and it is, lines. It's never fun to stand in lines and wait. But it is so fun to see lines in your arrangements.
There's two different kinds of lines we're going to talk about today. One is actual and one is implied. As you can imagine from the definition, an actual line is what the stem creates. It is a line that you follow with your eyes. So you can see it right here in this little piece of gomphrena.
Implied lines are like connect the dots lines. Maybe if you think about a starry night, all the different constellations and how we use those stars to connect the dots and to create a picture in our mind, that is what an implied line would be like. So I just wanted to show you how I used flowers in this arrangement to create some lines.
So of course, we just talked about the gomphrena and how we have this little bit of line here. I love to use maybe ranunculus, or things that have a little bit of a curvy stem or some interesting stems that can add some interest to the arrangement. This one's pretty straightforward. But we have some nice curve lines going on with the implied line.
So let's talk about the first one that's probably most obvious in this arrangement, and it is the zinnias. These are queen red limes. We start our line right down in here. And you can see they're at different levels and the direction that their faces are pointing are a little bit different to add some interest.
So we have one here, here, here, here, and here. So this is one of our implied lines. Now, the next one we're going to talk about is the line that is formed with these burnt orange dahlias. So it starts down in here, and it pops its way up.
So here is another implied line. Another one would be here with this lisianthus. We're going this way.
And this one's more horizontal as opposed to curved like these ones were. And I'll flip the arrangement around. You can use different flowers to create the lines on different sides of your arrangements if you want to add some interest and variety in the flowers to your arrangements.
So in this one we have dahlia's going in a little line like this. And then, lisianthus, again, we're using to go here. And then over here.
The great thing about lines is they guide your eye through the arrangement, and they invite you to keep looking deeper. So that is what I'd encourage you to do today. Consider how to add some lines to your arrangement, and always be thinking about how you can think deeper.
Hope you enjoyed this lesson. If you'd like to see more, you can visit teamflower.org/free. Thanks for watching.
------------------------
Hi, I'm Kelly Perry with Team Flower. And I wanted to do a little bit of a different take on a tutorial. A lot of times, we see the arrangements come together step by step, but when we actually look at them in real life, in a photo, they're already completed. And it's like, wow. How did they get there?
So I wanted to have a completed arrangement for you today. And I would like to pull it apart piece by piece. I'm going to go backwards, I'm going to show you the last thing that I put in. We're going to just slowly work our way out until all we have remaining is our container. So this will be a really fun one. I hope you enjoy it.
The ingredient that we're going to start with is this gomphrina, up here. So, I'm just going to start pulling it out in the order that I put it in. I like to use this as the final little bit of movement in the arrangement. So, you can take a little snapshot in your mind and see how removing this ingredient changes it. You could still do something like this if you had a bride who wanted something maybe just a little bit more tailored, less sculptural. Just deleting this one ingredient gives you a more tailored look.
Next, I'm going to pull out some of the focal flowers that I was working with. And, back here, they were the dahlias So the dahlias are going to come out and I'll show you what it looks like without those dahlias in there. And then on the other side of the arrangement, we were working with zinnias as the focal. And you can see them right here. So I'm just going to tug those out. And then I'm going to go in and pull out the lisianthus So you can take just a quick little peek of what that looks like without those dahlias and without the zinnias. And I'll start pulling out the lisianthus Everything comes together one step at a time, no matter what it is. Flowers, cakes, books-- just a series of steps. Homes. All of those things.
So, it might seem like a daunting task at first, but as you just start deconstructing it and thinking about it a little bit differently, it becomes, in a way, a little bit more attainable. Which is fun. So if I get overwhelmed, I kind of like to step back and think about all the steps it took to get there.
OK. Next, I'm going to pull out the burnt orange dahlias, here. And now I'm really getting down to the base material of the arrangement. These ones that I've been pulling out-- the dahlias and the lisianthus-- I would consider the accent flower. So, those are gone. Next I'm going to pull out the snapdragons. These were used to carry color to the sides of the arrangements. Missed a zinnia.
And now, we're left with the pokeweed, which creates the shape. And, then, the hydrangea and the sedum, which creates the grid that we can layer all the other flowers into. If you find that flowers move around on you a lot, especially with bouquets, this might be the ingredient that you're missing. Something like this, the flowers can really latch into. Because just the overlapping stems, I think, isn't quite enough sometimes. So I think it's helpful to have a flower, a structural flower, in there, as well.
So out comes the hydrangea. Now you're starting to be able to see the flower foam that it was arranged in. And, of course, with these, the purpose is to cover up that base or that structure, whatever you're using. Whether it's a frog or chicken wire or the foam. Each of those things has pros and cons to them. And you can learn more about those on the free page at Team Flower, where we go through the three different ways that you can set up an arrangement. So if you're curious about the different kinds, and pros and cons, and when to use what, you might consider watching that and chiming in with a few comments.
So, out comes the serum. And, then, all we have remaining is the pokeweed, which is what created our shape and our general-- how big we were going to get and how wide and deep. So I'll pull that out, too. And a lot of times, with this-- I'll leave this one in here, I guess-- some of these shorter pieces go in second. And I will use the longer pieces too. Those ones will go in first, to get the general shape established. And, then, these act both as a shape and then also as cover. And one little piece of spirea that I put in here.
So, there you have it. The deconstructed table arrangement. This isn't a very pretty way to end a tutorial, but it was pretty when started. So, anyway, I hope you enjoyed that. And hope that that helps you and inspires you to take the next step with your business. If you'd like to see more free videos like this, you can hop on TeamFlower.org/free. And hop on our mailing list, you'll be notified as soon as new videos are released. Thanks for watching. Have a great day.

How to Establish Your Unique Brand with Carrie of Type A Society
Carrie Moe from Type A Society joins Kelly on this episode of the podcast! Carrie and Kelly are discussing the measure of “success” and how to take steps to make sure that you’re successful in every facet of life. They’re also chatting about what makes a good brand a good brand. Carrie is sharing tips on how to make your brand stand out as well as how to manage your time efficiently.

Video: Experimenting with Luminosity in Floral Design
In this video, Kelly is experimenting with the concept of luminosity in floristry and how the varying intensity levels in the shades and colors of ingredients play with each other.

Creating Movement in Floral Design with Amy Osaba
In this episode, Amy Osaba joins Kelly on the Team Flower Podcast! In addition to discussing one of the essential principles of floral design—creating movement in florals.

Video: Make a Simple, Elegant Floral Design with Only 2 Ingredients
Watch as Kelly puts together a simple two ingredient arrangement. Poppies and Solomon's Seal are a sweet late-spring pair. This design is perfect for dressing up a windowsill at home, wedding bar or guestbook table on the fly!
Transcript
Hey, I'm back, excited to share an arrangement with you that this time only has two ingredients. I have Solomon's seal and poppies. I also have a message for you on the upper side of my camera. And it is that you are awesome. OK, have a flower frog in my container. This is also [INAUDIBLE] decor, if you're looking for one. Have my pieces of Solomon's seal are arranged by size. I have one that's long, and then two that are more of a smaller/medium size.
Gonna start with this one. We're going to go straight up. Going to be fun. And I'm going to clip it down just a little bit. Got a frog in here that's raising my levels. Whenever you're not using a lot of flowers, mention frogs are great, because they're just kind of pretty to look at. I think they look nice in an arrangement.
So I have to be as conscious about covering-- kind of the point is to show negative space in the arrangement. We're using the principle of design of radiation in this arrangement. Everything is going to-- all the lines are going to come out from one point with this base material that we're working with.
And for balance, I'm wanting to keep this as my center point, and then same amount both to the right and left. And what I'm doing with these pieces, I'm kind of moving around in this circle a bit, and I'm creating a little house for the poppies to live, making room for them.
So this is where we are. This is the front side of the arrangement, and my poppies are going to live in this area here. So we created the general shape, the general size, that goal of level one. We're not going to worry about covering the base. And this sort of is just another part of that. And then we're going to use the poppies as both level two and level three. We're going to have them work together to create a resting point for the eye. But then we're also going to use them to create movement through line.
Now, a lot of the times I like to use gradation in size whenever I'm arranging, but my smallest poppy has the shortest stem, so we're going to reverse that. This is probably technically-- let's see here. One third, it looks a little bit-- yeah, the poppy is a little bit too high proportion wise. So I'm going to let him come down a little bit.
I was reading somewhere that poppies like to drink through the little hairs on their stems. So getting them this way, you singe the ends to seal off that little wound, and then put them in deep water till they're properly hydrated as these ones are.
OK, so those are going to be my bottom two. With poppies, too, I think they're really pretty if you could just have their faces pointing in different ways as you work. They're all looking straight at you, staring you down, making you feel a little bit uncomfortable. Poppy etiquette.
So this is something that would be fantastic for a guest book table or bars, anywhere to add a little extra thing, only 10 stems, 10 stems, two ingredients. Big, the whole way down to small. We're doing this kind of trickle, faces up, faces out, moving in and out throughout the arrangement. OK. Be back with another one for you.

Living Floral with Margot of Flower Magazine
Margot Shaw, the founder of Flower Magazine and author of Living Floral joins us on this episode of the Team Flower Podcast. Margot tells the story of Flower Magazine and how it came into existence from her dream of a botanical lifestyle. We talk about what it means to live with flowers—not just work with them. We are also chatting about Margot’s wonderful new book, Living Floral. The pages are full of beautiful photos and inspiring stories of using flowers to bring color and life into your home.

Video: Using Complementary Colors in a Minimalistic Floral Arrangement
In this excerpt from the Team Flower Elements and Principles of Design class, Kelly demonstrates the principle of movement by creating a minimalistic floral arrangement using complimentary colors. Complimentary colors are opposites on the color wheel (orange and blue, purple and yellow, and red and green). She uses caladium, firecracker, and green trick dianthus to demonstrate the most difficult of the three groups: red and green. This is a color palette that typically reminds us of Christmas, but it can be used to create a sweet summer piece as well.